
Related Manuals for KanexPro HDMX44-18G


Summary of Contents for KanexPro HDMX44-18G
- Page 1 HDMX44-18G USER MANUAL 4K 4x4 HDMI 2.0 Matrix Switcher All Rights Reserved Version: HDMX44-18G_2017V1.2...
- Page 2 KANEXPRO HDMX44-18G Preface Read this user manual carefully before using this product. Pictures displayed in this manual are for reference only. Different models and specifications are subject to the actual product. This manual is only for operational instruction, not for any maintenance usage. The functions described in this version are updated till June 2016.
-
Page 3: Safety Precautions
KANEXPRO HDMX44-18G SAFETY PRECAUTIONS To ensure the best from the product, please read all instructions carefully before using the device. Save this manual for further reference. Unpack the equipment carefully and save the original box and packing material for possible future shipment. -
Page 4: Table Of Contents
KANEXPRO HDMX44-18G Table of Contents ........................6 1. Introduction ..................6 1.1 Introduction to HDMX44-18G ........................ 6 1.2 Features ......................7 1.3 Package List ....................... 7 2. Panel Description ......................9 3. System Connection ....................9 3.1 Usage Precautions ...................... 9 3.2 System Diagram... - Page 5 KANEXPRO HDMX44-18G 7.3.1 Scene Setting ......................7.3.2 I/O Connection Switching ..................7.3.3 EDID Configuration ....................7.3.4 Audio Out ........................ 7.3.5 Status Setting ......................7.3.6 Network Configuration ..................... 7.3.7 Password Modification .................... 7.4 TCP/IP Port Configuration ......................7.5 GUI Update ..........................
-
Page 6: Introduction
1. Introduction 1.1 Introduction to HDMX44-18G The KanexPro HDMX44-18G is a professional 4-input, 4-output HDMI matrix featuring HDCP 2.2 with the latest HDMI 2.0 specifications supporting ultra HD resolutions up to 4K @60Hz. This matrix switcher supports switching speeds to less than 0.2 seconds and provides 4-additional audio ports via S/PDIF connectors to support audio de- embedding from HDMI. -
Page 7: Package List
KANEXPRO HDMX44-18G ▪ Supports Dolby Digital, DTS, DTS-HD ▪ Control thru front-panel keys, IR, RS-232 & Web based GUI ▪ Front-panel LCD screen provides real-time I/O connection status ▪ Expedient firmware upgrade thru Micro USB port ▪ 1U (19") rack mountable aluminum enclosure ▪... -
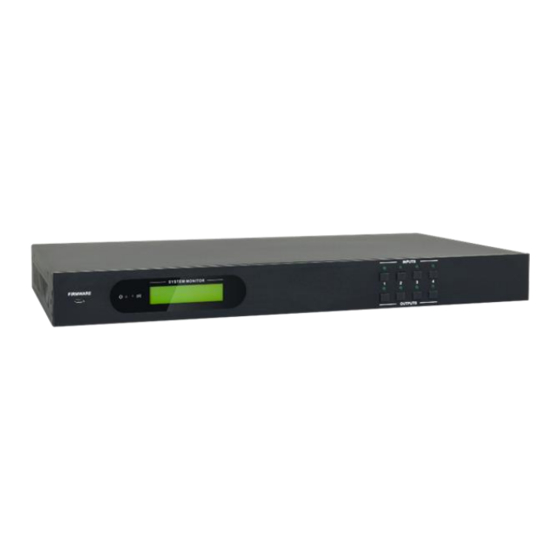
Page 8: Rear Panel
KANEXPRO HDMX44-18G Built-in IR sensor, receive IR signal sent from IR IR sensor ③ remote. LCD Screen Displays real-time operation status. ④ INPUT selector Total 4 input selector buttons, press one of buttons to ⑤ button switch input source. OUTPUT selector Total 4 output selector buttons, press the buttons to ⑥... -
Page 9: System Connection
KANEXPRO HDMX44-18G 3. System Connection 3.1 Usage Precautions 1) System should be installed in a clean environment, which should have a proper temperature and humidity. 2) All of the power switches, plugs, sockets and power cords should be insulated and safe. -
Page 10: Connection Procedure
3.4 System Applications The KanexPro HDMX44-18G matrix switcher is ideal for numerous commercial applications such as military, medical and government audio-video environments, where swift, reliable switching and distribution of high-resolution HDMI signal is critical to meet pixel-by-pixel needs. -
Page 11: Panel Button Control
KANEXPRO HDMX44-18G 4. Panel Button Control 4.1 I/O Connection Switching The front panel features four input selection buttons and four output selection buttons for switching I/O connection. To convert one input to an output: Example: Input 1 to Output 3 →... -
Page 12: I/O Connection Inquiry
KANEXPRO HDMX44-18G 4.3 I/O Connection Inquiry Press OUTPUTS button 1, 2, 3 or 4 to inquiry its corresponding input, and then the indicator of the input button will turn green. 5. IR Control The Matrix Switcher features one built-in IR receiver to receive IR signal from IR remote to enable IR control. -
Page 13: Rs232 Control
KANEXPRO HDMX44-18G 6. RS232 Control 6.1 Installation/uninstallation of RS232 Control Software Installation Copy the control software file to the computer connected with the Matrix Switcher. Uninstallation Delete all the control software files in corresponding file path. 6.2 Basic Settings Firstly, connect the Matrix Switcher with necessary input devices and output devices. -
Page 14: Rs232 Communication Commands
KANEXPRO HDMX44-18G reliable RS232 control. Baud rate: 9600 Data bit: 8 Stop bit: 1 Parity bit: none 6.3 RS232 Communication Commands 1) “[“, “]” in the commands are for easy recognition only and not necessary in real operations. Other symbols including “.”, “,”, “/”, “%”, “;”, “^”. are parts of the commands. -
Page 15: Lock/Unlock Commands
KANEXPRO HDMX44-18G 6.3.2 Lock/Unlock Commands Command Function Feedback Example Lock the front panel buttons. System Locked! /%Lock; Unlock the front panel buttons. System Unlock! /%Unlock; System Locked/ %9961. Query the system locking status. Unlock! 6.3.3 Switching Commands Command Function Feedback Example Transfer signals from the input channel X To All. -
Page 16: Scene Commands
KANEXPRO HDMX44-18G Resolution Out 1 1920x1080P Out 2 1920x1080P %9976. Query the output resolution. Out 3 1920x1080P Out 4 1920x1080P 6.3.4 Scene Commands Command Function Feedback Example Save the present operation to the preset command [Y], ranges from 1 to Save To FY (Y=1-10) Save[Y]. - Page 17 KANEXPRO HDMX44-18G Input port [y] learns the EDID from output port [x]. If the EDID data is available and the audio part supports not only PCM EDIDH[x]B[y]. EDIDH1B1 mode, then force-set it to support PCM mode only. If the EDID data is not available, then set it as initialized EDID data.
-
Page 18: Enable/Disable Digital Audio
KANEXPRO HDMX44-18G 6.3.7 Enable/disable Digital Audio Feedback Command Function Example Enable SPDIF audio output port x. DigitAudio ON with DigitAudioON[ X=1, 2, 3, 4, enable the port x. [x]/ ALL Outputs X=5, enable all ports. Disable SPDIF audio output port x. - Page 19 KANEXPRO HDMX44-18G Same network segment as the switcher Figure 7- 1 Modify the IP of PC Controlled by PC(s) in LAN The Matrix Switcher can be connected with a router to make up a LAN with the PC(s), this make it able to be controlled in a LAN. When control, just make sure the Matrix Switcher’s network segment is the same with the router.
-
Page 20: Tcp/Ip Communication Software Control
KANEXPRO HDMX44-18G Figure 7- 2 Connect to LAN Step1. Connect the TCP/IP port of the Matrix Switcher to Ethernet port of PC with twisted pair. Step2. Set the PC’s network segment to the same as the Matrix Switcher. Do please remember the PC’s original network segment. - Page 21 KANEXPRO HDMX44-18G Figure 7- 3 Connect to TCPUDP 2) Enter commands in designed area to control the Matrix Switcher, see as below: Enter your command here. Commands are the same with RS232 commands listed in 6.3 RS232 Here you will receive the feedback after a command is sent.
-
Page 22: Web-Based Gui Control
KANEXPRO HDMX44-18G 7.3 Web-Based GUI Control The Matrix Switcher provides with built-in GUI for convenient TCP/IP control. GUI allows users to interact with the Matrix Switcher through graphical icons and visual indicators. Access GUI interface through any one of the following methods: Access through web browser: Type the default IP 192.168.0.178 in the browser at... -
Page 23: Scene Setting
KANEXPRO HDMX44-18G Figure 7- 5 Login GUI This system divides into administrator and user mode. There are 2 selectable usernames – admin (default password: admin) and user (default password: user). Login as admin can access more configuration interfaces than user. -
Page 24: I/O Connection Switching
KANEXPRO HDMX44-18G Figure 7- 6 Scene Menu All ten scenes are shown in above interface. Select a scene and then click “Load” can invoke the selected scene. Click “Cancel” to cancel the current operation. 7.3.2 I/O connection switching Click to enter the following interface, it provide intuitive I/O connection switching. -
Page 25: Edid Configuration
KANEXPRO HDMX44-18G Figure 7- 7 Control Menu The button matrix displays every possible connection between every input and output; users can carry on the connections by clicking corresponding button. Buttons 1~4 at the right-bottom corner provides quick saving and recall for overall connection status. - Page 26 KANEXPRO HDMX44-18G Figure 7- 8 Embedded EDID Select “EDID Copy” to enter the below interface: Figure 7- 9 Copy EDID The EDID of INPUT device can be gained from OUTPUT devices. Step1: Select one OUTPUT device that you want to copy its EDID.
-
Page 27: Audio Out
KANEXPRO HDMX44-18G Step2: Select one or more input devices that need to gain EDID. When select To All inputs, all input devices will copy the EDID from output device. Step3: Click “Confirm” to save the setting or click “Cancel” to cancel operation. - Page 28 KANEXPRO HDMX44-18G Figure 7- 11 Status- LCD Button label: Select “Button” to enter the following interface to modify the name of buttons. Figure 7- 12 Status- Button 28 | P a g e...
-
Page 29: Network Configuration
KANEXPRO HDMX44-18G Scene name: Select “Scene” to enter the following interface to modify the name of scenes. Figure 7- 13 Status-Scene 7.3.6 Network Configuration Click “Network” to enter the below interface to inquire and configure network settings including MAC address, IP address, subnet mask, and Gateway. -
Page 30: Password Modification
KANEXPRO HDMX44-18G Figure 7- 14 Network 7.3.7 Password Modification Click “Password” to enter the below interface to inquire and modify the admin or user password. Figure 7- 15 Password 30 | P a g e... -
Page 31: Tcp/Ip Port Configuration
KANEXPRO HDMX44-18G In the above interface, turn on the Front Panel to lock all buttons of machine, they cannot be operated. 7.4 TCP/IP Port Configuration IP address, subnet mask, and Gateway of the Matrix Switcher can be modified via GUI from the above description, but beyond that users can configure the IP port, including IP reset, password reset, and IP module firmware update on the WebServer. -
Page 32: Firmware Upgrade Through Usb Port
KANEXPRO HDMX44-18G 8. Firmware Upgrade through USB port The Matrix Switcher boasts a USB port for firmware upgrade on the rear panel. Preparation: copy the upgrade software DfuSe Demonstration& upgrade file (.dfu) to control PC. Steps to upgrade the device: Step1. -
Page 33: Specifications
KANEXPRO HDMX44-18G Demonstration Step4. Click Choose… to load desired upgrade file (.dfu). Step5. Click Upgrade to start. Make sure the button Leave DFU mode is available to ensure control PC and the Matrix Switcher are connected successfully. 9. Specifications 10. -
Page 34: Troubleshooting & Maintenance
KANEXPRO HDMX44-18G 11. Troubleshooting & Maintenance Problems Causes Solutions connecting cables Check whether the cables may not be connected are connected correctly correctly or it may be Color losing or no video and in working condition. signal output broken. Make sure the connection... - Page 35 KANEXPRO HDMX44-18G Change for another HDMI EDID management does The HDMI cable is broken cable which is in good not work normally at the output end. working condition. Switch again. Manage the EDID data display does manually to make the...
-
Page 36: After-Sales Service
Detailed failure situations. The formation of the cases. Remarks: For any questions or problems, please try to get help from your local distributor or contact kanexpro.com or call us at 888-975-1368 for further support. 36 | P a g e... -
Page 37: Warranty
KanexPro has been advised of the possibility of such damages. - Page 38 KANEXPRO HDMX44-18G 1405 pioneer street Brea, CA 92821 38 | P a g e...
Need help?
Do you have a question about the HDMX44-18G and is the answer not in the manual?
Questions and answers