Table of Contents
Advertisement
Quick Links
Advertisement
Table of Contents

Related Manuals for Craftex CX118


Summary of Contents for Craftex CX118
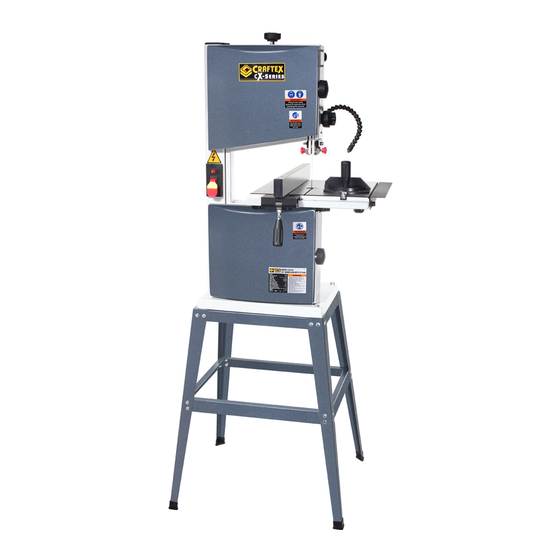
- Page 1 MODEL CX118 10” BAND SAW WITH STAND USER MANUAL Version 1.0...
-
Page 2: Table Of Contents
TABLE OF CONTENTS General Safety Instructions ------------------------------------------------------------------ 3 Specific Safety Instructions ------------------------------------------------------------------ 4 Features ------------------------------------------------------------------------------------------ 5 Physical Features ------------------------------------------------------------------------------ 6 Un-packing --------------------------------------------------------------------------------------- 7 Setup ---------------------------------------------------------------------------------------------- 7 Proper Grounding ------------------------------------------------------------------------------ 8 Stand Assembly --------------------------------------------------------------------------------- 9 Mounting Saw onto Stand -------------------------------------------------------------------- 9 Table Installation -------------------------------------------------------------------------------- 9 Installing Extension Wing --------------------------------------------------------------------- 10 Installing Fence---------------------------------------------------------------------------------- 10... -
Page 3: General Safety Instructions
GENERAL SAFETY INSTRUCTIONS Extreme caution should be used when operating all power tools. Know your power tool, be familiar with its operation, read through the owner’s manual and practice safe usage procedures at all times. ALWAYS read and understand the DISCONNECT the power source when user manual before operating the changing... -
Page 4: Specific Safety Instructions
1/2” above your band saw, before operating the the stock. CX118. If you fail to do so, serious injury could occur. WARNING! The safety instructions given above can not be complete because the environment in every shop is different. -
Page 5: Features
MODEL CX118 - 10” BAND SAW WITH STAND As part of the growing line of Craftex CX-Series machineries, we are proud to offer the CX118 a Wood Band Saw with Stand. By following the instructions and procedures laid out in this user manual, you will receive years of excellent service and satisfaction. -
Page 6: Physical Features
CX118 - 10" WOOD BAND SAW WITH STAND PHYSICAL FEATURES Quick Release Tracking Window Blade Tension Blade Tension Lever Adjustment Knob Upper Cabinet Lock Knob Upper Cabinet Blade Guard Assembly Knob Blade Guide Bearings LED Work Lamp Fence Blade Guard... -
Page 7: Unpacking
A. Band Saw.......... 1 WARNING! B. Table ..........1 CX118 is a heavy machine. While C. Table Insert ........1 moving the machine do not overexert D. Fence ..........1 yourself. Get the help of an assistant or use a fork truck to move the machine to E. -
Page 8: Proper Grounding
Improper connection of the equipment- grounding conductor can result in a risk CX118 is for use on a normal 110 volt of electric shock. Check with a qualified circuit. Make sure that the machine is electrician if you are in doubt as to connected to an outlet having the same whether the outlet is properly grounded. -
Page 9: Stand Assembly
STAND ASSEMBLY Attach the upper short leg braces and long braces to the legs using carriage bolts and flange nuts provided. Only hand tighten for now. Make sure the two short support braces with extra holes are opposite to one another. -
Page 10: Installing Extension Wing
INSTALLING THE EXTENSION WING Remove the stop screw and washer from the end of each extension rod. Attach the extension rods to the extension wing using screws and washers provided. See figure-5. Figure-7 Installing the fence rail Place the fence assembly on the fence rail and table. -
Page 11: On/Off Switch
ON/OFF SWITCH The ON/FF switch on the CX118 comes with a removable key which disables the Figure-9 Upper wheel switch and prevents from unauthorized operation. -
Page 12: Test Run
TEST RUN DUST COLLECTION Once you have assembled your machine The CX118 features a 4” diameter dust port completely, it is then time for a test run to to collect to a dust collector. make sure that the machine works properly and is ready for operation. -
Page 13: Blade Tension
TO ADJUST THE BLADE TENSION: TABLE TILT ADJUSTMENT Remove the cord from the power source. The table can be tilted 45° to the right. Move the quick release tension lever to the TO TILT THE TABLE: left to engage. See figure-14. Loosen the lock lever under the trunnion. -
Page 14: Support Bearing Adjustment
Once the thrust bearing is in correct SUPPORT BEARINGS position tighten thumb screw. ADJUSTMENT Loosen the socket head screw with a The guide bearings (beside) and thrust wrench and adjust the entire assembly back bearing (behind) the blade, support the or forth to just clear the back of the saw blade to move in a straight line during blade. -
Page 15: Miter Gauge Adjustment
Slide the adjustment shaft and position CALIBRATING each guide bearing approximately 1/16" TABLE TILT SCALE behind the gullets of the saw blade. See figure-16. The pointer on the table tilt scale must Figure-16 Blade guide approximately 1/16" calibrated in order for the scale reading to behind the blade gullets be accurate. -
Page 16: Work-Piece Inspection
WORK-PIECE INSPECTION BLADE REPLACEMENT Before cutting any wood, make sure to To remove / change the blade, turn the inspect the work-piece for nails, staples, switch OFF and disconnect the cord from small pieces of stone or metal and any the power source. -
Page 17: Operations
gauge is at 90° position on the miter slot. OPERATIONS Place the work-piece on the table so that Before operating the band saw make sure the marked point is aligned with the blade have performed following and hold the work-piece against the miter adjustments: gauge. -
Page 18: Maintenance
TO REPLACE THE V-BELT: MAINTENANCE Turn the power switch to OFF position and During the life of your machine, you will disconnect the cord from the power source. need to practice some regular maintenance to keep your saw in peak performance Remove saw blade. - Page 19 Place new belt partially around motor pulley to get it started, then turn the wheel by hand until the belt is completely seated into the motor pulley groove. TO TENSION THE V-BELT: Push the motor down to add tension to belt. The belt is properly tensioned when moderate finger pressure on the belt between the two pulleys causes a 1/2"...
-
Page 20: Wiring Diagram
WIRING DIAGRAM... -
Page 21: Parts Breakdown And Parts List
BAND SAW PARTS BREAKDOWN... - Page 22 STAND ASSEMBLY PARTS BREAKDOWN...
- Page 23 PARTS LIST...
-
Page 26: Warranty
This warranty shall not apply to consumable products such as blades, bits, belts, cutters, chisels, punches etceteras. Craftex shall in no event be liable for injuries, accidental or otherwise, death to persons or damage to property or for incidental contingent, special or consequential damages arising from the use of our products.
Need help?
Do you have a question about the CX118 and is the answer not in the manual?
Questions and answers