Table of Contents
Advertisement
Advertisement
Table of Contents

Related Manuals for Craftex CX116


Summary of Contents for Craftex CX116
- Page 1 CX116 5" METAL BAND SAW WITH SWIVEL HEAD User Manual Version 1.0...
-
Page 2: Table Of Contents
Stop Rod ......................10 Stop Bracket ....................11 Test Run .......................11 Blade Speed ....................12 Blade Selection.....................12 Feed Rate.....................13 Blade Guides ....................14 Blade Tensioning..................15 Blade Replacement ..................15 Blade Tracking....................17 Maintenance ....................18 Lubrication ....................18 CX116 Stand Diagram..................19 CX116 Band Saw Diagram................20 CX116 Parts List...................21 Warranty .......................23... -
Page 3: General Safety Instructions
GENERAL SAFETY INSTRUCTIONS Extreme caution should be used when operating all power tools. Know your power tool, be familiar with its operation, read through the user manual and practice safe usage procedures at all times. ALWAYS read and understand the router bits, shaper heads, blades, user manual before operating the knives or making other adjustments or... -
Page 4: Specific Safety Instructions
CX116 – 5" METAL BAND SAW WITH SWIVEL HEAD SAFETY INSTRUCTIONS CX116 is designed to cut metal only. band NEVER LEAVE unattended while it is running. ALWAYS inspect the blade for any crack or missing teeth before operating DO NOT attempt to remove jammed the band saw. -
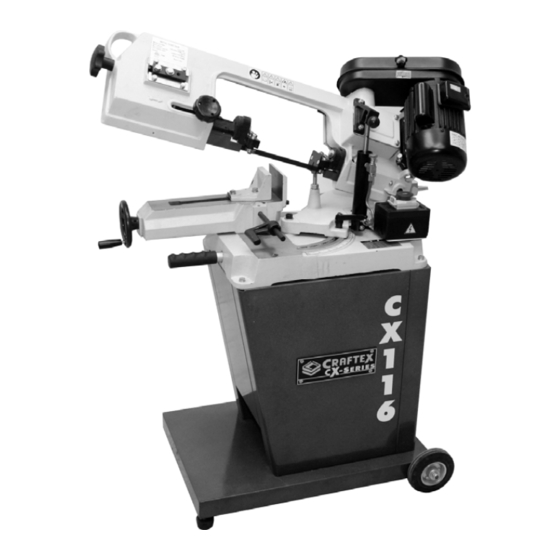
Page 5: Features
CX116 - 5" Metal Band Saw with Swivel Head. By following the instructions and procedures laid out in this user manual, you will receive years of excellent service and satisfaction. The CX116 is a professional tool and like all power tools, proper care and safety procedures should be adhered to. -
Page 6: Physical Features
CX116 – 5" METAL BAND SAW WITH SWIVEL HEAD PHYSICAL FEATURES Blade Tracking Blade Guides Assembly Pulley & Belt Cover Blade Tension Blade Guide Knob Knob 3/4 HP Motor Vise Clamp Hydraulic Feed Vise Hand Wheel ON/OFF Switch Carrying Handle... -
Page 7: Setup
Use a solvent cleaner that will not damage painted surfaces. WARNING! CX116 is a very heavy machine, do not over-exert yourself. For safe moving method use fork truck or get the help of an assistant or friend. -
Page 8: Proper Grounding
It is strongly recommended not to use resistance for electric current to reduce the extension cords with your CX116. Always risk of electric shock. try to position your machine close to the power source so that you do not need to Make sure the cord is plugged into a use extension cords. -
Page 9: Cabinet, Wheels And Feet
AND FEET the floor. The CX116 comes with two rubber feet and Tighten the hex nuts against the base to two wheels. The rubber feet and the wheels lock the rubber feet. -
Page 10: Stop Bolt Adjustment
Now, place a small machinist square on the STOP BOLT ADJUSTMENT vise and adjust the vise so that it is square with the blade. Adjust the stop bolt and jam nut using a proper size wrench so that the band saw Tighten the hex nuts securing the vise in blade teeth are just below the table surface position. -
Page 11: Stop Bracket
AUTO SHUT-OFF TEST RUN BRACKET Once you have assembled your band saw completely, it is then time for a test run to The auto shut-off bracket should be make sure that it works properly and is adjusted properly, so that the band saw ready for operation. -
Page 12: Blade Speed
BLADE SPEED cutting. This helps to distribute the cutting forces and avoids tooth breakage. The CX116 features 3 speeds; 24, 35 and 61 m/minute. Figure-9 illustrates the correct speeds and the position of the belt on the motor and gear box pulley for most... -
Page 13: Feed Rate
BLADE BREAKAGE CAN BE FEED RATE CAUSED BY: The speed at which the saw blade will cut 1. Faulty alignment and adjustment of the through the work piece is controlled by feed guides rate dial. 2. Insufficient number of teeth contacting the cut 3. -
Page 14: Blade Guides
Slowly turn the feed rate dial counter Rotate the side bearing eccentrics until the clockwise, allowing the blade to cut the space between the blade and the bearing is work piece. about 0.000" to 0.001". Tighten the nuts. WARNING! Make sure the cord is disconnected from Loosen the lock knob and slide the blade the power source, before servicing or guide close to the work piece so the blade... -
Page 15: Blade Tensioning
BLADE TENSIONING BLADE REPLACEMENT The blade should be properly tensioned in The band saw blade will become dull or order to get straight and efficient cuts. It damaged with use and will need to be also prolongs the life of the blade. replaced with a new one. - Page 16 Remove the screws securing the wheel Use the blade tension knob and tension the guard and remove the wheel guard to blade as necessary so that it does not slip access the blade and the wheels. See off the wheels. figure-15.
-
Page 17: Blade Tracking
Tightening the set screw will move the BLADE TRACKING blade towards the shoulder of the wheel. The blade tracking on the CX116 has been The blade is tracking properly when the properly factory back of the blade is touching the edge of... -
Page 18: Maintenance
During the life of your machine, you will The gearbox and all the bearings on the need to practice some regular maintenance CX116 are permanently lubricated and do to keep your band saw in peak performance not need any more lubrication. However condition. -
Page 19: Cx116 Stand Diagram
CX116 STAND DIAGRAM... -
Page 20: Cx116 Band Saw Diagram
CX116 BAND SAW DIAGRAM... -
Page 21: Cx116 Parts List
CX116 PARTS LIST BEARING 6202 C-RING EXT M15 DESCRIPTION BOLT - CARRIAGE M10-1.5 x 30 SH361- DRIVE WHEEL SHAFT KEY C5 X 20 NUT - LOCKING M12-1.75 WORM SHAFT TUBE WORK TABLE GASKET CABLE W/ PLUG WORM SWITCH SUPPORT BRACKET PIN - SPRING 4 X 24 SCREW - PAN HD M5-0.8 X 10... - Page 22 BOLT - HEX HD M12-1.75 X 30 ST03 BOLT - CARRIAGE M6-1.0 X 12 WASHER - FLAT M12 ST04 WASHER - FLAT M6 BOLT - HEX HD M8-1.25 X 25 ST05 NUT - HEX M6-1.0 MOTOR BASE ST06 BOLT - HEX HD M6-1.0 X 12 BOLT - HEX HD M12-1.75 X 30 ST07 WASHER -SPRING M6...
-
Page 23: Warranty
This warranty shall not apply to consumable products such as blades, bits, belts, cutters, chisels, punches etceteras. Craftex shall in no event be liable for injuries, accidental or otherwise, death to persons or damage to property or for incidental contingent, special, or consequential damages arising from the use of our products.
Need help?
Do you have a question about the CX116 and is the answer not in the manual?
Questions and answers