Advertisement
Quick Links
Advertisement

Related Manuals for Ledj Octoblox


Summary of Contents for Ledj Octoblox
- Page 1 www.prolight.co.uk (Order code: LEDJ94)
-
Page 3: Operating Determinations
IMPORTANT: The manufacturer will not accept liability for any resulting damages caused by the non-observance of this manual or any unauthorised modification to the equipment. • Never let the power-cable come into contact with other cables. Handle the power-cable and all mains voltage connections with particular caution! • Never remove warning or informative labels from the equipment. • Do not open the equipment and do not modify the equipment. • Do not switch the equipment on and off in short intervals, as this will reduce the system’s life. • Only use the equipment indoors. • Do not expose to flammable sources, liquids or gases. • Always disconnect the power from the mains when equipment is not in use or before cleaning! Only handle the power-cable by the plug. Never pull out the plug by pulling the power-cable. • Make sure that the available voltage is between 220v/240v. • Make sure that the power-cable is never crimped or damaged. Check the equipment and the power-cable periodically. • If the equipment is dropped or damaged, disconnect the mains power supply immediately. -
Page 4: Operation
Operation: After the power is switched on, Press the “MENU/ESC” button to access the main menu: DMX mode, Auto run mode, DMX channel selection mode, Preset colour mode, Sound active mode, Slave mode or Software mode. • The “MENU/ESC” button is to access or return to the main menu. • The “UP” button is to increase the value of the current setting or to scroll up through the different modes. • The “DOWN” button is to decrease the value of the current setting or to scroll down through the different modes. • The “ENTER” button is to access each mode. DMX mode: To control the Octoblox via your DMX controller, press the “MENU/ESC” button until “Addr”, is shown on the LED display, it is now in DMX mode. Now press the “ENTER” button so the LED display shows “A001”, this now means that the DMX address is set at 001. You can select your DMX address by using the “UP” and “DOWN” buttons. (A001-A512) Note: When in this mode the first “DOT” on the LED display will blink continuously showing that it is receiving DMX data. If it is not blinking it is NOT receiving any DMX data from the controller. To set the unit in one of the channel modes 3/5/8/14/24 or 26 see DMX channel selection mode. Auto run mode: To set the Octoblox in Auto run, press the “MENU/ESC” button and use the “UP” and “DOWN” buttons until “AUto” is shown on the LED display. Press the “ENTER” button to choose from one of the three auto run modes, “AUt1”, “AUt2” or “AUt3”. Now press the “ENTER” button a second time and you can set the desired speed “SP 1” (slow) to “SP 9” (fast) using the “UP” and “DOWN” buttons. - Page 5 DMX channel selection mode: In this DMX channel selection mode you can set the Octoblox into one of the following DMX channel modes; 1) 3CH mode, 2) 5CH mode, 3) 8CH mode, 4) 14CH mode, 5) 24CH mode, 6) 26CH mode First press the “MENU/ESC” button and use the “UP” and “DOWN” buttons until until “Chnd”, is shown on the LED display, now press the “ENTER” button to choose one of the DMX channel modes using the “UP” and “DOWN” buttons. For the DMX channel mode functions see overleaf. Preset colour mode: To access the Preset colour mode First press the “MENU/ESC” button and use the “UP” and “DOWN” buttons until “Colo”, is shown on the LED display, now press the “ENTER” button to choose one of the of the preset colours from “Col1” - “Col9” or choose “Atf” to adjust the indi- vidual RGB colour intensity using the “UP” and “DOWN” buttons. Note: In the “Atf” mode, to adjust the brightness of the RGB LEDs, press the “ENTER” button to choose one of the three colours; “red” = Red, “Gree” = green and “blue” = Blue using the “UP”...
- Page 6 DMX chart modes: Channel Channel Channel Channel Channel Channel Features mode mode mode mode mode mode Green Blue Green Blue Green Blue Green Blue Green Blue Green Blue Green Blue Green Blue Functions Speed/Sensitivity...
-
Page 7: Dmx Function Chart
DMX function chart: DMX Value Functions Master Dimmer 8-15 Strobe 16-23 Programme 1 24-31 Programme 2 32-39 Programme 3 40-47 Programme 4 48-55 Programme 5 56-63 Programme 6 64-71 Programme 7 72-79 Programme 8 80-87 Programme 9 88-95 Programme 10 96-103 Programme 11 104-111... - Page 8 LED segments This Octoblox is split up into 8 LED segments/spots which can be controlled in the following channel modes; 3 channel mode Every block occupies the same 3 channels. The unit occupies 3 channels. 5 channel mode Every block occupies the same 3 channels. The unit occupies 5 channels. 8 channel mode Every 4 blocks occupies the same 3 channels. 8 Spots occupy 6 channels. The unit occupies eight channels. 14 channel mode Every 2 blocks occupies the same 3 channels. 9-11 12-14 12-14 9-11 8 Spots occupy 12 channels. The unit occupies 14 channels. 24 channel mode Every block occupies 3 channels. The unit occupies 26 channels. 10-12...
- Page 9 DATA “IN” and DATA “OUT” XLR terminals located on all DMX fixtures (most controllers only have a data “out” terminal). DMX Linking: • DMX is a language allowing all makes and models of different manufactures to be linked to- gether and operate from a single controller, as long as all fixtures and the controller are DMX com- pliant. To ensure proper DMX data transmission, when using several DMX fixtures try to use the shortest cable path possible. The order in which fixtures are connected in a DMX line does not influence the DMX addressing. For example; a fixture assigned to a DMX address of 1 may be placed anywhere in a DMX line, at the beginning, at the end, or anywhere in the middle. When a fixture is assigned a DMX address of 1, the DMX controller knows to send DATA assigned to address 1 to that unit, no matter where it is located in the DMX chain. DATA Cable (DMX cable) requirements (for DMX operation): • The LEDJ Octoblox can be controlled via DMX-512 protocol. The DMX address is set on the back of the unit. Your unit and your DMX controller require a standard 3-pin XLR connector for data input/output (figure 1). Figure 1 Also remember that DMX cable must be daisy chained and cannot be split.
- Page 10 Notice: • Be sure to follow figures 2 & 3 when making your own cables. Do not connect the cable’s shield conductor to the ground lug or allow the shield conductor to come in contact with the XLR’s outer casing. Grounding the shield could cause a short circuit and erratic behaviour. Special Note: Line termination: • When longer runs of cable are used, you may need to use a terminator on the last unit to avoid erratic behaviour. Termination reduces signal transmission problems and interferance. it is always advisable to connect a DMX terminal, (resistance 120 Ohm 1/4 W) between pin 2 (DMX-) and pin 3 (DMX+) of the last fixture. Using a cable terminator (part number CABL90) will decrease the possibilities of erratic behaviour.
-
Page 11: Specifications
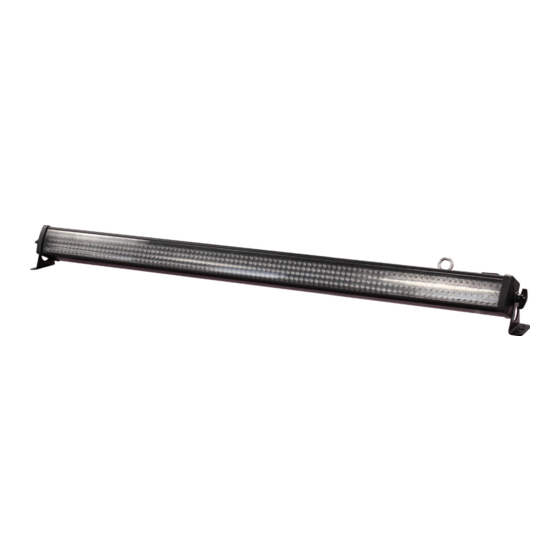
Specifications: DMX Channels: .................. 3/5/8/14/24 or 26 selectable Display: ....................4 Push button LED display Connections: ...........3-Pin XLR In/Out for DMX, IEC Power In/Out sockets Modes: ...........Preset colour, Auto run, Sound active, Slave and DMX LEDs: ............384 Ultra Bright 5mm LEDs (R: 128, G: 128, B: 128) Beam angle: ........................30 degrees Power consumption: ........................26W Power supply: ........................240v...
Need help?
Do you have a question about the Octoblox and is the answer not in the manual?
Questions and answers