Table of Contents
Advertisement
Available languages
Available languages
Advertisement
Table of Contents

Subscribe to Our Youtube Channel
Related Manuals for Bella 8-IN-1 GRILL


Summary of Contents for Bella 8-IN-1 GRILL
- Page 1 8-IN-1 GRILL 8-EN-1 GRILL Instruction Manual Recipe Guide Manual de instrucciones Guía de recetas Register your product and get support at: Para registrar y obtener asistencia de su producto ir: www.bellahousewares.com/welcome SO-313365_14577_BELLA_8 in 1 Grill_WM US_IM R5.indd 1 2016-07-14 9:29 AM...
- Page 2 SO-313365_14577_BELLA_8 in 1 Grill_WM US_IM R5.indd 2 2016-07-14 9:29 AM...
-
Page 3: Table Of Contents
Additional Important Safeguards .......................3 Notes on the Plug ............................3 Notes on the Cord............................3 Plasticizer Warning ............................3 Electric Power..............................3 Getting to Know Your 8-IN-1 Grill Station ....................4 Before Using for the First Time ........................5 Changing Cooking Plates..........................6 Operating Instructions ..........................6-7 USDA Cooking Guidelines ...........................7 To Use as a Full Grill/Griddle (Open Position) ..................7-8... -
Page 4: Important Safeguards
In order to avoid the risk of an electric shock, never try to repair the 8-IN-1 Grill Station yourself. Bring it to a qualified technician for examination, repair or electrical or mechanical adjustment. -
Page 5: Additional Important Safeguards
WARNING! ALWAYS UNPLUG UNIT WHEN COOKING IS FINISHED. OTHERWISE, THE 8-IN-1 GRILL STATION WILL CONTINUE TO HEAT UNTIL UNIT IS UNPLUGGED. All users of this appliance must read and understand this instruction manual before operating or cleaning this appliance. -
Page 6: Getting To Know Your 8-In-1 Grill Station
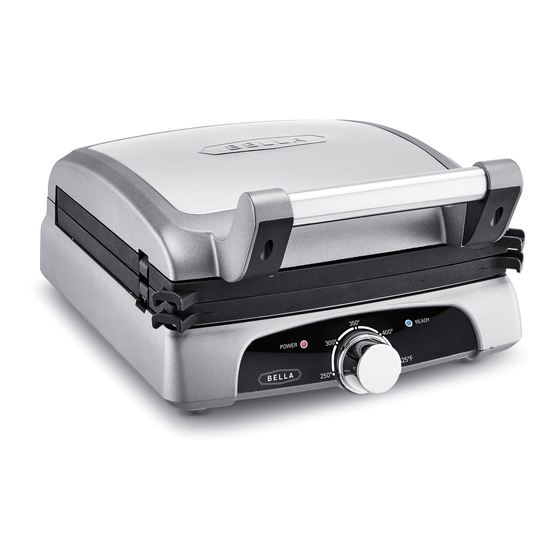
Getting to know your 8-in-1 grill station Product may vary slightly from illustrations Brushed Figure 1 Stainless Steel Housing Lid Handle Upper Plate Release Button Lower Plate Release Button Grill Station Lid Upper Plate Locks Heating Element Floating Hinge Power Cord... -
Page 7: Before Using For The First Time
NOTE: Your 8-IN-1 Grill Station is packed with upper and lower reversible grill/griddle plates installed. 2. Set the 8-IN-1 Grill Station on a dry, clean and flat surface. Open the lid to 90º. 3. Wipe the non-stick cooking plates with a damp cloth to remove all dust, and then dry. -
Page 8: Changing Cooking Plates
(See Figure 6.) 6. When using your 8-IN-1 Grill Station as a contact grill (closed position), position 1 removable grease catcher cup directly under the grease drain located on the right side of the front of the unit. -
Page 9: Usda Cooking Guidelines
165° F. To Use as a Full Grill/Griddle (Open Position) 1. Place the 8-IN-1 Grill Station on a flat, level surface. Make sure there is ample available space to accommodate the full opened Grill Station. -
Page 10: Versatile Full Grill & Griddle: Hints For Best Results
3. When the blue READY light illuminates, center food on the open cooking plate(s). 4. Place food, oiled side down, centered, on the lower cooking plate. 5. Your 8-IN-1 Grill Station is equipped with a floating hinge that allows the upper lid to expand and accommodate thicker foods: meats, veggies, desserts, etc 6. -
Page 11: Press Grill Or Griddle: Hints For Best Results
To ensure moist and delicious grilled meats, always allow meats to rest 10 to 20 minutes before cutting. • Use cuts of meat thick enough to touch the top and base plate when the 8-IN-1 Grill Station is closed. •... -
Page 12: Panini Maker: Hints For Best Results
Omelets 350ºF, 4 to 5 minutes Poached Eggs 300ºF, 3 minutes HINT: Use the 8-IN-1 Grill Station to cook omelet ingredients, if desired. Making omelets is a great way to use leftovers. 1. Install 2 reversible panini/omelet plates; omelet cookside up. -
Page 13: Waffle Maker
WARNING! ALWAYS UNPLUG UNIT WHEN COOKING IS FINISHED. OTHERWISE, THE 8-IN-1 GRILL STATION WILL CONTINUE TO HEAT UNTIL UNIT IS UNPLUGGED. 11. Allow 8-IN-1 Grill Station to cool completely before removing the cooking plates or to clean the unit. SO-313365_14577_BELLA_8 in 1 Grill_WM US_IM R5.indd 11... -
Page 14: Waffle Maker: Hints For Best Results
Waffle Maker: Hints for Best Results • Most recipes can be easily halved or doubled. • Do not open the Waffle Maker during the first minute of baking or the waffle will separate. Completely cook the waffle before removing. • When a waffle is done, the upper lid should lift easily. -
Page 15: Quesadilla Maker: Pressed Tortillas
WARNING! ALWAYS UNPLUG UNIT WHEN COOKING IS FINISHED. OTHERWISE, THE 8-IN-1 GRILL STATION WILL CONTINUE TO HEAT UNTIL UNIT IS UNPLUGGED. 10. Allow 8-IN-1 Grill Station to cool completely before removing cooking plates or to clean the unit. Quesadilla Maker: Hints for Best Results •... -
Page 16: User Maintenance Instructions
WARNING! ALWAYS UNPLUG UNIT WHEN COOKING IS FINISHED. OTHERWISE, THE 8-IN-1 GRILL STATION WILL CONTINUE TO HEAT UNTIL UNIT IS UNPLUGGED. 1. When the 8-IN-1 Grill Station has cooled completely and is safe to handle, slide the removable grease catcher cups away from the unit. -
Page 17: Storing Instructions
2. Never wrap cord tightly around appliance. Do not put any stress on cord where it enters unit, as this could cause cord to fray and break. 3. Store 8-IN-1 Grill Station in its box or store closed for easy and compact storage. 8-IN-1 Grill Station General Cooking Chart... -
Page 18: Recipe Guide
Always use oven mitts when placing foods onto the hot grill. Do not place anything on top of the 8-IN-1 Grill Station while it is operating or while it is hot. WARNING! ALWAYS UNPLUG UNIT WHEN COOKING IS FINISHED. OTHERWISE, THE 8-IN-1 GRILL STATION WILL CONTINUE TO HEAT UNTIL UNIT IS UNPLUGGED. - Page 19 Massage the bag to distribute flavors in the fish. Refrigerate for 2 to 3 hours. 2. Install 2 reversible grill/griddle plates; grill cookside up. 3. Preheat the 8-IN-1 Grill Station to 425ºF 4. When the blue READY light illuminates, lift the lid and if desired, use a heat-proof brush to lightly coat the upper and lower cooking plates with vegetable oil...
- Page 20 Refrigerate for 2 to 3 hours. 2. Install 2 reversible grill/griddle plates; grill cooksides up. 3. Preheat the 8-IN-1 Grill Station to 425ºF. 4. Remove chicken breast from brine; discard liquid. Replace the chicken breast into the bag.
- Page 21 8. If additional quesadillas are to be cooked, close the 8-IN-1 Grill Station to retain heat. 9. Use a pizza cutter or a sharp serrated knife to cut quesadilla into 6 pieces. Enjoy as a snack or serve for dinner.
- Page 22 6. When your Cuban sandwiches are ready, wearing oven mitts, gently open the lid and remove sandwiches from the cooking plate. If additional Cuban sandwiches are to be grilled, close the 8-IN-1 Grill Station to retain heat. 8. Serve with roasted tomatoes and a light slaw.
- Page 23 • lemon zest for presentation Install 2 waffle cooking plates. 2. Preheat the 8-IN-1 Grill Station to 400ºF. 3. Zest lemon and set aside. 4. Combine dry ingredients in a blender jar. Add wet ingredients to blender jar. 5. Blend until light and frothy, scraping down the sides several times.
- Page 24 Install 2 reversible grill/griddle plates; griddle cooksides up. 2. Following the instructions outlined in the section “To Use as a Full Grill/Griddle” set up the 8-IN-1 Grill Station in the open position. (See Figures 5 and 6.) 3. Preheat griddle to 400ºF.
-
Page 25: Warranty
Limited TWO-YEAR Warranty SENSIO Inc. hereby warrants that for a period of TWO YEARS from the date of purchase, this product will be free from mechanical defects in material and workmanship, and for 90 days in respect to non-mechanical parts. At its sole discretion, SENSIO Inc. -
Page 26: Medidas De Seguridad Importantes
MEDIDAS DE SEGURIDAD IMPORTANTES Al utilizar electrodomésticos, siempre deben cumplirse las precauciones de seguridad básicas, incluidas las siguientes: LEA TODAS LAS INSTRUCCIONES. El cable de este electrodoméstico solo debe enchufarse en un tomacorriente de 120 V CA. PRECAUCIÓN: NUNCA enchufe la unidad sin las placas de cocción superior e inferior colocadas correctamente. -
Page 27: Otras Medidas De Seguridad Importantes
17. ¡ADVERTENCIA! SIEMPRE DESENCHUFE LA UNIDAD CUANDO TERMINE DE COCINAR. DE LO CONTRARIO, LA ESTACIÓN DE LA PLANCHA 8 EN 1 CONTINUARÁ CALENTANDO HASTA QUE SE DESENCHUFE LA UNIDAD. 18. PRECAUCIÓN. SUPERFICIES CALIENTES: Este electrodoméstico genera calor mientras está en funcionamiento. Se deben tomar las medidas de precaución adecuadas para evitar el riesgo de quemaduras, incendios u otros tipos de lesiones físicas y daños materiales. -
Page 28: Notas Sobre El Enchufe
NOTAS SOBRE EL ENCHUFE Este electrodoméstico cuenta con un enchufe polarizado (una pata es más ancha que la otra). Para reducir el riesgo de descarga eléctrica, este enchufe encaja de una sola manera en un tomacorriente polarizado. Si el enchufe no encaja bien en el tomacorriente, delo vuelta. -
Page 29: Conozca La Estación De La Plancha 8 En 1
Conozca su estación de la plancha 8 en 1 El producto puede variar ligeramente con respecto A la ilustración. Carcasa de Figura 1 acero inoxidable cepillado Asa de la tapa Botón de liberación de la placa superior Botón de liberación de la placa inferior Tapa de la estación de la planchaplaca inferior... -
Page 30: Antes De Utilizar Por Primera Vez
Panel de control Figura 2 350° POWER 300° 400° READY 250° 425°F Luz roja de POWER Selector de control Luz azul de READY (Encendido) de temperatura (Listo) Antes de utilizar por primera vez 1. Desempaque con cuidado la estación de la plancha 8 en 1 y quite todos los envoltorios y materiales. Quite la lámina protectora transparente del panel de control. -
Page 31: Cambio De Las Placas De Cocción
Cambio de las placas de cocción 1. Coloque la estación de la plancha 8 en 1 sobre una superficie plana y nivelada. Abra la tapa a 90°. 2. Elija 2 placas de cocción, coloque el lado de la cocción hacia arriba, sobre una superficie de trabajo cerca de la estación de la plancha. -
Page 32: Pautas De Cocción Del Usda
7. Precaliente la estación de la plancha 8 en 1. Siga las instrucciones de la receta y coloque el selector de control de temperatura de 350 °F (177 °C) a 425 °F (218 °C). Utilice el asa para bajar la tapa. NOTA: Salvo que utilice la estación de la plancha como plancha/parrilla completa en posición abierta, siempre ponga en funcionamiento la unidad vacía y cerrada durante el precalentamiento. -
Page 33: Plancha Y Parrilla Completa Y Versátil: Consejos Para Obtener Mejores Resultados
5. Siga las instrucciones de la receta y coloque el selector de control de temperatura de 350 °F (177 °C) a 425 °F (218 °C). PRECAUCIÓN: Para evitar lesiones físicas y daños materiales, cuando cocine alimentos con jugo o grasa, siempre asegúrese de que las tazas recolectoras de grasa desmontables estén colocadas debajo del drenaje de grasa en las esquinas externas de las placas abiertas. -
Page 34: Uso Como Plancha A Presión (Posición Cerrada)
Uso como plancha a presión (Posición cerrada) NOTA: Cuando cocine más de una pieza de alimento o una combinación de alimentos, prepárelos con alimentos del mismo espesor. De esta manera, los alimentos se cocinarán más rápido y parejo. Con ambas placas de la plancha colocadas, la preparación adecuada de los alimentos y el calor más alto garantizarán que obtenga mejores marcas de la plancha en los lados superior e inferior. -
Page 35: Parrilla O Plancha A Presión: Consejos Para Obtener Mejores Resultados
Parrilla o plancha a presión: Consejos para obtener mejores resultados Cocción a la plancha de carne/ave/pescado • Para lograr obtener carnes cocidas tiernas y deliciosas, siempre deje a la carne reposar durante 10 a 20 minutos antes de cortar. • Use cortes de carne con el espesor suficiente como para que toquen la placa superior y la base cuando la estación de la plancha 8 en 1 esté... -
Page 36: Preparador De Panini: Consejos Para Obtener Mejores Resultados
Preparador de panini: Consejos para obtener mejores resultados • Es habitual preparar panini con una barra sustanciosa de pan. Sin embargo, el panini preparado con panes o bollos cortados en rodajas comprados en tiendas puede ser delicioso y fácil de preparar. Diviértase y experimente con una gran variedad de panes, tortillas, pan plano, incluso pitas. -
Page 37: Waflera
12. Deje enfriar la estación de la plancha 8 en 1 antes de quitar las placas de cocción o para limpiar la unidad. Waflera Waflera, rinde 4 wafles 400 °F (204 °C), 6 a 7 minutos 1. Coloque 2 placas para wafles. ¡IMPORTANTE! Las placas para wafles están marcadas como “UPPER” (Superior) e “LOWER” (Inferior) en el reverso de las placas. -
Page 38: Waflera: Consejos Para Obtener Mejores Resultados
Waflera: Consejos para obtener mejores resultados • La mayoría de las recetas se pueden duplicar o reducir a la mitad con facilidad. • No abra la waflera durante el primer minuto de cocción; de lo contrario, el wafle se partirá. Cocine por completo el wafle antes de quitarlo. -
Page 39: Preparador De Quesadilla: Tortillas A Presión
Preparador de quesadilla: Tortillas a presión 425 °F (218 °C), 5 a 7 minutos 1. Instale las placas para quesadilla superior e inferior. 2. Siga las instrucciones de la receta y gire el selector de control de temperatura a 425 °F (218 °C). 3. Prepare las quesadillas mientras se calienta el electrodoméstico. Coloque la primera tortilla en un plato limpio. -
Page 40: Instrucciones De Mantenimiento Para El Usuario
INSTRUCCIONES DE MANTENIMIENTO PARA EL USUARIO Este electrodoméstico requiere poco mantenimiento. No contiene piezas que puedan ser reparadas por el usuario. No intente reparar la unidad usted mismo. Comuníquese con un técnico de reparación de electrodomésticos calificado si el producto necesita servicio técnico. Instrucciones de cuidado y limpieza PRECAUCIÓN: Siga las instrucciones de la receta y gire el selector de control de temperatura a 250 °F (121 °C). -
Page 41: Instrucciones De Almacenamiento
Instrucciones de almacenamiento ADVERTENCIA: Nunca guarde la estación de la plancha 8 en 1 mientras está caliente o enchufada. 1. Siga las instrucciones de la receta y gire el selector de control de temperatura a 250 °F (121 °C). Asegúrese de que la unidad esté desenchufada y se haya enfriado por completo. 2. -
Page 42: Guía De Recetas
Recetas Guía de recetas PRECAUCIÓN. SUPERFICIES CALIENTES: Este electrodoméstico genera calor y libera vapor mientras está en funcionamiento. Use siempre manoplas para evitar quemaduras. PRECAUCIÓN: La estación de la plancha 8 en 1 se calienta durante su funcionamiento y mantiene el calor durante un tiempo luego de desenchufarse. Use siempre manoplas cuando coloca alimentos en la plancha caliente. - Page 43 Recetas Salmón asiático a la plancha con piel crocante Rinde 2 porciones • 3/4 a 1 lb (340 a 453 g) de filete de salmón (con piel) cortado en 2 trozos Adobo • 2 cucharadas de salsa Ponzu • 2 cucharadas de aceite de oliva extra virgen •...
- Page 44 Recetas Pechuga de pollo perfectamente cocida a la plancha Rinde 1 porciones • 1 pechuga de pollo*, deshuesada, sin piel Salmuera • 1/2 taza de agua • 1/2 cucharada de azúcar negro • 1/2 cucharada de sal kósher *Las cantidades de la receta se podrán incrementar según fuera necesario. Agregue los ingredientes de la salmuera a una bolsa de almacenamiento con cierre hermético con capacidad para un galón (3,8 L).
- Page 45 Recetas Quesadilla de pollo a la parrilla Rinde 1 porción • 2 tortillas de harina (8 pulgadas [20,3 cm]) • 1/4 taza de “Pechuga de pollo perfectamente cocida a la plancha”, desmenuzada • 1/2 cucharadita de comino molido • 1/2 cucharadita de polvo de chile •...
- Page 46 Recetas Emparedados cubanos a la plancha Rinde 2 porciones • 2 panes largos, abiertos • 1/2 lb (227 g) de jamón a la miel, cortado en rodajas finas • 1 cucharadita de mostaza marrón • rodajas de pepinillos con eneldo •...
- Page 47 Recetas Wafles frescos con limón y arándanos Rinde 4 wafles 400 °F (204 °C), 6 minutos • 3/4 taza (30 g) de harina común • 1/4 de taza de fécula de maíz • 3 cucharadas de azúcar granulada • 1/2 cucharadita de polvo para hornear •...
- Page 48 Recetas Pasteles de maíz ahumado Rinde 12 panqueques • 2 huevos grandes • 1/2 de taza de harina común tamizada • 1/4 de taza (180 ml) de leche • 1 cucharadita de polvo para hornear • 1 lata (15 oz [425 g]) de maíz dulce, bien escurrido •...
-
Page 49: Garantía
Garantía limitada de DOS AÑOS Mediante la presente, SENSIO Inc. garantiza que, durante el plazo de DOS AÑOS a partir de la fecha de compra, este producto no presentará defectos mecánicos en el material ni en la mano de obra, y durante 90 días, no los presentará en las piezas no mecánicas. - Page 50 Dudas o comentarios contactar el departamento de servicio al cliente 1-866-832-4843 www.sensioinc.com BELLA is a registered trademark of Sensio Inc., Montréal, Canada H3B 3X9. All rights reserved. BELLA es una marca registrada de Sensio Inc., Montréal, Canada H3B 3X9. Todos los derechos reservados.
Need help?
Do you have a question about the 8-IN-1 GRILL and is the answer not in the manual?
Questions and answers