
Related Manuals for Goodmans MICRODAB16BT


Summary of Contents for Goodmans MICRODAB16BT
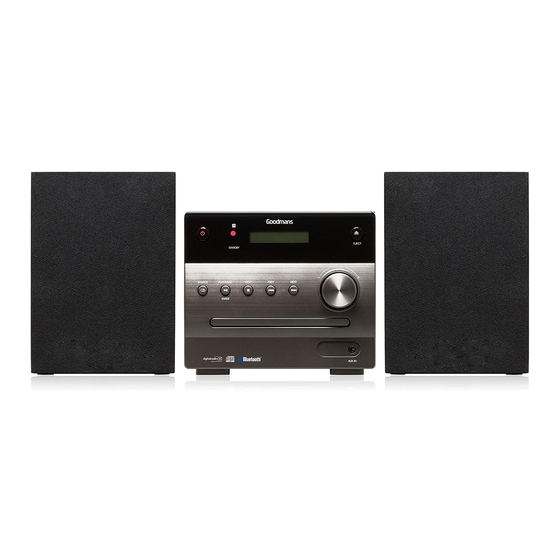
- Page 1 DAB MICRO SYSTEM EJECT STANDBY SOURCE PLAY/PAUSE STOP PREV NEXT ENTER AUX IN MODEL: MICRODAB16BT USER MANUAL...
- Page 2 Welcome Your DAB Micro System 2.0 In The Box 2.4 Rear View 2.1 Front View 2.5 Remote Control Quick Setup 3.5 Mute Function 3.0 Fitting the Remote Battery 3.1 Connecting the Speakers 3.6 Tone Adjustment 3.7 DSP Effects 3.2 Connecting the Power 3.3 Standby &...
-
Page 3: Mains Power
• Where it is dusty Adjusting the Antenna Fully extend the antenna to ensure good reception in both DAB and FM Radio modes. It may be necessary to alter the position of the MICRODAB16BT and/or the antenna to achieve the best signal. MICRODAB16BT... -
Page 4: Front View
Press to stop playback of a AUX input. Connect external audio sources with a 3.5mm audio cable (not CD drawer. Place CD onto the supplied) drawer when ejected. IR sensor. Remote control sensor. TAKE CARE WITH LIVE ELEMENTS MICRODAB16BT... -
Page 5: Rear View
ENTER button. Press to select/ VOLUME activate menu options. INFO button. Press to display information about the current DAB or FM station. DSP. Press to cycle the DSP sound effect modes. LOUD button. Press to enable the loudness option. MICRODAB16BT... - Page 6 RANDOM button. Press to enable the random playback mode. PROG. button. Press to enable the programmed playback function. VOLUME +/- buttons. Press the ‘+’ button to increase the volume level. Press the ‘-’ button to decrease the volume level. MICRODAB16BT...
-
Page 7: Quick Setup
Leaking batteries may damage the battery cabinet and the remote as a whole. If you are not going to use the MICRODAB16BT for an extended period, please remove the battery to avoid damage. Caution: Danger of explosion if battery is incorrectly replaced. -
Page 8: Connecting The Power
1. Rotate the volume control clockwise or anti-clockwise to increase or decrease the volume output. 2. Press the VOLUME +/- buttons on the remote control. Mute Function 1. Press the MUTE button at any time to silence the output. 2. Press again to resume audio output. MICRODAB16BT... -
Page 9: Switching Modes
IN follow the below steps. 1. Press the SOURCE button on the main unit to cycle through the options or press the relevant button on the remote control from CD, DAB/FM (press repeatedly to cycle between DAB & FM) & AUX IN. MICRODAB16BT... -
Page 10: Load A Disc
To skip back to a specific track, press this button several times. 3. Hold the button during playback to fast forward the current track. 4. Hold the button during playback to fast rewind the current track. MICRODAB16BT... -
Page 11: Numeric Buttons
2. To cancel the random operation press the RANDOM button again. You will see ‘DISC’ on the display. Numeric Buttons 4.06 While listening to a CD a specific track number can be played by pressing the relative digit on the number buttons. MICRODAB16BT... -
Page 12: Dab Radio Operation
Full Scan 4.12 1. To activate the full scan press the MENU button. 2. When you see the <Full scan> option press the ENTER button. The unit will search for all available DAB stations that can be tuned. MICRODAB16BT... -
Page 13: Manual Tuning
4.15 1. To select a preset, just press the required numeric button while in DAB mode to activate the station you stored. 2. To recall a preset above 9 press the ‘10+’ button and then enter the second digit. MICRODAB16BT... -
Page 14: Dab Display Modes
>> has changed to a << to indicate you < BBC R5L > > > have selected the secondary service. 2. Press the ENTER button to begin playback of the service. 3. To return to the original service press the button and then ENTER. MICRODAB16BT... - Page 15 1. Press the MENU button in DAB mode, and use the buttons to find <DRC> Press the ENTER button. 2. Choose between DRC off, DRC Low and DRC High using buttons. 3. Press the ENTER button to save the setting. MICRODAB16BT...
-
Page 16: Fm Radio Operation
Setting> appears on the display press either buttons to locate ‘Audio setting’, then press the ENTER button to view the submenu. 2. Use the buttons to select between STEREO or MONO. 3. Press the ENTER button to save the setting and MENU to exit. MICRODAB16BT... -
Page 17: Fm Display Modes
INFO button. 2. Once the indicator is displayed, move the aerial and observe the signal level as shown by the bar graph. When you are happy with the positioning, perform an auto-tune to capture all of the available stations. MICRODAB16BT... -
Page 18: Aux Input Operation
3.5mm audio cable (not supplied). 1. Connect one end of the cable to the AUDIO devices headphone /Line output and the other end to the AUX INPUT input on the front of the MICRODAB16BT. EJECT STANDBY SOURCE... -
Page 19: Bluetooth Operation
When using the Bluetooth connection, you can listen to audio wirelessly from a Bluetooth audio device (For example an MP3 player) within 10 metres of the MICRODAB16BT unit. 1. When the Bluetooth mode is selected the words ‘NOT CONNECTED’ will flash on the display. This means the unit is in connection mode and will pair with any previously connected devices. -
Page 20: General Operation
<System>, press the ENTER button. 3. Use the buttons to find <Factory reset> and press the ENTER button. 4. Use the buttons to select ‘Y’ (yes) and press the ENTER button to perform the reset function. MICRODAB16BT... -
Page 21: Troubleshooting
The external audio source volume is too low, increase the volume level. The sound is distorted Reduce the MICRODAB16BT volume level using the volume control. The sound is distorted from an AUX input The external audio source volume is too high, decrease the volume level. -
Page 22: Technical Specification
Max Power Consumption AC 20W Main unit: 170mm (L) x 215mm (W) x 150mm (H) Dimensions Speaker: 130mm (L) x 113mm (W) x 183mm (H) Customer Support Our customer service team is available for technical or guarantee support. Visit www.goodmans.co.uk/support QSG-APR16-MICRODAB16BT www.goodmans.co.uk...
Need help?
Do you have a question about the MICRODAB16BT and is the answer not in the manual?
Questions and answers