Table of Contents
Advertisement
Quick Links
- 1 Features Controls and Remote Control
- 2 Putting the Batteries into the Back-Up Battery Box
- 3 Timer Setting, Snooze Setting and to Set Sleep Function
- 4 Installing the Speaker Wire to the Speaker Termicals
- 5 Operating the Unit, Power / Standby and Clock Setting
- 6 Radio Operation
- 7 Listening to Compact Disc
- 8 Specification
- Download this manual
Advertisement
Table of Contents

Related Manuals for Goodmans MICRO 1109


Summary of Contents for Goodmans MICRO 1109
- Page 1 MICRO HI-FI SYSTEM MICRO 1109 OPERATING INSTRUCTIONS GOODMANS HELPLINE NUMBER 08708730080...
-
Page 2: Table Of Contents
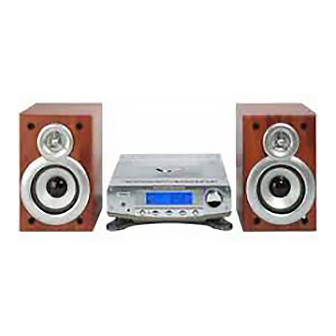
CD Display Window......................12 Specification........................12 Save the carton and packing material; they will be useful if you ever have to transport the unit. Pack contents: 1 x Goodmans Micro 1109 1 x remote control 2 x loudspeakers 1 x owner's manual Please retain all packaging material for future transportation of the unit or in the unlikely event that the unit needs to be returned for service. -
Page 3: Important Safeguards
IMPORTANT SAFEGUARDS For your own safety read following instructions carefully before attempting to connect this micro system to the mains. Mains Supply: 230V ~ 50Hz - AC only This unit is designed to operate on a 230V~50Hz supply only. Connecting it to other power sources may damage it. -
Page 4: Important Notes
To achieve the utmost in enjoyment and performance, please read this manual carefully before attempting to operate the unit in order to became familiar with its features, and assure you years of faithful, trouble free performance and listening pleasure. Important Notes The safety and operating instructions should be retained in a safe place for future reference. -
Page 5: Important Notes
IMPORTANT NOTES Hearing is very important to you and to us so please take care when operating this equipment. It is strongly recommendrd that you follow the listed guidelines in order to prevent possible damage or loss of hearing. ESTABLISH A SAFE SOUND LEVEL ˜... -
Page 6: Identification Of Controls
IDENTIFICATION OF CONTROLS... -
Page 7: Features Controls And Remote Control
FEATURES AND CONTROLS 1. SPEAKER 20. TUNER FUNCTION SELECT BUTTON 2. CD DOOR 21. AUX FUNCTION SELECT BUTTON 3. FM MODE (STEREO / MONO) BUTTON 22. PRESET EQ BUTTON 4. DISPLAY / REMAIN BUTTON 23. MUTE BUTTON 5. MEMORY / C-ADJ. BUTTON 24. -
Page 8: Installing The Speaker Wire To The Speaker Termicals
INSTALLING THE SPEAKER WIRE TO THE SPEAKER TERMINALS 1. Speakers Connection Extend the SPEAKER WIRES and connect them to the SPEAKER TERMINALS, the wire with white mark connect to Red terminal, the wire without white mark connect to Black terminal. 2. -
Page 9: Radio Operation
RADIO OPERATION 1. Press the TUNER button to select the Radio. 2. Select the desired waveband using the STOP / BAND button. Manual tuning 1. To tune to a stations manually press the TUNING / SKIP / SEARCH REV. or F.F. button using repeated brief presses until the station is found. -
Page 10: Listening To Compact Disc
LISTENING TO COMPACT DISC (CD) 1. Open the CD door using CD DOOR (OPEN / CLOSE) BUTTON. 2. Insert the CD disc into the CD compartment, press the CD DOOR (OPEN / CLOSE) BUTTON again. 3. Press the CD button. Playing The Entire Disc 1. -
Page 11: Reset Function, Mode / Remain Setting And Preset Eq
RESET FUNCTION : RESET If an abnormal situation occurs in the display, press the reset button on the back of the unit. DISPLAY/REMAIN SETTING Press Display button changing the display as shown below. 1. In the Radio mode : Frequency display >> Clock display >> Timer 2. -
Page 12: Compact Disc
COMPACT DISC Always use a compact discs bearing the mark as shown. Notes on handling discs Removing the disc from its storage case and loading it. * Do not touch the reflective recorded surface. * Do not stick paper or write anything on the surface. * Do not bend the disc. -
Page 13: Cd Display Window
CD DISPLAY WINDOW STEREO INDICATOR PRESET EQ INDICATOR TRACK/TIME INDICATOR TRACK NUMBER INDICATOR UNIT FUNCTION (CD, AUX & TUNER) INDICATOR SPECIFICATION POWER SUPPLY : 230V 50Hz OUTPUT POWER : 4.5 WATTS x 2 UNIT DIMENSION : 295 (L) x 246 (W) x 92 (H) mm SPEAKER BOX DIMENSION : 140 (L) x 185 (W) x 218.5 (H) mm N.
Need help?
Do you have a question about the MICRO 1109 and is the answer not in the manual?
Questions and answers
Message stating no cd when there is , disc rotates then stops with messages.
If the Goodmans MICRO 1109 shows "no CD" when a disc is inserted and the disc rotates then stops, take the following steps:
1. Ensure the CD is clean and free from scratches.
2. Make sure the CD is inserted correctly with the label side facing up.
3. Close the CD door completely to prevent dust from contaminating the lens.
4. Avoid touching the lens.
5. Try using a different CD to check if the issue is with the disc.
If the problem persists, the lens may be dirty or faulty and may require cleaning or service by a qualified technician.
This answer is automatically generated