
Subscribe to Our Youtube Channel
Related Manuals for Goodmans Micro 1990 DVDF


Summary of Contents for Goodmans Micro 1990 DVDF
-
Page 1: Instruction Manual
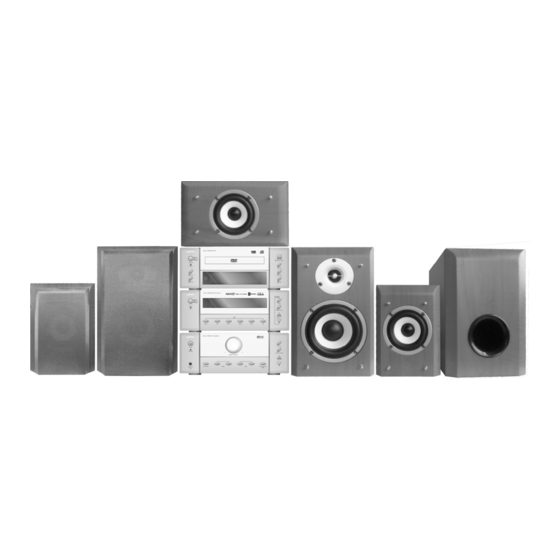
Micro 1990 DVDF Digital TV Radio & 5.1 Channel DVD Micro System Instruction Manual... -
Page 3: Table Of Contents
DIRECTORY 1.1 Pack Contents ..................1 1.2 Disc Types....................2 1.3 DVD Features..................2 1.4 DVD region code ..................2 1.5 Glossary of Disc Terms ................2 1.6 Notes on discs..................3 1.7 Inserting Batteries into Remote Control..........4 2.1 DVD Component ..................5 2.2 DVB-T & MW/FM Tuner Component ............6 2.3 Amplifier Component ................7 2.4 Remote Control ..................8 3.1 Connecting Components ..............9... - Page 4 7.3 Pre-Stop/Stop..................30 7.4 Pause ....................31 7.5 Previous/Next ..................31 7.6 Search Forwards/Backwards..............31 7.7 Repeat....................32 7.8 Rotate/Flip (JPEG CD ONLY) ............32 7.9 Sequential Play (JPEG CD ONLY) .............32 7.10 Picture Transition Effects (JPEG CD ONLY) ........32 7.12 Thumbnail View (JPEG CD ONLY) ..........33 8.1 Tuning ....................34 8.2 Storing Memory Presets ..............34 8.3 Recalling Memory Presets..............34...
-
Page 5: Pack Contents
1. Introduction Thank you for purchasing this state of the art DVD MICRO system. This instruction manual is important to you. Please read it. In a short time it shows exactly how to connect, operate and adjust this unit for best performance. It can save you money as it shows simple things to do and check before you call for help and save the cost of unnecessary service or call out charge. -
Page 6: Disc Types
1. Introduction 1.2 Disc Types The following table shows the type of discs that can be used with this DVD MICRO system Type of Disc Diameter Playback time Data Format Comments 1 Layer: 120 min DVD Format Disc: 12 cm 2 Layer: 240 min Compressed Digital Audio None... -
Page 7: Notes On Discs
1. Introduction (cont) Chapter (DVD) A chapter is normally a section of a title. For example, on a movie DVD the main feature may be recorded as a TITLE and this title may be split into several smaller sections called CHAPTERS to allow easy navigation to a particular point of a movie. -
Page 8: Inserting Batteries Into Remote Control
1. Introduction (cont) Do not use solvents such as petrol based products, thinner, commercially available cleaners or anti-static spray intended for vinyl LPs. Disc installation precautions Do not install more than 1 disc on disc tray Do not place the disc on the tray up side down. Do not try to close the disc tray when the disc is not inserted properly. -
Page 9: Dvd Component
2. Location of Controls 2.1 DVD Component Front Panel: 1. DVD Screen dimmer switch 6. Open/Close ( ) button 2. Power indicator 7. Play ( ) button 3. Previous ( ) button 8. Pause ( ) button 4. Next ( ) button 9. -
Page 10: Dvb-T & Mw/Fm Tuner Component
2. Location of Controls (cont) 2.2 DVB-T & MW/FM Tuner Component Front Panel 1. DVB-T screen dimmer switch 7. Channel up/Direction up 2. Power indicator 8. Direction right 3. Menu selection 9. Band selection(MW/FM) 4. Direction left 10. Stereo/Mono selection(FM) 5. -
Page 11: Amplifier Component
2. Location of Controls (cont) 2.3 Amplifier Component Front Panel 1. Power switch 8. Increase Bass Level button 2. Standby indicator 9. DVB-T Surround (DSP) button 3. Headphone socket (3.5 mm) 10. Source Select button 4. Tone Reset button 11. Volume menu button 5. -
Page 12: Remote Control
2. Location of Controls (cont) 2.4 Remote Control 23.Sensor cover 1. System standby 24.DVB menu/DVD Setup 25.DVB channel up/FM or MW 2.Numerical Keys turning up 26.DVB channel down/ FM or MW turning down 3.DVB help/DVD display 4.DVB last watch channel 27.DVB guide page 28.Yellow-select yellow option in 5.Green-select green option in digital teletext... -
Page 13: Connecting Components
3. Connections Before making/removing any connections ensure that you have unplugged the unit from the mains supply. 3.1 Connecting Components Connect the DVD and Tuner components to the amplifier component by using the ribbon cables. Please note: Due to the amplifier component being heavier than the rest it is recommended to place this at the bottom of the stack. -
Page 14: Connections To Tv
3. Connections (cont) 3.2 Connections to TV SCART CABLE For ease of use it is recommended that this DVB MICRO system is connected to the TV using a SCART cable, as shown in the diagram below: OTHER CONNECTIONS TO TV This DVB MICRO system also has Y Cr Cb (component), Video or CVBS (composite) and S-Video outputs to allow connection to televisions without SCART sockets. -
Page 15: Aerial Connections
3. Connections 3.3 Aerial Connections DVB-T Aerial Connect the TV aerial to the ANT in socket, and the RF loop cable to the LT out and the TV. FM Aerial Connect the plug on the supplied FM pigtail aerial to the centre pin of the 75-ohm socket on the rear of the tuner component. -
Page 16: Speaker Connections
3. Connections (cont) 3.5 Speaker Connections When connecting the speakers please ensure that the positive terminal on the speaker is connected to the positive terminal on the amplifier and the negative terminal on the speaker is connected to the negative terminal on the amplifier. Please use the following diagram to help connect up the speakers. -
Page 17: Setting Up The Surround Sound System
4. Basic Setup 4.1 Setting up the surround sound system Positioning For the best possible surround sound all the speakers other than the subwoofer should be the same distance from the listening position ( ). However, this system allows you to place the centre speaker up to 1.6 metres closer ( ) and the rear speakers up to 4.6 metres closer ( ) to the listening position. -
Page 18: Master Volume
4. Basic Setup (cont) Height The best height for the front speakers is when the high frequency speakers (tweeters) are at ear height (while seated) The best height for the centre speaker is also at ear height (while seated). The rear speakers should not be positioned below ear height (while seated). See the following diagram. -
Page 19: Mute
4. Basic Setup (cont) When the channel required is shown use the volume +/- keys on the remote or the front panel of the amplifier component to adjust the volume of the selected channel. 4.4 Mute To mute the audio output press the MUTE button and the sound from the speakers will be turned off with display “MUTE ON”... -
Page 20: System Setup
5. DVD Setup Menu To enter the setup menu press the SETUP button on the remote control. To access each submenu one of the icons along the top of the setup menu must be selected. The below diagram shows which icon represents which menu. 5.1. - Page 21 5. DVD Setup Menu (cont) 5.1.3 VIDEO • SCART-RGB: Select this option if the DVD player is connected to the DVB-T from the SCART-RGB output terminal. • S-VIDEO: Select this option if the DVD player is connected to the TV using an S-Video cable •...
- Page 22 5. DVD Setup Menu (cont) 5.1.5 PASSWORD The password option is used in conjunction with the parental rating option (see below) and can be used so that the player is locked and will only play discs with a lower rating that the one set.
-
Page 23: Language Setup
5. DVD Setup Menu (cont) 5.2. Language Setup 5.2.1 OSD LANGUAGE This option sets the language that is used for the OSD (on screen display). DEFAULT: ENGLISH 5.2.2 AUDIO LANG This option sets the preferred language for the audio when a DVD is played. If this language is not recorded on the DVD then the default language for the DVD will be used. -
Page 24: Audio Setup
5. DVD Setup Menu (cont) 5.2.4 MENU LANG This option sets the preferred language for the DVD menu screens. If the selected language is not recorded on the disc then the default language recorded on the disc will be used. DEFAULT: ENGLISH 5.3. -
Page 25: Video Setup
5. DVD Setup Menu (cont) 5.4. Video Setup 5.4.1. BRIGHTNESS When highlighted use the up/down directional keys to adjust the brightness of the video output. DEFAULT: 0 5.4.2. CONTRAST When highlighted use the up/down directional keys to adjust the contrast of the video output. -
Page 26: Speaker Setup
5. DVD Setup Menu (cont) 5.4.4. SATURATION When highlighted use the up/down directional keys to adjust the saturation of the video output. DEFAULT: 0 5.5. Speaker Setup 5.5.1. DOWNMIX The downmix specifies what sounds are heard from which speakers as follows: •... -
Page 27: Digital Setup
5. DVD Setup Menu (cont) 5.5.3. BASS MODE Select the bass mode in accordance with the type of speakers that are used. DEFAULT: ALL LG SPK 5.5.4. CENTER DELAY Set the delay for the Centre speaker. DEFAULT: 0 ms 5.5.5. REAR DELAY Set the delay for the rear speakers. - Page 28 5. DVD Setup Menu (cont) 5.6.2. DYNAMIC RANGE Dynamic Range Control is used to suppress loud sounds and enhance quiet sound for using the player at night. There are 8 steps between full compression and no compression. DEFAULT: OFF 5.6.3. DUAL MONO This option sets the L and R mono output mode.
-
Page 29: Insert A Dvd Disc
6. CD/DVD Operation Before using the DVD player please ensure that the TV connected to the player is turned on. Turn the power on using the bottom power button. Using the source button on the remote control or on the front panel select DVD as the source. “DVD”... -
Page 30: Play
6. CD/DVD Operation (cont) 6.2 Play Press the PLAY/PAUSE ( ) button to begin playback of the disc when the disc is stopped. 6.3 Pre-Stop/Stop Press the STOP ( ) button on the remote or the front panel once to enter pre- stop mode. -
Page 31: Search Forwards/Backwards
6. CD/DVD Operation (cont) Press PREVIOUS ( ) repeatedly during playback to skip to previous chapters. PREV 6.6 Search Forwards/Backwards Press the SEARCH FORWARD ( ) repeatedly during playback to cycle through the different speeds (i.e. 2x normal speed, 4x normal speed etc) for search forward as follows: PLAY FORWARD X2... -
Page 32: Programmed Playback
6. CD/DVD Operation (cont) Press the REPEAT button to cycle through the available repeat modes as follows: Repeat 1: repeat the Repeat All: repeat all Repeat OFF: repeat is turned off currently track tracks and disc will play as normal REP: [OFF] REP: [1] REP: [ALL]... -
Page 33: Audio Language (Dvd Only)
6. CD/DVD Operation (cont) 6.12 Audio Language (DVD only) Press the AUDIO button repeatedly to cycle through all of the available audio languages for the disc. (Please note: The audio languages available are entirely disc dependent. Some discs may have only one language recorded) 6.13 Subtitle Language (DVD only) Press the SUBTITLE button repeatedly to cycle through all of the available subtitle languages for the disc. -
Page 34: Introduction To Mp3/Jpeg Playback
7. MP3/JPEG CD Operation 7.1 Introduction to MP3/JPEG Playback This MICRO system will play MP3 or JPEG files that are recorded onto a blank CD. After inserting the disc the system will search for MP3 or JPEG files to play. After searching it will play the MP3/JPEG files in the first directory on the disc. -
Page 35: Pause
7. MP3/JPEG CD Operation (cont) To completely stop the DVD disc press the STOP( ) button when in the PRE- STOP mode. “STOP ” will be shown briefly in the top left corner of the TV screen. If the PLAY/PAUSE ( ) is pressed now, playback will commence from the beginning of the disc. -
Page 36: Repeat
7. MP3/JPEG CD Operation (cont) 7. MP3/JPEG CD Operation (cont) To resume normal playback press the PLAY/PAUSE ( ) button. Press the SEARCH BACKWARD ( ) repeatedly during playback to cycle through the different speeds (i.e. 2x normal speed, 4x normal speed etc) for search backwards as follows: BACKWARD X2 BACKWARD X4... -
Page 37: Thumbnail View (Jpeg Cd Only)
7. MP3/JPEG CD Operation (cont) Diagonal Wipe Right Top Diagonal Wipe Left Bottom Diagonal Wipe Right Bottom Extend From Centre Horizontally Extend From Centre Vertically Compress To Centre Horizontally Compress To Centre Vertically Window Horizontally Window Vertically Random Effect Wipe compress from edge to centre None 7.12 Thumbnail View (JPEG CD ONLY) Press the DVD MENU button to view all of the images as thumbnails. -
Page 38: Tuning
8. Tuner Operation 8.1 Tuning 8.1.1 Manual Tuning Briefly press the TUNING +/- buttons repeatedly to manually tune to the required station. 8.1.2 Automatic Tuning Press and hold the TUNING +/- buttons until the system starts scan the frequencies. The tuning will automatically stop at the next receivable station. To locate the next station repeat the above operation. -
Page 39: Over Air Download
9. DVB-T Operation 9.1. Over Air Download Over Air Download: To ensure that your digital receiver always has the most up to date information. Please ensure that after use it is set to its standby mode. The DVB-T automatically powers up at 3AM each day and searches for any new information which may be broadcast and will download this to your box automatically. - Page 40 9. DVB-T Preparation 9. DVB-T Preparation 9. DVB-T Preparation First you should select the type of TV set you have connected to the DVB-T receiver. Press the [LEFT] or [RIGHT] keys on the remote control handset to switch the indicator on the screen to show either 16:9, if you have a 16:9 or 'widescreen' TV, or to 4:3 if you have a standard TV set.
-
Page 41: Changing Channels
10. DVB-T Everyday Operation While using the DVB-T receiver to the full there are great many keys to use in different situations. Many of the menu screens displayed by the receiver have reminders as to which keys do what, at the base of the screen. In addition, many screens have further help available which is displayed when the [Info] key is pressed, as prompted at the bottom right of the screen. -
Page 42: Channel List
10. DVB-T Everyday Operation watching TV by pressing the [Info] key on the remote control. Pressing the [Info] key again removes the banner Hint: Not all channels broadcast the programme data. If the name and times of the programme is not available then 'Not available' is displayed in the information banner. The information banner gives a number of facts on the channel selected and the programmes on it. -
Page 43: Electronic Programme Guide
10. DVB-T Everyday Operation Using the [UP] or [DOWN] keys on there mote control, make sure that the first item, Channel List, is highlighted in yellow and press the [SELECT] key, to display the channel list. Here, you can preview any channel stored by the receiver before viewing it full screen. - Page 44 10. DVB-T Everyday Operation 10.3.1. Current Programme The channels are listed at the bottom of the screen, each with the 'current event' (the name of the programme showing at that time) and the 'next event' (the following programme). When the EPG screen is first displayed, the channel last watched is highlighted in the list of channels.
-
Page 45: Audio Control
10. DVB-T Everyday Operation Hint: Not all channels broadcast all the programme information data. Some channels do not provide the current and next event data and/or the programme details. In this case the programme names and/or the details are not displayed. This is not a fault with your receiver. -
Page 46: Digital Teletext
10. DVB-T Everyday Operation SETTINGS line and press [SELECT], and then use the [UP] or [DOWN] keys to highlight the Language line and press [SELECT]. Use the [UP] or [DOWN] keys to highlight the soundtrack language required and presses [SELECT]. Normal viewing, with the required language soundtrack, can be resumed by pressing the [MENU] key. -
Page 47: Widescreen
10. DVB-T Everyday Operation 10. DVB-T Everyday Operation 10.6. Widescreen TV sets are available with screens of the standard (4:3) format and widescreen (16:9) format. When you first installed your DVB-T receiver you specified the format of the connected TV (this can now be altered if necessary; see Section 11 –... -
Page 48: Configuring Your Receiver
11. DVB-T Advanced operation 11.1. Configuring Your Receiver Many aspects of your DVB-T receiver can be set up to reflect your circumstances and preferences. The Configuration menu screen is accessed from the Main Menu. Press the [MENU] key to display the Main Menu and the [DOWN] key twice to highlight Configuration, and then press [SELECT] to display the Configuration menu screen. -
Page 49: Editing The Channel List
11. DVB-T Advanced operation 11. DVB-T Advanced operation 11.1.2. Subtitle Digital terrestrial television channels can broadcast with subtitles displayed on- screen for the hard-of-hearing. This function selects the desired subtitle language and enables the automatic display of subtitles whenever subtitle information is broadcast. - Page 50 11. DVB-T Advanced operation First bring up the Main Menu with the [MENU] key on the remote control handset. Then, using the [UP] or [DOWN] keys on the remote control, make sure that the first item, Channel List, is highlighted in yellow and press the [SELECT] key, to display the Channel List.
-
Page 51: Channel And Menu Protection
11. DVB-T Advanced operation In addition, other channels which you do not want in the list. Highlight the channel to be deleted, highlight the DELETE button at the base of the screen using the [LEFT] or [RIGHT] keys, and press [SELECT].The highlighted channel is deleted from the list. - Page 52 11. DVB-T Advanced operation The channel lock is applied with the Channel List menu. Press the [MENU] key on there mote control handset to display the Main Menu and then, using the [UP] or [DOWN] keys on the remote control, make sure that the first item, Channel List, is highlighted in yellow and press the [SELECT] key.
-
Page 53: Favourite Channels
11. DVB-T Advanced operation You must return to normal TV viewing by pressing the [MENU] key (three times) to activate the lock. Now any attempt to access the locked menus will display the PIN request window and the menus will only be displayed on entry of the correct PIN code. - Page 54 11. DVB-T Advanced operation Use the [LEFT] or [RIGHT] keys to highlight the FAVOURITE button at the base of the screen and then, in turn, highlight each channel that is required to be a favourite channel, using the [UP] and [DOWN] keys (and the [RED(PAGE UP)] or [GREEN(PAGE DOWN)] keys),and press [SELECT].
-
Page 55: Programme Reminders And Timers
11. DVB-T Advanced operation 11.5. Programme Reminders And Timers With the greatly extended channel choice that digital terrestrial television brings, it is all too easy to miss a favourite programme. The DVB-T receiver has two facilities built in to help you make sure you catch all the TV shows you want. 11.5.1. - Page 56 11. DVB-T Advanced operation To set an event, Highlight its mode button using the [UP] or [DOWN] keys and press [SELECT] to display the timer entry window. Here the five settings of channel name, start time, end time; date and frequency mode can be set. You can move freely between each setting using the [UP] and [DOWN] keys.
-
Page 57: Re-Installation
11. DVB-T Advanced operation You can exit the Timer screen and return to normal TV viewing by pressing [MENU]. 11.6. Re-Installation Although your DVB-T receiver will not lose its settings or stored channels when switched off, you may wish to re-install the receiver because you have moved to a different area with different broadcast frequencies, you wish to reinstate a channel previously deleted from the channel list, or you want to watch new channels which have started broadcasting. - Page 58 11. DVB-T Advanced operation If, alternatively, from the search options menu the Manual Search line is highlighted and [SELECT] pressed, the manual search screen is displayed. Highlight the YES button with the [LEFT] or [RIGHT] key and press [SELECT] to start the automatic search.
- Page 59 Ensure the person who services your Micro System is qualified to do so. Do not remove the cover yourself - you could get an electric shock. We are proud to offer a high-quality product. To keep this level of quality, your receiver should be serviced at a Goodmans authorised service centre.
- Page 60 13. Listening to an External Source To listen to an external source, connect the source as shown in section 3.4. Press the source button until AUX is shown on the DVB-T & TUNER component display. U.S.Patent Nos.4,631,603;4,577,216; 4,819,098;4,907,093;And 6,516,132. LEGAL NOTICE: This product incorporates copyright protection technology that is protected by method claims of certain U.S.
- Page 61 14. Troubleshooting In the unlikely event that this DVB & DVD MICRO system should fail to work, please check the following items. Should this fail to solve the problem please Fault Possible solution No Power Are the power leads firmly plugged into the power outlets? Mains fuse blown The remote control will not...
- Page 62 14. Troubleshooting (cont) Severe hum or noise is heard Check that the speakers and components are connected securely Move the stereo/speakers away from Severe hum or noise is heard the TV (cont) Clean the disc When listening to a DVD with Check the speaker connections surround sound some sounds are This may be normal operation, on...
-
Page 63: Amplifier Section
15. Specification 15.1 Amplifier Section Frequency Response:- Main, Centre 20Hz-20kHz, and surround channels Frequency Response:- Subwoofer 80Hz-150Hz Signal noise ratio: > 85dB Harmonic distortion: 0.2%(1kHz/6Ω/25W) Power output:- Main Channel 15W + 15W Power output:- Centre Channel Power output:- Surround Channel 15W + 15W Power output:- Subwoofer Load impedance:- main, centre and... -
Page 64: Dvd Component
15. Specification Frequency Range:- MW 522-1611kHz Sensitivity:- FM < 20µV Sensitivity:-MW < 3mV/m Signal noise ratio:- FM > 46dB Signal noise ratio:- MW > 40dB Stereo separation: > 20dB Dimensions (mm) 220 (w) x 308 (d) x 82 (h) Weight 1.8KG 15.3 DVD Component Video Format...
Need help?
Do you have a question about the Micro 1990 DVDF and is the answer not in the manual?
Questions and answers