Grandstream Networks GXP1760 Administration Manual
Small business ip phones
Hide thumbs
Also See for GXP1760:
- User manual (33 pages) ,
- Quick start manual (30 pages) ,
- Quick installation manual (30 pages)

Related Manuals for Grandstream Networks GXP1760


Summary of Contents for Grandstream Networks GXP1760
- Page 1 Grandstream Networks, Inc. GXP1760 & GXP1780/82 Small Business IP Phones Administration Guide...
- Page 2 Grandstream Networks, Inc. is not permitted. The latest electronic version of this guide is available for download here: http://www.grandstream.com/support Grandstream is a registered trademark and Grandstream logo is trademark of Grandstream Networks, Inc. in the United States, Europe and other countries. CAUTION Changes or modifications to this product not expressly approved by Grandstream, or operation of this product in any way other than as detailed by this guide, could void your manufacturer warranty.
-
Page 3: Gnu Gpl Information
GNU GPL INFORMATION GXP1760/GXP1780/GXP1782 firmware contains third-party software licensed under the GNU General Public License (GPL). Grandstream uses software under the specific terms of the GPL. Please see the GNU General Public License (GPL) for the exact terms and conditions of the license. -
Page 4: Table Of Contents
GUI INTERFACE EXAMPLES ..................7 WELCOME ........................8 PRODUCT OVERVIEW ....................9 Feature Highlights ..........................9 GXP1760 Technical Specifications ...................... 10 GXP1780/GXP1782 Technical Specifications ..................11 CONFIGURATION GUIDE .................... 13 Configuration Via Keypad ........................13 Configuration Via Web Browser ......................19 Definitions ............................ - Page 5 Upgrade Via Web GUI ......................... 58 No Local TFTP/HTTP Servers ......................59 Configuration File Download ........................ 60 RESTORE FACTORY DEFAULT SETTINGS ............... 61 EXPERIENCING THE GXP1760/GXP1780/GXP1782..........62 P a g e GXP17xx Administration Guide...
- Page 6 Table of Tables Table 1: GXP1760/GXP1780/GXP1780 Features at a Glance ..............9 Table 2: GXP1760 Technical Specifications ....................10 Table 3: GXP1780/GXP1782 Technical Specifications ................11 Table 4: Configuration Menu ........................13 Table 5: Status Page Definitions ......................... 20 Table 6: Account Page Definitions ......................21 Table 7: Settings Page Definitions ......................
-
Page 7: Change Log
CHANGE LOG This section documents significant changes from previous versions of administration guide for GXP1760/GXP1780/GXP1782. Only major new features or major document updates are listed here. Minor updates for corrections or editing are not documented here. Firmware Version 1.0.0.38 ... -
Page 8: Gui Interface Examples
GUI INTERFACE EXAMPLES http://www.grandstream.com/sites/default/files/Resources/gxp17xx_web_gui.zip 1. Screenshots of Login Page 2. Screenshots of Status Pages 3. Screenshots of Accounts Pages 4. Screenshots of Settings Pages 5. Screenshots of Network Pages 6. Screenshots of Maintenance Pages 7. Screenshots of Phonebook Pages P a g e GXP17xx Administration Guide... -
Page 9: Welcome
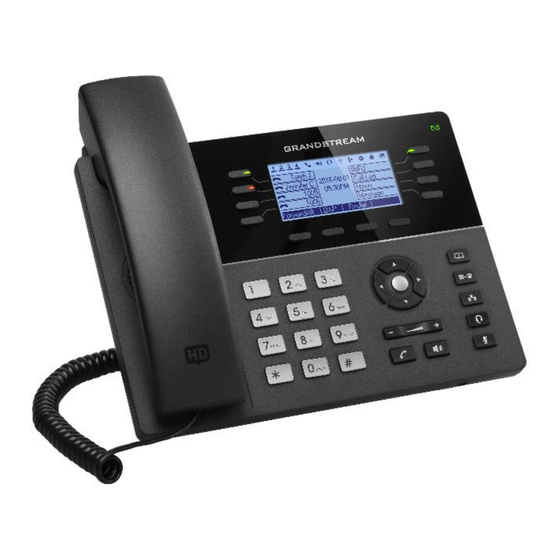
Thank you for purchasing Grandstream Small Business IP phone GXP1760/GXP1780/GXP1782 Enterprise IP Phone. GXP17xx series is a next generation small –to –medium business IP phone. The GXP1760 features 6 dual-color line keys with 3 SIP accounts, 4 XML programmable context-sensitive Softkeys, 200 x 80-pixel backlit LCD display, the GXP1780/GXP1782 supports 8 dual-color lines with 4 SIP accounts, 4XML programmable keys, 200 x 80-pixel backlight LCD display. -
Page 10: Product Overview
PRODUCT OVERVIEW Feature Highlights The following table contains the major features of the GXP1760 & GXP1780/82: Table 1: GXP1760/GXP1780/GXP1780 Features at a Glance 6 lines 200*80-pixel backlit LCD display 4 XML programmable Softkeys 8 Dedicated function Keys GXP1760 ... -
Page 11: Gxp1760 Technical Specifications
GXP1760 Technical Specifications The following table defines all the technical specifications including the protocols / standards supported, voice codecs, telephony features, languages and upgrade/provisioning settings for GXP1760 Table 2: GXP1760 Technical Specifications SIP RFC3261, TCP/IP/UDP, RTP/RTCP, HTTP/HTTPS, ARP, ICMP, DNS (A record,... -
Page 12: Gxp1780/Gxp1782 Technical Specifications
Storage: -10°C to 60°C. Humidity Humidity: 10% to 90% Non-condensing. GXP1760 phone, handset with cord, base stand, universal power supply, network Package Content cable, Quick Installation Guide, GPL license. Compliance FCC: Part 15 (CFR 47) Class B. - Page 13 English, German, Italian, French, Spanish, Portuguese, Russian, Croatian, Multi-Language Chinese, Korean, Japanese. Firmware upgrade via TFTP / HTTP / HTTPS, mass provisioning using TR-069 or Upgrade/Provisioning AES encrypted XML configuration file. Power & Green Universal power adapter included: Input:100-240V, Output: +5V, 1A. ...
-
Page 14: Configuration Guide
CONFIGURATION GUIDE The GXP1760/ GXP1780/ GXP1782 can be configured via two ways: LCD Configuration Menu using the phone's keypad. Web GUI embedded on the phone using PC's web browser. Configuration Via Keypad To configure the LCD menu using phone's keypad, follow the instructions below: ... - Page 15 Local Phonebook Local Group Broadsoft Phonebook LDAP Directory User may configure phonebooks/groups/LDAP options here, transfer phonebook XML to the phone, and search phonebook/LDAP directory. Messages Message sub menu include the following options: Instant Messages Displays or clears all received instant messages. ...
- Page 16 Date Time Configures time zone, date and time display format and NTP server on the phone. Security Configures the available security settings (Config via keypad menu, web access mode, disable SSH). Headset Type Selects headset types. Star Key Lock Turns on/off keypad lock feature and configures keypad lock password.
- Page 17 802.1X Enables/Disables 802.1X mode, Configures 802.1x identity and MD5 password. Layer 2 QoS Configures LAN port 802.1Q/VLAN Tag and priority value. Select “Reset Vlan Config” to reset VLAN configuration on the LAN port. PC Port Mode Selects PC port mode (Enabled/Disabled/Mirrored). Configures PC port 802.1Q/VLAN Tag and priority value.
- Page 18 and to red with “*”. Press any key on the phone to diagnose the key’s function. The key’s name will display on the LCD. Press the menu button or onhook/offhook handset to exit the diagnostic mode. Keyboard Diagnostic All keys’ names will display on LCD screen before diagnosing. Press each key on the phone to remove it from the list of remaining keys to be diagnosed.
-
Page 19: Figure 1: Keypad Menu Configuration
The following diagram shows the keypad MENU configuration flow: Local Call Log Call History Broadsoft Call Log Enable DND Disable DND Active Network Status Status Account Status Idle System Status NTP Server DHCP Option42 overrides NTP Time Zone Local Phonebook DHCP Option2 overrides Time Zone Local Group Phone Book... -
Page 20: Configuration Via Web Browser
Configuration Via Web Browser The GXP1760/GXP1780/GXP1782 embedded Web server responds to HTTP/HTTPS GET/POST requests. Embedded HTML pages allow a user to configure the IP phone through a Web browser such as Google Chrome, Mozilla Firefox and Microsoft’s IE. To access the Web GUI: 1. -
Page 21: Definitions
Status Page Definitions Table 5: Status Page Definitions Status Account Status Account index. For GXP1760: up to 3 SIP accounts. Account For GXP1780: up to 4 SIP accounts. For GXP1782: up to 4 SIP accounts. Displays the configured SIP User ID for the account. -
Page 22: Accounts Page Definitions
PPPoE connection status. PPPoE Link Up NAT Type Displays the type of NAT connection used by the phone. NAT Traversal Displays the status of NAT connection for each account on the phone. Status System Info Product Model Product model of the phone. Part Number Product part number. - Page 23 proxy cannot be connected. Proxy Configures the optional server used for SUBSCRIBE requests to indicate other BLF Server extensions status on the SIP server. Configures user account information provided by your VoIP service provider SIP User ID (ITSP). It's usually in the form of digits similar to phone number or actually a phone number.
- Page 24 to the STUN server. If NAT type is Full Cone, Restricted Cone or Port-Restricted Cone, the phone will try to use public IP addresses and port number in all SIP & SDP messages. The phone will send empty SDP packet to the SIP server periodically to keep the NAT port open if it is configured to be "Keep-alive".
- Page 25 request re-transmit retries would continue until a maximum amount of time define by T2. The default setting is 0.5 seconds. SIP T2 Timeout is the maximum retransmit time of any SIP request messages SIP T2 Timeout (excluding the INVITE message). The re-transmitting and doubling of T1 continues until it reaches the T2 value.
- Page 26 Controls whether the P-Preferred-Identity Header will present in the SIP INVITE message. The default setting is “default”. The P-Preferred-Identity Header will Use P-Preferred- show in INVITE unless “Huawei IMS” special feature is on. If set to “Yes”, the Identity Header P-Preferred-Identity Header will always show in INVITE.
- Page 27 and PhonePower depending on the server type. The default setting is "Standard". Default setting is "No". When set to "Yes", a softkey “BSCCenter” is displayed on LCD. User can access different Broadsoft Call Center agent features via this Broadsoft Call Center softkey.
- Page 28 UAS Specify As a Callee, select UAC to use caller or proxy server as the refresher, or select Refresher UAS to use the phone as the refresher. The default setting is “UAC”. The Session Timer can be refreshed using the INVITE method or the UPDATE method.
- Page 29 audio packets) will be sent during the period of no talking. If set to “No”, this feature is disabled. The default setting is “No”. Selects either Fixed or Adaptive for jitter buffer type, based on network Jitter Buffer Type conditions. The default setting is “Adaptive”. Selects jitter buffer length from 100ms to 800ms, based on network conditions.
- Page 30 Configures the prefix to be added to each dialed number. Dial Plan Prefix A dial plan establishes the expected number and pattern of digits for a telephone number. This parameter configures the allowed dial plan for the phone. Dial Plan Rules: 1.
- Page 31 be predefined inside the dial plan feature. An example dial plan will be: { *x+ } which allows the user to dial * followed by any length of numbers. Configures Call Log setting on the phone. You can log all calls, only log incoming/outgoing calls (missed calls will not be logged), or disable call log.
-
Page 32: Settings Page Definitions
If set to "Yes", the "Refer-To" header uses the transferred target's Contact Refer-To Use Target Contact header information for attended transfer. The default setting is "No". Transfer on If set to "Yes", when the phone hangs up as the conference initiator, the conference call will be transferred to the other parties so that other parties will Conference Hang- remain in the conference call. - Page 33 Note: This parameter must be set to "No" for Direct IP Calling to work. Specifies how often the phone sends a blank UDP packet to the SIP server in Keep-alive Interval order to keep the "ping hole" on the NAT router to open. The default setting is 20 seconds.
- Page 34 Specifies the function of mute key in idle. Default setting is “DND”. When select Mute Key Functions “Idle Mute” and press Mute key while idle, the future incoming call will be answered While Idle with mute. When select “Disabled”, Mute key will not take effect while idle. The default setting is “No”.
- Page 35 setting is “Disabled”. If enabled, during a multicast page if another multicast is received with higher Paging Priority priority (1 being the highest) that one will be played instead. The default setting is Active “Disabled”. The codec for sending multicast pages, there are 5 codecs could be used: PCMU, Multicast Paging PCMA, G.726-32, G.729A/B, G.722 (wide band), G.723 and iLBC.
- Page 36 HEADSET button to switch to headset. Press it again to hang up the call. Or press speaker/Handset to switch back to the previous mode. Toggle Headset/Speaker: When the phone is in idle, press HEADSET button to switch to Headset mode.
- Page 37 Time Zone Configures the date/time used on the phone according to the specified time zone. This parameter allows the users to define their own time zone. The syntax is: std offset dst [offset], start [/time], end [/time] Default is set to: MTZ+6MDT+5,M4.1.0,M11.1.0 MTZ+6MDT+5 This indicates a time zone with 6 hours offset with 1 hour ahead (when daylight saving) which is U.S central time.
- Page 38 Settings Programmable Keys Assigns a function to the corresponding VPK. The key mode options are: Line Regular line key to open up a line and switch line. The Value field can be left blank. Shared Line Share line for Shared Line Appearance feature. Select the Account registered as Shared line for the line key.
- Page 39 Monitored Call Park Select account from Account field, and enter the call park extension in the Value field to park/pick up the call, and also monitor the parked call via Line Key’s light. Intercom Select Account, and enter the extension number in the Value field to do the intercom.
- Page 40 field to be dialed. Speed Dial via active account Similar to Speed Dial but it will dial based on the current active account. For example, if the phone is offhook and account 2 is active, it will call the configured Speed Dial number using account 2.
- Page 41 Server Configure the BroadWorks Xsi server URI. If the server uses HTTPS, please add the header “HTTPS” ahead of the Server URI. For instance, “https://SERVER_URI”. Port Configure the BroadWorks Xsi server port. The default port is 80. If the server uses HTTPS, please configure 443.
- Page 42 Enable/Disable and rename the BroadWorks XSI Personal Directory features on the phone. If keep the Name box blank, the phone will use the default name “Personal” for it. Missed Call Log Enable/Disable and rename the BroadWorks XSI Missed Call Log features on the phone.
-
Page 43: Network Page Definitions
(Option 12) Internet Service Providers. Used by clients and servers to exchange vendor class ID. The default setting is DHCP Vendor Class “Grandstream GXP1760” for GXP1760, ”Grandstream GXP1780” for GXP1780, ID (Option 60) “Grandstream GXP1782” for GXP1780. PPPoE Account ID Enter the PPPoE account ID. - Page 44 DNS Server 2 Enter the DNS Server 2 for IPv6. Preferred DNS Enter the Preferred DNS Server for IPv6. server Network Advanced Settings Allows the user to enable/disable 802.1X mode on the phone. The default value 802.1X mode is disabled. To enable 802.1X mode, this field should be set to EAP-MD5, users may also choose EAP-TLS, or EAP-PEAP.
-
Page 45: Maintenance Page Definitions
OpenVPN Transport Specify the Transport Type of OpenVPN whether UDP or TCP. Default is UDP. OpenVPN CA Copy/Past the Certification Authority of OpenVPN. OpenVPN Certificate Copy/Past OpenVPN certificate. OpenVPN Client Key Copy/Past OpenVPN Key. Maintenance Page Definitions Table 9: Maintenance Page Definitions Maintenance ... - Page 46 Defines the day of the week to check HTTP/TFTP server for firmware upgrades Day of the Week (0-6) or configuration files changes. The default value is 1. Disable SIP NOTIFY Device will not challenge NOTIFY with 401 when set to “Yes”. The default setting is “No”.
- Page 47 Enables your ITSP to lock firmware updates. If configured, only the firmware Firmware File with the matching encrypted postfix will be downloaded and flashed into the Postfix phone. Maintenance Syslog Syslog Server The URL or IP address of the syslog server for the phone to send syslog to. Selects the level of logging for syslog.
- Page 48 Connection Request The port for the ACS to connect to the phone. Port CPE SSL Certificate The Cert File for the phone to connect to the ACS via SSL. CPE SSL Private The Cert Key for the phone to connect to the ACS via SSL. Maintenance ...
-
Page 49: Phonebook Page Definitions
Defines the filename of the capture. Only required for USB. USB File Name Start/Stop/Download Click to Start/ Stop and Download the packet capture. Phonebook Page Definitions Table 10: Phonebook Page Definitions Phonebook Contacts Group Specifies to which group the contact belong. Specifies Contact’s First Name, Last Name, Phone Number, Accounts and Groups Add Contact to add one new contact in phonebook. - Page 50 setting is “Default”, when user presses it, phone LCD will show the five options. Phonebook LDAP Server Address Configures the IP address or DNS name of the LDAP server. Configures the LDAP server port. The default port number is “389”. Port Configures the LDAP search base.
-
Page 51: Nat Settings
Editing Contacts and Click-To-Dial From GXP1760/GXP1780/GXP1782 Web GUI, users could view contacts, edit contacts, or dial out with Click-to-Dial feature on the top of the Web GUI. In the following figure, the Contact page shows all... - Page 52 the added contacts (manually or downloaded via XML phonebook). Here users could add new contact, edit selected contact, or dial the contact/number. Before using the Click-To-Dial feature, make sure the option "Click-To-Dial Feature" under web GUI->Settings->Call Features is turned on. By default it's disabled and the dialing icon in web GUI is in grey When clicking on the icon on the top menu of the Web GUI, a new dialing window will show for you to enter the number.
-
Page 53: Saving Configuration Changes
Click to dial from Click to call this Edit contact. Add contacts available lines. contact from the phone. Figure 2: Web GUI - Phonebook->Contacts Figure 3: Click-to-Dial Saving Configuration Changes After users makes changes to the configuration, press the "Save" button will save but not apply the changes until the "Apply"... -
Page 54: Rebooting From Remote Locations
Wait for about 1 minute to log in again. Packet Capture GXP1760/GXP1780/GXP1782 is embedded with packet capture function on firmware 1.0.0.38 or greater. The related options are under Maintenance -> Packet Capture. -
Page 55: Configuring Eventlist Blf
Lamp Filed and Eventlist BLF features and allows end users, such as attendant, to monitor the call status of users in the list. GXP1760/GXP1780/GXP1782 supports this feature by sending out the subscription request to the UCM and changing the indicator status of the Line keys, MPKs, or virtual MPKs that associated with the monitored users. -
Page 56: Table 11: Action Url - Supported Events
Figure 5: Action URL Settings Page Table 11: Action URL - Supported Events Supported Events Setup Completed Registered Unregistered Off Hook On Hook Incoming Call Outgoing Call Missed Call Established Call P a g e GXP17xx Administration Guide... -
Page 57: Table 12: Action Url - Supported Dynamic Variables
Terminated Call Open DND Close DND Open Forward Close Forward Blind Transfer Attended Transfer Hold Call UnHold Call Table 12: Action URL – Supported Dynamic Variables Supported Dynamic Variables Dynamic Variable Description $phone_ip The IP address of the phone. $mac The MAC address of the phone. -
Page 58: Table 13: Action Url Parameters P-Values
Figure 6: Action URL Packets The P values listed in below table are for the options under phone web UI->Settings->Outbound Notification->Action URL. Table 13: Action URL Parameters P-values P Value Web UI Option Value Format P8304 Setup Completed P8305 Registered P8306 Unregistered P8308... -
Page 59: Upgrading And Provisioning
UPGRADING AND PROVISIONING The GXP1760/GXP1780/GXP1782 can be upgraded via TFTP/HTTP/HTTPS by configuring the URL/IP Address for the TFTP/HTTP/HTTPS server and selecting a download method. Configure a valid URL for TFTP or HTTP/HTTPS, the server name can be FQDN or IP address. -
Page 60: No Local Tftp/Http Servers
Firmware upgrading takes around 60 seconds in a controlled LAN or 5-10 minutes over the Internet. We recommend completing firmware upgrades in a controlled LAN environment whenever possible. No Local TFTP/HTTP Servers For users that would like to use remote upgrading without a local TFTP/HTTP server, Grandstream offers a NAT-friendly HTTP server. -
Page 61: Configuration File Download
Password. For a detailed parameter list, please refer to the corresponding firmware release configuration template. When the GXP1760/GXP1780/GXP1782 boots up or reboots, it will issue a request to download a configuration XML file named "cfgxxxxxxxxxxxx.xml" followed by a file named "cfgxxxxxxxxxxxx", where "xxxxxxxxxxxx"... -
Page 62: Restore Factory Default Settings
RESTORE FACTORY DEFAULT SETTINGS Warning: Restoring the Factory Default Settings will delete all configuration information on the phone. Please backup or print all the settings before you restore to the factory default settings. Grandstream is not responsible for restoring lost parameters and cannot connect your device to your VoIP service provider. Please follow the instructions below to reset the phone: ... -
Page 63: Experiencing The Gxp1760/Gxp1780/Gxp1782
EXPERIENCING THE GXP1760/GXP1780/GXP1782 Please visit our website: http://www.grandstream.com to receive the most up- to-date updates on firmware releases, additional features, FAQs, documentation and news on new products. We encourage you to browse our product related documentation, FAQs User and Developer Forum for answers to your general questions.
Need help?
Do you have a question about the GXP1760 and is the answer not in the manual?
Questions and answers