
Related Manuals for RGBlink VSP 516 Series


Summary of Contents for RGBlink VSP 516 Series
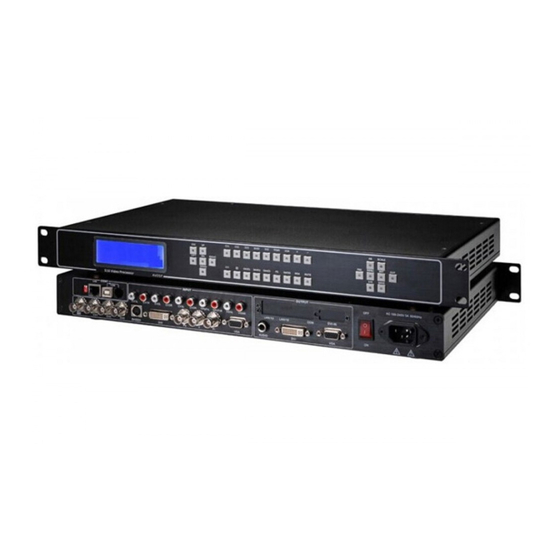
- Page 1 VSP 516 Series User Manual RGBlink The pictures and data in the user manual are reference only, check the real product please!
-
Page 2: Table Of Contents
2.1 Parameters ................3 3.0 Connection ................... 5 3.1 VSP 516 Back Panel ..............5 3.2 How to install ................7 4.0 Front Panel Keyboard Operation ........... 9 4.1 VSP 516 series Operator Guideline ......... 9 4.2 Video Processor Menu ............11... -
Page 3: Safety
It is forbid to pour liquid, metal fragment or anything else inside this device to avoid fire and other accident. Once that happens, must remove power cord and try to make it clean before power on again. VSP 516 Series User Manual... -
Page 4: Specification
2.0 Specification AVDSP series video processors are designed by the latest high performance image processing technology. AVDSP can handle following video without limit, include CVBS(Composite)、S-Video (YC)、YCbCr、YPbPr、RGBHV(VGA)、 DVI-D、HDMI、SDI(SD-SDI、HD-SDI) and VOIP(Copper RJ45). Compare table of AVDSP as following. VSP 516 Series User Manual... -
Page 5: Parameters
R、 G、 B、 Hsync、 Vsync:0 to1Vpp±3dB (0.7V Video+0.3v Sync ) 75ohm black level:300mV Sync-tip:0V DVI Input Number of Inputs Connector Standard DVI-I socket Supported Resolution SMPTE:625/25 PAL, 525/29.97 NTSC, 625/50p PAL, 525/59.94p NTSC:1080i50,1080i59.94/60,720p50,720p59.94/60 VESA:800×600×60Hz,1024×768×60Hz,1280×768× 60Hz, 1280×1024×60Hz, 1600×1200×60Hz, 1920×1080 ×60Hz,1920×1080×50Hz VSP 516 Series User Manual... -
Page 6: Audio Input
VGA Output Number of Inputs Connector Standard DB15 socket Supported Standards VESA:800×600×60Hz,800×600×75Hz,1024×768× 60Hz, 1024×768×75Hz, 1280×1024×60Hz, 1920×1080P ×60Hz Signal Level R、 G、 B、 Hsync、 Vsync:0 to1Vpp±3dB (0.7V Video+0.3v Sync ) 75ohm black level:300mV Sync-tip:0V Audio Output VSP 516 Series User Manual... -
Page 7: Connection
1、Dial the code switch; 2 、 10/100M interface (copper RJ45). Used to connect the computer by 568B-568A twist-pair; 3、USB interface,Used to connect the computer; 4、RS232 interface (RJ11) for AVDSP processor. Used to connect the computer; VSP 516 Series User Manual... - Page 8 HD-SDI signal, compared to VSP 516 and VSP 516H. 21-23、Composite input interface,Composite BNC. Used to input composite signal (PAL, NTSC, SECAM compatible); 24 、 S-Video DIN 4, used to input S-Video signal ( PAL, NTSC, SECAM compatible); VSP 516 Series User Manual...
-
Page 9: How To Install
(This Connection does not support hot-plugging) 32、VGA output interface, connect to the monitor, projector and so on; 33-34、Switch and power. It must use IEC-3 power line. Always ground to avoid electric shock. 3.2 How to install VSP 516 frame size VSP 516 Series User Manual... - Page 10 VSP 516S has the same frame size of VSP 516H and VSP 516S; Note: VSP 516 Series User Manual...
-
Page 11: Front Panel Keyboard Operation
Insert power cord and push power to ON position. LCD module on the front panel will show RGBLINK and go into self verification before it load last setting config and send processed image to the target monitor. For the first setup, CV1 input is default source. - Page 12 MUTE:Switch to select mute sound or return; MENU:push to go to main menu; FRE:push to freeze the video image or live again;(Freeze Live Freeze) AB: Channel Switch, only works under the PBP mode. Push it to switch between VSP 516 Series User Manual...
-
Page 13: Video Processor Menu
The ↑ on the right means you can select the menu items by pushing the up and down direction key. User can check the information of the equipment in “Dev Info” menu (including the manufacturer、serial-number ); User can get more service and support according to the serial-number. VSP 516 Series User Manual... - Page 14 Push UP/DWON to enter Alpha setup, user can set value from 0 to 100, 0 means video or graphic would be disappear and 100 means normal; Port A and Port B stand for two channel picture; VSP 516 Series User Manual...
- Page 15 V_BLANK: The overall effective area can be moved up and down by adjusting the value of V_BLANK. Screen parameter: Hsize: 1024 Step:user can set the step of scale; HSize:set the horizontal size of the image; VSP 516 Series User Manual...
- Page 16 AB in VSP 516 is used to enable channel if dual channel mode. Setup A on B OR: Setup A on B Push SCALE to set the size and position of the image, push UP/DOWN and VSP 516 Series User Manual...
- Page 17 Push BRT to set the brightness and the contrast ratio: VSP 516 50 ↓ Brightness OR: VSP 516 50 ↑ Contrast Push SAVE and then push SAVE1 or SAVE2 to save the operation to SAVE1 or VSP 516 Series User Manual...
- Page 18 SAVE2;Push SAVE1 or SAVE2 to execute relative operation after user save the operation sucessfully. Add prompt to save function For VSP 516 series, when user push the SAVE key, the SAVE1、 Note: SAVE2 and SAVE3 lights on the front panel will go on at the same time, it reminds user must press SAVE1 or SAVE 2 to finish the final save function.
- Page 19 MUTE:mute the equipment, shown as the picture: Mute Touch MUTE again will revovery to play sound VSP 516 Series User Manual...
- Page 20 VSP 516 Series User Manual...
Need help?
Do you have a question about the VSP 516 Series and is the answer not in the manual?
Questions and answers