
Related Manuals for Panasonic NEXTIVA KT-TGP 600


Summary of Contents for Panasonic NEXTIVA KT-TGP 600
- Page 1 1 | P a g e Panasonic KX-TGP 600 User Guide nextiva.com/support © Nextiva, All Rights Reserved...
-
Page 2: Table Of Contents
Directories ..........................37 Call Lists ........................... 37 Using Speed Dials ........................40 Additional Features ........................40 Do Not Disturb ......................... 40 Factory Reset ..........................41 Panasonic KX-A406 Repeater ......................46 Location of Controls ........................ 46 © Nextiva, All Rights Reserved... - Page 3 3 | P a g e Additional Setup ..........................46 Setting up a Repeater ......................46 Enabling Repeater Mode through the Phone Menu ............... 46 Enabling Repeater Mode through the Web Configuration Utility ........... 47 Registering the Repeater ......................50 Transferring a Call between Handsets ..................
-
Page 4: Installation
4 | P a g e Installation Desk Setup 1. Connect the AC adapter and the Ethernet cable to the base unit (Figure 1-1). Figure 1-1: Base Unit Cabling Configuration 2. Connect the AC adapter to the charger for the KX-TPA60 handset (Figure 1-2). Figure 1-2: Charge Cradle Cabling Configuration ©... - Page 5 5 | P a g e 3. Open the battery cover on the back of the Panasonic KX-TPA60 handset, insert the batteries, and close the cover as indicated below (Figure 1-3). Figure 1-3: Handset Battery Configuration To attach the handset to your belt, follow the steps below (Figure 1-4).
- Page 6 6 | P a g e At the time of shipment, the batteries are not charged. You will need to charge the batteries for about 6 hours before using the handset for the first time (Figure 1-5). The charge indicator will turn off when the batteries are fully charged. ...
-
Page 7: Wall Mounting
7 | P a g e Wall Mounting NOTE: Make sure that the wall and the fixing method is strong enough to support the weight of the unit. 5/32 1. Drive the screws into the wall 55 mm (2 in) apart, and mount the unit on the wall (Figure 1- Figure 1-6: Wall Mounting 5/32 *1 –... -
Page 8: Location Of Controls
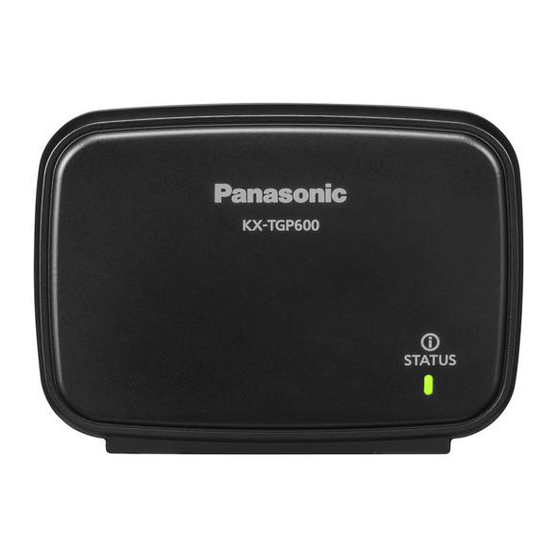
8 | P a g e Location of Controls Figure 2-1 is an image of the Panasonic KX-TGP600 base unit. The Ethernet port is on the back of the device. Figure 2-1: Panasonic KX-TGP 600 1. Status Indicator 2. Handset locator button... - Page 9 9 | P a g e Below is an image of the Panasonic KX-TPA60 handset as well as the variation between the different models. The Panasonic KX-TPA60 was used for testing (Figure 2-2). Figure 2-2: Panasonic TPA60 Handset © Nextiva, All Rights Reserved...
-
Page 10: Provisioning Instructions
10 | P a g e 1. Ringer/Charge/Message Indicator 5. HOLD/MSG Key 2. Headset Jack 6. Silent Mode Key 7. LINE Key 8. Receiver 9. Display 10. Soft Keys 11. POWER/CANCEL Key 12. XFER/CLR Key 13. FUNC Key 14. Microphone 15. - Page 11 11 | P a g e 4. If the Panasonic KX-TGP600 was purchased from Nextiva, select Nextiva device at the top of the screen; then select the model and MAC address of the phone in the corresponding drop-down lists. Otherwise, select Own device at the top of the screen (Figure 3-2).
- Page 12 12 | P a g e 6. Enter the MAC address found on the base unit in the MAC Address text box (Figure 3-4). Figure 3-4: Enter MAC Address 7. Click the blue Assign button (Figure 3-5). Figure 3-5: Assign ©...
- Page 13 Figure 3-6: Close pop-up message Now you will need to assign the Panasonic KX-TGP 600 to a user. 9. Select the user from the drop-down list to whom you want to assign the Panasonic KX-TGP 600 device (Figure 3-7). Figure 3-7: Select User...
- Page 14 14 | P a g e 10. Click the green Generate button under Authentication Name text box to generate an authentication name (Figure 3-8). Figure 3-8: Generate Authentication Name 11. Select Change Password, and then click the green Generate button to generate a new password (Figure 3-9).
-
Page 15: Checking The Firmware
Figure 3-10: Confirmation Message Checking the Firmware The Panasonic KX-TGP 600 should be on Firmware 1.30. The steps below detail how to upgrade the firmware if necessary. 1. Turn Embedded Web On. From the main screen, select Menu Setting Handset Other Option ... - Page 16 16 | P a g e 6. The page will display the phone’s current IP Adress. Enter admin as the User Name and adminpass as the Password (Figure 3-12). Figure 3-12: Log In to Phone Interface 7. The firmware will display on the screen. There are two banks. The bank listed in the Operating Bank field is the firmware that the phone is currently using.
- Page 17 17 | P a g e 8. If the firmware is lower than 01.030, click the Maintenance tab at the top of the screen (Figure 3-14) to upgrade the firmware. Figure 3-14: Maintenance Tab 9. Click Firmware Maintenance on the left side of the screen (Figure 3-15). Figure 3-15: Firmware Maintenance ©...
- Page 18 18 | P a g e 10. Make sure Yes is selected in the Enable Firmware Update field, and enter http://dm.nextiva.com:80/dms/Nextiva_Service_Provider/Panasonic/KX-TGP-600/TGP600- 1.030.fw in the Firmware File URL text box (Figure 3-16). Figure 3-16: Enter Firmware URL 11. Click Save. The base station should reboot automatically, and after a few minutes, the firmware upgrade will be complete.
-
Page 19: Entering The Provisioning Server
19 | P a g e Entering the Provisioning Server Before beginning, make sure the MAC address for the Panasonic KX-TGP600 base unit is assigned to a user on the account (see ‘Assigning the Device to a User using the NextOS 3.0 Portal’ above). - Page 20 20 | P a g e 7. Click the Maintenance tab at the top of the screen (Figure 3-20). Figure 3-20: Maintenance Tab 8. Enter http://dm.nextiva.com:80/dms/Nextiva_Service_Provider/Panasonic/KX-TGP- 600/TGP600-{mac}.cfg in the Standard File URL text box (Figure 3-21). 9. Enter http://dm.nextiva.com:80/dms/Nextiva_Service_Provider/Panasonic/KX-TGP- 600/TGP600-system.cfg in the Product File URL text box.
-
Page 21: Enabling The Web Configuration Utility
NOTE: Make sure the time zone in the NextOS 3.0 Beta portal is correct for the user before proceeding. The Panasonic KX-TGP600 cannot have its time changed on the local phone. Please call Nextiva Support to ensure your phone’s configuration file reflects the proper time zone. -
Page 22: Line Mirroring
The Panasonic KX-TGP600 does not support remote directories. Speed Dials While it is possible to set up speed dials through the menu on the Panasonic KX-TPA60 handset, setting up speed dials using Nextiva’s included speed dial features is preferred. Doing so will ensure your speed dials are not lost in the event of hardware failure. - Page 23 23 | P a g e 3. From the main dashboard, click Manage in the Users tile (Figure 4-1). Figure 4-1: Manage Users 4. Hover your cursor over the user for whom you want to set up speed dials, and click the pencil icon to the right (Figure 4-2).
- Page 24 24 | P a g e 5. Scroll down and select the Routing section (Figure 4-3). Figure 4-3: Routing Section 6. Click the pencil icon to the right of Speed dial (Figure 4-4). Figure 4-4: Speed Dial © Nextiva, All Rights Reserved...
- Page 25 25 | P a g e 7. Click the plus sign at the bottom-right (Figure 4-5). Figure 4-5: Add Speed Dial 8. Select the speed dial number from the Option drop-down list (Figure 4-6). Figure 4-6: Speed Dial Number © Nextiva, All Rights Reserved...
- Page 26 For instructions on how to use Speed Dial, see the section “Using Speed Dials” in the Basic Phone Usage section. NOTE: The Panasonic KX-TPA60 does not have line keys to set up as speed dials. © Nextiva, All Rights Reserved...
-
Page 27: Automatic Call Distribution (Acd) States
The Panasonic KX-TGP600 allows for multiple devices to be connected to it including cordless handsets and a wireless desk phone. By default, all incoming calls to the Panasonic KX-TGP600 will ring all the connected devices. The instructions below will walk you through setting up the Pansonic KX-TGP600 so that calls to one phone number ring only to handset 1, and calls to a second phone number ring only to handset 2, and so on. - Page 28 28 | P a g e 6. The page will display the phone’s current IP Address. Enter admin as the User Name and adminpass as the Password (Figure 4-11). Figure 4-11: Log In to Phone Interface 7. Click the Telephone tab at the top of the screen (Figure 4-12). Figure 4-12: Telephone Tab ©...
- Page 29 29 | P a g e 8. Deselect all the Line 1 check boxes except the one for Handset Number 1. Repeat this for Line 2 and Handset Number 2 and so on (Figure 4-13). Figure 4-13: Line & Handset Matrix 9.
-
Page 30: Outgoing Calls
Outgoing Calls By default, all outbound calls from the Panasonic KX-TGP600 will use line 1. This typically causes issues when the user of handset 2 wants to check their voicemail , which requires them to use line 2. While it is possible to use line 2 by pressing the LINE key on the phone (and then dialing extension 9999), this requires the user to remember to do so every time they check their voicemail. - Page 31 31 | P a g e 7. Click the Telephone tab at the top of the screen (Figure 4-17). Figure 4-17: Telephone Tab 8. Change the Default drop-down list for Handset 2 to option 2 (Figure 4-18). Figure 4-18: Default Outbound Line ©...
- Page 32 32 | P a g e 9. Click Save at the bottom of the screen (Figure 4-19). Figure 4-19: Save Outbound Line Selection © Nextiva, All Rights Reserved...
-
Page 33: Basic Phone Usage
3. Dial the phone number or extension of the party you want to call, and press the CALL softkey (middle softkey). NOTE: If you dial the full 10-digit phone number of the party you want to call, the Panasonic KX- TPA60 will automatically start dialing, so pressing the CALL softkey will not be necessary. -
Page 34: Accepting A Call
Transferring a Call Warm Transfer 1. While on a call on the Panasonic KX-TPA60 handset, press the XFER/CLR key. The party you were speaking to is put on hold, and you hear a dial tone. 2. Dial the phone number or extension of the party you want to transfer the call to, and press the CALL softkey (middle softkey). -
Page 35: Conferencing
(right softkey) once if you have not already started dialing and twice if you have. Conferencing 1. While on a call on the Panasonic KX-TPA60 handset, press the FUNC key on the bottom-right of the phone. 2. Scroll down and select Conference from the menu, or press 5 on the keypad. The party you were speaking to is put on hold, and you hear a dial tone. -
Page 36: Checking Voicemail
(e.g., John Smith). Follow the instructions below to complete the initial setup of your voicemail box. 1. While the Panasonic KX-TPA60 handset is idle (not on a call), press the HOLD/MSG key on the left side of the handset. -
Page 37: Directories
Remote directories are not supported on the Panasonic KX-TGP600. Call Lists When there is a missed call, the light on the upper-left of the Panasonic KX-TPA60 handset will slowly flash red, and the screen will say Missed Calls. After pressing the left ← navigator key, you will be prompted to select Missed Calls or Incoming Log. - Page 38 (right softkey) at the bottom of the screen twice. Conferencing to a Party on your Call List 1. While on a call on the Panasonic KX-TPA60 handset, press the FUNC key. 2. Select Conference from the menu, or press 5 on the keypad.
- Page 39 39 | P a g e 4. Select either Outgoing Log or Incoming Log from the menu (Figure 5-2). Figure 5-2: Incoming & Outgoing Logs 5. Use the up ↑ and down ↓ navigator keys to scroll through the list of calls. 6.
-
Page 40: Using Speed Dials
40 | P a g e Using Speed Dials 1. Pick up the Panasonic KX-TPA60 handset from the charger. 2. Press the green TALK/Speakerphone Key. NOTE: To switch to speakerphone, press the green TALK/Speakerphone key again. The screen updates to say Speaker Phone. If you are using a headset, you cannot switch to speakerphone mode. -
Page 41: Factory Reset
Factory Reset 1. Turn Embedded Web on (see ‘Enabling the Web Configuration Utility’ above). 2. On the Panasonic KX-TPA60 handset, press the MENU softkey (middle softkey). 3. Select System Settings Status IPv4 Settings IP Address from the menu. - Page 42 42 | P a g e 6. The page will display the phone’s current IP Address. Enter admin as the User Name and adminpass as the Password (Figure 7-2). Figure 7-2: Log In to Phone Interface 7. Click the Maintenance tab at the top of the screen (Figure 7-3). Figure 7-3: Maintenance Tab ©...
- Page 43 43 | P a g e 8. Click Reset to Defaults on the left side of the screen (Figure 7-4). Figure 7-4: Reset to Defaults 9. Click Reset to Carrier Defaults in the middle of the screen (Figure 7-5). Figure 7-5: Select Reset to Carrier Defaults ©...
- Page 44 44 | P a g e 10. Click OK when the pop-up message appears asking if you are sure you want to reset the settings (Figure 7-6). Figure 7-6: Confirm 11. Click Web Port Close in the upper-left corner of the screen (Figure 7-7). Figure 7-7: Web Port Close ©...
- Page 45 12. Click OK when the pop-up message appears asking if you are sure you want to close the Web server port (Figure 7-8). Figure 7-8: Confirm The Panasonic KX-TGP600 has now been reset to the original factory settings. © Nextiva, All Rights Reserved...
-
Page 46: Panasonic Kx-A406 Repeater
50m range to the base unit. A total of three repeaters may be synced to the base unit in a “cascade” style setup, effectively quadrupling (200m) the range of the Panasonic KX- TGP 600 base unit for up to 4 handsets. -
Page 47: Enabling Repeater Mode Through The Web Configuration Utility
Before a repeater can be registered to the Panasonic KX-TGP600 base unit, Repeater Mode must be enabled on the base unit. Follow the instructions below to do this. 1. From the main screen of a handset registered to the Panasonic TGP600, select Menu Setting Handset Other Option Embedded Web On. - Page 48 48 | P a g e 8. Click the System tab at the top of the screen (Figure 9-3). Figure 9-3: System Tab 9. Click System Settings on the left side of the screen (Figure 9-4). Figure 9-4: System Settings ©...
- Page 49 10. Select the Yes radio button to the right of Enable Repeater Mode (Figure 9-5). Figure 9-5: Enable Repeater Mode 11. Click Save at the bottom of the screen. The Panasonic KX-TGP600 base unit will reboot, after which Repeater Mode will be enabled (Figure 9-6).
-
Page 50: Registering The Repeater
The repeater is now ready for use. Transferring a Call between Handsets 1. While on a call on the Panasonic KX-TPA60 handset, press the MENU softkey (middle softkey) at the bottom of the screen.
Need help?
Do you have a question about the NEXTIVA KT-TGP 600 and is the answer not in the manual?
Questions and answers