Table of Contents
Troubleshooting

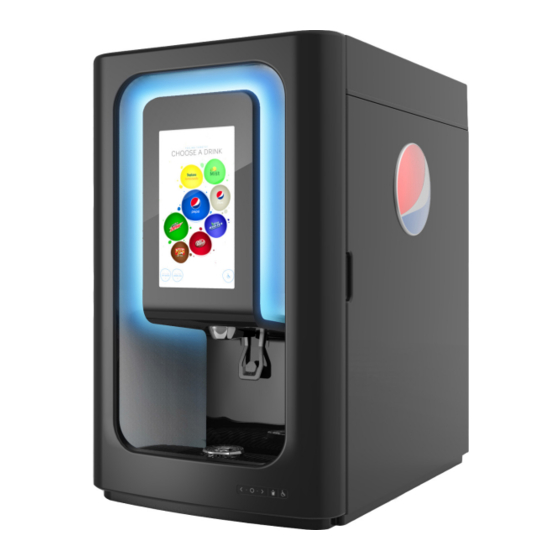
Related Manuals for Cornelius pbd175


Summary of Contents for Cornelius pbd175
- Page 1 PBD175 (SPIRE 3.0) Service Manual Release Date: September 01, 2015 Publication Number: 620062609SER Revision Date: September 06, 2016 Revision: D Visit the Cornelius web site at www.cornelius.com for all your Literature needs.
-
Page 2: Contact Information
Commercial Warranty. Cornelius will not be responsible for any repair, replacement or other service required by or loss or damage resulting from any of the following occurrences, including but not limited to, (1) other than normal and proper use and normal... -
Page 3: Table Of Contents
Cleaning the PBD175 (Spire 3.0)........ - Page 4 PBD175 (Spire 3.0) Service Manual Mapping the Valves ............16 Valve Assignment Options.
- Page 5 PBD175 (Spire 3.0) Service Manual Replacing the Agitator Timer Board ..........42 Replacing the Agitator Motor .
- Page 6 PBD175 (Spire 3.0) Service Manual Publication Number: 620062609SER © 2015, Cornelius Inc.
-
Page 7: Safety Instructions
PBD175 (Spire 3.0) Service Manual SAFETY INSTRUCTIONS ALL S EAD AND OLLOW AFETY NSTRUCTIONS Safety Overview • Read and follow ALL SAFETY INSTRUCTIONS in this manual and any warning/caution labels on the unit (decals, labels or laminated cards). • Read and understand ALL applicable OSHA (Occupational Safety and Health Administration) safety regulations before operating this unit. -
Page 8: Safety Precautions
PBD175 (Spire 3.0) Service Manual AFETY RECAUTIONS This unit has been specifically designed to provide protection against personal injury. To ensure continued protection observe the following: WARNING: Disconnect power to the unit before servicing following all lock out/tag out procedures established by the user. Verify all of the power is off to the unit before any work is performed. -
Page 9: Introduction
This manual is designed as a guide for the trained technician in maintaining and servicing the Pepsi PBD175 (Spire 3.0) dispenser. It is not meant for employees operating the equipment. -
Page 10: Preparing The Counter
REPARING OUNTER In order to place the PBD175 (Spire 3.0) unit on a counter, the counter must be prepared by cutting an opening in the counter to accommodate the syrup lines and power cord connection to the unit. Marking and Cutting the Counter To mark and cut the counter, refer to Figure 1. -
Page 11: Control Panel
PBD175 (Spire 3.0)) Service Manual ONTROL ANEL A microprocessor based control system monitors and controls all of the major systems and components of the unit. This control system uses the front panel display to interface with the system, as shown in Figure 2. -
Page 12: Spire Subsystems
Figure 4. Computer The computer controls all functions of the PBD175 (Spire 3.0) unit. This includes the display, all dispense functions, setup and all external devices, such as the SEN modem. The computer is shown in Figure 4. It has a power button and a LED on the front. -
Page 13: Valve Assemblies
PBD175 (Spire 3.0)) Service Manual Valve Assemblies The valves are located behind the display panel and control the flow of the syrup, water and flavor shots to the valve assembly.Image only applies to 16+8 unit.It also allows technicians to BRIX the unit. The valve assemblies are shown in Figure 6. -
Page 14: Lx3 Board
PBD175 (Spire 3.0) Service Manual LX3 Board The LX3 board is located on the upper-left of the unit, as shown in Figure 7. It is mounted to the unit by two mount- ing nuts, shown in Figure 7. It receives both 12 and 24 V input voltage. -
Page 15: Agitator/Carbonator Control Board
PBD175 (Spire 3.0)) Service Manual Agitator/Carbonator Control Board The Agitator/Carbonator Control Board is located behind the 30 VDC and 12/24VDC power supplies. It supplies function to the agitator motor, carb pump motor, off-cycle agitation settings, agitator motor heater, ice dispense switch and safety switches. -
Page 16: Operation
CEMAKER APABILITY The PBD175 (Spire 3.0) has a built-in icemaker adapter to accept a maximum 30” wide X 24” deep icemaker foot- print. The dispenser is supplied and shipped with needed parts for this icemaker installation. Any ice maker smaller than these dimensions may require an additional kit for proper icemaker installation. -
Page 17: Preventative Maintenance
PBD175 (Spire 3.0)) Service Manual PREVENTATIVE MAINTENANCE WARNING: Shutdown unit via the proper software shutdown procedure. When the computer has fully turned off, unplug the unit from the wall outlet. Failure to comply could result in serious injury, death or damage to the equipment. -
Page 18: Daily Maintenance
PBD175 (Spire 3.0) Service Manual Figure 13. Figure 14. Spray the nozzle and diffuser inside and outside with approved sanitizing solution, reinstall the diffuser and nozzle on the valve and allow them to air dry. Pour warm, soapy water down the drains to keep them clean and flowing properly and reinstall the cup rest into the drip tray. - Page 19 PBD175 (Spire 3.0)) Service Manual Table 1. Step Action Empty the plastic pail and prepare approximately five gallons of sanitizing solution. See sanitizing solution instructions on page 11. Submerge the BIB disconnects in the sanitizing solution. Sanitizing fittings must be attached to each BIB disconnect. If these fittings are not available, the fittings from empty BIB bags can be cut from the bags and used.
-
Page 20: Entering Service Mode
PBD175 (Spire 3.0) Service Manual ENTERING SERVICE MODE Service Screen The unit contains a service mode that is accessed through the front panel display. This allows service personnel to set up the unit or service it. To shut down the computer through the service screen, perform the procedure in Table 2. -
Page 21: Nuc Power Button
PBD175 (Spire 3.0)) Service Manual Figure 18. NUC Power Button To shut down the computer using the computer power button, perform the procedure in Table 3. Table 3. Step Action Open the unit door. To shut down the computer, press and release the exposed NUC power button, as shown in Figure 19. This operation provides the same function as a software shutdown. -
Page 22: Sold Out Syrups
PBD175 (Spire 3.0) Service Manual Computer NUC Power Button Figure 19. Sold Out Syrups This feature can be used to lock a brand or flavor from dispensing. One possible use is to lock a leaking valve that needs to be replaced. The screen is shown in Figure 20. - Page 23 PBD175 (Spire 3.0)) Service Manual Table 4. Step Action For reference of valve layout vs brand press View Valve Layout button on the Current Assignment screen, shown in Figure 20. The screen shown in Figure 23 is displayed and shows the valve number vs brand or flavor in the orientation that the valves are in the machine.
-
Page 24: Valve Assignment Options
PBD175 (Spire 3.0) Service Manual Figure 23. Valve Assignment Options When a brand or flavor is selected, a second screen is displayed, as shown in Figure 24, providing the technician with several options. NOTE: This option only allows one selection at a time. When dispensing a syrup or flavor no water will be dispensed. -
Page 25: Sanitization
PBD175 (Spire 3.0)) Service Manual Sanitization This selection graphically prompts the technician through the sanitization cycle. This feature includes timing func- tions that will not let the user continue until after the sanitization step has been completed. The screens are shown in Figure 25. -
Page 26: Actions Options
PBD175 (Spire 3.0) Service Manual CTIONS PTIONS This series of selections is used to navigate different options available to the service technician. System Reboot Shutdown This selection does a “soft” shutdown of the computer. Use this selection or the green button behind the display to reboot the computer to avoid creating corrupted files in the computer. -
Page 27: Define Input Flow Rates
PBD175 (Spire 3.0)) Service Manual Table 5. Valve Flow Rate High Carb 210 ml High Plain 210 ml Low Carb 90 ml Low Plain 90 ml Syrup 60 ml (5:1) Flavor Shot 12 ml Figure 28. EFINE NPUT ATES The technician has the ability to input the flow rates for water, carbonated water, and flavor shots. Figure 29 displays the default values for each of the three liquids. -
Page 28: System
PBD175 (Spire 3.0) Service Manual System This selection monitors vital temperatures of the computer. These include the CPU & SSD temperatures and fan speed. If the icon is red check the system fans to make sure they are operating. Valve Controller Validates communication between the computer and valve board. -
Page 29: Component Replacement
PBD175 (Spire 3.0) Service Manual COMPONENT REPLACEMENT EMOVING THE LADDING To remove the cladding, perform the procedure below. 1. Open the door by grasping it on the right side and swinging it open. Figure 32. Cladding crew 2. Remove the 4 screws from the latch side of the unit. -
Page 30: Replacing The Display
PBD175 (Spire 3.0) Service Manual 4. Pivot the side cladding away from the unit and slide back slightly to remove from rear tab and remove from the unit. 5. To replace the cladding, reverse the procedure. EPLACING THE ISPLAY To replace the touch screen display, perform the procedure below. - Page 31 PBD175 (Spire 3.0) Service Manual Mounting Screws 6. Loosen (Do NOT remove) the four screws holding the display to the door frame. Mounting Screws Figure 37. 7. Remove the cable connection. Figure 38. 8. Close the door and lift the display up and forward to remove it from the unit.
- Page 32 PBD175 (Spire 3.0) Service Manual Mounting Screws 10. Tighten the four screws that hold the display to the door frame. Mounting Screws Figure 40. 11. Reinstall the four screws that secure the display to the inner door. 12. Remove the tape and reconnect the RCA plugs, USB and HDMI cables to the rear of the display, as mentioned in Step 5 of "Replacing the Display"...
-
Page 33: Replacing Valves
PBD175 (Spire 3.0) Service Manual EPLACING ALVES If a valve is damaged, perform the procedure below to replace the valve. 1. Shut down the unit using the service menu on the display. 2. Unplug the power cord from the wall receptacle. -
Page 34: Replacing The Backblock
PBD175 (Spire 3.0) Service Manual 16. For valves or back blocks that have been replaced, enter priming mode and start the carb water priming to run water until circuits that were serviced are observed (typically several cycles of the carb pump). -
Page 35: Computer Information And Service
PBD175 (Spire 3.0) Service Manual Mounting Mounting Screws Screws 6. Remove the mounting screws holding the backblock to the panel. Figure 46. 7. Replace the backblock. 8. Reinstall the new backblock and perform Step 9 through Step 22 on page 28. -
Page 36: Replacing The Computer
PBD175 (Spire 3.0) Service Manual Replacing the Computer To replace the computer, perform the procedure below. 1. Shut down the unit using the service menu on the display. 2. Unplug the power cord from the wall receptacle. 3. Open the door. -
Page 37: Valve Control Board Information And Service
The Valve Control board uses a USB communication cable from the computer to cycle the beverage valves and control the down lights. The board is supplied by a 30/12 VDC connector from the power supply and is capable of supplying power to 28 valves {when PBD175 (Spire 3.0) is completely featured}. Valve Control Board Diagnostics To diagnose Valve Control board malfunctions, perform the procedure below. -
Page 38: Replacing The Valve Control Board
PBD175 (Spire 3.0) Service Manual Replacing the Valve Control Board To replace the Valve Control board, perform the procedure below. 1. Shut down the unit using the service menu on the display. 2. Unplug the power cord from the wall receptacle. -
Page 39: Ada Control Board Information And Service
PBD175 (Spire 3.0) Service Manual ADA C ONTROL OARD NFORMATION AND ERVICE The ADA feature is located in the front of the drip tray and controlled through a USB connector from the ADA board to the computer. The ADA feature is a capacitance touch control board activated by an object changing the capaci- tance field and sending a signal to the computer. - Page 40 PBD175 (Spire 3.0) Service Manual Figure 57. Figure 58. 6. If done correctly, board assembly mounting holes will align with screw posts and board will appear flush and not bulging outward. 7. Re-install the 2 mounting screw and plug ADA power harness back into its connector.
-
Page 41: Led Spot Light Assembly
PBD175 (Spire 3.0) Service Manual LED S IGHT SSEMBLY The LED Spot light consists of two LED lamps located on either side of the nozzle. These LED lights are controlled by a 12 VDC output from the Valve Control Board. -
Page 42: Enclave Re-Install Work Instructions
PBD175 (Spire 3.0) Service Manual NCLAVE NSTALL NSTRUCTIONS This document is to aid in Spire 3.0 Enclave removal and re-installation. Procedures not covered in this document can be found in Spire 3.0 Operators or Service manuals. Only trained and certified technicians familiar with the Spire family of Dispensers should service this unit. - Page 43 PBD175 (Spire 3.0) Service Manual Figure 66. Figure 67. 11. Once the connections are complete, stow the lines towards the back of the unit. Be sure to dress the lines in a clean manner taking notice of where lines should run to not interfere with the enclave when installed.
- Page 44 PBD175 (Spire 3.0) Service Manual Figure 70. Figure 71. 14. Push the Enclave back and down, tighten the lower Enclave screw at the mark location with a screw driver, stop when screw has seated to prevent overtightening and damage to plastic mounting parts.
- Page 45 PBD175 (Spire 3.0) Service Manual 16. If the door has difficulty in closing, loosen the 2 lower screws again and push the enclave fur- ther back, re-tighten screws. NOTE: Enclave depth is limited when it touches the cold plate foam base (See in Figure 74).
-
Page 46: Replacing The Carbonator Sensor
PBD175 (Spire 3.0) Service Manual Replacing the Carbonator Sensor If it is determined that the carbonator sensor is not functioning properly, replace it by performing the procedure below. 1. Shut down the unit using the service menu on the display. -
Page 47: Replacing The Ice Bin Agitator
PBD175 (Spire 3.0) Service Manual 9. Disconnect the lead from the damaged probe and unscrew the probe. 10. Screw in the new sensor and reconnect the connector.Probe connector goes only in one way. 11. Need to reconnect the drain to enclave. -
Page 48: Replacing The Agitator Timer Board
PBD175 (Spire 3.0) Service Manual 9. Close the door. 10. Reconnect the power cord in the wall receptacle and resume normal operation. Replacing the Agitator Timer Board If the agitator timer board is malfunctioning, perform the procedure below. 1. Shut down the unit using the service menu on the display. -
Page 49: Replacing The Agitator Motor
PBD175 (Spire 3.0) Service Manual 10. Swing the power supply panel up and install the two screws holding the panel. 11. Reconnect the power cord in the wall receptacle and resume normal operation. Replacing the Agitator Motor 1. Unplug from power and allow several minutes for gearbox heater to cool. -
Page 50: Off-Cycle Agitator Settings
Softer ice types should require the restrictor to be opened completely to prevent ice storage or ‘balling’ issues. It may be necessary to order a soft ice slide kit for use of soft/chunklet ice. Contact your local Cornelius Sales Repre- sentative or Customer Service for more details. -
Page 51: Ice Maker Mounting
PBD175 (Spire 3.0) Service Manual Figure 91. AKER OUNTING NOTE: For proper ice maker and dispenser function, it is necessary to make sure that following are checked. • Ice level sensor (bin stat) is installed at least 2” below hopper top (Refer to Ice maker Installation manual). - Page 52 PBD175 (Spire 3.0) Service Manual 3. Place ice maker on top of unit and push until rear of ice maker is flush with bracket OR ice maker rear is flush with rear of the dispenser Figure 93. 4. Make sure ice maker is centered on unit and equal distances on each side.
- Page 53 PBD175 (Spire 3.0) Service Manual 7. Now using the #8 self-tapping screws, screw into the ice maker as shown. A minimum of (2) screws are needed to safely secure ice maker to dispenser. Any hole or slot in bracket can be used.
- Page 54 PBD175 (Spire 3.0) Service Manual 11. Screw (2) #8-32 truss head screws into the upper frame front, one each side. Do not fully seat screws. Figure 100. 12. Place Filler panel on top (make rubber bumpers are installed on the 4 holes on Filler panel) and place keyslot into the #8-32 screws as shown in Figure 101.
-
Page 55: Troubleshooting
PBD175 (Spire 3.0) Service Manual TROUBLESHOOTING ROUBLESHOOTING ALVES Low Syrup Flow Check Valve does Validate backblock Adjust Low Syrup Flow not need adjusting is completely open Valve Call MEM Low Syrup or Service Water Pressure © 2015-2016, Cornelius Inc. - 49 -... -
Page 56: Some Valves Are Activating
PBD175 (Spire 3.0) Service Manual Some Valves are Activating Publication Number: 620062609SER - 50 - © 2015-2016, Cornelius Inc. -
Page 57: No Valve Activity
PBD175 (Spire 3.0) Service Manual No Valve Activity © 2015-2016, Cornelius Inc. - 51 - Publication Number: 620062609SER... -
Page 58: One Or Two Valves Are Activating
PBD175 (Spire 3.0) Service Manual One or Two Valves are Activating Publication Number: 620062609SER - 52 - © 2015-2016, Cornelius Inc. -
Page 59: Troubleshooting The Display
PBD175 (Spire 3.0) Service Manual ROUBLESHOOTING THE ISPLAY Screen Locked Up Check Computer Check Computer Refer to Screen Locked Up & Display Connections Computer Diagnostics Power is On Turn Computer On Reboot Computer UI Screen Black Check Circuit Breaker UI Screen Black Done &... -
Page 60: Ui Screen Black (Continued)
PBD175 (Spire 3.0) Service Manual UI Screen Black (Continued) From Page 51 Push Check Operation Is Computer Green Green Button of Grn Reboot Sw., Wires & Power Light On w/ Is Computer Blue Conn. to LH Rear Conn. Fan Running Light On Pin Conn. -
Page 61: Ui Screen Blue With "No Signal" Displayed
PBD175 (Spire 3.0) Service Manual UI Screen Blue with “NO SIGNAL” Displayed Is Computer running UI Screen Blue with Reboot or (blue light under Computer on) “NO SIGNAL” Displayed Replace Computer Does computer start after pressing Replace Computer green button below... -
Page 62: Troubleshooting Power Supply Problems
PBD175 (Spire 3.0) Service Manual ROUBLESHOOTING OWER UPPLY ROBLEMS No Power to Display Publication Number: 620062609SER - 56 - © 2015-2016, Cornelius Inc. -
Page 63: No Power To Computer
PBD175 (Spire 3.0) Service Manual No Power to Computer No Power 19.8 VDC Power to Computer to Computer Verify 120 VAC Replace the Connection to 19.8 VDC Power Supply Power Supply Reset Circuit Breaker ROUBLESHOOTING RINK UALITY Low or No Carbonation... -
Page 64: High Water Temperature
PBD175 (Spire 3.0) Service Manual High Water Temperature High Water Fill Hopper Low Ice in Hopper Temperature Recirculation Repair or Replace System not Recirculation Functioning System Python Call MEM Service Insulation Purged Carbonation Water Flow Low Recirculation Repair or Replace... -
Page 65: Wiring Diagrams
PBD175 (Spire 3.0) Service Manual WIRING DIAGRAMS L1 XFR L1 HTR L1 BALST L1 IN BLU (7) GRN (6) RED (5) ORG (1) Figure 103. 12-4 Wiring Diagram © 2015-2016, Cornelius Inc. - 59 - Publication Number: 620062609SER... - Page 66 PBD175 (Spire 3.0) Service Manual Figure 104. Publication Number: 620062609SER - 60 - © 2015-2016, Cornelius Inc.
-
Page 67: Valve Board Diagram
PBD175 (Spire 3.0) Service Manual ALVE OARD IAGRAM Figure 105. © 2015-2016, Cornelius Inc. - 61 - Publication Number: 620062609SER... - Page 68 PBD175 (Spire 3.0) Service Manual Publication Number: 620062609SER - 62 - © 2015-2016, Cornelius Inc.
- Page 70 Cornelius Inc. www.cornelius.com...
Need help?
Do you have a question about the pbd175 and is the answer not in the manual?
Questions and answers
How can I go from a Tropicana fruit punch label to a Lipton unsweetened tea label on a spire 3.0?
To change a Cornelius Spire 3.0 from a Tropicana fruit punch label to a Lipton unsweetened tea label, follow these steps:
1. Enter Service Mode: Refer to the instructions on how to enter Service Mode.
2. Access Valve Mapping: Locate the option for mapping the valves in the Service Mode menu.
3. Change the Label: Select the valve currently assigned to Tropicana fruit punch and reassign it to Lipton unsweetened tea.
4. Validate Connections: Ensure that the brand lines from the python are correctly connected to the labeled brands on the user display screen.
5. Save and Exit: Confirm the changes and exit the Service Mode.
Ensure the correct beverage is flowing through the selected valve before finalizing the setup.
This answer is automatically generated
Hi how to remove this black thing? Cause we need to deep clean the back of this pannel. Thank you