Table of Contents
Advertisement
Quick Links
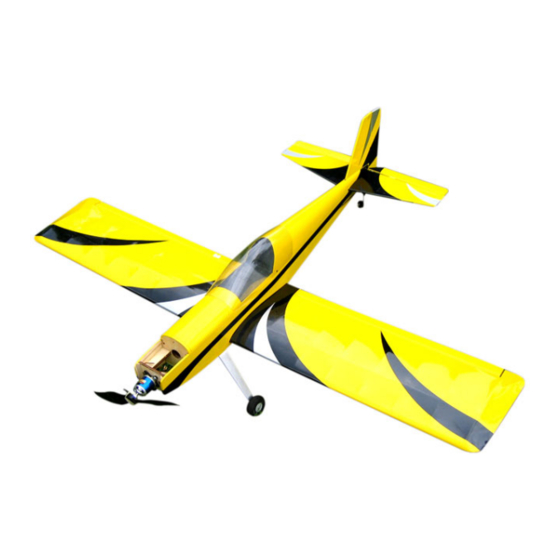
Almost‐Ready‐to‐Fly Nitro/Electric Aerobat
SPECIFICATIONS
WINGSPAN: 45.7"(1160mm)
LENGTH: 38.6"(980mm)
WING AREA: 370 sq in(24 sq dm)
FLYING WEIGHT: Approx. 3.3 lbs (1500g)
SUGGESTED POWER SYSTEM: GForce G15(3542)
Brushless Electric Motor or .15‐25 Nitro Motor
SUGGESTED RADIO SYSTEM: 4‐CH, 4‐5 Standard Servos
TWEETY ‐ 25
INSTRUCTION MANUAL
FEATURES
Light‐weight laser‐cut ply and balsa construction.
Detachable fuselage hatch for easy access of battery
and electronics.
Conveniently powered by either an electric or a nitro
motor.
Pre‐covered in high visibility trim scheme.
Advertisement
Table of Contents

Related Manuals for Value Hobby TWEETY - 25


Summary of Contents for Value Hobby TWEETY - 25
- Page 1 TWEETY ‐ 25 Almost‐Ready‐to‐Fly Nitro/Electric Aerobat INSTRUCTION MANUAL SPECIFICATIONS FEATURES WINGSPAN: 45.7”(1160mm) Light‐weight laser‐cut ply and balsa construction. LENGTH: 38.6”(980mm) Detachable fuselage hatch for easy access of battery WING AREA: 370 sq in(24 sq dm) and electronics. FLYING WEIGHT: Approx. 3.3 lbs (1500g) Conveniently powered by either an electric or a nitro SUGGESTED POWER SYSTEM: GForce G15(3542) motor. Brushless Electric Motor or .15‐25 Nitro Motor Pre‐covered in high visibility trim scheme. SUGGESTED RADIO SYSTEM: 4‐CH, 4‐5 Standard Servos ...
- Page 3 WARNING This radio controlled model is NOT a toy and NOT intended for person under 16 years old. Keep this kit out of reach of younger children, as it contains parts that could be dangerous. A radio controlled model is capable of causing serious bodily injury and property damage. It is the owner's responsibility to assemble the aircraft properly. Test fly your model in the presence of an experienced RC modeler. Your model must always be operated and flown using great care and common sense, as well as in accordance with the safety code of the AMA or MAAC. We suggest you purchase proper insurance prior to flying this model. The FCC requires that you use only radio frequencies specified for R/C model aircraft. Do not at any time fly this model while under the influence of drugs or alcohol. Parts of the Airplane 1. Fuselage 4. Horizontal stabilizer and elevator 2. Fin and rudder 5. Canopy 3. Wing ...
-
Page 4: Included Hardware
Included Hardware Please note the following abbreviations used in this manual about fasteners: 1. CM means socket head screws, e.g. CM4 means 4mm socket head screws 2. PWA means self‐tapping screws, e.g. PWA2/PWA3 means 2 or 3mm self‐tapping screws 3. PM means round head machine screws, e.g. PM4 ‐ 4mm round head machine screws 4. Ф1.8X600mm means 1.8mm diameter and 600mm length pushrod Qty Qty 1. Rudder pushrod [Ф1.8X600mm] 2 16. Round head machine screws (securing 2 2. Elevator pushrod [Ф1.8X600mm] 2 wings to Fuselage) [PM3X30mm] 3. Throttle pushrod [Ф1.5X300mm] 1 17. Round head machine screws for securing 2 4. Aileron pushrod [Ф1.8X150mm] 2 landing gear [PM3X20mm] 5. Elevator joiner wire [Ф2X84mm] 1 18. Pushrod EZ‐connector for throttle servo 1 6. Tail wheel assembly 1 [Ф2.1mm] 7. Fuel tank 1 19. Self‐lock Nuts for securing wheel shaft 4 8. Wing joiner strip ... -
Page 5: Install The Ailerons
Install the Ailerons Step 4: Adjust the aileron so there is a small gap between the LE of the aileron and the wing. The gap should be about 1/64‐inch or just wide enough to slip a piece of Step 1: Drill a 1/16‐inch hole into the center of each hinge paper through. slot in the aileron and wing panel. Trim the covering away from each hinge slot to ensure that the hinges will be properly glued in place. Step 5: Apply six drops of thin CA to the top and bottom of each hinge. Do not use accelerator in the hinging process. The CA must be allowed to soak into the hinge naturally. Step 2: Test fit a CA hinge into each of the hinge slots. If After the CA has cured, flex the surfaces several times to necessary, enlarge the slots with a hobby knife. When break in the hinges. Pull on both surfaces to make sure the satisfied with the fit, place the hinges into the slots. Push a hinges are secure. pin through the middle of each hinge to keep them centered. Repeat steps 1‐5 for the other wing panel. Step 3: Join the aileron to the wing panel and remove the pins from the hinges. Center the aileron on the wing. ... -
Page 6: Install The Aileron Servos & Pushrods
Install the Aileron Servos & Pushrods ENLARGE TO Before installation, confirm that the servos you will be using will properly fit in the servo opening. Make CUT OFF adjustments as necessary for your servos. The pre‐cut UNUSED ARM servo openings on this airplane will fit most standard sized servos. Step 3: Securely tie the string from inside the opening for the aileron servo to the end of the servo extension. Pull the servo wire and extension through the wing. Step 1: Installing the servos in the wing will require the use of a servo extension wire for each aileron servo. One Y‐harness connector is also required and is used to allow the aileron servos to plug into one slot in your receiver. You may also have a computer radio that allows you to plug the servos into separate slots and then mix them together with the radio transmitter. If you choose to mix them together with the radio rather than a Y‐harness, refer to the manual for your particular model radio system. Step 4: Temporarily position the aileron servo into the servo bay. Install and remove a servo mounting screw into each of the four holes. Apply a drop of thin CA into the holes to harden the wood. After the glue has hardened, install the servo into the opening. Cut three arms from a four‐armed servo arm (arms may need to be purchased separately). Center the servo with your radio system and install a servo arm parallel to the aileron hinge line as shown. ... -
Page 7: Finish The Wing Panels
Step 7: Use tape or a small clamp to hold the aileron in the Step 5: Place one of the nylon control horn on the aileron, neutral position. With the servo arm still parallel to the positioning it as shown in the sketch and aligning it with hinge line, make a mark on the pushrod where it crosses the servo arm using a straight edge as a guide. Mark the the outer hole in the servo arm. Remove the pushrod and location for the screw holes. Drill a hole through the clevis from the control horn and make a 90 degree bend at aileron at the marks you made. Install and remove the screw into each of the holes. Harden the holes with a drop your mark. Cut off the excess pushrod wire 6mm beyond the bend. Enlarge the outer hole in the servo arm using a of thin CA. After the glue has hardened completely, secure 2mm drill bit. Connect the pushrod to the servo arm using the control horn with two screws. a nylon Fast‐Link. Finish the wing panels Ф1.8X 17 mm Aileron Pushrod Servo Arm Faslink Step 1: Without using any glue, test fit the wing halves Bend t he end of the wire into a right with the wing joiner. Make sure the halves fit together ... - Page 8 Step 2: Mix a generous amount of 30‐minute epoxy. Pour the epoxy into the joiner opening on the wing. Make sure the epoxy is distributed all the way around inside the wings. Use an epoxy brush to coat the root ribs of both wings and one half of the joiner all the way around. Insert the epoxy‐coated half of the joiner. Wipe away excess epoxy as it is forced out. Step 5: Align the wing bolt plate over the holes on the underside of the wing. With the wing bolt plate centered over the holes, use a sharpie pen to trace around the plate onto the wing. Step 3: Coat the protruding end of the joiner all the way around with epoxy. Join the other wing, press the two halves together, allowing excess epoxy to drip out as you go. When the wings come together, wipe away excess epoxy that is squeezed out, then use a C‐clamp and several strips of masking tape on both the top and bottom of the wing to tightly hold the two halves together. If epoxy continues to work out of the wing under the tape, remove one strip at a time and wipe off the epoxy, then Step 6: Trim the covering just inside your lines. Wipe replace with another strip of tape. Do not disturb the wing away the lines with alcohol and glue the wing bolt plate to until the epoxy has hardened. the wing. Continue the wing bolt holes through the wing bolt plate with a 1/8" [3.2mm] drill bit. A wood backer piece while drilling will help ensure clean‐edged holes in the wing bolt plate. Step 4: Locate and remove the covering from the wing bolt holes near the trailing edge of the wing. ...
-
Page 9: Install The Stabilizer
Install the Stabilizer Step 1: Locate the horizontal stabilizer slot under the covering on the tail section of the fuselage by lightly Step 4: Attach a piece of string to measure the distance pressing with your finger. The slot is located on both sides “A” of each stabilizer halves, and “B” the difference of the fuselage. Carefully remove the covering. Make sure between the wing tip and the top of stabilizer. Both you do not cut into the wood. distances should be equal. Step 2: Locate the slot for the vertical fin on the top of Step 5: With the stabilizer properly aligned, use a felt‐tip the fuselage and remove the covering. Make sure you do pen to trace a line around the tail of the airplane on the not cut into the wood. top and bottom of the horizontal stabilizer. Step 3: Insert the stabilizer into the stabilizer slot so it is centered in the fuselage (dimension A should be equal). Place the wing onto the fuselage and secure it in place with the wing hold‐down bolts. View the plane from the rear and at a distance of a few feet. The stabilizer should be parallel to the wing (dimension B should be equal). If Step 6: Remove the stabilizer and draw two additional not, sand the stabilizer mounting base slightly to achieve lines, top and bottom, 1.6mm inside the lines drawn in the proper position of the stabilizer. the previous step. Using a knife, carefully cut through the covering along the inside lines and remove the covering from the center. Do not cut the wood under the covering! ... -
Page 10: Install The Vertical Fin
If the covering is not removed from the stabilizer, a degree angle between the vertical fin and horizontal proper bond for your adhesive will not be achieved. stabilizer when viewed from the rear. Use masking tape to hold the vertical fin in this position. Recheck the Step 7: Mix 30‐minute epoxy and spread some inside the alignment frequently while the epoxy cures. horizontal stabilizer mount on the fuselage. Spread more epoxy onto the top and bottom of the stabilizer where the Install the Elevator covering was removed. Insert the stabilizer into the fuselage from the rear and adjust the alignment using the Step 1: Find the pre‐cut hinges from the included guide lines that were drawn onto the stabilizer. Wipe off accessories. Test fit the hinges in the slots in the elevator any epoxy that squeezes out using a paper towel halves and stabilizer. If the hinges do not slide into the dampened with rubbing alcohol. Recheck the alignment slots easily, work your knife blade back and forth in the frequently while the epoxy cures. slot a few times to provide more clearance Install the Vertical Fin 3/32 DRILL A HOLE DEEP IN CENTER OF HINGE SLOT Step 2: Drill a 3/32” [2.4mm] hole, 1/2” [12.7mm] deep in the center of the hinge slots. Reinsert your knife blade to ... - Page 11 flex the elevators in both directions to free up the Install the Rudder and Tail Wheel elevators for operation. Step 1: Assemble the tail wheel assembly set using the included accessories. Step 4: Temporarily insert a pushrod into the elevator pushrod exit slot. Use the position of the pushrod to align the elevator control horns onto the undersides of the elevator halves. Mark the locations of the control horn mounting holes onto the elevator halves and drill holes at the marks. Do not drill all the way through the elevator halves! Thread a screw into the hole and back it out. Apply a couple drops of thin CA glue to the hole and let it harden. Attach the elevator control horns to the elevators using four screws. Step 2: The installation tab of the tail wheel need to be mounted on the bottom of the fuselage. Test fit the rudder to the fuselage with the tail wheel assembly installed in the orientation shown. Make any adjustments necessary so the tab on the tail wheel is securely fastened on the fuse. Roughen the wire on the tail wheel assembly that fits into the rudder with sand paper and clean it off with alcohol. Glue the tail wheel wire into the hole in the ...
- Page 12 LE of the rudder with medium or thick CA glue. Fit the rudder to the fuselage along with CA hinges. Glue the CA hinges in place with thin CA glue. Step 2: Thread the clevis securely onto the rudder pushrod. We recommend using a clevis retainer to help keep the clevis in place. Slide the pushrod through the rudder pushrod exit slot in the fuselage and connect it to Step 3: As you did with the elevator, use the pushrod to the rudder control horn. temporarily position a control horn onto the side of the rudder. Then secure the control horn using two screws. Installing the Tail Servos and Pushrods Step 3: With the rudder in the neutral position and the rudder servo arm perpendicular to the pushrod, mark where the pushrod crosses the outer hole of the servo arm. As you did with the aileron pushrods, make a 90 degree bend at the mark and cut off the excess pushrod 1/4" [6mm] beyond the bend. Secure the pushrod to the Step 1: Install the elevator and rudder servos into the servo arm with a FasLink. Make any adjustments fuselage as shown using the hardware supplied with the necessary to the nylon clevis so that the rudder is properly servos. Be sure to harden the screw holes with thin CA as centered and slide the silicone clevis retainer to the end of was done with the aileron servos. Cut three arms from the clevis. two four armed servo arms. Center the servos with your radio system and install them onto the servos with the servo screws. Enlarge the outer holes of each servo arm with a 5/64" [2mm] drill bit. Depending on your balancing needs, you can install the receiver battery in the front of ...
-
Page 13: Install The Main Landing Gear
Step 4: Thread the clevis securely onto the elevator pushrod. We recommend using a clevis retainer to help keep the clevis in place. Slide the pushrod through the Install the Main Landing Gear elevator pushrod exit slot in the fuselage and connect it to the elevator control horn. Step 1: Locate the four blind nuts in the bottom of the fuse. Cut the covering from the inside of the holes. Step 5: With the elevator in the neutral position and the elevator servo arm perpendicular to the pushrod, mark where the pushrod crosses the outer hole of the servo arm. As you did with the rudder pushrods, make a 90 degree bend at the mark and cut off the excess pushrod 1/4" [6mm] beyond the bend. Secure the pushrod to the servo arm with a FasLink. Make any adjustments necessary to the nylon clevis so that the elevator is properly centered and slide the silicone clevis retainer to the end of the clevis. Step 2: Mount the aluminum landing gear to the fuselage. ... - Page 14 have been secured, glue the motor mounting plate onto the motor rail. The plate should be secured on the top and bottom by the four triangles. The motor mounting plate has been cut so they should fit properly between the motor rails. After the plate has been secured, glue the two triangle stock onto the side as shown in the photo. Step 3: Mount the two wheel axles. Step 4: Mount the main wheels to the axles with the wheel collars. Brushless Motor and ESC Installation Step1. Locate the parts for assembling the electric motor mount as shown. Step 2: Mix a generous amount of 30‐minute epoxy. Next glue the four support triangles onto the motor rail, one on each side and top/bottom. After the four support triangles ...
- Page 15 Step3. Take the motor mount of your brushless motor, mark the position of the bolt openings. You will need to drill holes on the motor mounting plate for those bolt openings. Step6. Install the prop and spinner/prop adapter. Step4. Install the motor mount that came with your motor onto the motor mounting plate. Then Install your brushless motor onto the motor mount. Make sure the motor spins freely. Step5. Install the ESC inside the motor box or inside the fuselage, depending on the requirement for balancing the CG. ...
- Page 16 touching. The fuel tubing and clunks (fuel pickup) on the Installing the Fuel Tank (only if you use carb and fill lines should almost reach the back of the tank nitro motor) but not touch. The clunks must be able to move freely inside the tank when assembled. Adjust the length of the fuel tubing accordingly. When satisfied, tighten the PM3x25mm screw in the stopper to secure it in place (do not over‐tighten). Mark the side of the tank that must face up when installed in the plane. We also suggest marking the tubes in the stopper. Step 1: The fuel tank can be assembled as a two line system consisting of a vent (pressure) line to the muffler and a carb line. Filling and emptying of the tank would need to be done through the carb line, or an optional fuel fill valve. The tank can also be assembled as a three line system having a vent line, carb line, and fill line. If installing a fill line, puncture the top of the stopper above the sealed off fuel tube hole. The fill and carb lines should Step 3: Insert the tank into the fuselage with the correct extend out 13mm beyond the stopper and the vent line side facing up. The fuel tubing should be routed through should be bent upwards and left uncut. With the tubes the hole in the center of the firewall. installed in the stopper, the stopper plates loosely in place with the PM3x25mm screw to hold the assembly together. Installing ...
-
Page 17: Balancing The Model
on/off switch. If the hole spacing does not fit your switch, you may need to modify the pre‐cut opening, or mount it in a different location. You can also mount an optional charge jack receptacle below the switch. Balancing the Model After you have finished building the model into ready‐to‐ fly condition you can set the C.G. of the model. You need to have all of the systems installed before you begin, including the nitro engine or electric motor, landing gear, Step 2: Position the front of the engine drive washer radio system, and battery pack. approx 115‐120mm from the firewall, depending on the engine you selected. Mark the location of the engine mount bolt holes onto the mount rails using a Dead Center Hole Locator. Remove the engine from the mount rails and create threads in the four mounting holes. Attach the engine to the mount. Installing the Receiver The C.G. is located 64mm back from the leading edge of the wing at the fuselage. This is where your model should balance for the first flights. Later you may wish to experiment by shifting the C.G. forward or back to change the flying characteristics. Moving the C.G. forward may improve the smoothness and stability, but the model may then require more speed for takeoff and make it more difficult to slow for landing. Moving the C.G. aft makes the model more maneuverable, but could also cause it to become too difficult to control. When balancing your model, support the plane upright at ... - Page 18 Setting Control Throws Turn on the transmitter and receiver. Use a ruler to adjust the throw of the elevator, ailerons and rudder. Adjust the position of the pushrod at the control horn to achieve the following measurements when moving the sticks to their endpoints: Aileron Low Rate Up 9mm Down 9mm Aileron High Rate Up 16mm Down 16mm Elevator Low Rate Up 10mm Down 10mm Elevator High Rate Up 16mm Down 16mm Rudder Low Rate Up 12mm Down 12mm Rudder High Rate Up 20mm Down 20mm These are general guidelines for control throws. You can experiment with higher rates to match your preferred style of flying.