Table of Contents
Advertisement
Quick Links
Advertisement
Table of Contents

Related Manuals for EVA Stampaggi FUTURA


Summary of Contents for EVA Stampaggi FUTURA
- Page 1 INSTRUCTION MANUAL AIR STOVE FUTURA 15 kW – 19.5 kW...
- Page 2 IMPORTANT: ESSENTIAL TO READ 1. The warranty is valid only if the FIRST IGNITION is carried out by an AUTHORISED TECHNICIAN. 2. DO NOT TURN THE PRODUCT UPSIDE DOWN or LAY IT IN A HORIZONTAL POSITION during transportation and installation. 3.
- Page 4 9. The burn pot and the combustion chamber MUST BE CLEANED DAILY. The manufacturer declines any liability for any malfunctioning due to a failure to do so. Eva Stampaggi S.r.l. declines any liability for any damage to persons or property arising from the failure to comply with the points mentioned...
-
Page 5: Table Of Contents
TABLE OF CONTENTS 01. PRODUCT SAFETY ........................ 5 01.1 SAFETY WARNINGS ....................5 01.2 GENERAL SAFETY PRECAUTIONS ................6 01.3 EC CERTIFICATE OF CONFORMITY ................8 02. PRODUCT DESCRIPTION ....................... 9 02.1 DESCRIPTION OF COMPONENTS ................10 03. PRODUCT INSTALLATION ....................11 03.1 INTRODUCTION ..................... -
Page 6: Product Safety
Read this manual carefully before use or any maintenance operation. Eva Stampaggi aims to provide as much information as possible to ensure safer use and to avoid damage to persons, property or parts of the stove itself. -
Page 7: General Safety Precautions
01. PRODUCT SAFETY 01.2 GENERAL SAFETY PRECAUTIONS Use the stove only as described in this manual. Any other use not recommended by the manufacturer may cause fires or accidents to people. Make sure that the electrical power available corresponds to the value indicated on the data plate (220V~/50Hz). ... - Page 8 01. PRODUCT SAFETY Do not use the appliance as waste incinerator or for any other purpose other than the intended one. Do not use liquid fuels. Do not modify the appliance without prior authorisation. Use only original spare parts recommended by the manufacturer. ...
-
Page 9: Ec Certificate Of Conformity
01. PRODUCT SAFETY 01.3 EC CERTIFICATE OF CONFORMITY... -
Page 10: Product Description
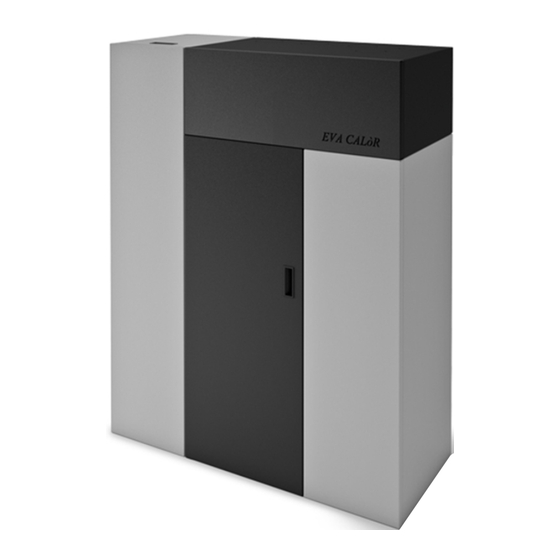
02. PRODUCT DESCRIPTION Ducted stove Futura 15 kW and Futura 19.5 kW The 40 Kg pellet hopper, remote control, DFCS control system for the combustion air and the air -tight system renders it ideal for passive houses, as it does not take combustion air from the environment. It can be fitted with upper or rear couplings for th e ducts and it can be connected to an already existing thermostat or can be set to start when the room temperature reaches a certain value (detected by the sensors that control the ventilation speed). -
Page 11: Description Of Components
02. PRODUCT DESCRIPTION 02.1 DESCRIPTION OF COMPONENTS ON/OFF SWITCH THERMOSTATS OR EXTERNAL SENSORS CLAMPS REMOTE CONTROL RECEIVER SAFETY THERMOSTAT PELLET HOPPER LID PELLET HOPPER LID GASKET EMERGENCY SWITCH... -
Page 12: Product Installation
INSTALLATION WITH WALL FUME OUTLET IS PROHIBITED. INSTEAD THE FUME OUTLET MUST BE ROOF-TYPE AS PROVIDED FOR BY NATIONAL REGULATIONS. Eva Stampaggi S.r.l. declines any liability for any damage to persons or property arising from the failure to comply with the points mentioned above and from non-compliant product installation. - Page 13 03 PRODUCT INSTALLATION The vent pipe is one of the key features for guaranteeing the proper functioning of the stove. Thanks to the quality of the materials, the strength, the durability, the easy cleaning and maintenance, the best vent pipes are made of steel, either stainless steel or aluminised.
- Page 14 03. INSTALLING THE PRODUCT EXISTING VENT PIPE (TRADITIONAL) Types of vent pipe Examples of vent pipe Steel vent pipe with Traditional clay vent double chamber pipe with cavities. insulated with material Optimum efficiency. resistant 400°C. Optimum efficiency. Refractory vent pipe with Avoid vent pipes with insulated double...
-
Page 15: Chimney Cowl
03. INSTALLING THE PRODUCT 03.3 CHIMNEY COWL A properly installed chimney cowl ensures optimum stove functioning. The anti-downdraught chimney cowl consists of a number of components whose outlet section sum always doubles the vent pipe section. Make sure the chimney cowl is at least 150cm above the roof top so that it is fully exposed to the wind. -
Page 16: Draught
03. INSTALLING THE PRODUCT 03.4 DRAUGHT Fumes heat up during combustion, increasing their volume. Their density is therefore lower than the one of the surrounding colder air. This difference between the inside and outside temperatures of the chimney results in a negative pressure which increases proportionally to the vent pipe length and the temperature. -
Page 17: Stove Efficiency
03. INSTALLING THE PRODUCT 03.5 STOVE EFFICIENCY Highly efficient stoves may pose difficulties for fume extraction. In order for a vent pipe to work properly its internal temperature must increase as a consequence of the fumes generated during combustion. Importantly, the efficiency of a heater is determined by its ability to transfer most of the heat produced to the environment to be heated: consequently, the greater the efficiency of the stove, the "colder"... -
Page 18: Installation
03. INSTALLING THE PRODUCT 03.6 INSTALLATION This stove is an air-tight stove. If properly connected by means of a suction tube, these stoves draw the combustion air and the air necessary for glass cleaning directly from outside and not from the room where they are installed, preserving the oxygen in the room. - Page 19 03. INSTALLING THE PRODUCT During normal operation, the stove draws air from the room where it is installed. Therefore, an external air intake must be positioned at the same height of the pipe located on the stove back. Exhaust fume pipes must be suitable for pellet stoves and must therefore be made from coated steel or stainless steel, with a diameter of 8cm and fitted with adequate gaskets.
- Page 20 03. INSTALLING THE PRODUCT INSTALLATION EXAMPLE: EXAMPLE OF INCORRECT INSTALLATION: Exhaust pipes must never be fitted pointing downwards or horizontally so that fumes are discharged directly through the external wall.
- Page 21 03. INSTALLING THE PRODUCT INSTALLATION EXAMPLE STOVE INSTALLATION In compliance with the current regulations for installation, the stove must be installed in a ventilated place with air that is sufficient to ensure correct combustion and therefore good operation. The room must have a volumetry of no less than 20 m3 and to ensure good combustion (40 m3/h of air), there must be a "combustion air intake"...
- Page 22 03. INSTALLING THE PRODUCT ATTENTION (limitations on installing sensors or thermostats): Room number 1 can be connected to a sensor but not to an actual thermostat: the remote control will act as a thermostat. Therefore, if you want a thermostat in room number 1, you will need to install the remote control system. However, install a sensor on input 1.
-
Page 23: Product Use
04. PRODUCT USE 04.1 REMOTE CONTROL WITH LCD DISPLAY Remote control description The remote control system replaces the classic display of the traditional pellet stoves. It comes with charger, rechargeable batteries, support and plugs with screws for wall mounting. It can also work with alkaline batteries. Installing the remote control system on the stove: ... -
Page 24: User Menu
04. PRODUCT USE Quick menu The P4 key (SET/menu) allows you to open the menu functions. Press it for several times to browse through the pages below: Maximum heat output setting: Use the P5 and P6 keys to increase and respectively decrease the maximum heat output SET. Press P4 again to go to the next page. - Page 25 04. PRODUCT USE SET PELLET: Use the P5 and P6 keys to select the desired load settings and confirm by pressing P4. Pellet type settings correction table setting fume exhaustion correction pellet load correction 10% increase 10% decrease 8% increase 8% decrease 6% increase 6% decrease...
- Page 26 04. PRODUCT USE Programmable thermostat The programmable thermostat function allows for the programming of the stove automatic switching on and off and of the SET temperature and SET heat output enabling during the week. To this purpose, you can either opt for the predefined settings or you can make your own ones.
- Page 27 04. PRODUCT USE To copy the settings made for one of the days of the week, proceed as follows: use the P5 (next) and P6 (back) keys to scroll through all periods of time until reaching the copy symbol; then, press P4 (SET).
- Page 28 04. PRODUCT USE Heat output operation The stove starts operating at the corresponding times and heat output level so as to reach the set temperature. You can set the maximum operating power to prevent the system from reaching any unwanted heat output levels. In practice, the system increases the operating power gradually, based on the difference between the room temperature and the SET TEMEPRATURE.
- Page 29 04. PRODUCT USE Alarms To each event corresponds an alarm that is activated after the delay time indicated when the event occurs. If the cause of the alarm is not removed within this period of time, the stove enters the alarm condition, shuts down immediately and enables the fume fan and the exchanger fan at maximum speed.
- Page 30 04. PRODUCT USE Connections...
-
Page 31: Cleaning And Maintenance
05. CLEANING AND MAINTENANCE 05.1 INTRODUCTION The stove requires a simple yet constant cleaning to guarantee top efficiency and proper functioning. Constant maintenance by a qualified technician is recommended. The stove should be cleaned before the cold season because it can sometimes get clogged during the summer (by nests for example) preventing exhaust fumes to flow regularly. -
Page 32: Troubleshooting
06. TROUBLESHOOTING PROBLEM CAUSE SOLUTION IT MAY BE NECESSARY TO REPEAT THE FIRST LOAD PHASE A FEW TIMES TO FACILITATE THE APPLIANCE INITIAL START-UP AS FIRST START-UP THE AUGER TUBE IS COMPLETELY EMPTY AND IT MAY TAKE A SPECIFIC PERIOD OF TIME TO FILL. POWER OUTAGE CHECK PLUG AND POWER SUPPLY. - Page 33 06. TROUBLESHOOTING LET STOVE COOL DOWN, LET STOVE COOL DOWN, MANUALLY RESET THERMOSTAT ON BACK. IF THE MANUALLY RESET PROBLEM REMAINS UNSOLVED, CONTACT A SPECIALISED TECHNICIAN. THERMOSTAT ON BACK. LET STOVE COOL DOWN, MANUALLY RESET THERMOSTAT ON BACK. SWITCH TEMPORARY POWER OUTAGE STOVE ON AGAIN.
-
Page 34: Yearly Scheduled Maintenance
07. YEARLY SCHEDULED MAINTENANCE Date 1st maintenance ____________ / ____________ / (Technical Assistance Centre stamp) Date 2nd maintenance ____________ / ____________ / (Technical Assistance Centre stamp) Date 3rd maintenance ____________ / ____________ / (Technical Assistance Centre stamp) -
Page 35: Certificate Of Installation And Testing
08. CERTIFICATE OF INSTALLATION AND TESTING CERTIFICATE OF INSTALLATION AND TESTING CUSTOMER: _______________________ Retailer's Stamp: ROAD: ___________________________ CITY: ______________________________ Installer's stamp: POSTAL CODE: ______________________ PROVINCE: __________________________ First name: ________________________ TEL: _________________________________ Last name: _________________________ Address: _________________Postal code: Delivery date:______________________ Location: ___________________________ Delivery note: :______________________ Tel: Equipment mod.: _____________________... -
Page 37: Warranty Certificate
09. WARRANTY CERTIFICATE Congratulations! Thank you for purchasing an Eva Stampaggi product. Warranty The warranty period is two years if the product was purchased by a private customer (Legislative Decree no. 24, February 2 2002) and one year if it was purchased by a company or by a professional (subject to VAT). - Page 38 Attention: after purchase, please keep this warranty certificate together with the original package, installation and testing certificate and the retailer receipt. Eva Stampaggi S.r.l. Retailer Stamp and Signature Via Cal Longa Z.I.
Need help?
Do you have a question about the FUTURA and is the answer not in the manual?
Questions and answers