Table of Contents
Advertisement
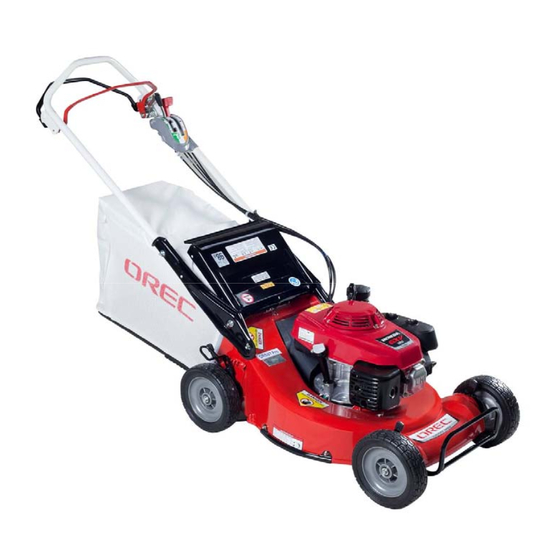
OWNER'S MANUAL
GR537Pro/GRH537Pro
Grassland walk behind mower
Read this instuction manual carefully before using the machine and keep it as a reference.
The engine manual is included as a set with the owners manual.
Please read both manuals carefully
For any questions about this manual, please contact your OREC dealer, the
OREC distributor in your country, or go to : http://www.orecamerica.com
0268-77000
1
Advertisement
Table of Contents

Subscribe to Our Youtube Channel
Related Manuals for OREC GRH537Pro


Summary of Contents for OREC GRH537Pro
- Page 1 The engine manual is included as a set with the owners manual. Please read both manuals carefully For any questions about this manual, please contact your OREC dealer, the OREC distributor in your country, or go to : http://www.orecamerica.com 0268-77000...
- Page 2 Introduction Thank you for purchasing this machine. These instructions explain the correct and easy way to always keep this machine in proper working order and how to operate it safely. Please read these instructions fully before using this machine in order to understand the safest, most efficient way of operating it, and the correct way to maintain it.
-
Page 3: Table Of Contents
Contents 1, For Safe Operation ・・・・・・・・・・・・・・・・・・・・・・・・・・・・・・・・・・・・・・・・・・・・・・・ 1) Warning labels ・・・・・・・・・・・・・・・・・・・・・・・・・・・・・・・・・・・・・・・・・・・・・・・・・ 2) Important safety points ・・・・・・・・・・・・・・・・・・・・・・・・・・・・・・・・・・・・・・・・・・・ 2, MOWER Controls and Features ・・・・・・・・・・・・・・・・・・・・・・・・・・・・・・・・・・・ 3, How to Assemble Machine・・・・・・・・・・・・・・・・・・・・・・・・・・・・・・・・・・・・・・・ 4, Before Operation・・・・・・・・・・・・・・・・・・・・・・・・・・・・・・・・・・・・・・・・・・・・・・・・ 5, How to Operate ・・・・・・・・・・・・・・・・・・・・・・・・・・・・・・・・・・・・・・・・・・・・・・・・・・ 1) How to start and stop the engine ・・・・・・・・・・・・・・・・・・・・・・・・・・・・・・・・・・ 2) Operating the contorols for mowing・・・・・・・・・・・・・・・・・・・・・・・・・・・・・・・・... -
Page 4: 1, For Safe Operation
1, For Safe Operation Please read the safety and engine manuals carefully before operating this machine. Please wear protective clothing and equipment such as gloves, helmet, ear and eye protection, non-hanging shirt sleeves and pant legs. Please carefully inspect the machine to ensure that it works properly. 1) Warning labels The warning signs are attached to the machine to draw attention to particularly serious dangers. -
Page 5: Important Safety Points
2) Important safety points This machine is equipped with a high-powered engine and fast moving blades. Misuse of this machine can result in serious injury or death. Before using this machine, please be sure to read these instructions and understand and obey the following warnings. ■Notes for the operator of this machine WARNING The operator of this machine should fully read these instructions. - Page 6 Please DO NOT modify the engine, as this could cause fire, malfunction or other ● accidents. Orec assumes no liability for accidents or injuries resulting from modification or addition to the machine. Any additions or modifications will also void warranty claims.
- Page 7 DO NOT use this machine on wet grass. It is easy to slip on wet grass, causing injury and ● accidents. Altering this machine in any way will void the warranty. ● Orec America Inc. will bear no responsibility for damage or injury caused by alterations or modifications.
- Page 8 ■Caution during operation DANGER During operation, blades, chains and belts are hidden by a cover, be sure to keep hands and feet ● well away. Touching these parts can cause serious injury such as the severing of hands and feet. WARNING During operation, the rotating blades come right to the edge of the blade cover.
-
Page 9: Important Message To Employers
■Using the machine on slopes WARNING When operating on slopes, serious accidents can be caused by operator slipping and the machine rolling over. Be especially careful when working in such areas and stop operating the machine immediately if you feel in any danger at all. DO NOT operate the machine on slopes of more than 15°. - Page 10 ■Maintenance DANGER Remove fuel when storing or transporting the machine. Accidents and damage can be caused ● by spilt or expired fuel. WARNING Be sure to switch off the engine and remove the spark plug cord before performing any ● inspection, adjustment or maintenance on this machine.
-
Page 11: 2, Mower Controls And Features
2. MOWER Controls and Features Note: The model shown in the figure below may looks slightly different from your machine. 3: BLADE CONTROL LEVER (p.20) 1: DRIVE CLUTCH LEVER (p.20) 2: BLADE SAFETY LOCK (p.20) 7: FRONT CUTTING HEIGHT ADJUSTMENT LEVER(S) 5: SPEED CHANGE (p.19) LEVER (p.20) - Page 12 This lever changes the drive speed. It can operate in three forward speeds: [1] [2] [3] To change speeds, release the drive clutch lever and move it to the desired position. GRH537Pro This lever changes the variable drive speed from 0 up to 4 mph.
-
Page 13: 3, How To Assemble Machine
3, How to Assemble Machine NOTICE Assembly should be done on a flat surface. ● This machine does NOT contain motor oil. Please fill with the proper motor oil after assembly. ● (pg.22) Dispose of the packaging materials in accordance with all federal, state, and local regulations. ●... - Page 14 ■ Install the Handle NUT SET, HANDLE SETTING BOLT HANDLE BRACE (M8) Insert the Hex. Bolt(M8x25) in to the HANDLE BRACE (M8X35) deck the inside. Slide handle brace on to hex. bolt MINI HEX. BOLT Hook the Handle pin into the hole at the (M8X25) HOOK Handle Brace.Insert the Handle Setting...
-
Page 15: 4, Before Operation
4, Before Operation Be sure to do a delivery inspection before operating the unit. ● Your safety is your responsibility. Correct preparation will significantly ● reduce your risk of injury. Read and understand this manual. Know what the controls do and how to operate them. ●... - Page 16 Check engine oil ● DIP STICK Use the dipstick to check the oil level. UPPER LEVEL When measuring with the dipstick, do not screw it in place. If the oil does not lie between the upper level and lower level, replenish to bring the oil to the upper level.
-
Page 17: 5, How To Operate
5, How to Operate 1) How to start and stop the engine (Please refer to the engine use manual) ■How to start the engine DANGER DO NOT start the engine in a confined space or in an area with insufficient ventilation. ●... - Page 18 ■How to stop the engine STOP Shift the throttle lever to the [Stop] position Shift the fuel valve to the [OFF] position. to stop the engine. WARNING DO NOT touch the hot engine immediately after switching off. ● Allow time for it to cool down as there is a burn danger...
-
Page 19: Operating The Contorols For Mowing
2) Operating the controls for mowing WARNING Confirm that the area around you is safe before driving the machine. ● ― Exercise sufficient caution when operating the machine on soft ground. If driving the machine alongside ditches or the edges of paths, there is a danger that the weight of the machine could cause the ground to collapse. -
Page 20: Operating The Controls For Mowing
LEVER Choose your desired speed Start the engine, then slide the throttle lever GR537Pro: 3 speeds. to the [HI] position. GRH537Pro: Vary the speed by sliding the speed change lever forward. BLADE CONTROL LEVER DRIVE CLUTCH LEVER BRADE SAFETY LOCK... -
Page 21: Safe Mowing Practices
■How to stop DRIVE CLUTCH LEVER BLADE CONTROL LEVER WARNING When you leave the machine, bring it to a flat Release the Blade Control Lever and ● area and turn the engine off If the machine the Drive Clutch Lever. The blade and drive will stop. -
Page 22: 6, Parts Inspection And Repair
Obstacles Use the side of the mower to cut close to large obstacles, such as fences or walls. If a blade hits something or the mower starts to vibrate, stop the engine immediately, disconnect the spark plug cap, and check for damage . Striking objects may damage the blades, bend the crankshaft, and/or break the mower deck or other components. - Page 23 WARNING This machine does NOT have the engine oil when it shipped out. ● Make sure proper amount of oil is in there. To always operate this machine in good condition, perform oil changes periodically. ● When performing inspection, replacement, or lubrication of oiled parts, place the machine on a ●...
- Page 24 ■HST Oil inspection , change and refill (GRH537Pro Only ) Replace oil after the first 50 hours of operation and after approximately every 100 hours thereafter. If you are unsure about how to change HST oil, please consult your purchasing dealer.
-
Page 25: Cleaning The Air Filter
2) Cleaning the air filter WARNING Be sure to clean the air filter periodically. A clogged air filter will not only cause an increase in ● output deficiency and fuel consumption but will also lead to an increase in exhaust gas temperature and the possibility of a fire. -
Page 26: Checking And Adjusting The Spark Plug
3) Checking and adjusting the spark plug Recommended Spark Plug: BPR5ES(NGK) or W16EPR-U(DENSO) Remove the spark plug with a plug wrench and clean away any carbon deposits on the electrodes with a wire brush. Wipe away any moisture if present. Replace the spark plug with a new one if the ceramic part has cracked or the electrodes have suffered extensive wear... -
Page 27: Adjusting Each Wire
5) Adjusting each wire WARNING Check that you are taking sufficient safety precautions when adjusting each type of wire by ● placing the machine on a flat, open surface with the engine switched off and the spark plug cord removed. Please verify that the machine moves properly after the adjustment. -
Page 28: Inspecting And Replacing Blades
6) Inspecting and replacing blades WARNING When inspecting or replacing the blade, always be sure to switch off the engine as there is a ● danger of injury. When having the blades replaced or repaired, always have any such work performed by a person ●... -
Page 29: 7, Regarding Long-Term Storage
7, Regarding Long-term Storage If you do not use the machine for more than 30 days, please carry out the following procedures for maintenance. If the machine is not stored properly, there is a danger of fuel spoilage, the machine failing to start, or other problems. -
Page 30: 8, Specifications
8, Specifications (Reference values) Name Lawn Mower Type GR537 Pro GRH537 Pro Total length × Total width × Total height 64.6 × 22.2 × 41.3 65.0 × 22.2 × 41.7 (Inch) (1640 × 564 × 1050) (1650 × 564 × 1060) Cutting width (Inch) 20.9 (530mm) 1.2----3.2 inch... -
Page 31: 11, Periodic Voluntary Inspection Table
11, Periodic Voluntary Inspection Table Neglecting inspection and maintenance is a cause of accidents and damage. Perform inspection referring to [Periodic voluntary inspection table] in order to always keep the machine functioning correctly. Perform annual inspection once a year and monthly inspection once a month, and starting checks every time you use the machine. - Page 32 Inspection Inspection Content freq. Cracking or deformity, Frame is not cracked or deformed. Nuts and Body mounting nuts and bolts are bolts have not fallen off. loose or have fallen off Cracking, deformity, Cover No cracking, deformity, corrosion. corrosion Damage, loosening, rattling When moving or loading, there is Levers of levers and wires, loss noticeable damage, loosening, rattling,...
-
Page 33: 12, Self Diagnosis Table
12, Self Diagnosis Table If any of the following effects occur, refer to the instruction manual and take the appropriate action. Effect Cause Treatment Grass is wet. Operate machine when grass is dry. Grass is too long. Raise the cutting height and cut Cut grass is not twice. -
Page 34: 13, Troubleshooting
13, Troubleshooting If the engine is defective, perform diagnosis by referring to the following table and then taking the appropriate action. Effect Cause Treatment Put the safety switch to the [start up] Safety switch is not in the [start up] positio position. -
Page 35: 14, Limited Warranty
14, LIMITED WARRANTY Terms and Conditions • Orec America, Inc. provides a limited warranty of two (2) years for residential users, one bold for commercial users, and one (1) year for rental companies, of its products against defects in workmanship and materials when said products are put to ordinary and normal use. The terms and conditions of the limited warranty are as set forth herein. • The second year of the residential warranty shall cover only parts and NOT service • Crawlers are guaranteed for one hundred eighty (180) days after initial purchase. This warranty covers defects in materials or workmanship only, and does not include damage to crawlers from normal use and other external factors. • The warranty shall commence from the date of purchase. This warranty is available only to the original purchaser, and is not transferable. • OREC reserves the right to inspect covered machines and parts in order to determine the validity of warranty claims • For the purposes of the above warranties “ordinary and normal use” does not include misuse, accidents, or damage due to inadequate maintenance. • Under this warranty, the responsibility of Orec America is limited to replacement or repair of defective parts at Orec America, or at an authorized Orec dealer. • Routine maintenance and adjustments, as defined by the manufacturer’s owners’ manuals, are the responsibility of the user and are not covered by the warranty. • Degradation or deterioration of the product due to everyday use are excluded from the warranty • Expendable components including but not limited to such as belts, blades, filters, spark plugs, bags, wheels hoses, cables, wires, brake pads and flappers, are excluded from the warranty. This warranty does NOT cover tire replacement or repair caused by punctures from outside objects, such as nails, thorns, stumps or glass. • During the warranty period, the warranty holder is responsible for equipment transportation charges, and transportation expenses needed to process the claim will not ... -
Page 36: Warranty Registration
• Under NO circumstances shall Orec America be liable for damages or expenses of any kind resulting from inappropriate use of its products. • Orec America shall NOT be responsible for incidental or consequential costs or damages resulting from defects in its machinery. Such excluded costs and damages may include : 1) Labor 2) Lost sales 3) Cost of replacement parts. • This warranty shall apply only to models sold within the United States and purchased from authorized dealers. Note: to request warranty service, please contact an authorized Orec dealer or refer to your owner’s manual for the proper procedure THIS WARRANTY GIVES YOU SPECIFIC LEGAL RIGHTS AND YOU MAY HAVE OTHER RIGHTS WHICH MAY VARY FROM STATE TO STATE. SOME STATES DO NOT ALLOW THE EXCLUSION OR LIMITATION OF INCIDENTAL OR CONSEQUENTIAL DAMAGES, SO THE ABOVE LIMITATIONS MAY NOT APPLY TO YOU. Warranty Registration Register your information within 30 days of purchase at http://www.orecamerica.com/warranty Warranty Claim Procedure Should this Orec product fail due to a defect in materials and/or workmanship, the owner should use the following procedure to make a warranty claim: 1) The owner must take the machine to the dealer from whom they purchased the machine or to an authorized Orec America dealer. 2) The owner must present the warranty registration sheet or the invoice or receipt received at time of purchase. 3) The warranty claim will be taken and verified by the Orec Dealer or distributor service manager and submitted to an Orec distributor. The dealer or distributors service manager will make a report and submit it to Orec America for consideration of Warranty. 4) Orec will research the claim and may request that parts be returned for further examination. Orec will report their decision to the distributor service manager or dealer from whom the claim was received. - Page 37 Orec Serial Plate (See owner’s manual) last OREC GR537/GRH537 is produced. However, even during the supply period, it may be necessary to consult with us when seeking the purchase particular parts. If you have a request for replacement parts after this period has passed, please consult with us for availability and prices.
Need help?
Do you have a question about the GRH537Pro and is the answer not in the manual?
Questions and answers