Table of Contents
Advertisement
INSTRUCTION MANUAL
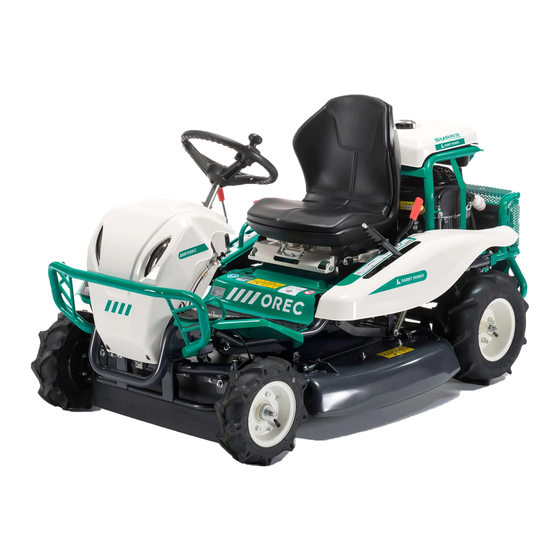
GRASSLAND MOWER RABBIT
RM882 / RM952 / RM982F
Read this instuction manual carefully before any use of the machine, keep it as a reference. For any
question about this manual, please report to your OREC dealer or to the distributor of your country.
OREC CO LTD
548-22 HIYOSHI HIROKAWA-MACHI YAME-GUN JAPON
http://www.orec-jp.com
Update: March 2019
Advertisement
Table of Contents

Subscribe to Our Youtube Channel
Related Manuals for OREC RABBIT RM882


Summary of Contents for OREC RABBIT RM882
- Page 1 RM882 / RM952 / RM982F Read this instuction manual carefully before any use of the machine, keep it as a reference. For any question about this manual, please report to your OREC dealer or to the distributor of your country. OREC CO LTD 548-22 HIYOSHI HIROKAWA-MACHI YAME-GUN JAPON http://www.orec-jp.com...
-
Page 2: Introduction
Use only the OREC genuine parts : “ non genuine ” parts will not assure you of a correct and safe working and non genuine parts are likely to make the guarantee null and void. Write the name and the serial number of your machine hereunder : MODEL :.............. -
Page 3: Table Of Contents
12 liters 12 liters Blade transmission belt belt belt Steering Rack and pinion Rack and pinion Reduction Blade engagement Belt tension Belt tension Belt tension Blade speed (tr/rpm) 1332 1332 1486 Width (mm) 1070 1070 OREC RM881 - © SAT 2021-05-06... -
Page 4: Check List
CHECK LIST NSTRUCTIONS TO THE DEALER The assembling, the installation and the first application of the machine is under the OREC dealer’s responsability. Read the instruction manual as safety measures. Check that all contents before delivery and at delivery check points specified in the following lists have been verified and possibly modified before delivering the machine to its owner. - Page 5 • Always use a chuck and bronze hammer when replacing or repairing on the pins and bolts at the end of rams, rod … etc in order to avoid the projection of metal fragments. OREC RM881 - © SAT 2021-05-06...
-
Page 6: Machine Description
Travel Lever (Forward & Reverse) Par- king brake pedal Front pedal (RM982F only) Right Guard Figure 2 FRONT RIGHT Blade enga- gement lever Front hood Cutting height lever Front bumper Left Guard Figure 1 OREC RM881 - © SAT 2021-05-06... -
Page 7: Safety Instruction Stickers
Always wear protective equipment maintenance against noise, dust Figure 3 Beware of rotating parts under Stay away from the machine Beware of thrown objects Keep hands and feet away from the shields rotating blades OREC RM881 - © SAT 2021-05-06... - Page 8 Beware of the toxic exhaust gas Beware of hot surfaces near engine Figure 4 Beware of rotating parts under Keep away from the machine Beware of thrown objects the shields Keep away hands and feet from rotating blades OREC RM881 - © SAT 2021-05-06...
-
Page 9: Controls
For the Grass cutting work, we suggest to use Low speed position to reduce the machine damage. On the Neutral position (N), HST gearbox is disengaged. It enable to push the machine without engine power. OREC RM881 - © SAT 2021-05-06... - Page 10 The front pedal (6, Fig 6b) is used to go forward the machine. The driving speed changes by the angle of using the pedal. If the brake pedal is pushed, speed control lever and front pedal move to neutral position. OREC RM881 - © SAT 2021-05-06...
- Page 11 The mower is delivered with the engine owner’s manual. Read the engine manual before use the machine. Pull up the adjust lever(1, Fig 8) and slide the seat to change the seat position. Release the lever, then seat position is locked. OREC RM881 - © SAT 2021-05-06...
- Page 12 The machine is equipped with a fuel cock. This fuel cock is opened when the lever is in the same direction as the fuel hose. The fuel cock is closed when it is turned across the fuel hose. (OPENED) (CLOSED) Figure 9 OREC RM881 - © SAT 2021-05-06...
-
Page 13: Operation
The best cutting speed depends on quantity and the density of the grass. Usually the machine should mow between 3 and 8 km/h. A tall grass should be cut slowly and a low grass can be cut faster. OREC RM881 - © SAT 2021-05-06... - Page 14 Check the worn and damaged parts, replace new parts as required ⚫ Do the normal maintenance refer accrding to the maintenance chart. ⚫ The machine should be stored in a dry and protected area ⚫ Remove ignition key. OREC RM881 - © SAT 2021-05-06...
-
Page 15: Maintenance Operations
3. With the HST unit on a flat surface, refill to the upper limit mark with the recommended oil. (Refill same oil if possible.) When oil is added, please pay high attention not to mix dust with oil. Tighten the cap securely to prevent leakage. OREC RM881 - © SAT 2021-05-06... - Page 16 And then, check if there is no bubbles in the HST oil tank. After working, check if the oil level reaches "High level position" in oil tank. If not, add oil up to "High level position" in oil tank.(figure 14) OREC RM881 - © SAT 2021-05-06...
- Page 17 When the machine is used on slopes, work with the fuel tank is half to avoid fuel leaking. Remove flammable materials : Remove flammable materials because it might cause fire. Espacially near hot parts like muffler or engine. OREC RM881 - © SAT 2021-05-06...
- Page 18 Check that lateral guards and shields are fixed. Lower Level Battery Electrolyte battery level (Figure 20) Check that electrolyte level is between the upper and lower level. Add distilled water if necessary. Figure 20 OREC RM881 - © SAT 2021-05-06...
- Page 19 RONT LIGHT Switch on the front light on the dash board. DANGER Be carefull when maintaining the battery. Avoid flames, and sparks. Always wear gloves and glasses. Wash with water if touch electrolyte. Figure 21 OREC RM881 - © SAT 2021-05-06...
- Page 20 The cutting blade can cut the use’s hand. Always wear gloves when holding blades. CAUTION Use only the OREC original parts : “ non genuine ” parts will not assure you of a correct and safe working. It is likely to make the warranty null and void.
- Page 21 Do not blow at high pressure, and maintain a safe distance between the air nozzle and the cartrige to avoid damage on it. Check when reinstall the cartridge that dusty air is obliged to go inside engine by the cartridge. OREC RM881 - © SAT 2021-05-06...
- Page 22 - Check for water and dust in the fuel cartridge filter cock (Figure 9). Clean if needed the filter inside the fuel cock. - Check for water and dust in the fuel cartridge filter (Figure 32). Replace the filter if it is dirty. OREC RM881 - © SAT 2021-05-06...
- Page 23 Diff lock lever adjustment : Adjust the control rod (B, Figure 35) until the lever has a free play of 1 to 3 mm before activate the diff lock. Figure35 OREC RM881 - © SAT 2021-05-06...
- Page 24 Blade clutch control Check the adjustment of the wire lever Blade brake Check the adjustment Blade belt Check they tensionned and in good condition Engine Refer to engine manual OREC RM881 - © SAT 2021-05-06...
-
Page 25: Breakdowns And Solutions
441,3 to 480,5 617,8 to 657,1 176,5 to 205,9 421,7 to 451,1 539,4 to 578,6 608 to 647,2 843,4 to 882,6 235,4 to 264,8 539,4 to 568,8 706,1 to 745,3 784,5 to 823,8 1098,4 to 1137,6 OREC RM881 - © SAT 2021-05-06... -
Page 26: Ec Conformity Declaration
Right side 60° from the axle of the steering wheel 0,32 m/s² 1,67 m/s² Left 60° from the axle of the steering wheel 0,68 m/s² 1,70 m/s² On the operator's seat 0,99 m/s² 1,00 m/s² OREC RM881 - © SAT 2021-05-06... -
Page 27: Ec Conformity Declaration
Right side 60° from the axle of the steering wheel 0,53 m/s² 1,39 m/s² Left 60° from the axle of the steering wheel 0,91 m/s² 0,83 m/s² On the operator's seat 0,42 m/s² 0,68 m/s² OREC RM881 - © SAT 2021-05-06... -
Page 28: Ec Conformity Declaration
Right side 60° from the axle of the steering wheel 0,65 m/s² 1,63 m/s² Left 60° from the axle of the steering wheel 0,61 m/s² 1,63 m/s² On the operator's seat 0,80 m/s² 0,95 m/s² OREC RM881 - © SAT 2021-05-06... -
Page 29: Limited Warranty
OREC. 2° each part concerned by a guarantee claim must be returned to OREC’s in order to be inspected, repaired or replaced. The part(s) must be returned with freight prepaid and must be accompanied with a proof of the purchase.
Need help?
Do you have a question about the RABBIT RM882 and is the answer not in the manual?
Questions and answers
Cut out safety device too sensatuve