Table of Contents
Advertisement
TROJAN
®
MY SPACE MY TIME
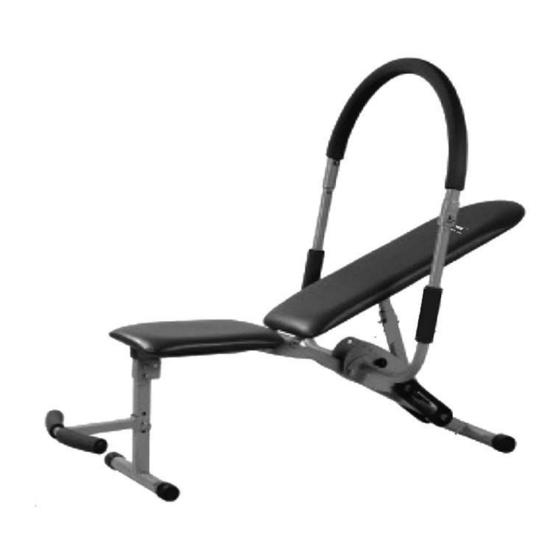
AB BURNER 200
EXERCISE BENCH
AB BURNER 200 EXERCISE BENCH
CARE INSTRUCTION AND ASSEMBLY MANUAL
CAUTION
READ ALL PRECAUTIONS AND
INSTRUCTIONS IN THIS MANUAL
BEFORE USING THIS EQUIPMENT
KEEP THIS MANUAL FOR
FUTURE REFERENCE
0861 876526
0861 TROJAN
WARRANTY
www.trojanhealth.co.za
Advertisement
Table of Contents

Related Manuals for Trojan AB BURNER 200


Summary of Contents for Trojan AB BURNER 200
- Page 1 TROJAN ® MY SPACE MY TIME AB BURNER 200 EXERCISE BENCH AB BURNER 200 EXERCISE BENCH CARE INSTRUCTION AND ASSEMBLY MANUAL CAUTION READ ALL PRECAUTIONS AND INSTRUCTIONS IN THIS MANUAL BEFORE USING THIS EQUIPMENT KEEP THIS MANUAL FOR FUTURE REFERENCE...
-
Page 2: Table Of Contents
INDEX PAGE SAFETY INSTRUCTIONS PRE ASSEMBLY CHECK LIST ASSEMBLY STEPS FITNESS TIPS AND TECHNIQUES CONDITIONING GUIDELINES WARMUP AND COOLDOWN EXERCISE PROGRAMS FREQUENTLY ASKED QUESTIONS PARTS LIST 10. EXPLODED DRAWING 11. TROJAN 1 YEAR LIMITED WARRANTY 12. TROJAN REPAIRS PROCEDURE 10171-2... -
Page 3: Safety Instructions
1. SAFETY INSTRUCTIONS It is the sole responsibility of the purchaser of TROJAN products to read the owner’s manual, warning labels and instruct all individuals, on proper usage of the equipment. Understanding each and every warning to the fullest is important. If any of these instructions or warnings are unclear please contact Trojan Customer Services on 0861 876526 (0861 Trojan), within the Republic of South Africa. - Page 4 SAFETY INSTRUCTIONS INSPECTION • Do not use or permit use of any equipment that is damaged or has worn or broken parts. For all TROJAN equipment use only replacement parts supplied by TROJAN. • Always make sure that all nuts and bolts are tightened prior to each use.
-
Page 5: Pre Assembly Checklist
2. PRE ASSEMBLY CHECKLIST Thank you for choosing the TROJAN AB BURNER 200 . We take great pride in producing this quality product and hope it will provide many hours of quality exercise to make you feel better, look better and enjoy life to its fullest. - Page 6 3. ASSEMBLY STEP STEP 1: ILLUSTRATION 1 • Open the box and place all parts on the floor. STEP 2: ILLUSTRATION 2 • First attach four Clips (18a) onto the Resistance Pin (19) of the Main Frame (10). Now attach the Rubber Resistance Belts followed by the remaining four Clips (18a).
-
Page 7: Assembly Steps
3. ASSEMBLY STEP STEP 5: ILLUSTRATION 5 • Attach the Left and Right Coupling Unit (3, 4) to the main Frame (10) using Bolt (19a) and Nut (19b). • Fasten Securing Pin (12) STEP 6: ILLUSTRATION 5 • Fold out the Front Foot Support (20) and fasten the Securing Pin (20b) in the hole. -
Page 8: Fitness Tips And Techniques
4. FITNESS TIPS AND TECHNIQUES AEROBIC EXERCISE Aerobic exercise is any sustained activity that sends oxygen to your muscles via your heart and lungs. Aerobic exercise improves the fitness of your lungs and heart - your body’s most important muscle. Aerobic exercise fitness is promoted by any activity that uses your large muscles -arms, legs, or buttock, for example. -
Page 9: Conditioning Guidelines
5. CONDITIONING GUIDELINES How you begin your exercise program depends on your physical condition. If you have been inactive for several years, or are severely overweight, you must start slowly and increase your time on the equipment; a few minutes per workout. Initially, you may be able to exercise only for a few minutes in your target zone, however, your aerobic fitness will improve over the next six to eight weeks. -
Page 10: Warmup And Cooldown
6. WARM-UP AND COOL-DOWN WORKOUT GUIDELINES Each workout should include the following three parts: A warm-up, consisting of 5 to 10 minutes of stretching and light exercise. A proper warm-up increases your body tem- perature, heart rate, and circulation in preparation for exercise. Training zone exercise, consisting of 20 to 30 minutes of exercising with your heart rate in your training zone. -
Page 11: Exercise Program
Your own body weight forms the counterweight, which means you do not need all sorts of loose parts and weights to generate counterweight. In this way your waist gets into shape quite easily. The AB Burner 200 has been designed in such a way that you cannot cheat, every move counts. - Page 12 7. EXERCISE PROGRAM 3. Oblique Crunch Left Hip Position: Lie down on the AB Burner 200, your legs turned over your left hip. Make sure you lie comfortably with your hands loosely on the hand rests. Put your feet on the floor or on the foot rest in front of you.
-
Page 13: Frequently Asked Questions
8. FREQUENTLY ASKED QUESTIONS Q1. My moveable parts are not moving freely? Do not over tighten any bolt or nut which has bushes and moveable parts Q2. My bench is not stable Ensure that all bolts are tightened and that all the end caps are on legs. Q3. -
Page 14: Parts List
9. PARTS LIST Part Description Part Description Securing Dowel Half Round Arch (Handle) Guard Coupling Unit Round Knob Elbow Foot Support – Horizontal Elbow 15a Rubber Plate U Pin 15b Foot Support Cover Plate Back Support 15c Round Protective Rubber Rail Pin to Adjust Height Bolt... -
Page 15: Exploded Drawing
10. EXPLODED DRAWING 10171-15... -
Page 16: Trojan 1 Year Limited Warranty
The Consumer does not need to return the product to the store. The Consumer shall phone the Trojan hotline on 0861 876526 (0861 Trojan) and the Manufacturer’s authorized agent will at its discretion either repair the item at the Consumer’s residence or collect and repair the item at their premises. -
Page 17: Trojan Repairs Procedure
12. TROJAN REPAIRS PROCEDURE 1. Procedure for repairs Should you experience any faults or breakdowns on your Trojan equipment, please adhere to the following procedure to have the fault rectified speedily and professionally. • Do not return the product to the store* Call 0861 876526 (0861 Trojan) to log the faulty product (under warranty or out of warranty) •...
Need help?
Do you have a question about the AB BURNER 200 and is the answer not in the manual?
Questions and answers