SciCan statim 2000 G4 Operator's Manual
Cassette autoclave
Hide thumbs
Also See for statim 2000 G4:
- Operator's manual (63 pages) ,
- Service manual (275 pages) ,
- Setting up and using (56 pages)

Related Manuals for SciCan statim 2000 G4


Summary of Contents for SciCan statim 2000 G4
- Page 1 statim 2000/5000 G4 Cassette autoClave ™ • Operator’s Manual • Manuel de l’utilisateur • Manuale per l’operatore • Manual del Operador • 操作手册...
-
Page 2: Table Of Contents
Retrieving Cycle Information Using Disclaimers the Touchscreen Drying Performance Retrieving Cycle Information Using Unit Overview - STATIM 2000 G4 the USB Data Back Up Unit Overview - STATIM 5000 G4 Cycle Printout Overview Touchscreen Overview 7. Retrieving a Remote Access Code ... 39. - Page 3 STATIM Cassette Autoclave and STATIM are registered trademarks and 88299 Leutkirch STAT-DRI, Your Infection Control Specialist, and DriTec logos are trademarks of SciCan Ltd. All other trademarks referred to in this manual are the property of their GERMANY respective owners.
-
Page 4: Introduction
1 Introduction STATIM 5000 G4 STATIM 2000 G4 Congratulations on selecting the STATIM Cassette Autoclave. The STATIM is a compact, ® countertop unit that is suitable for steam sterilization. This STATIM G4 Cassette Autoclave is fully compliant with EN13060. The details of installing, operating and maintaining your STATIM are all contained within this operator’s manual. Please read these instructions before operating this unit and keep... -
Page 5: Important Information
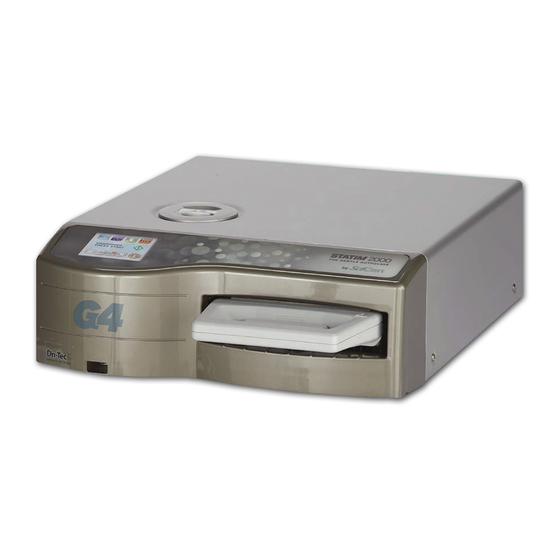
2 Important Information 2.1 Disclaimers Use only steam-process distilled water in your STATIM. Deionized, demineralized, or specially filtered water should not be used. Never use tap water. Do not permit any person other than certified personnel to supply parts, service or maintain your STATIM. SciCan shall not be liable for incidental, special or consequential damages caused by any maintenance or services performed on the STATIM by a third party, or for the use of equipment or parts manufactured by a third party, including lost profits, any commercial loss, economic loss, or loss arising from personal injury. Never remove the cover of the unit and never insert objects through holes or openings in the cabinetry. Doing so may damage the unit and / or pose a hazard to the operator. IMPORTANT: Follow local guidelines governing verification of the sterilization procedure. Drying Performance The STATIM 2000 G4 and 5000 G4 have been designed to provide a complete sterilization solution for your unwrapped and wrapped instrument needs: rapid sterilization balanced with rapid drying, by using the SciCan Dri-Tec Drying Technology. - Page 6 2 Important Information 2000 G4 2.2 STATIM 2000 G4 — Unit Overview Figure 1 LCD touchscreen reservoir cap/ water filter USB port power switch power cable port leveler feet Ethernet port exhaust tube port compressor cassette RS232 port biological filter The following symbols A situation which A potential hazard Important...
- Page 7 If any of the items are missing, contact your dealer immediately. Cassette Tray and Lid Power Cord Unwrapped Operator’s Manual Instrument Rack Exhaust Tube Waste Bottle Bottle Lid Fitting STAT-DRI PLUS P.C.D. + 20 SciCan Tube Mounting Hardware Sterilization Emulators Rack with Drying Plates USB Memory Stick Page 7...
-
Page 8: Touchscreen Overview
2.4 Touchscreen Overview Hollow Unwrapped cycles Wrapped cycles Rubber / Plastic cycles Air Dry Only Display Start button mm/dd/yyyy hh:mm:ss SELECT A CYCLE Stop button Figure 3 Network connectivity on/off (turns green when active) USB storage device connected/not connected (turns green when active) Water level and quality status Cassette properly inserted... -
Page 9: Set-Up Menu Overview
2.5 Set Up Menu Overview Setup Time --:-- Setup Time 14:02 Date Setup Time Date --/--/-- DST On/Off DD/MM/YY 01/01/2011 Date Time DST On/Off Date DST On/Off mm/dd/yyyy hh:mm:ss DST On/Off SELECT A CYCLE Default Setup Yyyy/mm/dd xxxxx OK Yyyy/mm/dd xxxxx OK Yyyy/mm/dd xxxxx OK Yyyy/mm/dd xxxxx OK Setup... - Page 10 2.5 Set Up Menu Overview 2.5 Set Up Menu Overview con’t con’t Setup End of line CR/LF Setup End of Line CR/LF Default Printer user ° char Setup End of Line CR/LF Printer user ° char Process Enforced Printer user ° char End of Line CR/LF Process Enforced Printer user °...
-
Page 11: Setting Up Your Statim
3 Setting up your STATIM 3.1 Positioning and Powering your Unit Positioning your Unit There are several factors that may affect the performance of your STATIM. Please review these factors, and select a suitable location in which to install the unit. • Temperature and Humidity Avoid installing your STATIM in direct sunlight or close to a heat source (e.g. vents or radiators). The recommended operating temperatures are 15-25˚C with humidity of 25-70%. -
Page 12: Levelling Your Unit
3 Setting up your STATIM 3.2 Levelling your Unit When placing your unit on a counter top, ensure it is stable and that all four feet are securely in contact with the counter surface. This will prevent the unit from moving freely. Next, use the level indicator bubble function in the settings menu to adjust the three leveler feet so that the unit drains properly. To access the level indicator bubble from the main screen, follow these steps: 2. Scroll to and select. Level 3. Adjust the leveler feet to move the bubble. Position the bubble in the bottom right quadrant of the target. This will ensure that the unit drains properly. -
Page 13: Connecting The Waste Bottle
3 Setting up your STATIM 3.3 Connecting the Waste Bottle The waste bottle is used to collect the wastewater after it has been converted to steam and then drained from the cassette. To connect the waste bottle to the STATIM, follow these steps (see Figure 4): 5000 G4 1. Insert the exhaust tube into the fitting on the back of the unit and pull gently to confirm a tight fit. 2. Cut the tube to length and slide the waste bottle fitting into place. 3. Place the free end of the tube into the hole in the lid of the waste bottle and hand-tighten the fitting. Do not coil the exhaust tube. 4. Unscrew the lid and copper condenser coil assembly from the waste bottle. -
Page 14: Filling The Water Reservoir
3 Setting up your STATIM 3.4 Filling the Water Reservoir When filling the reservoir, ensure you only use steam processed distilled water containing less than 5 ppm total dissolved solids (having conductivity of less than 10 µS / cm). The impurities and additives in other water sources will cause an error reading on the LCD. To fill the reservoir, follow these steps (see Figure 5): 1. -
Page 15: Setting The Time
3 Setting up your STATIM 3.6 Setting the Time 2. Scroll to and select. Time From the TIME screen, use the keypad to set the time. Press to save and to return to the Setup menu. To change your unit to display 12-hour time format (24-hour time format is the default setting), go to the Setup menu and use to scroll to TIME 12/24, select it and toggle to 12. -
Page 16: Assigning The Unit Identifier Number
3 Setting up your STATIM 3.9 Assigning Unit Identifier Number 2. Scroll to and select. Unit No Using the keypad, select a maximum of 3 digits to be used as the unit’s identifier number. Press to save and to return to the Setup menu. 3.10 Creating a User ID and PIN 2. Scroll to and select. User From the SETUP PIN screen, you can assign up to four PINs. Select one of the User icons to assign a PIN. -
Page 17: Changing The Touchscreen Display Themes
3 Setting up your STATIM 3.12 Changing the Touchscreen Display Themes Your STATIM G4 touchscreen themes (i.e., icons and background colours) can be changed to one of the preset options or you can upload additional themes, as they become available from SciCan, using the USB port. To change themes follow these steps: 2. Scroll to and select. Themes From here, you can either select Change Theme... -
Page 18: Adjusting The Screen Contrast
3 Setting up your STATIM 3.14 Adjusting the Screen Contrast The STATIM G4 touchscreens are calibrated for the lighting condition of most sterilization centres. Should you need to adjust the contrast for your office, follow these steps: 2. Scroll to and select. LCD Contrast to scroll through your contrast options. When you have found the contrast you require, press it. Press to save and return to the Setup menu. 3.15 Turning the Button Sound ON or OFF The STATIM G4 is preset to beep when a button is pressed. If you would like to turn the button sound off, follow these steps:... -
Page 19: Setting Up And Using Your Statim G4 Web Portal
3 Setting up your STATIM 3.17 Setting up and Using your STATIM G4 Web Portal The STATIM G4 web portal is a direct connection to the STATIM on your local area network. It is protected by your firewall and not accessible to outside users (unless they have a Remote Access Code. For more information, see Section 7. Retrieving a Remote Access Code). The web portal provides real-time cycle information and archived sterilization records unique to this unit. From here, you can print reports, set up email notification and search cycle histories. To set up your web portal follow the instructions available on the portal’s ‘HELP’ tab. 3.18 Connecting to a Network The STATIM G4 has a 10/100Base-T Ethernet port located at the back of the unit. -
Page 20: Connecting To A Wireless Network
NOTE: Connection time will vary depending on your network speed, and making an initial connection can take longer. 3.19. Connecting to a Wireless Network The STATIM G4 can be configured for wireless use by connecting the Ethernet port to an external wireless bridge / access point. SciCan currently recommends the use of the D-Link® DAP-1522 Xtreme N® Duo Wireless Bridge. Contact your network administrator to learn more about setting up a wireless bridge. 3.20 Reserving an IP Address for your STATIM When your STATIM is connected to a router on your network, it is assigned a unique IP address. If the connection between your STATIM and the router is lost (e.g. -
Page 21: Preparing Unit For Use
3 Setting up your STATIM NOTE: Accessing this screen will vary for each router, please consult your router’s User Manual or contact your network administrator for more detailed instructions. SciCan currently recommends D-Link DIR-615 Wireless N router. 2. Use the ‘DHCP/IP/Address Reservation’ function to assign your STATIM a ‘permanent’ IP address. -
Page 22: Using Cassettes And Preparing Instruments
1. Align the hinge tab on the cassette lid with the hinge slot on the rear of the bottom tray. 2. As you begin to close the lid, the hinge tab and slot will engage. Inserting the Cassette into the STATIM 2000 G4: 1. Place the end of the cassette into the unit. 2. Gently push inward until you hear a “click” sound and check the LCD icon for change from Never force the cassette into the STATIM as the interior components could be damaged. -
Page 23: Using The Statim 5000 G4 Cassette
4 Using Cassettes and Preparing Instruments 4.2 Using the STATIM 5000 G4 Cassette When removing the cassette after a cycle, exercise caution as the metal areas will be hot and the cassette may contain hot steam. Opening the Cassette: 1. Push the carry handle into the open position. 2. Put your hands on either side of the cassette handle 3. Insert your forefingers in the slots and place your thumbs on the thumb pads. -
Page 24: Preparing And Loading Instruments
4 Using Cassettes and Preparing Instruments Removing the cassette: 1. Grasp the cassette handle with one hand and pull out from the unit. 2. As the cassette emerges from the unit, grasp the carry handle with your free hand and lift it upwards. 3. Pull the cassette clear from the unit and set down on a firm surface. - Page 25 /or storage to maintain sterility. Care must be taken to ensure that the combined weight of the loaded bags does not exceed 1.5 kg (3.3 lbs) for STATIM 5000 G4 or 1.0 kg (2.2 lbs) for STATIM 2000 G4. For STATIM 2000 G4: The use of cloth wraps in the STATIM is not recommended. SciCan recommends the use of paper / paper and plastic / paper autoclave bags manufactured in accordance to EN 868. Loosely pack instruments in the bags to allow steam penetration to all instrument surfaces. For STATIM 5000 G4: The instrument rack fitted with a maximum of 10 drying plates will hold 10 autoclave bags.
-
Page 26: Using Biological And Chemical Indicators
/ recommendations. Note for Ophthalmology Use In the field of ophthalmology, proper wrapping or pouching of surgical instruments will reduce the exposure of instruments to any process residues during the sterilization cycle. Due to the highly sensitive nature of some types of surgery (particularly in ophthalmology), SciCan recommends that all instruments be routinely packaged or wrapped and processed through the wrapped cycle of the sterilizer. This practice is the suggested approach for the majority of sterile surgical procedures and is referenced in most leading infection control publications and guidelines. -
Page 27: Instrument Weight Guide
4 Using Cassettes and Preparing Instruments 4.6 Instrument Weight Guide Instrument Typical Instrument Weight Scissors 30 g / 0.96 oz Dental scalers 20 g / 0.64 oz Forceps 15 g / 0.48 oz Dental handpiece 40 to 60 g / 1.29 to 1.92 oz Wrapped instrument rack 260 g / 8.35 oz Unwrapped instrument rack 225 g / 7.23 oz Suction cannula 10 g / 0.32 oz Plastic mouth mirror 8 g / 0.25 oz Impression tray 15 to 45 g / 0.48 to 1.45 oz Plastic x-ray positioning ring 20 g / 0.64 oz... -
Page 28: Using Your Statim
5 Using your STATIM Before using your STATIM for the first time, make sure the reservoir is full and the pump is properly primed. Refer to sections 3.4 Filling the Reservoir and 3.5 Priming the Pump for detailed instructions. 5.1 Selecting a Cycle The STATIM 2000 G4 and 5000 G4 have seven sterilization cycles, each designed to sterilize using the parameters specified. Each cycle can be selected by pressing the UNWRAPPED, WRAPPED or RUBBER / PLASTIC cycle buttons. The types of instruments, sterilization requirements and a graph depicting each cycle characteristics are described over the following pages. Load size requirements are listed in the ‘Test Protocol’ section. 5.1.1 Unwrapped Cycles The STATIM 2000 G4 and 5000 G4 feature two 134˚C type S and one 134˚C type N UNWRAPPED sterilization cycles. At the end of the cycle’s sterilization phase, air drying... - Page 29 5 Using your STATIM 5.1.1 Unwrapped Cycles cont’d HOLLOW UNWRAPPED (S) 134˚C / 3.5 min HOLLOW UNWRAPPED (S) 134˚C / 18 min 100˚C / 101 kPa Sterilizing 134˚C / 304 kPa - 3 purges (Conditioning) 138˚C / 341 kPa peak at 133˚C / 295 kPa Venting vent to 115˚C / 169 kPa Pressurizing Air Drying (Type S)
- Page 30 5 Using your STATIM 5.1.2 Hollow Wrapped Cycles The STATIM 2000 G4 and 5000 G4 feature two WRAPPED 134°C type S sterilization cycles.These cycles are used to sterilize solid and hollow metal instruments which have been sealed in paper/paper or paper/plastic autoclave bags. HOLLOW WRAPPED (S) 134˚C / 3.5 min HOLLOW WRAPPED (S) 134˚C / 18 min From the main menu, press the WRAPPED icon to scroll through the available cycles. HOLLOW WRAPPED HOLLOW WRAPPED Press START Press START Once the desired cycle has been selected, press the START button. The STATIM G4 will remember the last Hollow Wrapped cycle type selected and will display it when you select the Hollow Wrapped icon. NOTE: A Process Challenge Device (PCD) is available for validation of HOLLOW WRAPPED (S) 134°C/3.5 min cycle. HOLLOW WRAPPED (S) 134˚C / 3.5 min HOLLOW WRAPPED (S) 134˚C / 18 min 100˚C / 101 kPa Sterilizing 134˚C / 304 kPa - 6 purges (Conditioning)
- Page 31 5 Using your STATIM 5.1.3 Rubber and Plastics Cycles The STATIM 2000 G4 and 5000 G4 feature two 121°C type S sterilization cycles used to sterilize solid unwrapped instruments constructed of metal or the materials listed in section ‘Preparing and Loading Instruments’. RUBBER / PLASTIC (S) 121˚C / 15 min RUBBER / PLASTIC (S) 121˚C / 30 min From the main menu, press the Rubber / Plastics icon to scroll through the available cycles. RUBBER / PLASTICS RUBBER / PLASTICS Press START Press START Once the desired cycle has been selected, press the START button. The STATIM G4 will remember the last Rubber / Plastics cycle type selected and will display it when you select the Rubber / Plastics icon. RUBBER / PLASTIC (S) 121˚C / 15 min RUBBER / PLASTIC (S) 121˚C / 30 min 100˚C / 101 kPa Sterilizing 121˚C / 205 kPa - 3 purges (Conditioning)
- Page 32 5 Using your STATIM 5.1.4 Air Dry Only Cycle This is not a sterilization cycle. The load is considered sterile after the successful completion of the sterilization phase of the cycle. The Air Dry phase starts automatically after each sterilizing cycle and runs for 60 minutes. Air drying may be interrupted by pressing the STOP button anytime after the sterilization phase of the cycle is complete. To ensure that the contents of the cassette are dry, the cycle should run for the full 60 minutes. Dryness is important for unwrapped instruments to prevent corrosion. For wrapped instruments, a dry wrap is required to maintain sterility.
-
Page 33: Running A Cycle
5 Using your STATIM 5.2 Running a Cycle To operate each cycle, follow these steps. 1. Turn the power switch at the back of the unit to ON. At start up, the unit will display the main menu. mm/dd/yyyy hh:mm:ss SELECT A CYCLE 2. Press the appropriate cycle button on the touchscreen to scroll through the available cycles. The display will show the cycle name and parameters. The STATIM G4 features seven different cycles: HOLLOW UNWRAPPED RUBBER / PLASTIC (S) - Page 34 5 Using your STATIM 5.2 Running a Cycle cont’d When the cycle starts, the cycle parameters are displayed at the top of the screen. Below it is the current phase. The unit’s cycle counter is displayed at right. A graph charts the progress of the cycle while current cycle information is displayed at right. As the cycle is running, various sounds will be heard. This is the normal functioning of the unit.
-
Page 35: Stopping A Cycle
5 Using your STATIM 5.2 Running a Cycle cont’d The buzzing noise during the air drying stage is the compressor operating. The air drying phase of the cycle may be interrupted at any time by pressing the STOP button. When the automatic 60-minute air drying stage is finished and the sterilization cycle is successful, the touchscreen will display a Cycle Complete message and the reminder tone will sound until the STOP button is pressed or the cassette is removed from the unit. Be careful. The metal parts will be hot and the cassette may contain hot steam. -
Page 36: Storing And Retrieving Cycle Information
6 Storing and Retrieving Cycle Information The STATIM G4 has an internal Data Logger capable of storing all cycle data on every cycle, whether successful or incomplete, for the lifetime of the unit. You can access this information through the touchscreen, through the web portal, using a USB storage device or by attaching a printer. 6.1 Retrieving Cycle Information Using the Touchscreen From the main menu, press the USB icon. The unit will record the last five successful cycles and the last five incomplete cycles. -
Page 37: Cycle Printout Overview
6 Storing and Retrieving Cycle Information 6.3 Cycle Printout Overview – Cycle with Stop button pressed Model: STATIM 5000 Software: S5S2R706 STATIM 5000 S5S2R706 Serial Number: 101010B01222 SN 101010B01222 Unit Identifier: Autoclave has UNIT # : been set up as number 000 WATER QUALITY Quality of water in reservoir 6.7 uS / 4.2 ppm Cycle counter: the number... - Page 38 6 Storing and Retrieving Cycle Information 6.3 Cycle Printout Overview – Full Cycle Model: STATIM 5000 Software: S5S2R706 STATIM 5000 S5S2R706 Serial Number: 101010B01222 SN 101010B01222 Unit Identifier: Autoclave has been set up as number 000 UNIT # : WATER QUALITY Quality of water in reservoir 0.5 uS / 0.3 ppm Cycle counter: the number CYCLE NUMBER...
-
Page 39: Retrieving A Remote Access Code
7 Retrieving a Remote Access Code To allow access to external persons to gain remote access to the STATIM G4, you will need to provide a security token to the person requesting access. To obtain this code follow these steps: 2. Scroll to and select. Remote Access Press and wait a few seconds for a security token to be provided. Enable Once displayed, provide the token to the person requiring Remote Access. NOTE: This token will be valid for only 2 hours, at which time the remote session will automatically disconnect. Should you wish to end the session earlier, select from the same menu to disable the token. -
Page 40: Printing Cycle Information
Baud Rate End of Line CR/LF Printer User Char. 8.3 External Printers and Specifications Suggested External End Of Line CR/LF Serial Port Bitrate Printer user ° char Printers by SciCan Epson CR/LF 9600 248 [0xF8] TM-U220D(C31C515603) Citizen 9600 IDP-3110-40 RF 120B... -
Page 41: Maintaining Your Statim
9. Maintaining your STATIM 9..1 Cleaning the Cassette Keeping the STATIM cassette clean is good clinical practice and assists in the proper functioning of the unit. SciCan recommends that the interior surface be cleaned at least once a week. Cleaning the inside of your cassette is very important if you regularly sterilize lubricated instruments. 1. Use dishwashing soap or a mild detergent that does not contain chlorine. 2. Scrub the inside of the cassette with a cleaning pad designed for use with Teflon™ coated surfaces. 3. After scouring, rinse thoroughly with water to remove all traces of the detergent. -
Page 42: Changing The Air Filter And The Bacteria
9. Maintaining your STATIM 9..5 Changing the Air Filter and the Bacteria Retentive Filters The filters should be replaced every six months or after 500 cycles to maintain an adequate supply of clean air during the air drying cycle. To change the bacteria retentive air filter on the STATIM 2000 G4 and 5000 G4, follow these steps: 1. Power the STATIM OFF. 2000 G4 2. Disconnect tube A from the bacteria retentive filter and remove the filter from the filter bracket . As you remove the filter from the bracket, note the orientation of the arrow mark on the filter. -
Page 43: Replacing The Cassette Seal
9..6 Replacing the Cassette Seal To ensure optimum performance of your STATIM cassette autoclave, change the cassette seal every 500 cycles or every six months, whichever comes first. Replacement seals are available from SciCan (order number 01-100028S for the STATIM 2000 G4 and 01-101649S for the STATIM 5000 G4). To change the cassette seal, follow these steps: Place the cassette lid and the new seal on a clean work surface. Examine the position of the old seal in the cassette lid and arrange the new seal in the same orientation, next to the lid. -
Page 44: Maintaining Fluid Levels
9. Maintaining your STATIM 9..7 Maintaining Fluid Levels 1. The water reservoir level is continually monitored by your STATIM. If the reservoir is low, a red X will appear on the water icon of the cycle select screen. Press the icon to go to the next screen to confirm that it is a water level issue and not a water quality issue. will appear next to WATER LEVEL. 2. If the reservoir is low, a 3. To fill the reservoir, remove the cap from the top of the unit and fill the reservoir. -
Page 45: Preventative Maintenance Schedules
• Drain after each working day. Waste Bottle • Empty the waste bottle every time you refill the reservoir. Fill with tap water up to MIN line. • You can also add some chlorine-free disinfectant. Unit • To ensure optimal performance of the STATIM autoclave, SciCan recommends that a full sterilization cycle, which must include the full Air Drying phase, be completed at the end of each day of use. This is especially important when the unit is left idle over the weekend or for any extended period of time. Cassette • W ash the interior of the cassette with chlorine-free dishwashing detergent or soap. -
Page 46: Shipping The Unit / Draining The Reservoir
9. Maintaining your STATIM Technician Cassette • C heck the tray, lid and seal for damage. Replace if necessary. Biological Filter • I nspect the biological filter for moisture. Solenoid Valve • I nspect the valve and clean if dirty. Replace the plunger if defective. Pump • C lean the filters, replace if dirty. Check Valve • R emove the exhaust tube from the back of the unit during the air drying phase. Check for air coming from the fitting. • R emove the air compressor tube from the check valve inlet while running a cycle. Make sure no steam is leaking from the valve. Replace if there are any leaks. Water Reservoir • C heck the reservoir for dirt. Clean and rinse with steam process distilled water if necessary. -
Page 47: Troubleshooting Your Statim
10 Troubleshooting Your STATIM Problem Solution Unit does not power ON. Check that the unit is plugged into a properly grounded outlet and that the power cord is firmly seated at the rear of the machine. Try another circuit. Power unit OFF for 10 seconds and then power ON again. Check the condition of the line circuit breaker or fuse. - Page 48 Depress the collar on the fitting and, with the other hand pull firmly on the tube. Once the tube is free of the fitting, cut the damaged section of tubing away using a sharp instrument. Be sure that you leave enough tube to reach the unit when you re-attach the tube to the exhaust fitting. If the tube is too short to remove a section, contact your SciCan dealer for a replacement. Check that the STATIM has not inadvertently been exposed to any electrical interference. Refer to section 3.1 Positioning your Unit. Try running another cycle. If the problem persists, record the cycle fault message number and contact your dealer. Page 48...
- Page 49 Replace the seal if required. Be careful as the metal parts will be hot and the cassette will contain hot steam. If the leak persists, turn the unit OFF, remove and unload the cassette and contact your SciCan dealer. Machine will not start and touchscreen shows: Press on the icon to confirm whether it is a water level problem or a water quality problem.
- Page 50 Internet connections. If all settings appear to be OK. Go to the unit’s touchscreen and renew the IP address by following these steps: 1. Scroll through the setup menu to NETWORK SETUP and select. 2. Select RENEW IP Not receiving emails from the unit Check your spam filter. Be certain the unit has been identified as an accepted email source. Ensure that you have accepted the SciCan Privacy policy by putting a check mark in the box on the CONTACTS page of your web portal. Page 50...
-
Page 51: Test Protocols
11 Test Protocols 11.1 Type test Page 51... - Page 52 11 Test Protocols con’t. 10. Test Protocol con’t. STATIM 2000S STATIM 5000S STATIM 2000 G4 STATIM 5000 G4 Cycle Cold Unit With Max. Load + Cold Unit With Max. Load + Drying Phase Drying Phase Warm Unit Without Load +...
-
Page 53: Ordering Spare Parts
12 Ordering Spare Parts STATIM G4 SPARES STATIM G4 ACCESSORIES 01-100028S Cassette Seal (2000) 01-101709S Mesh Rack (5000) 01-101649S Cassette Seal (5000) 01-106653 Mesh Rack - STATIM 2000 01-103865S Seal Lubricant 01-112408S Cassette Tray (2000 G4) 01-1016528 Air Filter (5000) 01-112407S Cassette Tray with mesh rack (2000 G4) 01-100207S Compressor Filter (2000) 01-102119S Biological Filter... -
Page 54: Warranty
13 Warranty Limited Warranty For a period of one year, SciCan guarantees that the STATIM 2000 / 5000 G4, when manufactured by SciCan in new and unused condition, will not fail during normal service due to defects in material and workmanship that are not due to apparent abuse, misuse, or accident. The one year warranty will cover the performance of all components of the unit except... -
Page 55: Specifications
14 Specifications 2000 G4 14.1 STATIM 2000 G4 Machine Dimensions: Length: 50.0 cm Width: 41.5 cm Height: 16 cm Cassette Size (External): Length: 41 cm (includes handles) Width: 19.5 cm Height: 4 cm Cassette Size (Internal): Length: 28 cm Width: 18 cm Height: 3.5 cm... - Page 56 14 Specifications 5000 G4 14.2 STATIM 5000 G4 Machine Dimensions: Length: 60.0 cm Width: 41.5 cm Height: 19.0 cm Cassette Size (External): Length: 49.5 cm (includes handles) Width: 19.5 cm Height: 8 cm Extended Cassette Size Length: 56.5 cm (includes handles) (External): Width: 19.5 cm Height: 8 cm...
Need help?
Do you have a question about the statim 2000 G4 and is the answer not in the manual?
Questions and answers