SciCan Statim 2000 Technical Training Manual
Hide thumbs
Also See for Statim 2000:
- Service manual (275 pages) ,
- Operator's manual (43 pages) ,
- Training manual (20 pages)
Table of Contents
Advertisement
Quick Links
- 1 Statim 2000 & 5000 Specifications
- 2 Statim 5000 Wrapped Cycle Description
- 3 Cassette Operation, Care & Maintenance, Seal Replacement
- 4 Steam Flow Chart
- 5 No Power Pcb Revision 2.4-2.92 & 6.4
- 6 Pump, Solenoid & Compressor Testing
- 7 Boiler Calibration 2000 & 5000 Rev. 2.4-2.9
- 8 Water Quality Problems
- Download this manual
Advertisement
Table of Contents

Subscribe to Our Youtube Channel
Related Manuals for SciCan Statim 2000


Summary of Contents for SciCan Statim 2000
- Page 1 Statim 2000 & 5000 Technical Training Manual...
-
Page 2: Table Of Contents
Statim 2000 Wrapped Cycle Description Statim 5000 Unwrapped Cycle Description Statim 5000 Wrapped Cycle Description Cassette Operation, Care & Maintenance, Seal Replacement Statim 2000 & 5000 Cover Removal Steam Flow Chart Sequence of Operation No Power PCB Revision 2.4-2.92 & 6.4 Pump, Solenoid &... -
Page 3: Statim 2000 & 5000 Specifications
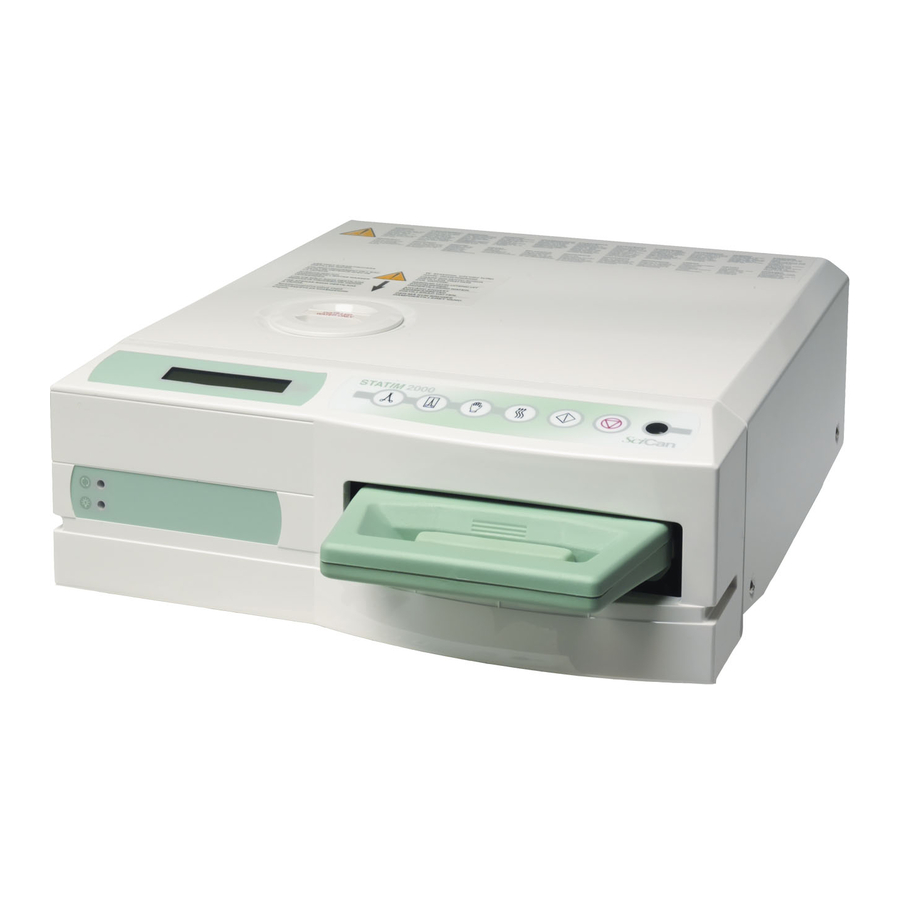
Statim 2000 & 5000 Specifications The Statim 2000 & 5000 are tabletop steam sterilizers, which are designed to sterilize instruments and handpieces between patients. Statim 2000 Statim 5000 External Size (LgthxWdthxHgth) External Size (LgthxWdthxHgth) 17 3/4" x 16 1/4" x 6"... -
Page 4: 2000 Keypad
2000 Keypad Cycle Sterilization Time & Temperature Unwrapped Instruments 3.5 Minutes 135°C Wrapped Instruments 10 Minutes 135°C Rubber & Plastics 15 Minutes 121°C Air Dry Only 60 Minutes Start Stop... -
Page 5: 5000 Keypad, Installation & Language Selection
5000 Keypad, Installation & Language Selection Cycle Sterilization Time & Temperature Unwrapped Instruments 3.5 Minutes 132°C Wrapped Instruments 6 Minutes 132°C Rubber & Plastics 20 Minutes 121°C Heavy Duty Unwrapped 6 Minutes 132°C Start Stop Installation Adjust the bubble level, located in the right front corner of the Statim, so the bubble is in the 4 or 5 o’clock position. -
Page 6: Display
Statim will need to be turned OFF and then back ON. This display is for a Statim 2000, with revision 501 software. Units manufactured from 1990 thru 1994 may say Select A Program with no software number when turned ON. -
Page 7: Statim 2000 Unwrapped Cycle Description
Statim 2000 Unwrapped Cycle Temperature rises to approx 102°C. Solenoid closes (new units 30 second delay after reaching 102°C before Solenoid closes). Unit then pressurizes to 135°C. Unit goes into sterilization for 3.5 minutes. Unit then depressurizes to 103°C, air-drying starts (on units with 4XX and 5XX software the air compressor will turn ON while unit is still venting). -
Page 8: Statim 2000 Wrapped Cycle Description
Statim 2000 Wrapped Cycle Temperature rises to approx 102°C. Solenoid closes (new units 30 second delay after reaching 102°C before Solenoid closes). Unit then conditions to 135°C. Unit will hold at 135°C for approximately 30 seconds, then the Solenoid opens and the unit depressurizes to 115°C. This depressurization is to remove air from the bags. -
Page 9: Statim 5000 Unwrapped Cycle Description
Statim 5000 Unwrapped Cycle Temperature rises to approx 102°C. Solenoid closes (new units 30 second delay after reaching 102°C before Solenoid closes). Unit then conditions to 132°C. The Solenoid opens and the unit depressurizes to 115°C. This depressurization is to remove air from the large chamber. The Solenoid then closes and the unit pressurizes to 132°C. -
Page 10: Statim 5000 Wrapped Cycle Description
Statim 5000 Wrapped Cycle Temperature rises to approx 102°C. Solenoid closes (new units 30 second delay after reaching 102°C before Solenoid closes). Unit then conditions to 132°C. The Solenoid opens and the unit depressurizes to 115°C. The unit will condition up and down between 115°C and 132°C six times. -
Page 11: Cassette Operation, Care & Maintenance, Seal Replacement
After cleaning, rinse and dry, then apply a liberal amount of Stat-Dri Plus to the inside metal surfaces. This SciCan product helps the water expel off of the inside surfaces of the cassette. When you open the cassette and see beads of water clinging to the cassette lid the cassette needs to be treated with Stat-Dri Plus. -
Page 12: Statim 2000 & 5000 Cover Removal
Statim 2000 & 5000 Cover Removal Unplug the Statim and remove the cassette and reservoir cap. Remove 4 sides screws and 3 rear screws. On the Statim 5000 the center screw in the rear is behind the biological filter holding the filter bracket. -
Page 13: Steam Flow Chart
Statim Steam Flow Chart Fill Water Reservoir with steam-distilled water Water Quality Sensor checks water level and quality of water Water gravity flows into Water Pump Water Pump has an input and output filter. Water Pump sends water at 38PSI to the Boiler Boiler produces steam, which is injected into Cassette. -
Page 14: Sequence Of Operation
Solenoid Pump All Statim 2000 & 5000 sterilizers operate in the same manner. You will have different times and temperatures for the various cycles and the conditioning is different on each cycle but the pump, boiler, solenoid and air compressor will basically operate the same in each unit. The explanation below is for an Unwrapped Cycle for a Statim 2000. -
Page 15: No Power Pcb Revision 2.4-2.92 & 6.4
No Power PCB Revision 2.4-2.92 & 6.4 J1-2 J1-1 1. Verify that there is no display and no green power light. 2. Check outlet to make sure there is power. 3. Check that power cord is plugged into electrical outlet and back of Statim. 4. -
Page 16: Pump, Solenoid & Compressor Testing
MIN. Activate the pump by shorting P1-16 to ground on the PCB. 5. For Statim 2000 the water level should reach the MIN line within 23-24 seconds. 6. For Statim 5000 the water level should reach the MIN line within 21-23 seconds. -
Page 17: Pump Filter Cleaning Instructions
Inlet Fitting Outlet Fitting The inlet fitting of the SciCan pump contains a coarse mesh filter and the outlet elbow fitting contains a fine mesh filter. To clean the filters rinse them under clean running water and scrub with a toothbrush... -
Page 18: Thermal Fuse Location
Thermal Fuse Location Thermocouple Lead Mounting Bracket Thermal Fuse... -
Page 19: Probe Bracket
Probe Bracket Steam Inlet Port Cassette Stop Steam Exhaust Port Chamber Thermocouple Cassette Microswitch Roller Bar Cassette when it reaches roller bar Cassette completely engaged To avoid bending the chamber thermocouple, slide the cassette in gently until it reaches the roller bar, then push cassette firmly until cassette is completely engaged. -
Page 20: Microswitch Location
Microswitch Location Statim 2000 Microswitch Screw Microswitch Screw Compressor Microswitch Location Statim 5000 Microswitch... -
Page 21: Solenoid Valve
Solenoid Valve Inspection and Repair (Honeywell & Parker solenoids only) 1. Ensure that the power is off. Disassembly of the solenoid valve with the power on will cause valve coil damage. 2. Remove the retaining nut, yoke and coil from the top of the valve. 3. -
Page 22: Boiler Calibration 2000 & 5000 Rev. 2.4-2.9
Boiler Calibration 2000 & 5000 Rev. 2.4-2.9 Turn the main power switch OFF and remove the cover. Check to see that the reservoir has enough distilled water to cover the water quality sensor. 1. Short together pins W1 located to the left of the microprocessor on the PCB. Turn the power switch ON. -
Page 23: Boiler Calibration 2000 & 5000 Rev. 6.X & Adapter Boards With 44-Pin Microprocessor
Boiler Calibration 2000 & 5000 Rev. 6.x & Adapter Boards with 44-pin Microprocessor 44-pin Microprocessor 1. Turn the main power switch OFF and remove the cover. Check to see that the reservoir has enough distilled water to cover the water quality sensor. 2. -
Page 24: Water Testers
The TDS 1 tester reads Parts Per Million (ppm) of Total Dissolved Solids (TDS). The display will read from 0 to 999 ppm. The SciCan tester reads the conductivity of water, micro Siemens (µS). The display will read from 0 to 99.9 µS. -
Page 25: Water Quality Problems
Water Quality Problems Note: Always Test Water First J4-6 J4-5 J4-4 J4-3 Diagnosing Water Quality Sensor Problems 1. Turn off the power; disconnect the sensor leads from the probe terminals J4-3 and J4-4. 2. Turn on the power and start an unwrapped cycle. 3. -
Page 26: Water Quality Check Revision 4Xx Or 5Xx Software
Water Quality Check Revision 4XX or 5XX Software The water setting should not be changed without first testing the water quality using a conductivity meter. Increasing the high setting may shorten the life of the boiler. To check the water quality on a Statim with 4XX or 5XX software follow these steps: Short pins W1 and hold down the Unwrapped &... -
Page 27: Control Box Connections
Control Box Connections...
Need help?
Do you have a question about the Statim 2000 and is the answer not in the manual?
Questions and answers