SciCan STATIM 5000 G4 Operator's Manual
Cassette autoclave
Hide thumbs
Also See for STATIM 5000 G4:
- Setting up and using (56 pages) ,
- Service manual (271 pages) ,
- Operator's manual (63 pages)

Related Manuals for SciCan STATIM 5000 G4


Summary of Contents for SciCan STATIM 5000 G4
- Page 1 STATIM 2000/5000 G4 AUTOCLAVE À CASSETTE ™ • Operator's Manual • Manuel de l'utilisateur...
-
Page 2: Table Of Contents
4.1 Using the STATIM 2000 G4 Cassette 11. Warranty .............. 47 4.2 Using the STATIM 5000 G4 Cassette 12. Specifications ............. 48 4.3 Using Drying Plates with the STATIM 5000 G4 4.4 Preparing and Loading Instruments 12.1 STATIM 2000 G4 4.5 Using Biological and Chemical Indicators 12.2 STATIM 5000 G4... - Page 3 11. Garantie ............... 93 4.2 STATIM 5000 G4 - Cassette 12. Spécifications ............94 4.3 STATIM 5000 G4 - Utilisation des plateaux de séchage 4.4 Préparation et chargement des instruments 12.1 STATIM 2000 G4 4.5 Utilisation des indicateurs biologiques et chimiques 12.2 STATIM 5000 G4...
-
Page 4: Introduction
1 Introduction STATIM 5000 G4 STATIM 2000 G4 STATIM 2000 G4 IM 2000 G4 Congratulations on your selection of the STATIM Cassette Autoclave . We are confi dent that you have ® purchased the fi nest equipment of its type. The STATIM is a compact, counter-top unit that features a ®... -
Page 5: Important Information
Never remove the cover of the unit and never insert objects through holes or openings in the cabinetry. Doing so may damage the unit and / or pose a hazard to the operator. All elements of this book are common to both STATIM 2000 G4 and STATIM 5000 G4 except when noted. -
Page 6: Statim 2000 G4 - Unit Overview
2 Important Information 2.2 STATIM 2000 G4 — Unit Overview LCD Touchscreen Reservoir cap / water fi lter USB port Power switch Power cable port Leveler feet Ethernet port Exhaust tube port Compressor Cassette Biological fi lter RS232 port A situation which The following symbols appear A potential hazard Important... -
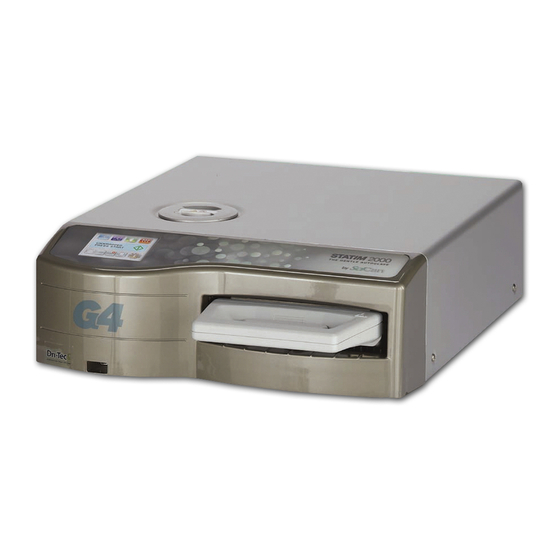
Page 7: Statim 5000 G4 - Unit Overview
(do not use tap water) PLASTIC CYCLE before servicing CYCLE When you receive your STATIM 5000 G4, the items listed below will be included. If any of the items are missing, contact your dealer immediately. Cassette Tray and Lid Power Cord Unwrapped Operator’s Manual... -
Page 8: Touchscreen Overview
2.4 Touchscreen Overview Unwrapped cycles Wrapped cycles Rubber / Plastic cycles Air Dry Only (2000) or Heavy Duty Unwrapped (5000) Display Start button mm/dd/yyyy hh:mm:ss SELECT A CYCLE Stop button Network connectivity on/off (turns green when active) USB storage device connected/not connected (turns green when active) Water level... -
Page 9: Setup Menu Overview
2.5 Setup Menu Overview Setup Time --:-- Setup Time 14:02 Date Setup Time Date --/--/-- DST On/Off DD/MM/YY 01/01/2011 Date Time DST On/Off Date DST On/Off mm/dd/yyyy hh:mm:ss DST On/Off SELECT A CYCLE Default Setup Setup Recent Printouts Time 12/24 Setup Recent Printouts 12h/24h Setup... - Page 10 Setup 2.5 Setup Menu Overview Setup End of Line CR/LF Printer user ° char Printer user ° char End of Line CR/LF Process Enforced Printer user ° char Process Enforced Process Enforced Default Setup Setup PIN PIN Setup User x 0000 PIN Updated New PIN xxxx...
-
Page 11: Setting Up Your Statim
3 Setting up your STATIM 3.1 Positioning and Powering your Unit. Positioning your Unit There are several factors that may affect the performance of your STATIM. Please review these factors, and select a suitable location in which to install the unit. •... -
Page 12: Leveling Your Unit
3 Setting up your STATIM 3.2 Levelling your Unit When placing your unit on a counter top, ensure it is stable and that all four feet are securely in contact with the counter surface. This will prevent the unit from moving freely. Next, use the level indicator bubble function in the settings menu to adjust the three leveler feet so that the unit drains properly. -
Page 13: Connecting The Waste Bottle
3 Setting up your STATIM 3.3 Connecting the Waste Bottle The waste bottle is used to collect the wastewater after it has been converted to steam and then drained from the cassette. To connect the waste bottle to the STATIM, follow these steps (see Figure 4): 1. -
Page 14: Filling The Water Reservoir
3 Setting up your STATIM 3.4 Filling the Water Reservoir When filling the reservoir, ensure you only use steam processed distilled water containing less than 5 ppm total dissolved solids (having conductivity of less than 10 µS / cm). The impurities and additives in other water sources will cause an error reading on the LCD. -
Page 15: Setting The Time
3 Setting up your STATIM 3.7 Setting the Time 2. Scroll to and select. Time 3. From the TIME screen, use the keypad to set the time. Press to save and to return to the Setup menu. 4. To change your unit to display 12-hour time format (24-hour time format is the default setting), go to the Setup menu and use to scroll to TIME 12/24, select it and toggle to 12. -
Page 16: Assigning Unit Identifier Number
3 Setting up your STATIM 3.10 Assigning Unit Identifier Number 2. Scroll to and select. Unit No 3. Using the keypad, select a maximum of 3 digits to be used as the unit’s identifier number. Press to save and to return to the Setup menu. 3.11 Creating a User ID and PIN 2. -
Page 17: Changing The Touchscreen Display Themes
Your STATIM G4 touchscreen themes (i.e. the colours of the icons and background) can be changed to one of the preset options or you can upload additional themes, as they become available from SciCan, using the USB port. To change themes follow these steps: 2. -
Page 18: Turning The Button Sound On Or Off
3 Setting up your STATIM 3.16 Turning the Button Sound ON or OFF The STATIM G4 is preset to beep when a button is pressed. If you would like to turn the button sound off, follow these steps: NOTE: Turning OFF the button sound does NOT turn off other alarms and cycle notification beeps. 2. -
Page 19: Using Cassettes And Preparing Instruments
Using the STAT-DRI™ Drying Agent Treatment of the interior surfaces of the cassette with the STAT-DRI drying agent, provided with your unit, will enhance the drying process. (Replacement bottles are available from SciCan, order number 2OZPLUS, 8OZPLUST, 32OZPLUS). Page 19... -
Page 20: Using The Statim 5000 G4 Cassette
3. Place the carry handle into the closed position. • Inserting the Cassette into the STATIM 5000 G4: 1. Hold the cassette handle in one hand and the carry handle in the other as shown in Figure 8. 2. Place the end of the cassette into the unit and drop the carry handle into its closed position. -
Page 21: Using Drying Plates With The Statim 5000 G4
4.3 Using Drying Plates with the STATIM 5000 G4 The STATIM 5000 G4 cassette comes with two racks, one with drying plates affixed and another without. To ensure optimal drying of instruments within autoclave bags use the rack with drying plates. - Page 22 The use of cloth wraps in the STATIM is not recommended. SciCan recommends the use of paper / paper and plastic / paper autoclave bags such as SPS™, Medi-Plus™ and Chex All™. Steri-Stik™ paper / paper autoclave bags may also be used. The use of cloth wraps in the STATIM is not recommended.
-
Page 23: Using Biological And Chemical Indicators
For the STATIM 5000 units in the United States, SciCan recommends using the SciCan ENSURE™ or 3M Attest™ biological monitoring system for routine monitoring. This system consists of self contained biological indicators and incubators. -
Page 24: Instrument Weight Guide
4 Using Cassettes and Preparing Instruments Because the turnaround time for the SciCan ENSURE is up to 24 hours, and 3M Attest is up to 48 hours, it is recommended that the tests be conducted so that the incubation period occurs during a period of planned downtime such as the last cycle before a weekend. -
Page 25: Using Your Statim
5 Using your STATIM Before using your STATIM for the first time, make sure the reservoir is full and the pump is properly primed. Refer to Sections Filling the Reservoir and Priming the Pump for detailed instructions. 5.1 Preparing Unit for Use Once the unit is installed and before any instruments are sterilized, run two Wrapped Cycles (see Section STATIM 2000 / 5000 G4 - Running a Cycle. - Page 26 5 Using your STATIM 5.2.2. Wrapped Cycle (STATIM 2000 G4) The Wrapped Cycle is used to sterilize up to 1.0 kg (2.2 lbs) of solid and hollow metal instruments which have been sealed in paper / paper, or paper / plastic autoclave bags. Dental handpieces may be sterilized in this cycle.
- Page 27 5 Using your STATIM 5.2.4. Air Dry Only Cycle (STATIM 2000 G4) This is not a sterilization cycle. The load is considered sterile after the successful completion of the sterilization phase of the cycle. The Air Dry phase starts automatically after each sterilizing cycle and runs for 30 minutes. Air drying may be interrupted by pressing the STOP button anytime after the sterilization phase of the cycle is complete.
-
Page 28: Statim 5000 G4 - Selecting A Cycle
The sterilization temperature in the cassette is 132˚ C (270˚ F) for USA and 134˚ C (273˚ F) for all other countries, and the holding time is 3.5 minutes. See Section STATIM 5000 G4 — Cassette and Section Preparing and Loading Instruments before running this cycle. - Page 29 132˚ C (270˚ F) for USA and 134˚ C (273˚ F) for all other countries, and the holding time is 6 minutes. See Section STATIM 5000 G4— Cassette and Section Preparing and Loading Instruments before running this cycle.
- Page 30 5 Using your STATIM 5.3.4. Heavy Duty Unwrapped Cycle (STATIM 5000 G4) The Heavy Duty Cycle is used to sterilize larger loads of unwrapped metal instruments weighing up to 1.5 kg (3.3 lbs). Dental hand pieces can be sterilized in this cycle. Using the STATIM 5000 Extended Cassette (order no.
-
Page 31: Statim 2000 / 5000 G4- Running A Cycle
5 Using your STATIM 5.4 STATIM 2000 / 5000 G4— Running a Cycle To operate each cycle, follow these steps. 1. Turn the power switch at the back of the unit to ON. At start up, the unit will display the main menu. mm/dd/yyyy hh:mm:ss SELECT A CYCLE... - Page 32 A graph charts the progress of the cycle while current cycle information is displayed at right. As the cycle is running, various sounds will be heard. This is the normal functioning of the unit. Example of sterilization cycle phases in STATIM 5000 G4: Page 32...
- Page 33 5 Using your STATIM 5.4 STATIM 2000 / 5000 G4— Running a Cycle As the cycle is running, an intermittent buzzing sound will be apparent as he pump injects water into the steam generator. A random clicking sound will also be heard as the exhaust valve opens and closes. Once the sterilization cycle is complete, a reminder tone will sound as the cycle moves into the Air Drying phase.
-
Page 34: Statim 2000 / 5000 G4- Stopping A Cycle
5 Using your STATIM If a message is displayed which gives a CYCLE FAULT code or a NOT STERILE message, the cassette contents are not sterile. See Section Troubleshooting for more information. 5.5 STATIM 2000 / 5000 G4— Stopping a Cycle To stop a cycle press the STOP button. -
Page 35: Storing And Retrieving Cycle Information
6 Storing and Retrieving Cycle Information The STATIM G4 has an internal Data Logger capable of storing all cycle data on every cycle, whether successful or incomplete, for the lifetime of the unit. You can access this information through the touchscreen, through the web portal, using a USB storage device or by attaching a printer. -
Page 36: Cycle Printout Overview
6 Storing and Retrieving Cycle Information 6.3 Cycle Printout Overview Model: STATIM 2000 software: S201R604 STATIM 2000 S201R604 Unit Identifier: autoclave has been set up as number 000 UNIT #: Water Quality: conductivity measurements WATER QUALITY 1.3 µS / 13 ppm Cycle Counter: the number of cycles having been run on the unit = 2 CYCLE NUMBER 000002... -
Page 37: Printer Cycle Information
Baud Rate End of Line CR/LF Printer User Char 7.3 External Printers and Specifications Suggested External End of Line CR/LF Serial Port Bitrate Printer user ° char Printers by SciCan Epson CR/LF 9600 248 [0xF8] TM-U220D (C31C515603) Citizen 9600 N / A... -
Page 38: Maintaining Your Statim
8.1 Cleaning the Cassette Keeping the STATIM cassette clean is good clinical practice and assists in the function of the unit. SciCan recommends that the interior surface be cleaned at least once a week. Use dishwashing soap or a mild detergent that does not contain chlorine. -
Page 39: Changing The Bacteria Retentive Filter And The Air Filter
To change the air fi lter on the STATIM 5000 G4, follow these steps: 1. Unscrew the cylindrical air fi lter in a counter-clockwise direction. 2. Discard the old fi lter. 3. Screw the new fi lter (SciCan part no. 01-101652S), fi nger tight only, into place. Page 39... -
Page 40: Replacing The Cassette Seal
To ensure optimum performance of your STATIM cassette autoclave, change the cassette seal every 500 cycles or every six months, whichever comes first. Replacement seals are available from SciCan (order number 01-100028S for STATIM 2000 G4 and 01-101649S for STATIM 5000 G4). -
Page 41: Maintaining Fluid Levels
8 Maintaining your STATIM 8.7 Maintaining Fluid Levels 1. The water reservoir level is continually monitored by your STATIM. If the reservoir is low, a red X will appear on the water icon of the cycle select screen. Press the icon to go to the next screen to confirm that it is a water level issue and not a water quality issue. -
Page 42: Preventative Maintenance Schedules
8 Maintaining your STATIM 8.9 Preventative Maintenance Schedules To ensure trouble-free performance, both the operator and the dealer must follow a preventative maintenance schedule. NOTE: Please refer to your National, Regional, State or Safety laws for any additional reoccurring user testing that may be required. -
Page 43: Troubleshooting Your Statim
Be sure that you leave enough tube to reach the unit when you re-attach the tube to the exhaust fitting. If the tube is too short to remove a section, contact your SciCan dealer for a replacement. - Page 44 If the tube is too short to remove a section, contact your SciCan dealer for a replacement. Check that the STATIM has not inadvertently been exposed to any electrical interference.
- Page 45 9 Troubleshooting your STATIM Problem Solution Time and date are incorrect. The time and date have not been set. See Section Setting up your STATIM, for time and date instructions. Touchscreen is blank/white. Power was interrupted during a firmware upgrade. Power off the unit and power it on again.
-
Page 46: Ordering Spare Parts
10 Ordering Spare Parts STATIM G4 SPARES STATIM G4 ACCESSORIES 01-100028S Cassette Seal (2000) 01-112406S Cassette Complete (2000 G4) 01-112409S Cassette Lid (2000 G4) 01-112408S Cassette Tray (2000 G4) Cassette Tray with Mesh Rack 01-112410S Cassette Handle - Lid (2000 G4) 01-112407S (2000 G4) Rack-tray Unwrapped Instr. -
Page 47: Warranty
SciCan’s option and without charge, of any defected part(s) (except gasket), provided SciCan is notified in writing within thirty (30) days of the date of such a failure and further provided that the defective part(s) are returned to SciCan prepaid. -
Page 48: Specifications
12 Specifications 12.1 STATIM 2000 G4 Machine Dimensions: Length: 495 mm (19.5”) Width: 415 mm (16.3”) Height: 150 mm (5.9”) Cassette Size (External): Length: 410 mm (16”) (includes handles) Width: 195 mm (7.7”) Height: 40 mm (1.6”) Cassette Size (Internal): Length: 280 mm (11”) Width:... -
Page 49: Statim 5000 G4
12 Specifications 12.2 STATIM 5000 G4 Machine Dimensions: Length: 600 mm (23.6”) Width: 410 mm (16.1”) Height: 190 mm (7.5”) Cassette Size (External): Length: 495 mm (19.5”) (includes handles) Width: 195 mm (7.7”) Height: 80 mm (3.2”) Extended Cassette Size (External): Length: 565 mm (22.2”)
Need help?
Do you have a question about the STATIM 5000 G4 and is the answer not in the manual?
Questions and answers
the screen is black. The cord is plugged in the power source is active