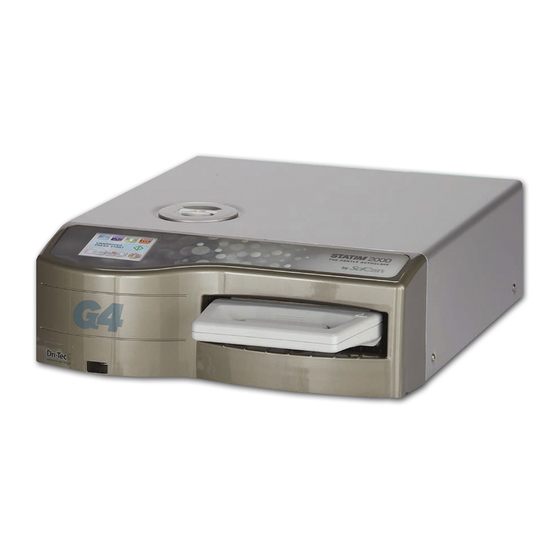
SciCan STATIM 5000 G4 Setting Up And Using
Casset autoclave
Hide thumbs
Also See for STATIM 5000 G4:
- Operator's manual (49 pages) ,
- Service manual (271 pages) ,
- Operator's manual (63 pages)
Table of Contents
Advertisement
Available languages
Available languages
Quick Links
Advertisement
Table of Contents

Subscribe to Our Youtube Channel
Related Manuals for SciCan STATIM 5000 G4


Summary of Contents for SciCan STATIM 5000 G4
- Page 1 StAtim 2000/5000 G4 CASSette AutoCLAve ™ • Setting Up and Using Your Web Portal • Paramétrage et utilisation de votre portail Web • Einrichtung und Verwendung Ihres Web-Portals • Impostazione e uso del Vostro portale web • Configuración y uso de su portal web...
-
Page 2: Table Of Contents
Retrieving Cycle Information Using your STATim Web Portal ... 15 EU Representative SciCan GmbH Wangener Strasse 78 StAtim Cassette Autoclave and STATim are registered trademarks, and 88299 Leutkirch Your Infection Control Specialist logos are trademarks of SciCan Ltd. All other trademarks referred to in this manual are the property of their respective owners. GERMANY Tel.: +49 (0)7561 98343 - 0 For all service and repair inquiries: Fax: +49 (0)7561 98343 - 699 In Canada 1-800-870-7777 United States: 1-800-572-1211 SciCan Inc. +49 (0)7561 98343 - 0 Germany: 701 Technology Drive International: (416) 446-4500 Canonsburg, PA 15317 Email: techservice.ca@scican.com Phone: +1 724 820 1600 Fax: +1 724 820 1479 Toll free: 1-800-572-1211 Manufactured by: SciCan SciCan Medtech 1440 Don Mills Road, Toronto ON M3B 3P9... - Page 3 StAtim Cassette Autoclave et STATIM sont des marques déposées Wangener Strasse 78 et le logo Your Infection Control Specialist est une marque commerciale de SciCan Ltd. Toutes les autres marques commerciales mentionnées 88299 Leutkirch dans ce manuel appartiennent à leurs propriétaires respectifs. GERMANY Tél : +49 (0)7561 98343 - 0 Pour toute demande de maintenance et Fax : +49 (0)7561 98343 - 699 de réparation : Canada : 1-800-870-7777 SciCan Inc. Etats Unis : 1-800-572-1211 701 Technology Drive +49 (0)7561 98343 - 0 Allemagne : Canonsburg, PA 15317 International : (416) 446-4500 Email : techservice.ca@scican.com Téléphone : +1 724 820 1600 Fax : +1 724 820 1479 Appel gratuit : 1-800-572-1211 Fabriqué par :...
- Page 4 StAtim Cassette Autoclave und STATim sind eingetragene Handelsmarken. Wangener Straße 78 Die Logos Your Infection Control Specialist” sind Handelsmarken von SciCan “ 88299 Leutkirch Ltd. Sämtliche weitere im vorliegenden Handbuch erwähnte Handelsmarken sind Eigentum ihrer jeweiligen Besitzer. DEUTSCHLAND Telefon: +49 (0)7561 98343 - 0 Kundendienst und Reparaturen: Fax: +49 (0)7561 98343 - 699 Kanada: 1-800-870-7777 Vereinigte Staaten: 1-800-572-1211 SciCan Inc. +49 (0)7561 98343 - 0 Deutschland: 701 Technology Drive International: (416) 446-4500 Canonsburg, PA 15317 E-Mail: techservice.ca@scican.com Telefon: +1 724 820 1600 Fax: +1 724 820 1479 Gebührenfrei: 1-800-572-1211 Hergestellt von: SciCan SciCan Medtech 1440 Don Mills Road,...
- Page 5 StAtIM Cassette Autoclave e STATim sono marchi registrati e i logo Infection 88299 Leutkirch Control Specialist sono marchi della SciCan Ltd. Tutti gli altri marchi riportati in questo manuale sono proprietà dei loro rispettivi titolari. GERMANIA Telefono: +49 (0)7561 98343 - 0 Per tutte le richieste di assistenza e di riparazioni: Fax: +49 (0)7561 98343 - 699 In Canada 1-800-870-7777 Stati Uniti: 1-800-572-1211 SciCan Inc. +49 (0)7561 98343 - 0 Germania: 701 Technology Drive Internazionale: (416) 446-4500 Canonsburg, PA 15317 E-mail techservice.ca@scican.com Telefono: +1 724 820 1600 Fax: +1 724 820 1479 Senza addebito: 1-800-572-1211 Fabbricato da:...
- Page 6 StAtim Cassette Autoclave y STATim son marcas registradas, y los logotipos 88299 Leutkirch de Your Infection Control Specialist son marcas comerciales de SciCan Ltd. Todas las demás marcas mencionadas en este manual son propiedad de sus ALEMANIA respectivos dueños. Teléfono: +49 (0)7561 98343 - 0 Para cualquier consulta relacionada con tareas de Fax: +49 (0)7561 98343 - 699 servicio técnico y reparaciones: En Canadá 1-800-870-7777 SciCan Inc. Estados Unidos: 1-800-572-1211 701 Technology Drive +49 (0)7561 98343 - 0 Alemania: Canonsburg, PA 15317 International: (416) 446-4500 techservice.ca@scican.com Correo electrónico: Teléfono: +1 724 820 1600 Fax: +1 724 820 1479 Número de teléfono gratuito: 1-800-572-1211 Fabricado por:...
-
Page 7: Connecting To A Network
Setting up and using your STATIM G4 web portal This web portal is a direct connection to the STATim on your network. It is protected by your firewall and not accessible to outside users. It provides real-time cycle information and archived sterilization records unique to this unit. From here, you can print reports, set up email notification and search cycle histories. To set up your web portal follow these instructions. Connecting to a Network the StAtim G4 has a 10/100Base-T Ethernet port located at the back of the unit. To connect your STATim to a network using a router, follow these steps: Connect your network cable to the Ethernet port at the back of the unit (see next section for location of port). If your office uses a router, the router should automatically assign the unit an IP address. You will know the IP address has been assigned when the red X over the Network icon disappears. NOTE: In some circumstances, for example, where you do not have a router and when using Windows Network Sharing, you may have to assign a dedicated or ‘static’ IP address. To assign a static IP address, contact your local network administrator. 2000 G4 Ethernet Port 5000 G4 Page 7... -
Page 8: Connecting To A Wireless Network
Link: On Bind: dhcp SELECT A CYCLE IP: xxx.xxx.xxx.xxx MASK: xxx.xxx.xxx.xxx GATE: xxx.xxx.xxx.xxx DNS1: xxx.xxx.xxx.xxx Type the IP address displayed on the touchscreen into your computer’s browser to access your unit’s web portal. You will know that an IP address has been assigned when the red X over the Network icon disappears. When the Network icon is active (for example when sending email) it will turn green. NOTE: Connection time will vary depending on your network speed, and making an initial connection may take longer. Connecting your STATIM G4 to a wireless network the StAtim G4 can be configured for wireless use by connecting the Ethernet port to an external wireless bridge / access point. SciCan currently recommends the use of the D-Link ® DAP-1522 Xtreme N Duo Wireless Bridge. Contact your network administrator to learn ® more about setting up a wireless bridge. Page 8... -
Page 9: Reserving An Ip Address For Your Statim
Setting up and using your STATIM G4 web portal Reserving an IP Address for Your STATIM When your is connected to a router on your network, it is assigned a unique StAtim IP address. NOTE: Accessing this screen will vary for each router, please consult your router’s User Manual or contact your network administrator for more detailed instructions. SciCan currently recommends D-Link DIR-615 Wireless N router. If the connection between your and the router is lost (ie. facility lost power, StAtim or router was restarted, etc), then the re-established connection may be StAtim a different IP address. This may result in invalid links from any previously saved bookmarks or other saved connections. In order to set a ‘permanent’ IP address, follow these steps to establish a ‘DHCP/IP/Address Reservation’: NOTE: Each manufacturer may use different nomenclature, this settings may be called one of the following: • DHCP Reservation, •... -
Page 10: Setting Up Your Contacts Page
Setting up and using your STATIM G4 web portal Setting up your CONTACTS page Click on the SETUP page and go to the CONTACTS tab. Here you will be prompted to provide a user name and password. For both the user name and password, the default is “scican”. Use it to enter and then you can customize it using the PASSWORD tab. The information you use to fill the fields on the CONTACTS page, such as your office name, address and uploaded logo, is then used to customize your StAtim’s home page and print outs. NOTE: Please read and review SciCan’s privacy statement. Refer to SciCan’s website if you cannot access the statement through the Web Portal. To accept the statement, check the box - your StAtim cannot send any emails if the box is unchecked. Setting up your LAN page From the SETUP page, use the LAN tab to check your network settings. If you have a router in your office, keep the Automatic IP box checked. This will populate the fields for correct network settings automatically. If you want to assign different values to these fields, uncheck the box, populate the fields and click Save to preserve the changes. Page 10... -
Page 11: Setting Up Your Email
Setting up and using your STATIM G4 web portal Setting up your STATIM’s email From the SETUP page, use the REMOTE tab to assign your unit an email address. Your STATim must use an email account set up either with your Internet service provider or with a web-based email service. Populate the email account fields on this page with your provider’s information if you are working with an email address from your Internet service provider. To use one of the STATim web portal’s preset email servers (choose from gmail, gmx mail, Yahoo and MSN mail), you must create an account for your STATim (e.g. drsmithstatim@gmail.com). Click the Test button to verify your settings. Setting up who will receive email NOTIFICATIONS From the SETUP page, use the NOTIFICATIONS tab to enter the email addresses and specify which records will be sent. Choose from either ‘All’ cycle information including cycle faults or ‘CF’ for cycle faults only. The message box lets you add details to identify the unit, such as its location. Uncheck the box if you do not want SciCan Technical Service to automatically receive your unit’s cycle fault emails. NOTE: If you are not receiving emails from your unit, check your spam filter to be certain your STATim has been identified as an accepted email source. Page 11... -
Page 12: Setting Up Time Zone And Internet Synchronizations
Setting up and using your STATIM G4 web portal Setting the TIME zone and Internet synchronization From the SETUP page, use the TIME tab to set the time and according to your time zone and check the box if you want your unit to synchronize automatically with dedicated Internet time servers. It will then automatically reset its clock whenever it connects to the network. NOTE: It will override any manual changes you may have made to time settings directly on the unit. Setting up your PASSWORD Set a new user name and password to keep unauthorized users from changing the configurations you have made on your web portal as well as in the Contacts information your STATim uses to generate forms. From the SETUP page, go to the PASSWORD tab. Note that both the default user name and password is ‘scican’. Page 12... -
Page 13: Setting Up Backups
Setting up and using your STATIM G4 web portal Setting up a BACKUP From the SETUP page, use the BACKUP tab to back up all the configurable changes and Contacts information you have made on your STATim’s web portal by storing a file on your office computer. NOTE: For security reasons, your email password will not be saved. Click download settings to automatically store all settings in a file on your computer (TIP: Use the Save As function on your computer to choose a specific location, otherwise it will load the file in a default location preset by your browser). To restore settings, click Choose file and browse for the file on your computer, select it and click Restore. Using TESTS From the SETUP page, click on the TOOLS tab. From here you can run a simple pass or fail test to check your network connectivity. The results will confirm whether you are accessing the Internet, accessing a router and whether your unit has a proper IP address. Page 13... -
Page 14: Using The Status Page
Setting up and using your STATIM G4 web portal Using the STATUS page From the Status page, you can see exactly what your STATim is doing. When your unit is in operation, a graph depicting the different stages of the current cycle will display in real time. Upon completion or after a forced stop, you can print the cycle graph on a form that includes your organization’s information and logo. Using the ARCHIVES page From the Archives page, you can access cycle information stored in your STATim’s internal Data logger. Fill in the year, month and day fields to browse through the cycles completed on that date. To print, select the print preview button and then click Print. Page 14... -
Page 15: Emailing Cycle Information
Setting up and using your STATIM G4 web portal Emailing cycle information Send the cycle information you accessed in the ARCHIVES by selecting the print preview button and clicking on EMAIL. It will send both a text file and PDF version of the cycle information to any of the email addresses you have preset in the NOTIFICATIONS page. the StAtim G4 has an internal Datalogger capable of storing all cycle data on every cycle, whether successful or incomplete, for the lifetime of the unit. You can access this information through the touchscreen, through the web portal, using a USB storage device or by attaching a printer. Retrieving Cycle Information using your STATIM Web Portal From your home page, click on the ARCHIVES page. From the ARCHIVES page, you can access cycle information stored in your STATim’s internal Datalogger. Fill in the year, month and day fields to browse through the cycles completed on that date. To print, select the print preview button and then click Print. Page 15... - Page 16 Setting up and using your STATIM G4 web portal Fill in the following information for your own reference. IP Address: _____________________________________________________________ GATE: __________________________________________________________________ Unit Type: ______________________________________________________________ Serial #: ________________________________________________________________ Page 16...
-
Page 17: Connexion À Un Réseau
Paramétrage et Utilisation de Votre Portail Web Le portail Web est la connexion directe vers STATIM sur votre réseau. Il est protégé par votre pare-feu et inaccessible aux utilisateurs extérieurs. Il vous permet de retrouver en temps réel toutes vos informations sur les cycles d’utilisation et d’archiver les paramètres de stérilisation propres à votre appareil. A partir de ce portail, vous pouvez imprimer des rapports, créer des notifications par e-mail et effectuer des recherches dans l’historique des cycles. Pour créer votre portail Web, il vous suffit de suivre les instructions fournies. Connexion à un réseau Le STATIM G4 dispose d’un port Ethernet 10/100Base-T situé au dos de l’appareil. Pour connecter votre STATIM au réseau à l’aide d’un routeur, suivez nos instructions pas à pas : Connectez votre câble réseau au port Ethernet situé au dos de l’appareil (voir la position exacte du port ci-dessous). Si votre cabinet utilise un routeur, le routeur assignera automatiquement une adresse IP à l’appareil. Vous saurez que l’adresse IP a été assignée lorsque le X rouge qui se trouve sur l’icône de réseau disparaîtra. NOTE : Dans certaines circonstances, si, par exemple, vous ne disposez pas d’un routeur, ou si vous utilisez le partage de réseau Windows Network Sharing, il vous faudra peut-être assigner une adresse IP dédiée ou ‘statique’. Pour ce faire, contactez votre administrateur réseau. 2000 G4 Port Ethernet 5000 G4 Page 17... -
Page 18: Connexion De Votre Statim G4 À Un Réseau Sans Fil
Bind: dhcp CHOISIR UN CYCLE IP: xxx.xxx.xxx.xxx MASK: xxx.xxx.xxx.xxx GATE: xxx.xxx.xxx.xxx DNS1: xxx.xxx.xxx.xxx Entrez l’adresse IP affichée sur l’écran tactile dans le navigateur de votre ordinateur pour accéder au portail web de votre appareil. Vous saurez qu’une adresse IP aura été assignée lorsque le X rouge disparaîtra de l’icône Réseau. Lorsque l’icône Réseau est activée, (par exemple lors de l’envoi d’un e-mail) elle devient verte. NOTE : La durée de connexion est variable et dépend de la vitesse du réseau. La première connexion peut prendre plus longtemps que d’habitude. Connexion de votre STATIM G4 à un réseau sans fil Le STATIM G4 peut être configuré pour une utilisation sans fil en connectant le port Ethernet à une passerelle extérieure sans fil. SciCan recommande de façon générale la passerelle sans fil D-Link DAP-1522 Xtreme N Duo Wireless. Contactez votre ® ® administrateur réseau pour en savoir plus sur le paramétrage de la passerelle réseau. Page 18... -
Page 19: Réservation D'une Adresse Ip Pour Votre Statim
Paramétrage et Utilisation de Votre Portail Web Réservation d’une adresse IP pour votre STATIM Il sera assigné une seule et unique adresse IP lorsque votre SRTATIM sera connecté à un routeur sur votre réseau. NOTER : l’accès à cet écran pouvant varier pour chaque routeur, veuillez s’il vous plaît consulter le manuel d’utilisation de votre routeur ou contacter votre administrateur réseau pour plus d’instructions détaillées. SciCan recommandera actuellement le routeur sans fil N D Link DIR-615. En cas de panne de connexion entre votre STATIM et le routeur (par ex. panne d’alimentation installation ou routeur ayant redémarré, etc.), la connexion rétablie pourra afficher une adresse IP différente. Il pourra en résulter des liens invalides pour tous les signets enregistrés ou autres connexions précédemment enregistrées. Afin de définir une adresse IP «permanente» IP, veuillez suivre ces étapes pour établir une réservation IP/DHCP : NOTER : chaque fabricant pouvant utiliser une nomenclature différente, les paramètres pourront donc être appelés comme suit : • Réservation DHCP, • Réservation IP, ou •... -
Page 20: Paramétrage De Votre Page De Contacts
NOTE : Pour recevoir des e-mails de votre STATIM, vous devez accepter la politique de confidentialité de SciCan en cochant la case au bas de cette page. Si vous ne cochez pas cette case, votre STATIM ne pourra pas envoyer des e-mails. -
Page 21: Paramétrage De Votre E-Mail Statim
Paramétrage et Utilisation de Votre Portail Web Paramétrage de votre e-mail STATIM A partir de la page de paramétrage (CONFIGURATION), utilisez le tableau À DISTANCE pour assigner une adresse e-mail à votre appareil. Votre appareil STATIM doit disposer d’un compte e-mail soit auprès de votre fournisseur d’accès Internet, soit auprès d’un service d’e-mail sur le Web. Complétez les champs de votre compte e-mail sur cette page en inscrivant les informations sur votre fournisseur si vous utilisez une adresse e-mail de votre fournisseur d’accès Internet. Pour utiliser l’un des serveurs d’e-mail déjà paramétrés du portail Web STATIM (choisissez entre gmail, gmx mail, Yahoo et MSN mail), il vous suffit alors de créer un compte pour votre appareil STATIM (tel que par exemple drsmithstatim@gmail.com). Un e-mail de test vous sera envoyé pour vérifier vos paramètres. Décochez la boîte de dialogue si vous ne désirez pas recevoir de téléchargements et de promotions de SciCan. Paramétrage du lieu de réception de vos NOTIFICATIONS d’e-mail Veuillez utiliser l’onglet Notifications depuis la page d’installation afin d’entrer les adresses e-mail et spécifier quels dossiers seront envoyés. Choisissez entre l’information de cycle « Tous », y compris les défauts de cycle ou « FC » pour les défauts de cycle uniquement. Une boîte de message paramétrable vous permet d’ajouter des détails pour identifier l’unité, par exemple son emplacement. Décochez la case si vous ne désirez pas que le Service technique SciCan reçoive automatiquement les messages d’erreur de votre unité. NOTE : Si vous ne recevez pas d’e-mails de votre unité, vérifiez votre filtre de spam pour vous assurer que votre STATim a bien été identifiée comme une source d’e-mails autorisée. Page 21... -
Page 22: Paramétrage De La Zone Horaire Et De La Synchronisation Internet
Paramétrage et Utilisation de Votre Portail Web Paramétrage de la zone horaire et de la synchronisation Internet A partir de la page de paramétrage (CONFIGURATION), utilisez le tableau HEURE pour régler l’heure en fonction de votre fuseau horaire et cochez la case si vous désirez que votre unité se synchronise automatiquement sur les serveurs horaires dédiés sur Internet. Votre horloge système sera alors automatiquement réinitialisée lorsque vous vous connecterez au réseau. NOTE : Ceci écrasera tous les changements manuels d’heure que vous pourriez avoir opérés sur l’appareil. Paramétrage de votre MOT DE PASSE Paramétrez un nouveau nom d’utilisateur et un nouveau mot de passe pour empêcher des utilisateurs externes de modifier les paramétrages que vous avez effectués sur votre portail Web ainsi que dans les informations de contact de votre STATIM pour générer des formulaires. A partir de la page de paramétrage (CONFIGURATION), allez au tableau MOT DE PASSE. Notez que votre mot de passe et votre nom d’utilisateur par défaut est ‘scican’. Page 22... -
Page 23: Paramétrer Une Sauvegarde
Paramétrage et Utilisation de Votre Portail Web Paramétrer une sauvegarde A partir de la page de paramétrage (CONFIGURATION) utilisez le tableau SAUVEGARDE pour effectuer une sauvegarde de tous les paramètres configurables et des informations de contact que vous avez configurés sur votre portail Web STATim en les sauvegardant dans un fichier sur votre l’ordinateur de votre cabinet. NOTE : Pour des raisons de sécurité, votre mot de passe d’e-mail ne sera pas enregistré dans la sauvegarde. Cliquez sur les paramétrages de téléchargement pour enregistrer automatiquement vos paramètres dans un fichier sur l’ordinateur de votre cabinet. (CONSEIL: Utilisez la fonction Enregister sous (Save As) sur votre ordinateur pour choisir un emplacement spécifique. Le fichier sera sinon enregistré sur votre ordinateur à un emplacement automatiquement choisi par votre navigateur). Pour restaurer les paramétrages, cliquez sur Sélectionner, cherchez le fichier sur votre ordinateur, sélectionnez-le et cliquez sur Restaurer. Utilisation de TESTS A partir de la page de paramétrage (CONFIGURATION) cliquez sur le tableau OUTILS. Vous pouvez effectuer ici un test simple de bon fonctionnement de la connectivité de votre réseau. Les résultats vous confirmeront que vous pouvez bien accéder à Internet et à un routeur ou que votre unité dispose de sa propre adresse IP. Page 23... -
Page 24: Utilisation De La Page Statut
Paramétrage et Utilisation de Votre Portail Web Utilisation de la page STATUT A partir de la page STATUT, vous pouvez voir exactement ce que fait votre STATIM. Lorsque votre unité est en fonctionnement, un graphique montrant les différentes étapes du cycle en cours est affiché en temps réel. Une fois la procédure achevée achevé ou après un arrêt d’urgence, vous pourrez imprimer le graphique de cycle sous une forme qui inclut l’information et le logo de votre organisation. Utilisation de la page ARCHIVES A partir de la page ARCHIVES, vous pouvez accéder aux informations de cycle mémorisées dans le Data Logger de votre STATIM. Compléter les champs de l’année, du mois et du jour pour parcourir les cycles effectués à cette date. Pour imprimer, sélectionnez le bouton de prévisualisation d’impression et appuyez ensuite sur Imprimer. Page 24... -
Page 25: Envoi D'un E-Mail Sur Les Informations De Cycle
Paramétrage et Utilisation de Votre Portail Web Envoi d’un e-mail sur les informations de cycle Envoyez les informations de cycle que vous avez obtenues dans les ARCHIVES en sélectionnant le bouton de visualisation de l’impression et en cliquant sur EMAIL. Un fichier texte et une version PDF de toutes les informations de cycle seront alors envoyés aux ad- resses e-mail que vous aurez définies dans la page NOTIFICATIONS. Le STATIM G4 dispose d‘un Data Logger interne capable d’enregistrer toutes les informations d’un cycle quelconque, réussi ou incomplet, sur toute la durée de vie de l’appareil. Vous pouvez accéder à de telles informations via l’écran tactile, via le portail Web, en utilisant une unité de stockage USB ou en connectant une imprimante. Retrouver les informations de cycle en utilisant votre portail Web STATIM A partir de votre page d’accueil, cliquez sur la page ARCHIVES. A partir de la page ARCHIVES, vous pouvez accéder aux informations de cycle enregistrées dans le Data Logger interne du STATIM. Complétez les champs de l’année, du mois et du jour pour parcourir les cycles effectués par la machine à cette date. Pour imprimer, sélectionnez le bouton de prévisualisation d’impression et appuyez ensuite sur Imprimer. Page 25... - Page 26 Paramétrage et Utilisation de Votre Portail Web Remplissez les informations suivantes pour vos propres références. Adresse IP : _____________________________________________________________ ACCES : ________________________________________________________________ Type d’unité : ___________________________________________________________ Numéro de série : ________________________________________________________ Page 26...
-
Page 27: Netzwerkverbindung
Einrichtung und Verwendung Ihres STATIM-G4-Web-Portals Dieses Web-Portal ist eine direkte Verbindung zum STATim in Ihrem Netzwerk. Es wird durch Ihre Firewall geschützt und ist für externe Benutzer nicht zugänglich. Es stellt für dieses Gerät individuelle Echtzeit-Zyklus-Informationen und archivierte Sterilisierungsaufzeichnungen zur Verfügung. Von hier aus können Sie Berichte drucken, E-Mail-Benachrichtigungen einrichten und archivierte Zyklusdaten suchen. Befolgen Sie zum Einrichten Ihres Web-Portals die unten stehenden Anweisungen. Netzwerkverbindung Der STATim G4 verfügt auf der Rückseite des Gerätes über einen 10/100Base-T-Ethernet- Anschluss. Befolgen Sie die unten stehenden Schritte, wenn Sie Ihren StAtim an ein Netzwerk über einen Router anschließen wollen: Schließen Sie das Netzwerkkabel an den Ethernet-Anschluss auf der Rückseite des Gerätes an (wo sich der Anschluss befindet, sehen Sie im nächsten Abschnitt). Verwen- det Ihr Büro einen Router, muss dieser dem Gerät automatisch eine IP-Adresse zuord- nen. Die IP-Adresse wurde zugeordnet, wenn das rote X über dem Netzwerksymbol nicht mehr zu sehen ist . HINWEIS: Unter bestimmten Umständen, wenn Sie keinen Router haben und beispielsweise Windows Network Sharing verwenden, müssen Sie möglicherweise eine gesonderte oder statische’ IP-Adresse zuordnen. Wenden Sie sich zum Zuordnen ‘ einer statischen IP-Adresse an Ihren zuständigen Netzwerkadministrator. 2000 G4 Ethernet- Anschluss 5000 G4... -
Page 28: Anschluss Ihres Statim G4 An Ein Wireless-Netzwerk
DHCP Link: On Bind: dhcp PROGRAMM WAEHLEN IP: xxx.xxx.xxx.xxx MASK: xxx.xxx.xxx.xxx GATE: xxx.xxx.xxx.xxx DNS1: xxx.xxx.xxx.xxx Geben Sie die auf dem Touchscreen angezeigte IP-Adresse in den Browser Ihres Computers ein, um auf das Web-Portal Ihres Gerätes zuzugreifen. Die IP-Adresse wurde zugeordnet, wenn das rote X über dem Netzwerksymbol nicht mehr zu sehen ist. Ist das Netzwerksymbol aktiv (beispielsweise beim Verschicken einer E-Mail), wird es grün. HINWEIS: Die Verbindungszeit variiert je nach Geschwindigkeit Ihres Netzwerks. Die erste Verbindung dauert möglicherweise länger. Anschluss Ihres STATIM G4 an ein Wireless-Netzwerk Der StAtim G4 kann für eine kabellose Verwendung konfiguriert werden, indem der Ethernet-Anschluss an eine externe drahtlose Brücke (Zugangspunkt) angeschlos- sen wird. SciCan empfiehlt derzeit, die Verwendung der Duo Wireless Bridge DAP-1522 Xtreme N von D-Link . Wenden Sie sich für weitere Informationen zum Einrichten einer ® ® drahtlosen Brücke an Ihren Netzwerkadministrator. Seite 28... -
Page 29: Reservieren Einer Ip-Adresse Für Ihren Statim
Einrichtung und Verwendung Ihres STATIM-G4-Web-Portals Reservieren einer IP-Adresse für Ihren STATIM Wenn Ihr STATIM mit einem Router in Ihrem Netzwerk verbunden wird, wird ihm eine eindeutige IP-Adresse zugeordnet. HINWEIS: Der Zugriff auf diesen Bildschirm wird je nach Router unterschiedlich sein; wenn Sie ausführlichere Anweisungen benötigen, lesen Sie bitte im Benutzerhandbuch Ihres Routers nach oder wenden Sie sich an Ihren Netzwerkadministrator. SciCan empfiehlt gegenwärtig den D-Link DIR-615 Wireless N Router. Wenn die Verbindung zwischen Ihrem STATIM und dem Router unterbrochen wurde (d.h. Stromausfall im Haus, STATIM oder Router wurde neu gestartet usw.), hat die wiederhergestellte Verbindung möglicherweise eine andere IP-Adresse. Dies kann zu ungültig gewordenen Links von früher gespeicherten Lesezeichen oder anderen gespeicherten Verbindungen führen. Um eine ‚dauerhafte’ IP-Adresse zu setzen, führen Sie bitte folgende Schritte aus, um eine ‚DHCP/IP/Adressen-Reservierung’ vorzunehmen: HINWEIS : Die Hersteller verwenden unterschiedliche Nomenklaturen; die Einstellungen können daher eine der folgenden Bezeichnungen tragen: • DHCP-Reservierung, • IP-Reservierung oder • Adressen-Reservierung. WICHTIG: Wenden Sie sich bitte an Ihren Netzwerkadministrator, wenn Sie ... -
Page 30: Einrichten Ihrer Kontakte-Seite
Die von Ihnen verwendeten Informationen in den Feldern auf der KONTAKTE-Seite, wie etwa der Name Ihres Büros, die Anschrift und das hochgeladene Logo, werden dann verwendet, um die Startseite und Ausdrucke von StAtim zu personalisieren. HINWEIS: Um E-Mails von Ihrem STATIM zu erhalten, müssen Sie die SciCan Datenschutzrichtlinie akzeptieren, indem Sie ein Häkchen in dem Kasten am Ende dieser Seite setzen. Wenn Sie das Häkchen in diesem Feld nicht setzen, kann Ihr STATIM keine E-Mails senden. -
Page 31: Einrichten Der E-Mail-Adresse Ihres Statim
Einrichtung und Verwendung Ihres STATIM-G4-Web-Portals Einrichten der E-Mail-Adresse Ihres STATIM Ordnen Sie Ihrem Gerät über die Registerkarte E-MAIL SERVER auf der SETUP-Seite eine E-Mail-Adresse zu. Ihr STATim muss einen E-Mail-Account verwenden, der entweder bei Ihrem Internetanbieter oder bei einem webgestützten E-Mail-Dienst eingerichtet ist. Geben Sie auf dieser Seite die Informationen Ihres Anbieters in die Felder für den E-Mail-Account ein, wenn Sie mit einer E-Mail-Adresse von Ihrem Internetanbieter arbeiten. Wenn Sie die voreingestellten e-Mail-Server des StAtim-Web-Portals verwenden möchten (Sie kön- nen zwischen gmail, gmx mail, Yahoo und MSN mail auswählen), müssen Sie für Ihren StAtim einen Account anlegen (beispielsweise drsmithstatim@gmail.com). Es wird eine Test-E-Mail verschickt, um Ihre Einstellungen zu überprüfen. Entfernen Sie das Häkchen im Kästchen, wenn Sie keine Downloads und Werbenachrichten von SciCan erhalten möchten. Einrichten von Personen für E-Mail-Benachrichtigungen Verwenden Sie die Registerkarte BENACHRICHTIGUNGEN auf der SETUP-Seite, um die E-Mail-Adressen einzugeben und legen Sie fest, welche Aufzeichnungen verschickt werden sollen. Wählen Sie entweder ‚alle’ Zyklusinformationen einschließlich fehlerhafte Zyklen oder ‚CF’ für ausschließlich fehlerhafte Zyklen (cycle faults). In einem konfigurierbaren Nachrichtenfeld können Sie Angaben zur Identifizierung des Gerätes, wie etwa dessen Standort, eingeben. Entfernen Sie das Häkchen im Kästchen, wenn Sie nicht wünschen, dass der technische Kundendienst von SciCan automatisch Zyklusfehler-E-Mails des Gerätes erhält. HINWEIS: Wenn Sie von Ihrem Gerät keine E-Mails erhalten, prüfen Sie Ihren Spamfilter, um sicherzustellen, dass Ihr STATim als ein akzeptierter E-Mail-Absender identifiziert wurde. Seite 31... -
Page 32: Einrichten Von Zeitzone Und Internet-Synchronisierungen
Einrichtung und Verwendung Ihres STATIM-G4-Web-Portals Einrichten von Zeitzone und Internet-Synchronisierungen Richten Sie über die Registerkarte ZEIT auf der SETUP-Seite die Zeitzone ein und ma- chen Sie entsprechend Ihrer Zeitzone im Kästchen ein Häkchen, wenn Sie möchten, dass Ihr Gerät automatisch mit zugeordneten Internet-Zeitservern synchronisiert wird. Daraufhin wird die Uhrzeit jedes Mal automatisch zurückgesetzt, wenn eine Verbindung zum Netzwerk aufgebaut wird. HINWEIS: Manuelle Änderungen, die Sie an den Zeiteinstellungen direkt am Gerät vorgenommen haben, werden aufgehoben. Einrichten Ihres Passwortes Legen Sie einen neuen Benutzernamen und ein neues Passwort fest, damit unbefugte Benutzer keine Änderungen an den von Ihnen in Ihrem Web-Portal vorgenommenen Konfigurationen und an den Kontaktinformationen, die Ihr STATim zur Erstellung von Formularen verwendet, vornehmen. Gehen Sie auf der SETUP-Seite zur Registerkarte PASSWORT. Beachten Sie, dass so- wohl für Benutzername als auch Passwort die Standardeingabe “ scican” lautet. Seite 32... -
Page 33: Einrichten Eines Backups
Einrichtung und Verwendung Ihres STATIM-G4-Web-Portals Einrichten eines Backups Erstellen Sie über die Registerkarte BACKUP auf der SETUP-Seite ein Backup von säm- tlichen konfigurierbaren Änderungen und Kontaktinformationen, die Sie in Ihrem Web- Portal von STATim vorgenommen bzw. eingegeben haben, indem Sie eine Datei auf Ihrem Büro-Computer speichern. HINWEIS: Aus Sicherheitsgründen wird Ihr E-Mail-Passwort nicht gespeichert. Klicken Sie auf die Download-Einstellungen, damit sämtliche Einstellungen automatisch in einer Datei auf Ihrem Computer gespeichert werden (Tipp: Wählen Sie mit Hilfe der Funktion “ Speichernunter” auf Ihrem Computer einen bestimmten Speicherort aus. Andernfalls wird die Datei an einem standardmäßigen, von Ihrem Browser voreingestellten ort gespeichert. Klicken Sie zum Wiederherstellen der Einstellungen auf “ Datei auswählen” und suchen Sie die Datei in Ihrem Computer. Wählen Sie sie aus und klicken Sie auf “ Wiederherstellen”. Verwenden von TESTS Klicken Sie auf der SETUP-Seite auf die Registerkarte WERKZEUGE. Hier können Sie einen einfachen Test vornehmen, um Ihre Netzwerk-Konnektivität zu prüfen. Mit den Ergebnissen wird bestätigt, ob Sie Zugriff auf das Internet haben, auf einen Router zugreifen können und ob Ihr Gerät über eine ordnungsgemäße IP-Adresse verfügt. Seite 33... -
Page 34: Verwenden Der Status-Seite
Einrichtung und Verwendung Ihres STATIM-G4-Web-Portals Verwenden der STATUS-Seite Sie können über die Status-Seite exakt sehen, was Ihr STATim tut. Ist Ihr Gerät in Betrieb, erscheint eine grafische Darstellung, die die unterschiedlichen Stadien des aktuellen Zyklus in Echtzeit darstellt. Nach Abschluss des Zyklus oder nach einem Abbruch können Sie den Zyklus-Graph auf einem Formular ausdrucken, auf welchem die Daten und das Logo Ihres Unternehmens angegeben sind. Verwenden der ARCHIV-Seite Sie können über die Archiv-Seite auf Zyklusinformationen zugreifen, die im internen Datenspeicher Ihres STATim gespeichert sind. Füllen Sie die Felder “ Jahr”, “ Monat” und “ Tag” aus, um die an diesem Datum abgeschlossenen Zyklen zu durchsuchen. Wählen Sie zum Drucken die Schaltfläche “ Druckvorschau” aus und klicken Sie dann auf “ Drucken”. Seite 34... -
Page 35: Verschicken Von Zyklusinformationen Per E-Mail
Einrichtung und Verwendung Ihres STATIM-G4-Web-Portals Verschicken von Zyklusinformationen per E-Mail Verwenden Sie die im ARCHIV beschafften Zyklusinformationen, indem Sie die Schaltfläche “ Druckvorschau” auswählen und auf EMAIL klicken. Es werden von den Zyklusinformationen sowohl eine Textdatei als auch eine PDF-Version an die E-Mail-Adressen verschickt, die Sie auf der E-MAIL NUTZER-Seite voreingestellt haben. Der STATim G4 verfügt über einen internen Datenspeicher, mit dem sämtliche Zyklusdaten zu erfolgreich abgeschlossenen oder nicht abgeschlossenen Zyklen für die gesamte Lebensdauer des Gerätes gespeichert werden können. Sie können über den Touchscreen, über das Web-Portal, mit Hilfe eines USB-Speichergerätes oder durch Anschließen eines Druckers auf diese Informationen zugreifen. Abrufen von Zyklusinformationen über Ihr STATIM-Web-Portal Klicken Sie auf Ihrer Startseite auf die ARCHIV-Seite. Sie können über die ARCHIV-Seite auf Zyklusinformationen zugreifen, die im internen Datenspeicher Ihres STATim gespeichert sind. Füllen Sie die Felder “ Jahr”, “ Monat” und “ Tag” aus, um die an diesem Datum abgeschlossenen Zyklen zu durchsuchen. Wählen Sie zum Drucken die Schaltfläche “ Druckvorschau” aus und klicken Sie dann auf “ Drucken”. Seite 35... - Page 36 Einrichtung und Verwendung Ihres STATIM-G4-Web-Portals Tragen Sie folgende Angaben zur eigenen Erinnerung ein. IP-Adresse: _____________________________________________________________ GATE: __________________________________________________________________ Gerätetyp: ______________________________________________________________ Seriennummer: __________________________________________________________ Seite 36...
-
Page 37: Come Connettersi A Una Rete
Impostazione e Uso del Vostro Portale Web Questo portale web è un collegamento diretto a STATim sulla Vostra Rete. È protetto dal Vostro firewall e non è accessibile a utenti esterni. Fornisce informazioni in tempo reale sui cicli e sulle registrazioni di sterilizzazione archiviate in memoria, che appartengono unicamente al Vostro apparecchio. Da qui avete la possibilità di stampare relazioni, impostare notifiche di e-mail e di ricercare storie relative ai cicli. Per impostare il Vostro portale web, seguite le seguenti istruzioni. Come connettersi a una Rete Lo StAtim G4 è dotato di una porta Ethernet T a base 10/100, situata sul lato posteriore dell’apparecchio. Per collegare il Vostro STATim a una rete usando un router, seguite questi passaggi: Collegate il cavo di rete alla porta Ethernet sul lato posteriore dell’apparecchio (per individuare la porta, consultate il prossimo paragrafo). Se il Vostro ufficio usa un router, questo router deve assegnare automaticamente all’apparecchio un indirizzo IP. Conoscerete l’indirizzo IP che è stato assegnato, quando sull’icona della Rete scompare la X rossa. NOTA: In alcune circostanze, in cui non avete un router disponibile, ad esempio, quando usate un Windows Network Sharing (condivisione di Rete Windows), è necessario assegnare un indirizzo IP dedicato o “statico”. Per assegnare un indirizzo IP statico, metteteVi in contatto con il Vostro amministratore locale di rete. 2000 G4 Porta Ethernet 5000 G4 Pagina 37... -
Page 38: Come Connettere Lo Statim G4 A Una Rete Wireless
Link: On Bind: dhcp SELEZIONE DEL CICLO IP: xxx.xxx.xxx.xxx MASK: xxx.xxx.xxx.xxx GATE: xxx.xxx.xxx.xxx DNS1: xxx.xxx.xxx.xxx Digitate l’indirizzo IP, visualizzato sullo schermo a contatto (touchscreen), sul browser del Vostro computer, per accedere al portale web del Vostro apparecchio. Conoscerete l’indirizzo IP che è stato assegnato, quando sull’icona della Rete scompare la X rossa. Quando è attiva (ad esempio, quando si spedisce una e-mail), l’icona della rete diventa verde. NOTA: Il tempo necessario per il collegamento varia in funzione della velocità della Vostra Rete e può essere più lungo quando si esegue il collegamento iniziale Come connettere lo STATIM G4 a una rete wireless Lo StAtim G4 può essere configurato per un uso wireless collegando la porta Ethernet a un ponte / punto di accesso wireless esterno. SciCan attualmente raccommanda di usare il D-Link® DAP-1522 Xtreme N® Duo Wireless Bridge. Consultate il Vostro amministratore di rete per apprendere maggiori particolari su come impostare un ponte wireless. Pagina 38... -
Page 39: Come Riservare Un Indirizzo Ip Per Il Vostro Statim
Impostazione e Uso del Vostro Portale Web Come riservare un indirizzo IP per il vostro STATIM Quando si collega lo STATIM a un router sulla vostra rete, gli viene assegnato un indirizzo IP esclusivo. NOTA: L’accesso a questa schermata è diverso per ogni router; per istruzioni più dettagliate, consultare il Manuale utente del router oppure contattare l’amministratore di rete. SciCan attualmente raccomanda il router D-Link DIR-615 Wireless N. Se si perde la connessione tra il vostro STATIM e il router (ad es. perdita di potenza dell’impianto, riavvio dello STATIM o del router, ecc.), la connessione ristabilita potrebbe avere un diverso indirizzo IP. Ciò può determinare collegamenti non validi da qualsiasi bookmark precedentemente salvato oppure altre connessioni salvate. Se si vuole impostare un indirizzo IP “permanente”, seguire questi passi per creare una ‘Riserva DHCP/IP/indirizzo: NOTA: Ogni produttore può utilizzare una nomenclatura diversa, tali impostazioni possono infatti essere chiamate in uno dei modi seguenti: • Riserva DHCP • Riserva IP oppure •... -
Page 40: Come Impostare La Pagina Dei Vostri Contatti
AVISO: Per ricevere posta elettronica dal suo STATIM, la preghiamo di accetare l’accordo di confidenza della SciCan porrendo una X alla fine di questa pagina. Se non viene marcato con una X nel posto addetto, la STATIM non sarà in grado d’inviare posta elettronica. -
Page 41: Come Impostare Le E-Mail Sul Vostro Statim
Come impostare le E-mail sul Vostro STATIM Nella pagina di IMPOSTAZIONE, usate il comando REMOTO per assegnare al Vostro apparecchio un indirizzo e-mail. Il Vostro STATim deve usare una impostazione dell’account della e-mail o con il Vostro provider del servizio Internet o con un servizio di e-mail basato sul web. Se state lavorando con un indirizzo E-mail fornito dal Vostro provider del servizio Internet, compilate tutti i campi dell’account della e-mail su questa pagina con le informazioni relative al Vostro provider. Per usare uno dei server di e-mail preimpostati nel portale web di STATim (scegliete tra gmail, gmx mail, Yahoo and MSN mail), dovete creare un account per il Vostro STATim (ad esempio: drsmithstatim@gmail.com). Una e-mail di prova sarà inviata per verificare le Vostre impostazioni. Disattivate il riquadro (togliendo il simbolo di spunta) se non volete ricevere file scaricati e promozioni da SciCan. Come impostare gli utenti che riceveranno NOTIFICHE di e-mail Dalla pagina SETUP (impostazioni), utilizzare la scheda NOTIFICATIONS (notifiche) per inserire gli indirizzi e-mail e specificare quali record saranno inviati. Scegliere tra “All” (tutte) le informazioni sul ciclo, incluse le anomalie del ciclo, e ‘CF’ per le sole anomalie del ciclo. Un riquadro configurabile di messaggi permette di aggiungere particolari per identificare l’apparecchio, quale ad esempio, l’ubicazione. Disattivate il riquadro (togliendo il simbolo di spunta) se non volete che l’Assistenza tecnica di Scican riceva automaticamente dal Vostro apparecchio le e-mail di errore sul ciclo. NOTA: Se non ricevete e-mail dal Vostro apparecchio, controllate il filtro della posta ... -
Page 42: Come Impostare Il Fuso Orario E La Sincronizzazione Internet
Impostazione e Uso del Vostro Portale Web Come impostare il Fuso orario e la Sincronizzazione Internet Nella pagina di IMPOSTAZIONE usate il comando TEMPO per impostare l’ora in base al Vostro fuso orario e attivate il riquadro (con un segno di spunta) se volete che il Vostro apparecchio si sincronizzi automaticamente con server dedicati di Internet di regolazione del fuso orario. In questo caso l’apparecchio reimposterà automaticamente l’ora ogni volta che si collega alla rete. NOTA: Questo avrà la priorità su qualsiasi modifica manuale sia stata apportata all’impostazione dell’ora direttamente sull’apparecchio. Come impostare la Vostra PASSWORD Impostate un nuovo nome utente e una nuova password per evitare che utenti non autorizzati modifichino le configurazioni che avete impostato sul Vostro portale web e nelle informazioni relative ai Contatti, che il Vostro STATim usa per generare i moduli. Cliccate sulla pagina di IMPOSTAZIONE e posizionateVi sul comando PASSWORD. Tenete presente che sia il nome utente che la password sono “scican”. Pagina 42 Pagina 42... -
Page 43: Come Impostare Una Copia Di Sicurezza (Backup)
Impostazione e Uso del Vostro Portale Web Come impostare una COPIA DI SICUREZZA (BACKUP) Nella pagina di IMPOSTAZIONE usate il comando COPIA DI SICUREZZA (BACKUP) per eseguire la copia di sicurezza (backup) di tutte le modifiche configurabili e delle in- formazioni sui Contatti che avete inserito sul portale web del Vostro STATim, archiviando un file nel Vostro computer dell’ufficio. NOTA: Per ragioni di sicurezza, la Vostra password delle e-mail non verrà salvata. Cliccate le impostazioni di scaricamento (download) per memorizzare automaticamente tutte le impostazioni in un file del Vostro computer. SUGGERIMENTO: Usate la funzione Save As …(Salva come …) sul Vostro computer per scegliere una destinazione specifica, altrimenti il computer caricherà il file in una destin- azione di default preimpostata dal Vostro motore di ricerca (browser). Per ripristinare le impostazioni, cliccate su Selezionare file (Choose file) e andate alla ri- cerca del file (browse) sul Vostro computer, selezionatelo e poi cliccate su Ripristina. Come usare TEST Cliccate sulla pagina di IMPOSTAZIONE e posizionateVi sul comando STRUMENTI. Di qui potete eseguire un semplice test passa/non passa per verificare la connettività della Vostra rete. I risultati Vi confermeranno se avete accesso a Internet, se avete accesso a un router e se il Vostro apparecchio ha un indirizzo IP idoneo. Pagina 43 Pagina 43... -
Page 44: Come Usare La Pagina Degli Stati
Impostazione e Uso del Vostro Portale Web Come usare la pagina degli STATI Sulla pagina degli Stati potete vedere esattamente che cosa il Vostro STATim sta facendo. Quando il Vostro apparecchio è in funzione, un grafico che descrive i diversi passaggi del ciclo in corso sarà visualizzato in tempo reale. Al termine o dopo un arresto forzato, potrete stampare il grafico del ciclo su un modulo che riporta anche le informazioni sulla Vostra organizzazione e il logo. Come usare la pagina degli ARCHIVI Sulla pagina degli Archivi potete avere accesso alle informazioni sul ciclo memorizzate nel registro dati (Data Logger) interno del Vostro STATim. Compilate i campi relativi all’anno, al mese e al giorno per eseguire una ricerca dei cicli completati in quella data. Per stampare, selezionate il tasto di anteprima di stampa e poi cliccate su Stampa. Pagina 44... -
Page 45: Come Inviare Per E-Mail Informazioni Su Un Ciclo
Impostazione e Uso del Vostro Portale Web Come inviare per e-mail informazioni su un ciclo Inviate le informazioni sul ciclo, a cui avete avuto accesso negli ARCHIVI, selezionando il tasto di anteprima di stampa e cliccando su E-MAIL. Saranno inviati sia un file testo che la versione PDF delle informazioni sul ciclo a ciascuno degli indirizzi e-mail che avrete predefinito nella pagina NOTIFICHE. Lo StAtim G4 ha un registro dati (Data Logger) interno, in grado di memorizzare tutti i dati del ciclo per ogni ciclo, sia esso concluso con esito positivo o incompleto, per tutto il periodo di vita dell’apparecchio. Potete accedere a queste informazioni mediante lo schermo a contatto, tramite portale web, usando una chiavetta di memoria USB o collegando una stampante. Come recuperare informazioni su un ciclo usando il portale web del Vostro STATIM Sulla Vostra pagina iniziale cliccate sulla pagina ARCHIVI. Sulla pagina ARCHIVI potete avere accesso alle informazioni sul ciclo memorizzate nel registro dati (Data Logger) interno del Vostro STATim. Compilate i campi relativi all’anno, ... - Page 46 Impostazione e Uso del Vostro Portale Web Inserire le seguenti informazioni per proprio riferimento. Indirizzo IP: _____________________________________________________________ GATE: __________________________________________________________________ Tipo di unità: ____________________________________________________________ N° di serie: ______________________________________________________________ Pagina 46...
-
Page 47: Configuración Y Uso De Su Portal Web
Configuración y Uso de Su Portal Web Este portal web es una conexión directa al STATim en su red. Se encuentra protegido por su cortafuegos (firewall) y no es accesible para los usuarios exteriores. El portal proporciona información de los ciclos en tiempo real y archiva registros de esterilización que resultan únicos para esta unidad. Desde aquí, usted puede imprimir informes, configurar la notificación de correo electrónico y buscar historiales de los ciclos. Para configurar su portal web, siga estas instrucciones: Conexión a una red La unidad STATim G4 tiene un puerto Ethernet 10/100Base-T situado en su parte trasera. Para conectar su STATim a una red utilizando un enrutador, siga estos pasos: Conecte el cable de red al puerto Ethernet situado en la parte trasera de la unidad (para ver la posición del puerto, consulte la siguiente sección). Si en su establecimiento se utiliza un enrutador, éste deberá asignar automáticamente a la unidad una dirección IP. Usted sabrá que se ha asignado una dirección IP cuando desaparezca la X roja situada sobre el icono de red. NOTA: En aquellas circunstancias en las que usted no tiene un enrutador (por ejemplo, al aplicar el Uso compartido de red de Windows), puede ocurrir que deba asignar una dirección IP dedicada o “estática”. Para asignar una dirección IP estática, póngase en contacto con su administrador de red local. 2000 G4 Puerto Ethernet 5000 G4 Página 47... -
Page 48: Conexión De Su Statim G4 A Una Red Inalámbrica
DHCP mm/dd/yyyy hh:mm:ss Link: On Bind: dhcp ELIJA UN CICLO IP: xxx.xxx.xxx.xxx MASK: xxx.xxx.xxx.xxx GATE: xxx.xxx.xxx.xxx DNS1: xxx.xxx.xxx.xxx Escriba la dirección IP correspondiente (que aparece en la pantalla táctil) en el navegador del ordenador para acceder al portal web de su unidad. Usted sabrá que se ha asignado una dirección IP cuando desaparezca la X roja situada sobre el icono de red. Cuando el icono de red está activo (por ejemplo, al enviar correo electrónico), se pone verde. NOTA: El tiempo de conexión varía según la velocidad de la red; además, puede ser necesario un tiempo más prolongado para establecer una conexión inicial. Conexión de su STATIM G4 a una red inalámbrica La unidad STATim G4 puede ser configurada para un uso inalámbrico si se conecta el puerto Ethernet a un puente / punto de acceso inalámbrico externo. Actualmente, SciCan recomienda usar el puente inalámbrico de D-Link® DAP-1522 Xtreme N® Duo. Póngase en contacto con su administrador de red para obtener más detalles acerca de cómo configurar un puente inalámbrico. Página 48... -
Page 49: Reserva De Una Diricción Ip Para Su Statim
Configuración y Uso de Su Portal Web Reserva de una dirección IP para su STATIM Cuando la unidad STATIM se conecta a un enrutador en su red, se le asigna una dirección IP única. NOTA: El acceso a esta pantalla varía según el enrutador. Consulte el manual del enrutador o póngase en contacto con su administrador de red para obtener instrucciones más detalladas. En la actualidad, SciCan recomienda utilizar el enrutador inalámbrico D-Link DIR-615 Wireless N. Si la conexión entre su STATIM y el enrutador se pierde (se interrumpe el suministro de energía, se reinicia su STATIM o el enrutador, etc.), la conexión restablecida posteriormente puede tener una dirección IP diferente. Esto puede generar enlaces inválidos de cualquier marcador previamente almacenado u otras conexiones almacenadas. Si desea configurar una dirección IP “permanente”, siga estos pasos para establecer una “Reserva de DHCP/IP/dirección”: NOTA: Cada fabricante puede usar una nomenclatura diferente; la configuración puede ser una de las siguientes: • reserva de DHCP, • reserva de IP o •... -
Page 50: Configuración De Su Página De Contactos
ADVERTENCIA: Para recibir correos electrónicos desde su STATIM, usted debe aceptar el acuerdo de confidencia de SciCan poniendo una X al pie de esta página. Si no marca con una X en el lugar adecuado, el STATIM no podrá enviar correos. -
Page 51: Configuración De Su Correo Electrónico De Statim
Configuración y Uso de Su Portal Web Configuración de su correo electrónico de STATIM En la página de SETUP, utilice la pestaña REMOTO para asignar a su unidad una dirección de correo electrónico. Su STATim debe usar una cuenta de correo electrónico configurada con el proveedor de servicios de Internet o con un servicio de correo electrónico basado en web. Si usted trabaja con una dirección de correo electrónico configurada con su proveedor de servicios de Internet, rellene los campos de la cuenta de esta página con la información correspondiente a su proveedor. Para utilizar uno de los servidores de correo electrónico predeterminados en el portal web STATim (se puede elegir entre gmail, gmx, Yahoo y MSN), usted debe crear una cuenta para su STATim (por ejemplo, drsmithstatim@gmail. com). Se enviará un correo electrónico de prueba para verificar su configuración. Desmarque la casilla si no desea recibir descargas y promociones de SciCan. Configuración de quién recibirá NOTIFICACIONES de correo electrónico En la página de SETUP, utilice la pestaña NOTIFICACIONES para indicar las direcciones de correo electrónico y especificar qué registros serán enviados. Seleccione “Toda” la información, que incluye los errores de ciclo, o “EC” para errores de ciclo solamente. Una casilla de mensajes configurable permite que usted añada detalles para identificar la unidad (por ejemplo, su ubicación). Desmarque la casilla si no desea que el servicio técnico de SciCan reciba automáticamente los mensajes de correo electrónico referidos a errores de ciclo en su unidad. NOTA: Si no está recibiendo mensajes de correo electrónico de su unidad, controle el filtro antispam. Asegúrese de que su STATim haya sido identificada como una fuente aceptada de correo electrónico. -
Page 52: Configuración De Huso Horario Y Sincronizaciones Por Internet
Configuración y Uso de Su Portal Web Configuración de huso horario y sincronizaciones por Internet En la página de SETUP, utilice la pestaña HORA para realizar la configuración correspondiente de acuerdo con su huso horario y marque la casilla si desea que su unidad esté sincronizada automáticamente con servidores de hora dedicados en Internet. Si lo hace, el reloj se reajustará de forma automática cada vez que la unidad se conecte a la red. NOTA: De este modo, se anularán todos los cambios manuales que usted haya realizado directamente en la unidad para ajustar la hora. Configuración de su CONTRASEÑA Introduzca un nuevo nombre de usuario y una nueva contraseña. De este modo, evitará que personas no autorizadas cambien las configuraciones realizadas en su portal web o la información de “Contactos”, que su STATim usa para generar formularios. En la página de SETUP, vaya a la pestaña CONTRASEÑA. Tenga en cuenta que, por defecto, tanto el nombre de usuario como la contraseña son “scican”. Página 52... -
Page 53: Configuración De Una Copia De Seguridad
Configuración y Uso de Su Portal Web Configuración de una COPIA DE SEGURIDAD En la página de SETUP, utilice la pestaña COPIA DE SEGURIDAD para hacer una copia de seguridad de todos los cambios configurables y la información de “Contactos” que usted ha introducido en el portal web STATim. De este modo, podrá almacenar un archivo en su ordenador. NOTA: Por razones de seguridad, no se guardará la contraseña de su correo electrónico. Haga clic en “Ajustes de descarga” para almacenar automáticamente todas las configuraciones en un archivo en el ordenador (SUGERENCIA: Utilice la función “Guardar como” en su ordenador para elegir una ubicación específica; de lo contrario, el archivo se cargará en una ubicación definida por defecto). Para restaurar la configuración, haga clic en “Elegir archivo”, busque el archivo en su ordenador, selecciónelo y haga clic en “Restaurar”. Uso de PRUEBAS En la página de SETUP, haga clic en la pestaña HERRAMIENTAS. Aquí usted podrá verificar la conectividad de la red mediante una sencilla prueba de éxito o fracaso. Los resultados confirmarán si usted tiene acceso a Internet, si existe el acceso a un enrutador y si su unidad cuenta con una dirección IP adecuada. Página 53... -
Page 54: Uso De La Página De Estado
Configuración y Uso de Su Portal Web Uso de la página de ESTADO En la página de “Estado”, usted puede ver exactamente qué está haciendo su STATim. Si la unidad se encuentra en funcionamiento, un gráfico mostrará en tiempo real las diferentes fases del ciclo en curso. Una vez que éste se completa o tras una parada forzada, se puede imprimir el gráfico del ciclo en el formulario correspondiente, con información y el logotipo de su establecimiento. Uso de la página de ARCHIVOS En la página de “Archivos”, usted puede acceder a la información de los ciclos que está almacenada en el registrador interno de su STATim. Rellene los campos correspondientes a año, mes y día para navegar a través de los ciclos completados en esa fecha. Para imprimir, seleccione el botón “Vista previa de impresión” y luego haga clic en “Impresión”. Página 54... -
Page 55: Mensajes De Correo Electrónico Con Información Del Ciclo
Configuración y Uso de Su Portal Web Mensajes de correo electrónico con información del ciclo Para enviar la información del ciclo a la que ha accedido en ARCHIVOS, seleccione el botón “Vista previa de impresión” y haga clic en CORREO ELECTRÓNICO. La información del ciclo será enviada mediante un archivo de texto y una versión en PDF a alguna de las direcciones de correo electrónico predefinidas en la página de NOTIFICACIONES. Su STATim G4 tiene un registrador interno, que permite almacenar todos los datos correspondientes a cada uno de los ciclos (exitosos o incompletos) a lo largo de la vida útil de la unidad. Usted puede acceder a esta información mediante la pantalla táctil, a través del portal web, utilizando una memoria USB o conectando una impresora. Recuperación de la información del ciclo mediante el uso de su portal web STATIM En su página de inicio, haga clic en ARCHIVOS. En la página de ARCHIVOS, usted puede acceder a la información de los ciclos que está almacenada en el registrador interno de su STATim. Rellene los campos correspondientes a año, mes y día para navegar a través de los ciclos completados en ... - Page 56 Configuración y Uso de Su Portal Web Complete la siguiente información para su propia referencia. Dirección IP: _____________________________________________________________ PUERTA DE ENLACE: ____________________________________________________ Tipo de unidad: __________________________________________________________ Serie Nº: ________________________________________________________________ Página 56...
Need help?
Do you have a question about the STATIM 5000 G4 and is the answer not in the manual?
Questions and answers