SciCan STATIM 5000 Operator's Manual
Cassette autoclave
Hide thumbs
Also See for STATIM 5000:
- Service manual (271 pages) ,
- Operator's manual (43 pages) ,
- Technical training manual (29 pages)

Related Manuals for SciCan STATIM 5000


Summary of Contents for SciCan STATIM 5000
- Page 1 STATIM 2000/5000 CASSETTE AUTOCLAVE ™ • Operator’s Manual • Manual del Operador • Manual do Operação...
-
Page 2: Table Of Contents
STAT-DRI, Your Infection Control Specialist, DriTec and DriTec logos are trademarks of SciCan Ltd. All other trademarks referred to in this manual Tel.: +49 (0)7561 98343 - 0 are the property of their respective owners. Fax: +49 (0)7561 98343 - 699 For all service and repair inquiries: SciCan Inc. -
Page 3: Introduction
1. Introduction Statim 5000 Statim 2000 Congratulations on your selection of the STATIM Cassette Autoclave ® . We are confident that you have purchased the finest equipment of its type. The Statim is a compact, counter-top unit that features a number of sterilizing cycles designed to meet your needs and suitability for steam sterilization. -
Page 4: Important Information
Never remove the cover of the unit and never insert objects through holes or openings in the cabinetry. Doing so may damage the unit and / or pose a hazard to the operator. All elements of this book are common to both Statim 2000 and Statim 5000 except when noted. -
Page 5: Statim 2000 - Unit Overview
2. Important Information 2.2 Statim 2000 — Unit overview level indicator Figure 1 keypad reservoir cap/ water filter power indicator active indicator power switch power cable port leveler feet exhaust tube port cassette biological filter compressor RS232 port (not on all models) The following symbols A situation which A potential hazard... -
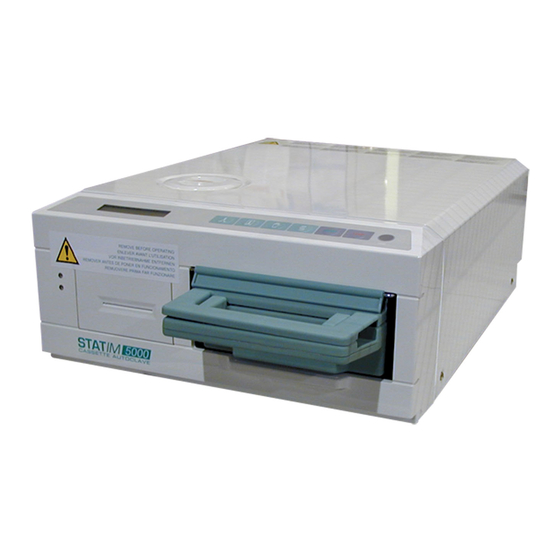
Page 6: Statim 5000 - Unit Overview
Indicator LED button Indicator LED When you receive your Statim 5000 packing carton, the items listed below will be included. If any of the items are missing, contact your dealer immediately so that the situation can be corrected. STAT-DRI Plates Cassette Tray and Lid (Not standard with U.S. -
Page 7: Installation
3. Installation 3.1 Environmental Considerations There are several factors that may affect the performance of your Statim. Please review these factors, and select a suitable location in which to install the unit. • Temperature and Humidity Avoid installing your Statim in direct sunlight or close to a heat source (e.g. -
Page 8: Connecting The Waste Bottle
10 μS / cm). The impurities and additives in other water sources will cause an error reading on the LCD. If you have a water conductivity meter (available from SciCan, order number 01-103139S) check each new water container before filling the reservoir. -
Page 9: Priming The Statim Pump
3. Installation To fill the reservoir, follow these steps (see Figure 5): 1. Remove the reservoir cap 2. Pour steam-process distilled water into the reservoir until almost full (a maximum of 4L/1 U.S. gal). Use a funnel to avoid spillage. 3. -
Page 10: Language Selection
Once the unit is installed and before any instruments are sterilized, run two Wrapped Cycles (see Section 4.8 Statim 2000 - Running a Cycle and 4.10 Statim 5000 - Running a Cycle). Remove the cassette once it has cooled. Clean the top (lid) and bottom (tray) sections using a soft cloth to wipe the inside surfaces and then rinse thoroughly with tap water. -
Page 11: Instructions For Use
Statim 2000 and the cassette handle. • STAT-DRI Treatment of the interior surfaces of the cassette with the STAT-DRI drying agent, provided with your unit, will enhance the drying process. (Replacement bottles are available from SciCan, order number 2OZPLUS, 8OZPLUST, 32OZPLUS). -
Page 12: Statim 5000 - Cassette
4. Instructions For Use 4.2 Statim 5000 — Using the Cassette When removing the cassette after a cycle, exercise caution as the metal areas will be hot and the cassette may contain hot steam. • To open the cassette: 1. Push the carry handle into the open position. -
Page 13: Statim 5000 - Stat-Dri Plates
Statim 5000 and the cassette handle. 4.3 Statim 5000 — STAT-DRI Plates The Statim 5000 cassette uses STAT-DRI plates to enhance the drying process for wrapped instruments. The adjustable plates are designed for the unwrapped instruments rack and eliminate the need for a separate wrapped instrument rack. - Page 14 The wrapped instrument rack for the Statim 5000 is designed to hold a maximum of 12 autoclave bags. Care must be taken to ensure that the combined weight of the loaded bags does not exceed 1.5 kg (3.3 lbs).
-
Page 15: Using Biological/Chemical Indicators
In addition, the weekly use of biological indicators, which allow you to ascertain whether the instruments have been exposed to sterilization conditions, is recommended. For Statim 5000 units in the United States, SciCan recommends using the 3M Attest™ biological monitoring system for routine monitoring. - Page 16 4. If the results do not change, do not process any more instruments within the Statim and contact your SciCan dealer for further assistance. Because the turnaround time for the 3M Attest™ is up to 48 hours, it is recommended that the tests be conducted so that the incubation period occurs during a period of planned downtime such a the last cycle before a weekend.
-
Page 17: Statim 2000 - Selecting A Cycle
4. Instructions For Use 4.7 Statim 2000 — Selecting a Cycle The Statim 2000 has three sterilization cycles, each designed to sterilize a specific type of instrument. The instruments will remain sterile after a successful cycle until the cassette is removed from the autoclave. At the end of each sterilization cycle, microbiologically filtered air-drying will commence for 1 hour. - Page 18 4. Instructions For Use 2. Wrapped Cycle The Wrapped Cycle is used to sterilize up to 1.0 kg (2.2 lbs) of solid and hollow metal instruments which have been sealed in paper / paper, or paper / plastic autoclave bags. Dental handpieces may be sterilized in this cycle.
- Page 19 4. Instructions For Use 4. Air Dry Only Cycle This is not a sterilization cycle. The Air Dry Only Cycle starts automatically after each sterilizing cycle and runs for 60 minutes. Air drying may be interrupted by pressing the STOP button. To ensure that the contents of the cassette are dry, the cycle should run for the full 60 minutes.
-
Page 20: Statim 2000 - Running A Cycle
4. Instructions For Use 4.8 Statim 2000 — Running a Cycle To operate each cycle, follow these steps and watch the LCD . Turn the power switch 14:23 3/11/2001 at the back of the unit to ON. SELECT A CYCLE SELECT A CYCLE The LCD Display reads: (if optional printer is installed) - Page 21 4. Instructions For Use As the cycle is running, an intermittent buzzing sound will be apparent as the pump injects water into the steam generator. A random clicking sound will also be heard as the exhaust valve opens and closes. Once the sterilization cycle is complete, a reminder tone will sound and the amber light will flash as the cycle moves into the Air Drying phase.
-
Page 22: Statim 5000 - Selecting A Cycle
4. Instructions For Use 4.9 Statim 5000 — Selecting a Cycle The Statim 5000 has four sterilization cycles, each designed to sterilize a specific type of instrument. It is important not to overload the chamber as this can inhibit steam access to all instrument surfaces. - Page 23 132˚ C (270˚ F) for USA and 134˚ C (273˚ F) for all other countries, and the holding time is 3.5 minutes. See Section 4.2 Statim 5000 — Cassette and Section 4.4 Preparing and Loading Instruments before running this cycle.
- Page 24 The Heavy Duty Cycle is used to sterilize larger loads of unwrapped metal instruments weighing up to 1.5 kg (3.3 lbs). Dental hand pieces can be sterilized in this cycle. Using the Statim 5000 Extended Cassette (order no. 01-104104), rigid endoscopes may be sterilized in this cycle.
-
Page 25: Statim 5000 - Running A Cycle
4. Instructions For Use 4.10 Statim 5000 — Running a Cycle To operate each cycle, follow these steps and watch the LCD. Turn the power switch at the 14:23 3/11/2001 SELECT A CYCLE back of the unit to ON. SELECT A CYCLE... - Page 26 4. Instructions For Use The sterilizing cycle ends when the reminder tone sounds, the amber light flashes and the message CYCLE COMPLETE is displayed. The display appears similar to: AIR DRYING 60:00 CYCLE COMPLETE You may interrupt the automatic 60 minute Air Drying phase at any time, or let it run to the end.
-
Page 27: Stopping A Cycle
4. Instructions For Use 4.11 Stopping a Cycle To stop a cycle press the STOP button. If the STOP button is pushed, the cassette is removed, or the unit detects a problem while operating, the cycle will stop and the amber active light will flash. -
Page 28: Maintenance
Keeping the Statim cassette clean is good clinical practice and assists in the function of the unit. SciCan recommends that the interior surface be cleaned at least once a week. Use dishwashing soap or a mild detergent that does not contain chlorine. Scrub the inside of the cassette with a cleaning pad designed for use with Teflon™... -
Page 29: Changing The Bacteria Retentive Air Filters
To ensure optimum performance of your Statim cassette autoclave, change the cassette seal every 500 cycles or every six months, whichever comes first. Replacement seals are available from SciCan (order number 01-100028S for Statim 2000 and 01-101649S for Statim 5000). -
Page 30: Maintaining Fluid Levels
5. Maintenance Remove the old seal and discard. Clean any residue out of the seal channel and flush out the channel with distilled water. Lubricate the new seal with the liquid seal lubricant provided. Insert the rounded edge of the seal under the round lip of the lid. -
Page 31: Preventative Maintenance Schedule
5. Maintenance 5.10 Preventative Maintenance Schedule To ensure trouble-free performance, both the operator and the dealer must follow a preventative maintenance schedule. NOTE: Please refer to your National, Regional, State or Safety laws for any additional reoccurring user testing that may be required. The schedules below describe the necessary actions. -
Page 32: The Communication Port
For your Statim to communicate to a specific device, you must enable this function through the User Setup menu. Follow the instructions in Section 6.2 Installing the SciCan Data Logger below to enable communication to either an external printer or the SciCan Data Logger. - Page 33 (Not on all models) 6.2 Installing the SciCan Data Logger SciCanʼs USB Data Logger can record and store cycle information onto a mass storage device (MSD) such as a USB Flash Drive or SD memory card. These instructions are for units with a 9-pin communication (RS232) port located at the back of the unit.
- Page 34 6. The Communication Port (Not on all models) Setting the Serial Port Bitrate to 9600 9600 Serial Port Bitrate 1. From the User Setup menu, use the UNWRAPPED and WRAPPED buttons to scroll to the Serial Port Bitrate menu and select it using the RUBBER AND PLASTIC button.
- Page 35 Connecting the SciCan Data Logger 1. Ensure that both the Statim unit and the SciCan Data Logger are off. 2. Connect the SciCan Data Logger to the Statim unit by using the serial cable. 3. Power up the SciCan Data Logger.
-
Page 36: Cycle Printout Overview
6. The Communication Port (Not on all models) STATIM 2000 S201R604 6.3 Cycle Printout Overview UNIT # : 1. Model: STATIM 2000 software: S201R604 CYCLE NUMBER 000002 2. Unit Identifier: autoclave has been set up as number 000 10:47 10/25/2007 3. -
Page 37: Internal Printer
(Not on all models) 7.1 Installing Paper on the Internal Printer Use only paper approved for use with the optional internal printer on the Statim 5000. The use of any other paper will damage the printer and will void the warranty. Thermal paper is available from your dealer (SciCan order no. - Page 38 7. Internal Printer (Not on all models) 7. Continue to press the paper advance button until the paper feeds through the paper exit slot on the front of the printer. Then, move the paper roll arm into the operating position and close the printer door .
-
Page 39: Removing Internal Printer Paper Jams
When paper is jammed in the printer, follow these steps to remove the jam: 1. Power the Statim 5000 OFF and unplug the unit. 2. Using scissors, cut the paper between the roll and the paper feed slot 3. - Page 40 Do not over-tighten these screws. 6. Plug your Statim 5000 into the wall receptacle. Turn the power switch to the ON position. 7. Press the printer power button to the ON position. Load paper into the printer...
-
Page 41: Troubleshooting
8. Troubleshooting Problem Solution Unit does not power ON. Check that the unit is plugged into a properly grounded outlet and that the power cord is firmly seated at the rear of the machine. Try another circuit. Power unit OFF for 10 seconds and then power ON again. - Page 42 If the tube is too short to remove a section, contact your SciCan dealer for a replacement. Make sure the compressor is working. To check, remove the exhaust tube from the waste bottle.
- Page 43 Be careful as the metal parts will be hot and the cassette will contain hot steam. If the leak persists, turn the unit OFF, remove and unload the cassette and contact your SciCan dealer. Message WATER QUALITY IS NOT You have used water which is not steam-process ACCEPTABLE.
- Page 44 Check the power connection. Ensure the lower red LED is lit. Check that the Mass Storage Device is properly inserted. Repeat the instructions for Installing the SciCan Data Logger on your Statim. Message MSD/FLASH FULL <> The MSD is full. Export the data.
-
Page 45: Spare Parts List
9. Spare Parts List 01-100780S Bumper 01-101766S Power Cord UK (2000 & 5000) 01-100782S Push-in Fitting (2000) 01-101767S Power Cord Australia (5000) 01-101658S Cassette Handles (5000) 01-101768S Power Cord Switzerland (2000 & 5000) 01-101755S Push-in Fitting (5000) 01-101769S Power Cord Italy (2000 & 5000) 01-106030S Cassette Lid Handle (2000) 01-101779S Power Cord Europe (2000 &... -
Page 46: Warranty
10. Warranty Limited Warranty For a period of one year, SciCan guarantees that the Statim 2000 / 5000, when manufactured by SciCan in new and unused condition, will not fail during normal service due to defects in material and workmanship that are not due to apparent abuse, misuse, or accident. -
Page 47: Specifications
11. Specifications 11.1 Statim 2000 — Specifications Machine Dimensions: Length: 485 mm (19") Width: 415 mm (16.3") Height: 150 mm (5.9") Cassette Size (External): Length: 410 mm (16") includes handles Width: 195 mm (7.67") Height: 40 mm (1.6") Cassette Size (Internal): Length: 280 mm (11") Width:... -
Page 48: Statim 5000 - Specifications
11. Specifications 11.2 Statim 5000 — Specifications Machine Dimensions: Length: 550 mm (22") Width: 410 mm (16") Height: 190 mm (7.5") Cassette Size (External): Length: 495 mm (19.5") includes handles Width: 195 mm (7.67") Height: 80 mm (3.2") Extended Cassette Size (External): Length: 565 mm (22.2")
Need help?
Do you have a question about the STATIM 5000 and is the answer not in the manual?
Questions and answers