
Subscribe to Our Youtube Channel
Related Manuals for SWIT s-1222F


Summary of Contents for SWIT s-1222F
-
Page 1: User Manual
Model: S-1222F 21.5" Broadcast Studio LCD Monitor User Manual Ver: V1.0.0V00 Please read this User Manual throughout before using. - Page 2 . Due to constant effort of product development, SWIT reserves the right to make changes and improvements to the product described in this manual without prior notice. The warranty period of this product is 2 years, and does not cover the following: ....
-
Page 3: Maintenance
Maintenance The Monitor 1. Please keep the signal terminals and the cooling vent away from knife-edge, metal or liquid in order to avoid short-circuit and damage. 2. Please don't try to disassemble any parts of the monitor by yourself, which would probably damage the monitor and do harm to human body, and it will cause the invalidation of product warranty. - Page 4 1. Features Full-HD 21.5” LCD Panel Peaking focus assist (red/blue switch) ◆ ◆ ◆ ◆ 1920×1080 resolution, H 178°/V 178° viewing The Peaking focus assist function is to mark the angle, 1000:1 contrast sharpest edges of the image with red or blue Multiple inputs color, for users to check if the subjects are HD/SD-SDI, HDMI and Composite input...
-
Page 5: Panel Instruction
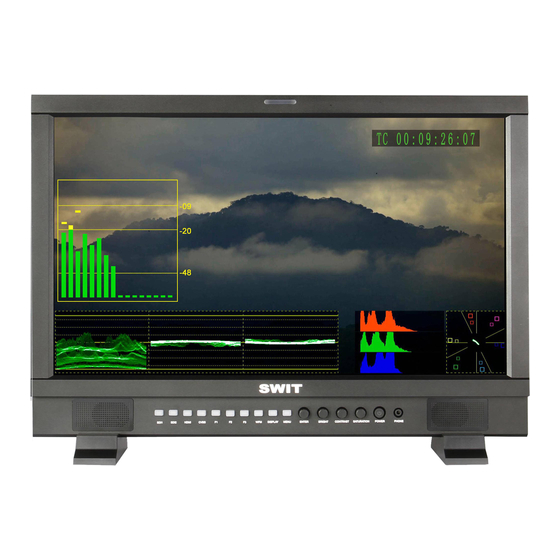
2. Panel Instruction Front view ⑴ Desktop Stand Feet Speaker: For SDI/HDMI embedded audio and analog audio monitoring. (Will not work if earphone ⑵ is plugged in) ⑶ SDI1: Press “SDI1” to switch to SDI input 1 SDI2: Press “SDI2” to switch to SDI input 2 ⑷... - Page 6 Rear view Battery plate Install: Gold mount / V-lock mount option ⑴ S-1222FA: Gold mount; S-1222FS: V-lock mount Handle ⑵ HDMI-IN: HDMI input(HDMI-A connector) ⑶ ⑷ SDI-LOOP2: SDI loop through output (BNC connector) SDI-LOOP1: SDI loop through output (BNC connector) ⑸...
- Page 7 3. Menu Operation ⑴ Press “MENU” and it will display menu system Revolve “ENTER” to select an item. The selected item will be highlighted display. ⑵ Press “ENTER” to enter the selected item. ⑶ ⑷ Under menu system, press “MENU” to back to previous menu. *The menu will automatically save and quit if it remains idle.
- Page 8 3.4 TITLE submenu Revolve "ENTER" button to select the letters, and press "ENTER" to input. Select SPACE to input space and DEL to delete the left letter. Max 10 letters are supported. After setting, press "MENU", the system will save data to current user and quit menu.
- Page 9 3.7 COLOR submenu The color submenu is to change the color temperature settings. User can select color temperature as 6500K 5 600K 9 300K, or define color temperature by RGB GAIN and RGB BIAS. 、 、 ⑴ COLOR TEMP: 6500K, 5600K, 9300K, USER1, USER2, USER3 R GAIN: 0-255 value adjustment ⑵...
- Page 10 4. REMOTE Interface Definition The TALLY light controlling port and UMD signal port are controlling through the DB-9 socket at the rear panel, and terminal description is as follows: Terminal 485B(Rx-) 485A(Rx+) Description T he RED light is on when connecting the terminal “R” with “GND”, and goes out when ⑴...
-
Page 11: Specification
5.Specification LCD Performance Size 21.5 inches Display area 2 68mm × Resolution 1920 × R GB × 1 080 Aspect ratio 16:9 (4:3 adjustable) Brightness 250cd Contrast 1000:1 Color 16.77 million colors Viewing angle Horizontal: 178 V ertical: 178 ° °... -
Page 12: Protective Glass
6.Paking List Monitor ×1 V-lock or Gold mount battery plate ×1 (Installed before delivery) Desktop Stand Feet ×2 User Manual ×1 Warranty Card ×1 Power Adaptor ×1 Power Cable ×1 Magnetic protective glass (A-PG22) ×1 ( f or optional purchase )... - Page 13 6.3 RACK install bracket Installation 1. Fix the brackets onto the left and right sides of S-1222F monitor, see Fig (1) and Fig (2); 2. Install the monitor with brackets onto the 19-inch rack; see Fig (3) and Fig. (4);...
- Page 14 7. Installation Dimension The main body (in mm) With desktop stand feet (in mm)
- Page 15 With VESA desktop stand (in mm) With Rack install bracket (in mm)
Need help?
Do you have a question about the s-1222F and is the answer not in the manual?
Questions and answers