OWC Mercury Elite Pro Dual Assembly Manual & User Manual
Usb 3.0 & thunderbolt raid storage enclosure
Hide thumbs
Also See for Mercury Elite Pro Dual:
- User manual ,
- Assembly manual (24 pages) ,
- Assembly manual & user manual (16 pages)
Table of Contents
Advertisement
Quick Links
Advertisement
Table of Contents

Related Manuals for OWC Mercury Elite Pro Dual


Summary of Contents for OWC Mercury Elite Pro Dual
- Page 1 M E R C U R Y E L I T E P R O D U A L Assembly Manual & User Guide...
-
Page 2: Table Of Contents
2.3.2 RAID Modes 2.4 Drive Failure 2.4.1 Drive Replacement 2.4.2 Rebuilding a RAID 1 SUPPORT RESOURCES ................3.1 Formatting 3.2 Unmounting drives 3.3 Troubleshooting 3.4 About Data Backup 3.5 Online Resources 3.6 Contacting Technical Support MERCURY ELITE PRO DUAL CONTENTS... -
Page 3: Introduction
1.1.3 Supported Drives • 3.5” SATA hard drives NOTE: Drives of identical model and capacity are required for RAID 0 and RAID 1. 1.2 PACKAGE CONTENTS Mercury Elite Pro Dual Power Supply and cable USB 3.1 Gen 1 (Standard-A Thunderbolt cable to Standard-B) cable 1.3 ABOUT THIS MANUAL... -
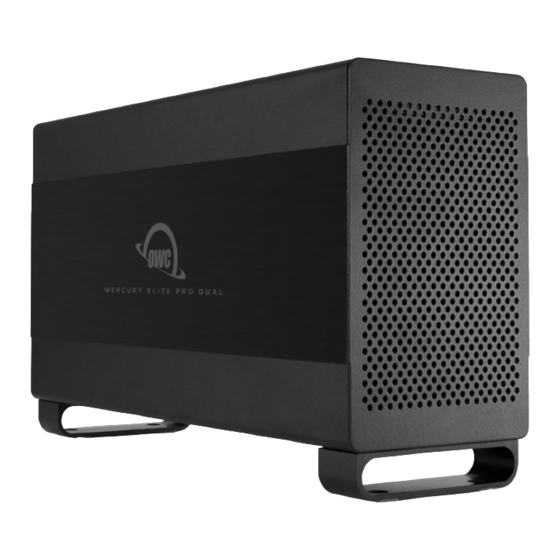
Page 4: Front View
1.4 FRONT VIEW Power LED — This LED will emit a solid blue light when the Mercury Elite Pro Dual is on. During drive activity the LED will blink blue Power HDD1 HDD2 steadily, and during a rebuild the LED will... -
Page 5: Rear Features
• Thunderbolt device chains can support up to six Thunderbolt devices. • There is no power switch on the Mercury Elite Pro Dual. As long as the power supply is connected, the device will power on when it receives a data signal through the interface cable (USB 3.1 Gen 1 or Thunderbolt). -
Page 6: Device Setup
Section 2.2, Assembly. If you purchased the Mercury Elite Pro Dual with drives, the drives ship as a RAID 0 array with the OWC Drive Guide pre-installed to assist with the formatting process. Follow the steps below to use Drive Guide to format your drives for Mac (OS X 10.4 and later) or Windows (XP and later). - Page 7 4. Install the lower hard drive (HDD2), as shown below. Slide the SATA connector on the hard drive into the black SATA connector highlighted below-left. Make sure the drive is firmly connected to the SATA port before continuing. MERCURY ELITE PRO DUAL DEVICE SETUP...
- Page 8 5. Install the upper hard drive (HDD1), as shown below. Insert the SATA power and SATA data cables from the Mercury Elite Pro Dual into the SATA connectors on the hard drive (NOTE: do not twist the black SATA data cable). Next, slide the hard drive to line up the screw holes in the hard drive with those on the inner chassis.
- Page 9 REAR FRONT 8. Once you have determined the correct side for inserting the inner chassis, slide it back into the outer enclosure, as shown at left. MERCURY ELITE PRO DUAL DEVICE SETUP...
- Page 10 9. Once the front grill of the inner chassis sits flush with the edge of the outer enclo- sure, turn the Mercury Elite Pro Dual on its side again. The screw holes in the outer enclosure should line up with the screw holes in the inner chassis. Use the four smaller screws to fasten the inner chassis to the outer enclosure, as shown below.
-
Page 11: Raid Settings
2. If the power supply is connected to the Mercury Elite Pro Dual, use a paperclip to press the ‘confirm’ button next to the RAID dial. This will power cycle the device, power- ing it off and back on. -
Page 12: Raid Modes
In the event that one of the drives fails, the corresponding drive LED will blink red. If the Mercury Elite Pro Dual was configured as a RAID 0 or Span, the data on the array is lost and the volume cannot be used. For Span setups, data recovery software may aid in retrieving files from the remaining functional drive. -
Page 13: Drive Replacement
RAID 0 or RAID 1. If the Mercury Elite Pro Dual is set up as a span or as a RAID 0, the array must be reformatted before it can be used again. If the device is set up in independent drive mode, you do not need to reformat the existing drive or the new drive. -
Page 14: Support Resources
Begin your troubleshooting by verifying that the power cable is connected to the Mercury Elite Pro Dual and to a power source. If the power cable is connected to a power strip, make sure that the power switch on the strip is turned on. -
Page 15: About Data Backup
To ensure that your files are protected and to prevent data loss, we strongly suggest that you keep two copies of your data: one copy on your Mercury Elite Pro Dual and a second copy on either your internal drive or another storage medium, such as an optical backup, or on another external storage unit. - Page 16 The material in this document is for information purposes only and subject to change without notice. While reasonable efforts have been made in the preparation of this document to assure its accuracy, OWC and its officers and employees assume no liability resulting from errors or omissions in this document, or from the use of the information contained herein.
Need help?
Do you have a question about the Mercury Elite Pro Dual and is the answer not in the manual?
Questions and answers