Table of Contents
Advertisement
Quick Links
Advertisement
Table of Contents

Subscribe to Our Youtube Channel
Related Manuals for OWC Mercury Elite RAID


Summary of Contents for OWC Mercury Elite RAID
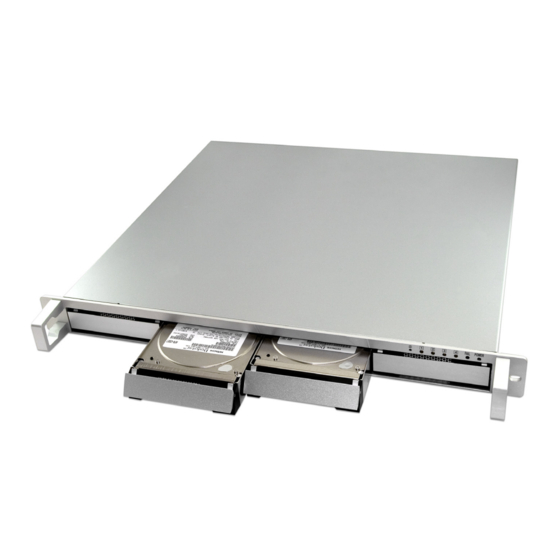
- Page 1 OWC Mercury Elite RAID 4 Bay Rack Enclosure Owner’s Manual...
-
Page 2: Table Of Contents
Table of Contents Chapter 1 • Quickstart Guide Chapter 2 • Package Contents and Accessories Chapter 3 • Hardware Overview • Important note before proceeding! Chapter 4 • Cable Connections • FireWire 800 (1394B) connection options • USB 2.0 connection options •... -
Page 3: Quickstart Guide
Quickstart Guide Chapter 1 You can start using your OWC Mercury Elite RAID Rack storage solution immediately with a few easy steps if you don’t want to read the entire manual. The drive solution is formatted for a Macintosh and ready to use right out of the box. -
Page 4: Package Contents And Accessories
Package Contents and Accessories Chapter 2 Item Quantity OWC Mercury Elite RAID Rack Enclosure SATA Hard Drive in carrier (installed) 1394b (FireWire 800) cable USB 2.0 (A-B) cable Power cable Drive Carrier Keys Software Bundle CD Installation & Setup Guide... -
Page 5: Important Note Before Proceeding
IMPORTANT!! Please read before proceeding with installation 1. Before installing, make sure that you have reviewed the previous page and that all necessary cables and parts are present. 2. Please be sure to use the heavy duty power cord that is provided. The unit is able to be used with 100-240V, 60Hz power and is autoswitching. -
Page 6: Cable Connections
FireWire 800 (1394b) - which is the fastest interface this drive solution uses, or via USB 2.0, or both. The OWC Mercury Elite RAID Rack has two separate back panel connec- tions - called bridges - each controlling 2 hard drives. On the following pages you will see the different methods used to connect the drive solu- tion to your computer. -
Page 7: Firewire 800 (1394B) Connection Options
FireWire 800 (1394B) Connection Options Connection option #1 - Connect to the same FireWire 800 source (built in FireWire 800 ports, or a PCI/PCIe FireWire 800 card) using two cables - direct connection for each bridge card. Connection option #2 - Connect to the same FireWire 800 source (built in FireWire 800 ports, or a PCI/PCIe FireWire 800 card) via daisy-chaining the two bridges together, then connect one bridge to the computer. -
Page 8: Usb 2.0 Connection Options
USB 2.0 & Other Connection Options Connection option #4 - Connect to the same USB 2.0 source (built in USB 2.0 ports, or a PCI/PCIe USB 2.0 card) using two cables - direct con- nection for each bridge card. Connection option #5 - This option allows you to use both a FireWire 800 and a USB 2.0 connection. -
Page 9: How To Daisy Chain Multiple Enclosures
Daisy Chaining Multiple Enclosures Together Mercury Elite RAID #1 Mercury Elite RAID #2 Mercury Elite RAID #3 If you wish to connect multiple storage enclosures together, use the above diagram to properly connect the enclosures to each other. You can of course split the enclosures onto multiple FireWire 800 sources to improve data transfer speeds, but it is possible to connect multiple units together in the described method. -
Page 10: How To Not Hook Up Your Enclosure (What Not To Do)
puter Ways to NOT hook your storage enclosure to your com The below described methods show what NOT to do to hook your storage enclosure to your computer. You cannot share the storage enclosure between two computers. Do not attempt to hook cables between the storage enclosure and 2 computers as shown, data loss and damage to the unit can occur. -
Page 11: Using With A Macintosh
The methods are: JBOD - All 4 hard drives formatted independently, as four individual hard drive volumes. If you had 4 1TB drives in your OWC Mercury Elite 4 Bay RAID Rack, you would have 4 1TB volumes mount on your desktop. -
Page 12: Setting Up As Jbod (4 Individual Hard Drives)
(4 individual hard drives) on a Macintosh JBOD - All 4 hard drives formatted independently, as four individual hard drive volumes. If you had 4 1TB drives in your OWC Mercury Elite 4 Bay RAID Rack, you would have 4 1TB volumes mount on your desktop. - Page 13 Once Disk Utility opens, you will see a screen that looks similar Step to this - note the 4 individual hard drives shown on the left side, all unformatted with no volumes listed. Click on the first hard drive in the list that has no volume, as Step shown above.
- Page 14 Enter a name for your new hard drive, select a volume format, Step and click Erase. Step Are you sure? Click Erase. 1 drive down, 3 more to go. Continue naming and formatting Step each of your drives. You’re all set! Page 13...
-
Page 15: Setting Up As Raid-0 (2 Hard Drives Striped For Performance)
RAID-0 Stripe - combining two volumes each. Using a RAID-0 Stripe format, if you had 4 1TB drives in your OWC Mercury Elite 4 Bay RAID Rack, you would have 2 2TB volumes mount on your desktop. - Page 16 Once Disk Utility opens, you will see a screen that looks similar Step to this - note the 4 individual hard drives shown on the left side, all unformatted with no volumes listed. Click on the first hard drive in the list that has no volume, as Step shown above.
- Page 17 Are you sure? Click Erase. Step 1 pair of drives down, 1 more pair to go. Repeat on the 2nd set Step and you’re all done! Page 16...
-
Page 18: Using With A Pc
The methods are: JBOD - All 4 hard drives formatted independently, as four individual hard drive volumes. If you had 4 1TB drives in your OWC Mercury Elite 4 Bay RAID Rack, you would have 4 1TB volumes mount on your desktop. -
Page 19: Setting Up As Jbod (4 Individual Hard Drives)
(4 individual hard drives) on a PC (Windows XP / Vista) JBOD - All 4 hard drives formatted independently, as four individual hard drive volumes. If you had 4 1TB drives in your OWC Mercury Elite 4 Bay RAID Rack, you would have 4 1TB volumes mount on your desktop. - Page 20 Open Administrative Tools. Step Double click on Computer Management. Step Click on Disk Management under the Storage subcategory. Step Page 19...
- Page 21 You will see the above box appear in the middle of the screen. Step Right click on the first unallocated volume that you wish to format. Select “New Simple Volume”. The New Simple Volume Wizard will launch. Click Next. Step Page 20...
- Page 22 The maximum volume size will automatically be prompted in Step the box at the bottom. If you wish to adjust the size smaller, you can do so. In this demonstration we will use a maximum size volume. Click Next when you are ready. Choose a new drive letter for the volume.
- Page 23 Check “Perform a quick format” and choose which file system Step you want to use. NTFS is default and recommended. Click Next when you are ready. This screen is an overview of the settings you have chosen to Step format the disk with. Click Finish when you are ready. Page 22...
- Page 24 You will see the drive begin to format. This will take up to 5 Step minutes to complete. The format has completed. You will see it report back as a Step healthy partition. Complete the formatting process for the remaining drives using these steps.
-
Page 25: Setting Up As Raid-0 (2 Hard Drives Striped For Performance)
RAID-0 Stripe - combining two volumes each. Using a RAID-0 Stripe format, if you had 4 1TB drives in your OWC Mercury Elite 4 Bay RAID Rack, you would have 2 2TB volumes mount on your desktop. - Page 26 Open Administrative Tools. Step Double click on Computer Management. Step Click on Disk Management under the Storage subcategory. Step Page 25...
- Page 27 You will see the above box appear in the middle of the screen. Step Right click on the first unallocated volume that you wish to format. Select “New Simple Volume”. The New Simple Volume Wizard will launch. Click Next. Step Page 26...
- Page 28 The maximum volume size will automatically be prompted in Step the box at the bottom. If you wish to adjust the size smaller, you can do so. In this demonstration we will use a maximum size volume. Click Next when you are ready. Choose a new drive letter for the volume.
- Page 29 Check “Perform a quick format” and choose which file system Step you want to use. NTFS is default and recommended. Click Next when you are ready. This screen is an overview of the settings you have chosen to Step format the disk with. Click Finish when you are ready. Page 28...
- Page 30 You will see the drive begin to format. This will take up to 5 Step minutes to complete. The format has completed. You will see it report back as a Step healthy partition. Complete the formatting process for the remaining drives using these steps.
-
Page 31: Customize - Swap Drive Trays, Change System Drive Icons
Drive Icons: Now that you have your new OWC Mercury Elite-AL Dual configured to your needs, dress it up! Change the icon of the hard drive! We have cre- ated disk icons for every model of drive we make: http://eshop.macsales.com/Reviews/Framework.cfm?page=/icons/... -
Page 32: Troubleshooting
Troubleshooting Chapter 8 If your OWC Mercury Elite-AL is not functioning properly, begin by checking some basic possibilities, such as: • Are all cables tightly attached to the computer and drive? • Is the power supply plugged in firmly, and is the LED lit on the... -
Page 33: Tips
If you wish to disconnect your OWC Mercury drive without shutting down your computer, simply drag the OWC Mercury drive icon to the trash can on the desktop (or, in the dock using Mac OS X). Your drive is now safe to power off and unhook. -
Page 34: Contacting Customer Service
Contacting Customer Service Chapter 10 Before contacting Customer Service: • Read the manuals and review Chapter 5: Troubleshooting • Try and confirm the problem is with the hard drive. If you have a sec- ond Macintosh computer, move the drive to that system and verify that the drive does not function with that machine. - Page 35 Page 34...
- Page 36 Copyrights Copyright © 2007 Other World Computing, Inc. All rights reserved. No part of this publication may be reproduced, stored in a retrieval system, or transmitted in any form or by any means, electronic, mechanical, photocopying, recording or otherwise, without the prior written consent of Other World Computing. Changes The material in this document is for information only and subject to change without notice.
Need help?
Do you have a question about the Mercury Elite RAID and is the answer not in the manual?
Questions and answers