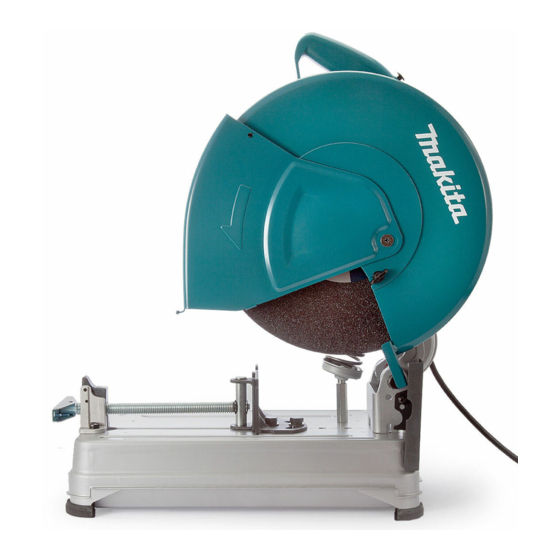
Makita 2414EN Technical Information
355mm (14") portable cut-off
Hide thumbs
Also See for 2414EN:
- Instruction manual (12 pages) ,
- Instruction manual (14 pages) ,
- Instruction manual (41 pages)
Advertisement
Quick Links
Download this manual
See also:
Instruction Manual
T
ECHNICAL INFORMATION
Models No.
Description
C
ONCEPT AND MAIN APPLICATIONS
Model 2414EN has been developed based on current model 2414NB
to comply with the new EU standards (EN61029-2-10: 2010).
The safety cover, safety guard, spark guard and quick vise are redesign
of those of 2414NB.
This product is also available with an upgraded armature gear
for some countries as model 2414ENE.
S
pecification
Voltage (V)
110
120
220
230
240
No load speed: min
Wheel size: mm (")
Weight according to
EPTA-Procedure 01/2003*
Power supply cord: m (ft)
Capacity: mm (")
Form of materials
D: Diameter
W: Width
H: Height
S: Side
T: Thickness
*1 with Abrasive cut-off wheel 355
S
tandard equipment
Socket wrench 17 ............................................... 1
Abrasive cut-off wheel 355 ................................ 1
Note: The standard equipment for the tool shown may vary by country.
O
ptional accessories
Abrasive cut-off wheel 355
2414EN
355mm (14") Portable Cut-Off
Current (A)
Cycle (Hz)
15.0
50/60
15.0
50/60
9.6
50/60
9.2
50/60
8.8
50/60
¹
rpm
ˉ
.
=
Diameter
Arbor
Thickness
: kg (lbs)
1
Miter angle
D
W
H x W
H
W
H x W
H
S
S
S x S
T
T
Continuous Rating (W)
Input
1,650
---
2,000
2,000
2,000
3,800
355 (14)
25.4 (1)
3 (1/8)
17.6 (38.7)
2.5 (8.2)
90°
ø115 (4-1/2)
115 (4-1/2) x 130 (5-1/8)
102 (4) x 194 (7-5/8)
70 (2-3/4) x 233 (9-1/8)
119 (4-11/16) x 119 (4-11/16)
137 (5-3/8) x 137 (5-3/8)
10 (3/8)
PRODUCT
P 1/ 9
L
W
Dimensions: mm (")
Length (L)
500 (19-3/4)
Width (W)
280 (11)
Height (H)
620 (24-3/8)
Max. Output(W)
Output
900
2,400
900
2,400
1,200
3,300
1,200
3,300
1,200
3,300
45°
ø115 (4-1/2)
115 (4-1/2) x 103 (4-1/16)
106 (4-3/16) x 106 (4-3/16)
100 (4) x 100 (4)
10 (3/8)
H
Advertisement

Summary of Contents for Makita 2414EN
- Page 1 Description 355mm (14") Portable Cut-Off ONCEPT AND MAIN APPLICATIONS Model 2414EN has been developed based on current model 2414NB to comply with the new EU standards (EN61029-2-10: 2010). The safety cover, safety guard, spark guard and quick vise are redesign of those of 2414NB.
- Page 2 14 , Surface where 86 Base contacts Gear housing complete Gear room where Helical gear 41 rotates 25 g Makita grease N No.1 M10 Hex bolt Top where Spring holder contacts a little Base Punched hole for Pin 16-113 passing a little Fig.
- Page 3 P 3/ 9 epair [3] DISASSEMBLY/ASSEMBLY [3] -1. Armature DISASSEMBLING Armature can be removed as drawn in Fig. 2. Fig. 2 1. Remove Brush holder caps and Carbon brushes from the machine. Viewed from Motor housing side 2. Separate Motor housing together with Handle Important: It is not necessary to remove the other screws.
- Page 4 P 4/ 9 epair [3] DISASSEMBLY/ASSEMBLY [3] -2. Helical Gear 41 (cont.) DISASSEMBLING 2. Separate Gear section from Gear housing, and disassemble the removed Gear section as drawn in Fig. 4. Fig. 4 1. Remove Gear section (including 2. Remove Spindle together with Ball 3.
- Page 5 P 5/ 9 epair [3] DISASSEMBLY/ASSEMBLY [3] -3. Vise Section DISASSEMBLING Refer to Fig. 7. Fig. 7 1. Remove M8x30 Pan head screws (2pcs.) 2. Remove Retaining ring S-16 from Shoulder pin 10-16. and Chain from Screw guide. Retaining ring S-16 M8x30 Pan head Shoulder pin 10-16 screw (2pcs.)
- Page 6 P 6/ 9 epair [3] DISASSEMBLY/ASSEMBLY [3] -3. Vise Section (cont.) ASSEMBLING Assemble by reversing the Disassembly procedure. (Refer to Fig. 7) Note: Align the ring of Chain to the square projection of Screw guide when securing Chain with M8x30 Pan head screw. (Fig.
- Page 7 P 7/ 9 epair [3] DISASSEMBLY/ASSEMBLY [3] -4. Base (cont.) DISASSEMBLING (2) Remove Safety cover section as illustrated in Fig. 3. (3) Unscrew M6x10 Pan head screw and remove Spark guard. (4) Separate Base section from Motor section as drawn in Fig. 10. Fig.
- Page 8 P 8/ 9 ircuit diagram Fig. D-1 Color index of lead wires' sheath Black Blue White Brown For 220-240V area Support unit viewed from Fan side Switch Line filter (ø 20-10, 2T) Choke coil Noise Power supply cord suppressor For 110V-127V area Support unit viewed from Fan side Switch...
- Page 9 P 9/ 9 iring diagram Fig. D-2 Wiring in Motor housing Fix Lead wires (black) of Support unit with these Lead wire holders. Lead wires (black) of Support unit have to be tightened in Motor housing. Support unit has to be put into Motor Rib A Rib B housing so that its Lead wires (2 blacks)


Need help?
Do you have a question about the 2414EN and is the answer not in the manual?
Questions and answers