Table of Contents
Advertisement
Comfort, Quality & Style Since 1998
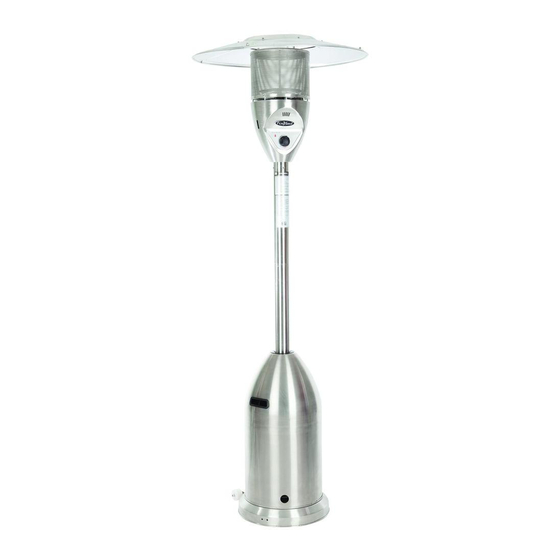
Deluxe Patio Heater
Questions, problems, missing parts?
Before returning to your retailer, our exceptional customer service is available.
Call us toll-free at (866) 985-7877, email us at cservice@welltraveled.net, or go online
and live chat at www.wtliving.com. Our hours are: 9 a.m. – 6 p.m., EST, Monday – Friday
Item#: 11201, 61315
Model: PH03-S/PH03-SS
If you smell gas:
1. Shut off gas to the appliance.
2. Extinguish any open flame.
3. If odor continues, immediately call
gas supplier.
Do not store or use gasoline or other
flammable vapors and liquids in the
vicinity of this or any other appliance.
For Outdoor Use Only
ATTACH YOUR
RECEIPT HERE
Keep a copy of your proof of
purchase or order confirmation
which will be needed if you
need to contact us about
warranty coverage.
Purchase Date:
FOR YOUR SAFETY
FOR YOUR SAFETY
WARNING
Advertisement
Table of Contents

Subscribe to Our Youtube Channel
Summary of Contents for Fire Sense PH03-S
- Page 1 Comfort, Quality & Style Since 1998 Deluxe Patio Heater Item#: 11201, 61315 Model: PH03-S/PH03-SS FOR YOUR SAFETY If you smell gas: 1. Shut off gas to the appliance. 2. Extinguish any open flame. 3. If odor continues, immediately call gas supplier.
-
Page 2: Table Of Contents
www.wtliving.com TAblE OF CONTENTS Table of Contents Page 2 before You begin Page 2 Safety Information Page 3 Package Contents Page 4 Hardware Contents Page 4 Assembly Page 5-9 Operating Instructions Page 10-11 Care and Maintenance Page 12 Troubleshooting Page 13 Warranty Information Page 14 bEFORE YOU bEGIN... -
Page 3: Safety Information
SAFETY INFORMATION DANGER WARNING WARNING CARBON MONOXIDE HAZARD • This appliance must only be used • At least once a year, the unit should be • This appliance can produce carbon outdoors. inspected for the presence of spiders, monoxide which has no odor. •... -
Page 4: Package Contents
PACKAGE CONTENTS PART DESCRIPTION QUANTITY Center Reflector Cap Reflector Panels Head Assembly Gas Hose attached to Head Assembly Upper Post Cylinder Cover Lower Post Post Support Regulator (with 1-foot Hose) Post Mounts Base Waterbox (pre-assembled to Base) Wheel Assembly HARDWARE CONTENTS large bolt, bracket Medium bolt, Tall bolt,... -
Page 5: Assembly
ASSEMblY PREPARATION Before beginning assembly of this appliance, make sure all parts are present. Compare all parts with package contents list and hardware contents as listed on page 4 of this manual. If any part is missing or damaged, do not attempt to assemble this product. Contact customer service for replacement parts. ESTIMATED ASSEMblY TIME: 60 minutes Tools Required for Assembly (NOT included): •... - Page 6 www.wtliving.com Place Waterbox back under base and use your phillips head screwdriver to screw back in the 4 screws from base to the Waterbox. Note: You may find it easier to fill the waterbox prior to attaching wheels, in step 5. To fill, pull open the plastic cap on top of the waterbox and fill with water or sand.
- Page 7 ASSEMblY Place the Post Support on the top of Post Mounts attach using the Tall bolt and Small Nut . Repeat with remaining holes. Hand tighten initially then tighten with the Wrench when all nuts and bolts have been inserted. Hardware Used: 6x Tall Bolt and Small Nut Attach the lower Post to the Post Support...
- Page 8 ASSEMblY Attach Reflector Studs to the top of the Head Assembly by inserting 1 Reflector Stud into the hole on the top of the Head Assembly. Tighten stud securely. Repeat with the other 2 Reflector Studs. Hardware Used: 3x Reflector Stud Remove the 4 pre-assembled screws and lock washers from the base of the Head Assembly and set aside.
-
Page 9: Assembly
ASSEMblY Install Reflector. NOTE: MAKE SURE TO REMOvE THE blUE REFlECTOR TAPE ON REFlECTOR PIECES PRIOR TO ASSEMblY! Assembly Tip: If necessary for proper alignment of reflector sections, loosen each screw prior to further assembly and retighten after sections are aligned. Slide two Reflector Panels together. -
Page 10: Operating Instructions
OPERATION bEFORE TURNING GAS SUPPlY ON WARNING WARNING Your heater was designed and approved for OUTDOOR USE ONLY. DO NOT use it FOR YOU SAFETY: DO NOT attempt to operate heater inside a building, or any other enclosed If at any time you are unable to light burner until you have read and understood and smell gas, wait 5 minutes to allow all precautions. - Page 11 OPERATING CAUTION: Avoid inhaling fumes WHEN HEATER IS ON: emitted from the heater’s first use. Emitter screen will become bright red due to intense heat. The color is more Smoke and odor from the burning of visible at night. Burner will display tongues of blue flame. These flames should oils used in manufacturing will appear.
-
Page 12: Care And Maintenance
CARE AND MAINTENANCE CHECK YOUR HOSE ASSEMblY WARNING The installation of fixed appliance shall only be carried out by competent persons and be in accordance with the relevant codes of practice. FOR YOUR SAFETY DO NOT touch or move heater for at least WARNING: This appliance requires a gas hose and regulator. -
Page 13: Troubleshooting
TROUblESHOOTING PROblEM POSSIblE CAUSE CORRECTIvE ACTION Gas valve may be off Turn gas valve ON Fuel tank may be empty Refill LPG tank Orifice blocked Clean or replace orifice Purge air from lines. Open gas lines and depress Control Air in supply system Knob for 2-3 mins. -
Page 14: Warranty Information
716 S 8th Street, Amelia Island, FL 32034 online and live chat at www.wtliving.com. Our hours are: wtliving.com | cservice@welltraveled.net 9 a.m. – 6 p.m., EST, Monday – Friday (866) 985-7877 Fire Sense ® , Mojave Sun ® , and Well Traveled Living ®...


Need help?
Do you have a question about the PH03-S and is the answer not in the manual?
Questions and answers