Fire Sense PH01-S Instruction Manual & Parts List
Hide thumbs
Also See for PH01-S:
- Instruction manual & parts list (20 pages) ,
- Instruction manual (18 pages) ,
- Instruction manual & parts list (19 pages)
Table of Contents
Advertisement
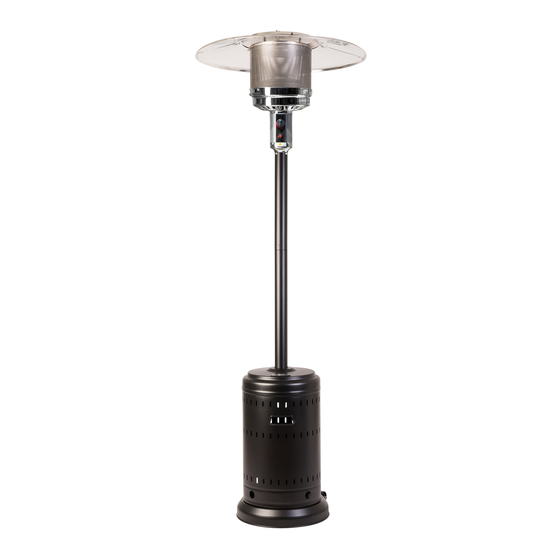
Patio Heater
Instruction Manual & Parts List
INSTALLER: Please leave this manual for the consumer.
CONSUMER: Please retain this manual for future reference.
Manufacturer: Changzhou Wellife Furnace Co., Ltd.
Model: PH01-S PH01-SS
Item numbers: 02411,02412,
60755, 60786, 60788
WARNING: For outdoor use only.
FOR YOUR SAFETY
If you smell gas:
1. Shut off gas to the appliance.
2. Extinguish any open flame.
3. If odor continues, immediately
call gas supplier.
FOR YOUR SAFETY
Do not store or use gasoline or
other flammable vapors or liquids
in the vicinity of this or any other
appliance.
PLEASE retain this manual for
reference
- 1 -
.
CERTIFICATE TO ANSI
STD.Z83.26-2007
CONFORM TO CSA
STD.2.37-2007
Advertisement
Table of Contents

Subscribe to Our Youtube Channel
Related Manuals for Fire Sense PH01-S


Summary of Contents for Fire Sense PH01-S
- Page 1 Patio Heater Model: PH01-S PH01-SS Item numbers: 02411,02412, 60755, 60786, 60788 WARNING: For outdoor use only. FOR YOUR SAFETY If you smell gas: 1. Shut off gas to the appliance. 2. Extinguish any open flame. 3. If odor continues, immediately call gas supplier.
-
Page 2: Tools And Parts Needed For Assembly
Tools and parts needed for assembly DANGER CARBON MONOXIDE HAZARD This appliance can produce carbon monoxide which has no odor. Using it in an enclosed space can kill you. Never use this appliance in an enclosed space such as a camper, tent, car or home. Tools needed: Improper installation, adjustment, WARNING:... -
Page 3: Check For Leaks
PRECAUTIONS NOTE: PLEASE READ THE FOLLOWING SAFETY RULES WARNING: This heater must only be used outdoors. Using this product in an enclosed area may cause injury, death or property damage. Only use in a well-ventilated space. Do not use in a building, garage, or any other enclosed area. - Page 4 PRECAUTIONS CHECK THE HEATER IMMEDIATELY IF ANY OF THE FOLLOWING EXIST: 1. The smell of gas in conjunction with extreme yellow colored tips of the burner flames. 2. The heater does not reach temperature. 3. The burner makes a popping noise during use (a slight popping noise is normal when the burner is extinguished after using).
- Page 5 ASSEMBLY 1. 3 pcs castle nuts 2. Reflector 3. 6 pcs 8mm washers for pins support 4. 3 pcs 90mm (L) pins for reflector support 5. Head assembly 6. 4 pcs M6x10mm bolts 7. 2 pcs Post assembly 8. Tank housing 9.
- Page 6 ASSEMBLY ATTACHING WHEEL ASSEMBLY Step 1 1-1. Locate Wheel Assembly (17) and 2 nuts/bolts Fig. 1 contained in plastic bag with Wheel Assembly (Fig. 1). Step 2 2-1. Turn Base (15) so that holes for attachment of Fig. 2 Wheel Assembly are facing you (Fig. 2). 2-2.
- Page 7 ASSEMBLY WARNING: This appliance requires installation by a competent person. Proper assembly is the responsibility of the installer. Step 1 1-1. Attach 3pcs LPG cylinder fixed parts on the base with 6pcs M6x12mm bolts. 1-2. Position the 3 pcs support legs on the base as shown in the picture to the right.
- Page 8 ASSEMBLY Step 3 3-1. Connect the second piece of the post assembly to the first piece of the post assembly and screw on clockwise. Step 4 4-1. Place the tank cover on the base. Step 5 5-1. Secure the 3 pcs 90mm pins(reflector support bolts) on the cap of emitter screen.
- Page 9 ASSEMBLY Reflector (#2) is comprised of 3 – outer pieces and 1 – center piece. Locate all 4 pieces of Reflector (#2) which are wrapped in bubble wrap. Unwrap and remove all pieces and peel off the protective blue plastic on each piece. Locate 9 bolts and 9 cap nuts in the plastic bag.
- Page 10 ASSEMBLY Step 6 6-1. Put 8mm washer on each reflector support bolt. 6-2. Fasten the reflector with 3 pcs washers and 3 pcs M8 mm castle nuts. Step 7 7-1. Lift the tank cover and rest it on the post flange. 7-2.
-
Page 11: Check For Leak
ASSEMBLY 7-4. Lower tank housing over gas cylinder and down to cover base. Check for Leak Your patio heater has been checked at all factory connections for leaks, but you should always check when you attach the LPG cylinder. To check for leaks, following these instructions: --Assemble all gas connections;... - Page 12 ASSEMBLY 8) If bubbles still appear, close the propane tank valve and contact your gas supplier. If a leak is detected , DO NOT attempt to use the heater. MAKE SURE to check all THREE connections between the cylinder and gas line.
-
Page 13: Before Turning Gas Supply On
ASSEMBLY C. Spoon several drops (or use squirt bottle) of the solution onto gas hose connection and pilot connection. D. Inspect the connections and look for bubbles. E. If no bubbles appear, the connection is safe. F. If bubbles appear, there is a leak. Close the propane tank valve and loosen and re-tighten this connection. -
Page 14: Lighting Instructions
OPERATION LIGHTING INSTRUCTIONS TO TURN ON THE HEATER: 1. Turn the control knob “OFF”. 2. Open gas valve fully. 3. Press and turn the control knob to “HI” position (counterclockwise 90° ). Press down the control knob and hold 3-5 seconds. While holding down the control knob, press the igniter button several times until the pilot flame ignites. - Page 15 OPERATION CAUTON: Avoid inhaling fumes emitted from the heater’s first use. Smoke and odor from the burning of oils used in manufacturing will appear. Both smoke and odor will dissipate after approximately 30 minutes. The heater should not produce thick black smoke. Note: The burner may be noisy when initially turned on.
- Page 16 LOCATION OF HEATER WHILE IN USE CAUTION: WHEN CERTAIN MATERIALS OR ITEMS ARE LEFT UNDER THIS HEATER WHILE IN USE, THEY WILL BE SUBJECT TO RADIANT HEAT AND COULD BE SERIOUSLY DAMAGED. This heater is to be used for the heating of outdoor patios, decks, spas, pool, and open working areas.
-
Page 17: Cleaning And Maintenance
MAINTENANCE WARNING CLEANING AND MAINTENANCE FOR YOUR SAFETY DO NOT touch or move To enjoy years of outstanding performance from your heater for at least 45 heater, make sure you perform the following maintenance minutes after use. on a regular basis: Allow all burner elements to cool before touching. -
Page 18: Troubleshooting
TROUBLESHOOTING Problem Problem cause solution Burner will not light Pressure is low Fuel tank is near empty Control valve not ON Turn valve to ON Thermocouple bad Replace thermocouple Pilot light assembly bent Place pilot in proper position or not in correct location and retry Burner flame is low Supply hose is bent or... - Page 19 Email: cservice@welltraveled.net Customer Service Hours: Mon. - Fri. 9:00 a.m. - 6:00 p.m.(EST) Fire Sense®, Mojave Sun ™, and Well Traveled Living® are registered trademarks of Well Traveled Imports, Inc®. All assembly instruction presentations are the property of Well Traveled Imports, Inc.® and are protected by U.S. copyrights and trademarks.
Need help?
Do you have a question about the PH01-S and is the answer not in the manual?
Questions and answers