Avermedia AVerVision CP300 Quick Manual
Hide thumbs
Also See for AVerVision CP300:
- Quick manual (2 pages) ,
- User manual (32 pages) ,
- Quick reference manual (1 page)
Advertisement
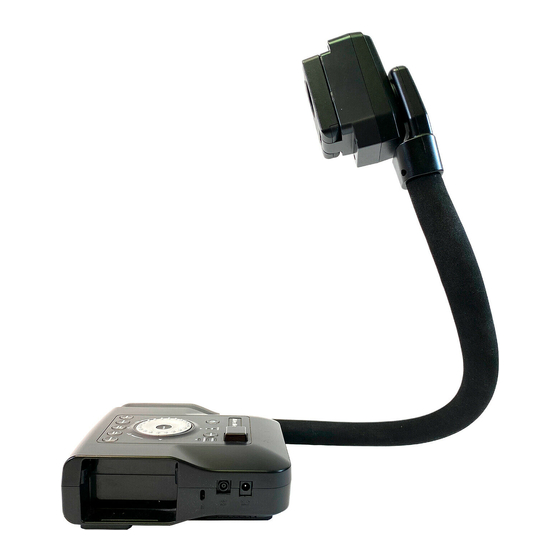
QUICK GUIDE: Your New AVerMedia AVerVision CP300
1
Document Camera
To
be
provided
by
the
Ferndale
School
District:
The
carrying
case
The
AVerVision
CP300
document
camera,
power
cord
with
power
adapter,
RCA
cable,
S‐Video
cable,
USB
cable,
VGA
cable,
S‐
Video/RS‐232
cable,
remote
control
More in AVerVision CP300 folder on your MacBook and at www.avermedia-usa.com
Advertisement
Table of Contents

Subscribe to Our Youtube Channel
Related Manuals for Avermedia AVerVision CP300


Summary of Contents for Avermedia AVerVision CP300
-
Page 1: Document Camera
QUICK GUIDE: Your New AVerMedia AVerVision CP300 Document Camera To be provided by the Ferndale School District: The carrying case The AVerVision CP300 document camera, power cord with power adapter, RCA cable, S‐Video cable, USB cable, VGA cable, S‐ Video/RS‐232 cable, remote control 1 More in AVerVision CP300 folder on your MacBook and at www.avermedia-usa.com... - Page 2 Epson projector) power cord to adapter S‐Video output RGB input port port (to TV) (from computer or other source) Composite video output port (to TV) TV/RGB switch (TV Connect directly to vs. MacBook) Epson projector Connect directly to MacBook with USB cord 2 More in AVerVision CP300 folder on your MacBook and at www.avermedia-usa.com...
- Page 3 Camera, Playback selection or PC Shuttle Wheel: zoom Auto focus in/out; press at to pan the image Auto adjust Go to exposure Main Menu Capture an image Freeze or delete image an image from memory 3 More in AVerVision CP300 folder on your MacBook and at www.avermedia-usa.com...
- Page 4 Auto memory image focus 180° Auto adjust Select predetermined exposure user settings Freeze Display/hide image thumbnail image Set time and Converts display pause/resume a to BW, negative or AVerBox: overlays a frame on timer Color screen AVerVisor: covers part of the Split screen divides screen into screen two parts. One side is live image while the other side displays 4 More in AVerVision CP300 folder on your MacBook and at www.avermedia-usa.com captured images ...
Need help?
Do you have a question about the AVerVision CP300 and is the answer not in the manual?
Questions and answers