Table of Contents
Advertisement
Advertisement
Table of Contents

Related Manuals for Avermedia AVerVision300AF


Summary of Contents for Avermedia AVerVision300AF
- Page 1 AVerMedia AVerVision300AF ® User Manual AVerMedia ® Digital Document Camera...
- Page 2 P/N 300AACE9 Made in Taiwan...
- Page 3 The information contained in this documentation is subject to change without notice. In no event will AVerMedia be liable for direct, indirect, special, incidental, or consequential damages arising out of the use or inability to use this product or documentation, even if advised of the possibility of such damages.
- Page 4 C O P Y R I G H T © 2006 by AVerMedia TECHNOLOGIES, Inc. All rights reserved. No part of this publication may be reproduced, transmitted, transcribed, stored in a retrieval system, or translated into any language in any form by any means without the written permission of AVerMedia TECHNOLOGIES, Inc.
-
Page 5: Table Of Contents
Connecting a VGA, Mac Display Monitor or LCD/DLP Projector..............7 Connecting a Computer via USB Connection .....8 Installing the Optional Light Box........9 Connecting to a Microscope........9 Setting Up AVerVision300AF ......10 Camera Head............10 Mechanical Arm ............10 LED Light Module ............. 11 Anti-glare Sheet ............11 Using the Infrared Remote Control .... -
Page 7: Introduction
AVerVision300AF. This document camera displays any documents, negatives, transparencies and 3D objects onto a TV, LCD or DLP projector making presentations a snap. AVerVision300AF is an ideal presentation tool for business, academic, medical and the scientific ® AVerMedia AVerVision300AF community. -
Page 8: Optional Accessories
34mm Microscopic Adapter 28mm Microscopic Adapter Light Box Microscopic Coupler LED Lamp with Laser Carrying Bag Positioning Pointer... -
Page 9: Avervision300Af Parts
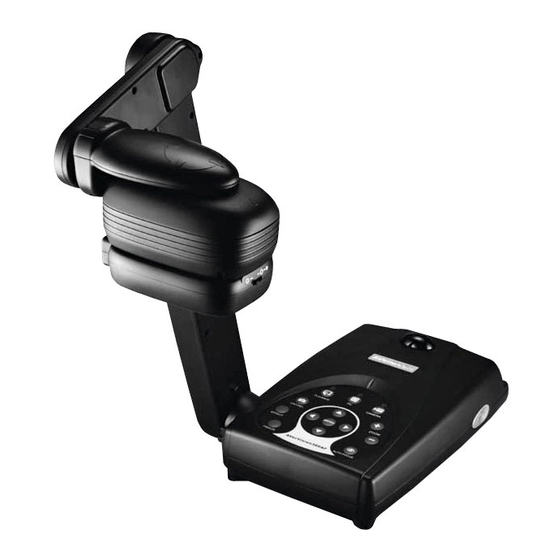
The illustrations below identify the parts of AVerVision300AF (1) Camera head (2) LED light module (3) Camera lens (4) Control panel (5) Arm (6) Left panel (7) IR sensor (8) Rear panel (9) Right panel (10) Power button (11) Security slot... -
Page 10: Technical Specifications
Image Sensor 1/2” progress scan CMOS Total Pixels 3.2 mega pixel Frame Rate 24 fps (Max.) White Balance Auto / Manual Exposure Auto / Manual / Flicker / Night View Image Mode Text / Graphics / High Frame Effect Color / B/W / Negative; Reverse; Mirror XGA:... -
Page 11: Making The Connections
The ports on the back and side panel of the AVerVision300AF enable you to connect the unit to a computer, graphics display monitor or LCD/DLP projector, TV or other device. Illustrated below are the ports that are located at the back and side panel of the AVerVision300AF with their corresponding labels. -
Page 12: Connecting The Power Adapter
Connect the power adapter to a standard 100V~240V AC power source. LIGH T DC12 V VGA IN VGA OUT Wall outlet Power adapter Power cord Locate the video, s-video or SCART RGB input port of the TV or Video equipment (i.e., VCR) to record your presentation on a videotape. If you are not sure, please refer to the user manual of the TV or Video equipment. -
Page 13: Projector
Locate the RGB (VGA) input port of the display device. If you are not sure, please refer to the user manual of the device. Make sure the TV/RBG switch is set to RGB. LIGH T DC12 V VGA IN VGA OUT RGB (VGA) cable LCD/DLP projector (not supplied) -
Page 14: Connecting A Computer Via Usb Connection
(not supplied) Locate the USB port of the computer or laptop. This enables you to use AVerVision300AF as a USB Camera or to transfer the captured images from the built-in memory to your computer. Also see “Transfer Image from AVerVision300AF to PC” and refer to the bundled software user guide in the CD. -
Page 15: Installing The Optional Light Box
Connecting an optional light box enables you to view x-rays, transparencies and negative slides. TURN ON Light Box (optional) PLUG IT HERE Connecting the AVerVision300AF to a microscope enables you to examine microscopic objects on a big screen without straining your eyes. Microscope Coupler Microscope Adapter... -
Page 16: Setting Up Avervision300Af
This section provides useful tips on how to adjust the AVerVision300AF to meet your needs. The camera head can be rotated 135 degrees from left to right. You can also manually adjust the focus from here to improve the quality of the pictures. -
Page 17: Led Light Module
The LED light module provides white light and it is best use when presenting in low lighting condition. Turn On Turn On Turn Off Turn Off The anti-glare sheet is a special coated film that helps eliminate any glare you may encounter when you are displaying very shiny object or glossy surfaces such as magazines, pictures, etc. -
Page 18: Using The Infrared Remote Control
Use the AVerVision300AF Remote Control to enhance your presentation, switch between (3) three presentation modes and access various features. To use the remote control, first insert the batteries (2 size “AAA” batteries are provided) into the battery compartment at the back of the remote. - Page 19 Name Button Function (6) TIMER Display, start and hide the on-screen display timer. (See Timer Function for more details) (7) REVERSE Rotate the image by 180°. (camera REVERSE mode only) PG UP Display previous and next set of (8 & 18) 16-thumbnail images.
-
Page 20: Touch Button Control Panel
(20) DELETE Remove the selected picture from the built-in memory permanently in Playback mode. The touch button control panel located on the top side of the AVerVision300AF provides quick access to commonly used functions. (10 ) Function Description (1) CAMERA MODE Display image from the document camera. -
Page 21: Led Panel
(See Menu Functions, for more details) Make a selection in 16-thumbnail images and press to view the selected image. The LED on the front panel of AVerVision300AF indicates the status of the unit. Color Description Green The unit is operated with VGA output. -
Page 22: Timer Function
USB cable between the doc cam and your computer. 3. Upon connecting the USB cable, the system automatically detects the document camera as a new removable disk. 4. You may now transfer the captured image from AVerVision300AF to your computer. -
Page 23: Osd Navigation Tree
VIDEO OUTPUT OSD For TV output, RESOLUTION is not included in the menu list. BRIGHTNESS CONTRAST ZOOM LINEAR MENU FAST BRIGHTNESS TIMER : MIN. CONTRAST ZOOM TIMER MODE MODE TEXT GRAPHICS EFFECT HIGH FRAME DEFAULT ADVANCE EFFECT COLOR NEGATIVE MIRROR REVERSE DEFAULT EXPOSURE... -
Page 24: Menu Functions
The MENU functions of the AVerVision300AF enable you to fine-tune your screen display, set the timer, select OSD language and more. Press the MENU button to call up and exit from the main menu or sub-menu display. Use the ▲or▼ buttons to select the items in the menu list. - Page 25 AUTO Use ▲or▼ buttons to select between Auto and MANUAL Manual. FLICKER AVerVision300AF enables you to automatically NIGHT VIEW or manually adjust the camera to determine how much light is required. If you choose to manually adjust the exposure, MANUAL press ►or◄...
-
Page 26: Rs-232C Diagram Connection
In Image Download mode, you can download the saved images from AVerVision300AF’s built-in memory to your computer. AVerVision300AF can be controlled using a PC through RS-232 connection. VIDEO VIDEO S-VIDEO S-VIDEO... -
Page 27: Rs-232C Cable Spec
Make sure the RS-232 cable matches the cable spec design. PC COM Port AVerVision RS-232 Port DSUB-9P (Female) DSUB-9P (Female) RI (CI) :1 bit Star bit :8 bit Data bit :1 bit Stop bit Parity bit :None X parameter :None Baud rate(Communication speed) :9600bps Start Code(1 Byte) -
Page 28: Troubleshooting
0xF7 NEGATIVE This section provides many useful tips on how to solve common problems while using the AVerVision300AF. There is no picture on the presentation screen. 1. Check all the connectors again as shown in this manual. 2. Check the on/off switch of the display output device. - Page 29 There is no computer signal on presentation screen. 1. Check all the cable connections among the display device, AVerVision300AF and your PC. 2. Connect your PC to the AVerVision300AF first before you power on your computer. The presentation screen does not show the exact desktop image on my PC or Notebook after I toggle from Doc Cam mode to PC mode.
-
Page 30: Limited Warranty
You as the original purchaser. Except for the foregoing, the Product is provided “AS IS.” In no event does AVerMedia warrant that You will be able to operate the Product without problems or interruptions, or that the Product is suitable for your purposes. -
Page 31: Limitation Of Liability
AVERMEDIA’S TOTAL, AGGREGATE LIABILITY FOR DAMAGES OF ANY NATURE, REGARDLESS OF FORM OF ACTION, SHALL IN NO EVENT EXCEED THE AMOUNT PAID BY YOU TO AVERMEDIA FOR THE SPECIFIC PRODUCT UPON WHICH LIABILITY IS BASED. Governing Law and Your Rights This warranty gives You specific legal rights;...
Need help?
Do you have a question about the AVerVision300AF and is the answer not in the manual?
Questions and answers