
Related Manuals for Wansview W1


Summary of Contents for Wansview W1
-
Page 1: User Manual
Wansview Pro HD 1080P Pro IP Camera W1 User Manual Revised 18 April 2016 Support Email/ Skype: service2@wansview.com... -
Page 2: Table Of Contents
3.4.4.5 E-Mail Setting................................19 3.4.4.6 SD/TF Card Setting..............................20 3.4.4.7 Reboot camera................................20 3.4.4.8 About Camera................................20 3.4.5 Start Video....................................21 3.4.6 Delete Device..................................21 4. Android Access......................................21 4.1 Software Installation..................................22 4.2 App Interface Introduction................................22 4.2.1 Interface....................................22 Support Email/ Skype: service2@wansview.com... - Page 3 5.3.2.2 Port Setting..................................37 5.3.2.3 Wi-Fi Set Up................................37 5.3.2.4 UPNP................................... 38 5.3.2.5 DDNS Setting................................38 5.3.2.6 RTSP Setting................................38 5.3.2.7 Onvif Setting................................39 5.3.2.8 FTP Setting..................................39 5.3.2.9 SMTP (E-mail) Setting...............................39 5.3.3 Video and Audio..................................40 5.3.3.1 Video.................................... 40 Support Email/ Skype: service2@wansview.com...
- Page 4 7.3 Installation......................................51 7.4 iSmartViewPro 2.0 Operation................................52 7.4.1 Interface....................................52 7.4.2 Device Library..................................52 Add......................................52 Delete....................................... 53 Set......................................53 Device Edit....................................53 Device information..................................53 User Setting....................................53 WiFi Setting..................................... 54 7.4.3 System Settings..................................54 7.4.4 Video Library..................................54 Support Email/ Skype: service2@wansview.com...
- Page 5 8.1 Compatibility Settings for Internet Explorer........................... 56 8.2 Plugin Issues.......................................56 8.3 Install IE Tab for Chrome 43................................57 8.4 Install IE Tab for Firefox 42................................58 8.5 Port Forwarding....................................58 8.6 iSmartViewPro Exit Abruptly on Windows XP..........................60 Support Email/ Skype: service2@wansview.com...
-
Page 6: Welcome
Thank you for purchasing Wansview W1 1080P Pro HD IP Camera! The user manual is designed to be a reference tool for the installation and operation of your W1 camera. Here you can find information about the camera's features and functions, as well as information to aid in troubleshooting. - Page 7 Before installation, please open the package and check to ensure that all of the components are present. Contact the retailer where you purchased from the camera, or Wansview directly, if anything is broken or missing in the package. Support Email/ Skype: service2@wansview.com...
-
Page 8: Features And Specifications
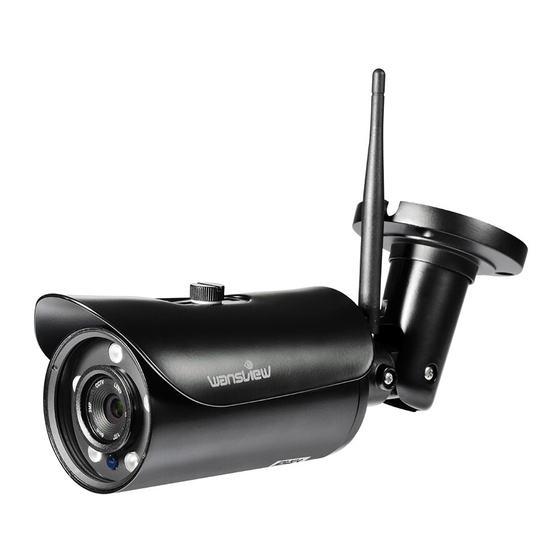
1.1 Product Overview Thank you for purchasing a Wansview K1 Pro HD IP Camera! The product is an integrated indoor/ outdoor IP Camera developed specifically for network video applications. It is suitable for families, shops, chain stores, supermarkets, office buildings and other uses. -
Page 9: Device Connection
(under such circumstances, camera Wi-Fi should be configured for the Wi-Fi of the current router so that the camera can be detected by the LAN computer). For detailed information, please refer to section 2.2 Wi-Fi Set Up. Support Email/ Skype: service2@wansview.com... -
Page 10: Wi-Fi Set Up
1) Please keep the camera on-line. Click the icon on the right side of the camera. 2) Enter advanced Settings 3) Select Wi-Fi Setting 4) Automatically search for available Wi-Fi SSID 5) Select WiFi hot spots to connect to 6) Input the password 7) Click Done to complete WiFi set up. Support Email/ Skype: service2@wansview.com... -
Page 11: Iphone/Ipad Access
3. iPhone/iPad Access Wansview APP (iPhone version) is an application developed by our company based on the iOS system. It is applicable to iPad/iPod of iPhone4s or higher. It supports iOS 6.0 or 9.2. The functional characteristics of this software: Supports Alarm Notification ... - Page 12 Camera: On this page, user can add camera, check camera list and can enter to Edit Camera page. Message By tapping icon to check alarm message, tap the camera you added you can check the alarm type. More Support Email/ Skype: service2@wansview.com...
-
Page 13: Add Camera
Reminder:DID number is showed on the sticker which is on the bottom of the camera. 1. Manually add the camera Please input the info: Camera DID, Username and Password, then click Default user name:admin Default password: 123456 2. LAN search: Support Email/ Skype: service2@wansview.com... -
Page 14: Live View And Setting
3. Scan QRCode Click 【Scan QRCode】 , then scan the Sticker’s Barcode on the bottom of the camera. 3.3 Live View and Setting 3.3.1 Viewing Camera on a Single Window Support Email/ Skype: service2@wansview.com... -
Page 15: Viewing Camera On Multi-View
1: For two-way audio, make the Listen/Talk ON, When talk, please press Hold Talk, then talk.(need install external Mic and Speaker) 2: Tap , you can turn ON/OFF the IR LED and Set or Call Preset(For PTZ camera). 3.3.2 Viewing Camera on Multi-View Support Email/ Skype: service2@wansview.com... -
Page 16: Edit Camera
On this page, user can check Local Picture and Record, SD/TF Record Playback, Alarm Setting and Advanced Setting and Start Video and Delete device. 3.4.1 Local Picture and Record Tap Local Picture and Record you check pictures and records on Mobile. 3.4.2 SD/TF Record Playback Support Email/ Skype: service2@wansview.com... -
Page 17: Alarm Setting
Trigger Alone : The alarm will be triggered for any kind of alarm condition. Trigger Linkage: If set two or more kinds of alarm methods, only met all alarm conditions, the alarm can be triggered. Alarm Action: Support Email/ Skype: service2@wansview.com... -
Page 18: Advanced Setting
WiFi. Note: 1. It only accept 2.4GHz WiFi signal. 2. The password shall be not longer than 31 characters. The following special characters are not be supportted in SSID and password: ‘ & 3.4.4.2 User Settings Support Email/ Skype: service2@wansview.com... -
Page 19: Time Setting
Click to enter【FTP Setting】 , when the user is using the FTP alarm, user parameters of FTP servers can be set. It is recommended to fill in “./” for Upload Path. Please refer to 5.2.3.8 for settings. 3.4.4.5 E-Mail Setting Support Email/ Skype: service2@wansview.com... -
Page 20: Sd/Tf Card Setting
3. Built in 8GB SD Card, and Support Max.64GB Micro SD card. The duration of SD card formatting is about 20s. 3.4.4.7 Reboot camera Tap “reboot camera”, user can restart the camera. 3.4.4.8 About Camera Support Email/ Skype: service2@wansview.com... -
Page 21: Start Video
On this page, user can check the camera firmware version 3.4.5 Start Video Tap Start Video to view live stream. 3.4.6 Delete Device Tap Delete Device to delete the camera. 4. Android Access Support Email/ Skype: service2@wansview.com... -
Page 22: Software Installation
Wansview APP (Android version) is an application developed by our company based on the Android system. It supports iOS 2.3.0 or 6.0. The functional characteristics of this software: Supports Alarm Notification Temperature and Humidity Alarm Supports rapid mobile phone acoustic configuration of camera Wi-Fi;... -
Page 23: Add Camera
Message to check the Alarm info and alarm type. More Check Records/Photo, Multi-View for the cameras,WiFi Configuration, About Wansview and Exit the APP. 4.2.2 Add Camera Start up the “Wansview” app and tap to access to Add Camera page There are three methods available to add camera: add manually, LAN Search and Scan QRCode on the bottom of the camera. - Page 24 3) Scan QRCode Click Scan QRCode, then scan the Sticker’s QRCode on the bottom of the camera Note: Default user name/password: admin/123456 Support Email/ Skype: service2@wansview.com...
-
Page 25: Live View And Setting
1: For two-way audio, make the Listen/Talk ON, When talk, please press Hold Talk, then talk.(need to install external mic and speaker) 2: Tap , you can turn ON/OFF the IR LED and Set or Call Preset(For PTZ camera). Support Email/ Skype: service2@wansview.com... -
Page 26: Viewing Camera On Multi-View
“Edit Camera” page. On this page, user can check Local Picture Record, SD/TF Record Playback, Alarm Setting and Advanced Setting. 4.4.1 Edit camera Alias Access to Edit camera page, on the Alias column, user can edit camera’s name. Support Email/ Skype: service2@wansview.com... -
Page 27: Local Picture And Record
Check snapshot pictures and recorded video on Mobile. Click Local Pictures and Local records. Check Local Picture User can check the pictures according to date, and check the snapshot picture. Share Local Picture Long press a selected picture, then user can share picture. Support Email/ Skype: service2@wansview.com... -
Page 28: Sd/Tf Record Playback
The state you have to choose depends on your sensor(the wrong choice will give a continuous alert once detector connected). More operation, please refer to 3.4.3 Support Email/ Skype: service2@wansview.com... -
Page 29: Advanced Setting
User can check whether the camera is connected with WiFi or not. When Searching WiFi, user can see the WiFi encryption and signal strength 4.4.5.2 User Settings Click to enter "User Setting", the password of the camera can be modified and Username cannot be modified at present. Support Email/ Skype: service2@wansview.com... -
Page 30: Time Setting
*The Authentication must be ON, or the camera cannot log to the sender email to send email. * Please select SSL or TLS when the SMTP Port is 465 and 587. For more detailed setting, please go to our website www.wansview download FAQ document: Email setting.pdf Support Email/ Skype: service2@wansview.com... -
Page 31: Sd/Tf Setting
The duration of SD card formatting is about 20s. 3: The camera is built in a 8GB SD Card. And support max.64GB 4.4.5.7 Reboot Device Tap “reboot camera”, user can restart the camera. 4.4.5.8 About Camera Support Email/ Skype: service2@wansview.com... -
Page 32: Web Access
5.1.1 Network Installation 1: Please install and start the SearchPro tool 2: The camera tool will automatically find all Wansview IP Cameras in your network and will show their IP address(Figure 5.1). 3: In case your camera isn’t found right away please wait 10-15 seconds for your routers DHCP service to assign an IP address to your camera. -
Page 33: Live Video
● When you select Flash Player mode, the multiple image function is not supported, nor is multiple region motion detection. The Microsoft Edge browser is not supported. 5.2 Live Video Video plays after clicking into the video browsing interface. Support Email/ Skype: service2@wansview.com... -
Page 34: Playback Video
Click "Playback Video" to enter the SD card video file playback page. Click the video date to inquire. Click "Search" to list the video files of the selected day. Click the listed files to play back. The files can be downloaded by clicking the download button. Support Email/ Skype: service2@wansview.com... -
Page 35: Set Up
NTP server synchronization to achieve a higher accuracy for alarm trigger events. 5.3.1.4 Other Settings The power status indicator light and Wi-Fi status indicator light of camera can be turned on or off at "Other Settings". Support Email/ Skype: service2@wansview.com... -
Page 36: Multiple Settings
Enter “About” bar, Device name can be modified, and system firmware version/system firmware time /WebUI firmware version etc. can be checked at "Device Information". The device name will be showed at the searched information when using the SearchPro tool. Support Email/ Skype: service2@wansview.com... -
Page 37: Network
Choose the wireless router to be connected. Input the password to connect to the router. Click Save to complete Wi-Fi Configuration. After completing the configuration, click Test to confirm whether it is connected to the wireless router. Support Email/ Skype: service2@wansview.com... -
Page 38: Upnp
VLC. Access links are as shown below: The first bit stream: rtsp://user: password @IP:rtsp port /live/ch0 The second bit stream: rtsp://user: password @IP:rtsp port /live/ ch1 The third bit stream: rtsp://user: password @IP:rtsp port /live/ ch2 Support Email/ Skype: service2@wansview.com... -
Page 39: Onvif Setting
Receiver Address #1: These fields allow the user to enter the receiver email address which will receive any emails pertaining to alert and alarm emails. Mail subject: This field allows the user to define the subject line of the email. Mail content: This field allows the user to define the mail content. Support Email/ Skype: service2@wansview.com... -
Page 40: Video And Audio
You can also flip and mirror the video image when tick the options. 5.3.3.3 On Screen Display Setting Enter "OSD Setting" to overlay the time and name on the video image. Support Email/ Skype: service2@wansview.com... -
Page 41: Night Vision Setting
5.3.4 Safety 5.3.4.1 User Setting Enter "User ". The user can add, edit or delete users as needed. 1: Add user Click Add to enter the following interface to add users and choose user authorities. Support Email/ Skype: service2@wansview.com... -
Page 42: Ip Filtering
Click the red box and it will turn green. Click and drag the mouse to move and modify the size of the box. And then click Save to complete setting. Support Email/ Skype: service2@wansview.com... -
Page 43: Alarm
5.3.5.3 Audio Detection EnterAudio Detection to start up audio detection and alarm function. In addition, detection sensitivity setting can be set Support Email/ Skype: service2@wansview.com... -
Page 44: Alarm Action
7d*24h, 15min. intervals. The camera default is open 24 hours. The user can drag the mouse to perform continuous selection of the arming time. 5.3.7 Log Enter "Log". The user can check the functional operation log of the camera. Support Email/ Skype: service2@wansview.com... -
Page 45: Local Configuration
The icon of the search tool is: 1. When accessing the camera via Mac, the following menu bar will not be available for camera setting. 2. No motion detection box is available under mode 1 or mode 2. Click Window 1, it will show the full screen motion detection box. -
Page 46: Windows Pc Software Access
Screen resolution: ≥1024*768 6.3 iSmartViewPro Installation Access iSmartViewPro installation software: Access the installation software from the camera disk or official website of our company http://www.wansview.com/Service Please create a desktop shortcut when you install iSmartViewPro Desktop shortcut icon 6.4 iSmartViewPro Operation 6.4.1 CMS Interface... -
Page 47: Access To Camera
The items marked with “*” are required to be filled in. Reminder: Please select correct corresponding "device type". Please fill out DID while selecting SmartP2P. Please fill out DDNS or IP address while selecting X series. Support Email/ Skype: service2@wansview.com... -
Page 48: Edit / Delete Device
Brightness and contrast of the camera can be adjusted through the image parameter setting button. The user can choose resolution and can tick Mirror or Flip if the video is upside down. Click , user can pan and tilt the camera by click Up/Down/Left/Right arrow. Support Email/ Skype: service2@wansview.com... -
Page 49: System Settings
Reminder: While creating video scheduling, select “Sustain Recording, stop record when the disk is only 1GB space” or “not enough 1GB space, cover earliest file to continue record”. Choose the created record plan, then Save. Support Email/ Skype: service2@wansview.com... -
Page 50: Local Menu Bar
Please refer to the figure below. Manage device Log On this icon, users can query camera operation, such as detailed operation time for Play, Snapshot Record, Get Param, as well as log type etc. Full screen mode Support Email/ Skype: service2@wansview.com... -
Page 51: Mac Software Access
Access iSmartViewPro 2.0 installation software: You can download the software from the CD or official website of our company www.wansview.com/service Double click to open the dmg file. Drag iSmartViewPro 2.0 software to copy to the computer according to the direction of the arrow. -
Page 52: Ismartviewpro 2.0 Operation
Check setting list, add, delete and advanced settings of the camera Icon: Show camera list by Icon List: Show camera list by List. Click to enter Add Camera. Cameras can be added manually or Lan Search Support Email/ Skype: service2@wansview.com... -
Page 53: Delete
Device Edit To modify device name and change password Device information To check relevant information of the camera User Setting To modify user name and password of the administrator Support Email/ Skype: service2@wansview.com... -
Page 54: Wifi Setting
Click the cameras being added to the list at the right side for real-time viewing Live Video Real-time Live video, Snap, Record for the camera, and choose Resolution and IR led ON/OFF. Local Recording Check local recorded files or playback the local recorded video. 1/4/9 Windows Full screen Color Adjust: Support Email/ Skype: service2@wansview.com... -
Page 55: Camera Log
7.4.5 Camera Log The user can get online information of the device through a camera log query, such as alarm information etc.. Support Email/ Skype: service2@wansview.com... -
Page 56: Faqs/Troubleshooting
“regsvr32” (as shown in Figure 8.4) ====> Press Enter, a dialog box will pop up (Figure 8.5) that says that the npHYPlayer.dll has been installed successfully. Click to confirm====>You can refresh or re-open the web page to view camera in real time. Support Email/ Skype: service2@wansview.com... -
Page 57: Install Ie Tab For Chrome 43
Chrome web store to download and install an IE tab. Figure 8.3.1 2. Open Chrome, right-click on a blank place, choose the IE Tab option-- click Open in IE Tab Figure 8.3.2 Support Email/ Skype: service2@wansview.com... -
Page 58: Install Ie Tab For Firefox 42
1. One router connected (only one router is being used, and the router is directly connected to the WAN) Log on the router, find the Port forwarding (or Port Mapping or Virtual Server), then add the camera’s local IP and Port as in the figure below: Support Email/ Skype: service2@wansview.com... - Page 59 Second, please log on to router 1, find port forwarding, then add the Router 1 IP and camera’s Port number. Note: Because each brand of router is different, port forwarding methods may be different, please consult the user manual of your router to carry out port forwarding. Support Email/ Skype: service2@wansview.com...
-
Page 60: Ismartviewpro Exit Abruptly On Windows Xp
8.6 iSmartViewPro Exit Abruptly on Windows XP 1: Right click the iSmartViewPro shortcut, and select Properties as below. Figure 8.6.1 2. Select Compatibility and tick “run this program in compatibility mode for” Figure 8.6.2 Support Email/ Skype: service2@wansview.com... - Page 61 Technical Support We hope your Wansview IP Camera is enjoyable and easy to set up and use. You may have some additional questions or conc erns that are not clarified in this user manual. You can always contact us at : Email: service@wansview.com...
Need help?
Do you have a question about the W1 and is the answer not in the manual?
Questions and answers