Table of Contents

Subscribe to Our Youtube Channel
Related Manuals for Wansview B Series


Summary of Contents for Wansview B Series
- Page 1 Dear users, the configuration for this camera is professional, so please read the user manual carefully before using the camera. 2012-11 V4.19...
- Page 2 Statement If the user manual can not help you to solve the problem, please call our technology center about the solutions. We will update the content for the new functions without notice. Notice 1、 Installation Environment Keep away from the places for high-temperature, heat source and direct sunlight; Keep away from water and when get wet, cut off the power immediately.
-
Page 3: Table Of Contents
Index PRODUCT INTRODUCTION ......................4 .........................4 RODUCT SUMMARY ..................4 ACKAGE FOR TYPICAL PRODUCTION INSTALLATION GUIDE .......................6 LAN..................6 PERATION OF CONNECTING TO WIFI ....................8 TEP FOR CONNECTING WAN ..................9 PERATION OF CONNECTING TO OPERATION OF IE BROWSER ....................10 ..........................10 IEW VIDEO .......................12... - Page 4 NCB540W PTZ .......................24 CAMERA NCB547W PTZ .......................25 CAMERA NCB543W W ..................26 ATERPROOF CAMERA...
-
Page 5: Product Introduction
1 Product introduction 1.1 Product summary Thank you for choosing our company’s B series IP camera, the IP Camera combines a high quality digital video camera with network connectivity and a powerful web server to bring clear video to your desktop from anywhere on your local network or over the Internet. - Page 6 √ √ √ √ NCB541W PTZ camera √ √ √ √ NCB545W PTZ camera √ √ √ √ NCB540W PTZ camera √ √ √ √ NCB547W PTZ camera √ √ √ √ NCB543W Waterproof camera Notice: ♦ If you choose IP camera with wireless function, so it includes wifi module inside the camera and antenna in package.
-
Page 7: Installation Guide
2 Installation guide 2.1 Operation of connecting to LAN Power on the IP camera(please check carefully the voltage of power adaptor, don’t insert incorrect power, otherwise it will damage the device), connect IP camera to router by network cable, meanwhile, connect computer to the same router, example of figure 1. - Page 8 1) Click ‘Search (F3)’; 2) Choose a camera; 3) Change the ip address of the ip camera according to the information in the red frame on the left. The numbers in the red circle should not be the same. Http port should be a number between 80~65535;...
-
Page 9: Step For Wifi Connecting
Figure 4 Notice: ♦ You can hold on reset button on the camera for 10 seconds to restore factory default if you forget user name and password, during the process, don’t disconnect the power, otherwise the camera maybe damaged;... -
Page 10: Operation Of Connecting To Wan
Notice:When the device is connected both WIFI and wired, it will firstly connect to the wired network, if it can’t be connected, then it will changed to connect to the wifi. The IP address and port is the same, either wireless or wired network. -
Page 11: Operation Of Ie Browser
Operation Steps: After login the interface of the router,choose “Port Forwarding” Choose “Add custom Service” Input IP camera port. Input IP address of IP camera, click “Apply”。 (the http port and ip address should be the same as figure 2 which set by you own) After finishing the port forwarding, you can use WAN IP address of router and http port of camera to visit the camera by remote computer as figure 6. - Page 12 1) Main Menu The main menu includes the function setting of different submenu. 2) Status Displaying Area Indicates the status for 9 devices: if unconnected, button is gray if connected, button is green If connected wrong, button is yellow If alarm , button is red 3)...
-
Page 13: Network Settings
3.2 Network Settings 3.2.1 Basic network setting The user can also enter the Basic Network Settings to set the IP address except using the search software. See below Figure 10. Figure 10 Network settings 3.2.2 WIFI setting Please refer to chapter 2.2. -
Page 14: Ddns Setting
Not all the routers support UPnP perfectly. Please test if the router works well with the equipment, if not, we suggest you to disable this function and do the port-forwarding manually. 3.2.5 DDNS Setting If doing port forwarding successfully, and visit the camera via ip address in WAN, you also can visit it via DDNS. -
Page 15: Msn Setting
3.2.6 MSN setting Figure 15 MSN setting The user can apply MSN account number by himself, fill in account information in figure 15, and add friends to the number, the camera will display in friends list when it is connected, the friend only need to send “url?”... - Page 16 User can select the motion detection. If there is any motion, it will detect the motion and trigger the alarm. In the motion detect sensibility and sound sensitivity, the larger the figure, the more sensitivity. As showed in Figure 16, if any external alarm detector is connected, user will be able to tick “Alarm Input Armed”.
-
Page 17: Mail Service Setting
Figure 17 Schedule interface 3.3.2 Mail Service Setting Figure 18 Mail service setting... -
Page 18: Ftp Service Setting
When it detects alarming, it can send email to your appointed email box, but you need to set email service parameters correctly. Example of figure 18, click “Submit” to save these parameters, and then you can click “Test” to check if the setting is successful.(Notice:... -
Page 19: Multi-Device Setting
3.4.2 Multi-Device Setting Figure 21 Multi-device setting As Figure 21, User can add 9 devices the maximum to view the device simultaneously. Click “refresh” button to check the device in the LAN. When click a device, will popup setting dialogue box and input the device info, as figure 22 and click “save” to add device. -
Page 20: Maintain
Figure 23 Other setting 3.5 Maintain 3.5.1 Device Information Figure 24 Device information 3.5.2 Alias Setting Figure 25 Alias setting... -
Page 21: Time Setting
3.5.3 Time Setting If the device is connected to the Internet, you enable the NTP server to correct the time and need to select the correct time zone. Otherwise you should use the PC’s time to correct its time. -
Page 22: Operation Of Other Software
4 Operation of other software 4.1 Other web browser Except IE browser, you can visit the camera by Firefox, Safari, Chrome, Opera browser etc, please select “Mode 2 to view” when using these browser (example of figure 3). You can use “Mac search and setting tool” in CD to search the camera and set IP address of camera in Mac computer. -
Page 23: Centralization Control
4.3 Centralization Control IPCMonitor is a free software offered by factory, several devices on LAN and WAN can be browsed at the same time. The software also supports snapshot, video record, alarming and so on. The interface is as figure 30. -
Page 24: Product Family For Ncb Series
5 Product family for NCB series 5.1 NCB546W Card camera Figure 31 The camera adopts 300K pixels CMOS sensor, 3.6mm lens, built in MIC, 12 pieces IR LED, audio out port. It uses 5V power adaptor. 5.2 NCB541W PTZ camera Figure 32 The camera adopts 300K pixels CMOS sensor, 3.6mm lens, built in PTZ and MIC, 10... -
Page 25: Ncb545W Ptz Camera
5.3 NCB545W PTZ camera Figure 33 The camera adopts 300K pixels CMOS sensor, IR cut, 3.6mm lens, built in PTZ and MIC, 8 pieces IR LED, audio out port, alarm in/out port. It uses 5V power adaptor. 5.4 NCB540W PTZ camera Figure 34 The camera adopts 300K pixels CMOS sensor, IR cut, 3.6mm lens, built in PTZ and MIC,... -
Page 26: Ncb547W Ptz Camera
5.5 NCB547W PTZ camera Figure 35 The camera adopts 300K pixels CMOS sensor, IR cut, 3.6mm lens, wifi module, built in PTZ, speaker and MIC, 10 pieces IR LED, audio out port. It uses 5V power adaptor. The camera have a slide switch, you can put switch to AP on or AP off mode. -
Page 27: Ncb543W W Aterproof Camera
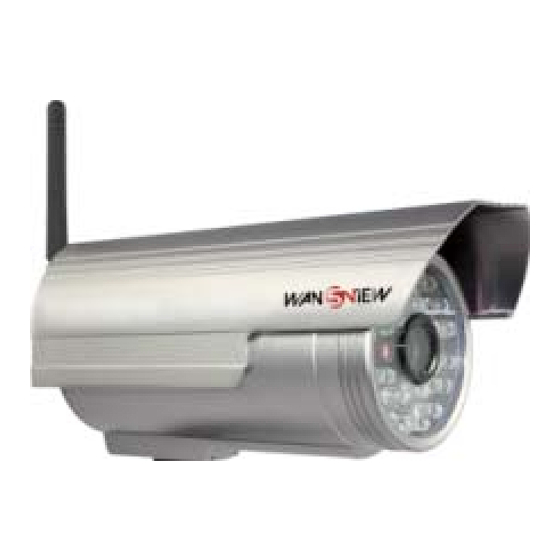
5.6 NCB543W Waterproof camera Figure 37 The camera adopts 300K pixels CMOS sensor, 4mm IR lens, 36pcs IR LED. It uses 5V power adaptor. Statement: 1. This manual may be different with your using camera, if you have any questions of the manual, please contact our technical support.
Need help?
Do you have a question about the B Series and is the answer not in the manual?
Questions and answers
How to set up without cd How do I set it up without institution cd
To set up a Wansview B Series camera without a CD:
1. Connect the camera to power and your router using an Ethernet cable.
2. Access your router’s admin panel to find the camera’s IP address (assigned automatically via DHCP).
3. Enter the camera’s IP address into a web browser.
4. Log in using the default ID and password.
5. Configure the camera using the browser interface.
6. Disconnect the Ethernet cable and connect the camera to your wireless network.
7. Ensure the camera is visible to the router and gets an IP address.
8. Set the camera as a DMZ host in the router if needed.
9. Use dynamic DNS (e.g., no-ip.org) for remote access if desired.
Avoid using the bundled software or CD by configuring everything through the browser.
This answer is automatically generated