HP Z1 G2 Maintenance And Service Manual
Hide thumbs
Also See for Z1 G2:
- User manual (75 pages) ,
- Technical white paper (26 pages) ,
- Product end-of-life disassembly instructions (15 pages)
Table of Contents
Advertisement
Quick Links
Advertisement
Table of Contents
Troubleshooting

Related Manuals for HP Z1 G2


Summary of Contents for HP Z1 G2
- Page 1 HP Z1 G2 Workstation Maintenance and Service Guide...
- Page 2 Microsoft and Windows are U.S. registered Company, L.P. change without notice. The only warranties for trademarks of the Microsoft group of HP products and services are set forth in the companies. Third Edition: September 2015 express warranty statements accompanying Intel, Intel Xeon, Intel Core, and Thunderbolt such products and services.
-
Page 3: About This Guide
About this guide This guide provides service and maintenance information. IMPORTANT: Removal and replacement procedures are now available in videos on the HP website. Go to the HP Customer Self Repair Services Media Library at http://www.hp.com/go/sml. Guide topics Hardware overview on page 1... - Page 4 About this guide...
-
Page 5: Table Of Contents
Copying a setup configuration to another computer ............... 24 Updating and managing software ....................25 LANDesk Software ..........................25 HP Driver Pack ........................... 25 HP SoftPaq Download Manager ......................25 HP System Software Manager ......................26 ROM Flash ............................26 Remote ROM Flash ......................26 HPQFlash ......................... - Page 6 Recovering the computer from Boot Block Recovery mode .......... 27 Workstation security ......................... 27 Asset tracking ......................... 27 SATA hard drive security ....................28 DriveLock applications ................. 28 Using DriveLock .................... 29 Password security ......................30 Establishing a setup password using Computer Setup (F10) Utility ... 30 Establishing a power-on password using computer setup ......
- Page 7 Solving audio problems ........................60 Solving printer problems ........................61 Using HP PC Hardware Diagnostics (UEFI) ......................62 Downloading HP PC Hardware Diagnostics (UEFI) to a USB device ..............62 Diagnostic codes and errors ..........................63 Diagnostic LED and audible (beep) codes ..................63 LED color definitions .........................
- Page 8 Clearing and resetting the CMOS ......................... 73 Using the CMOS button to reset CMOS ....................73 Using Computer Setup (F10) Utility to reset CMOS ................74 Appendix A Linux technical notes ........................75 System RAM ................................. 75 Audio ..................................75 Network cards ..............................
-
Page 9: Hardware Overview
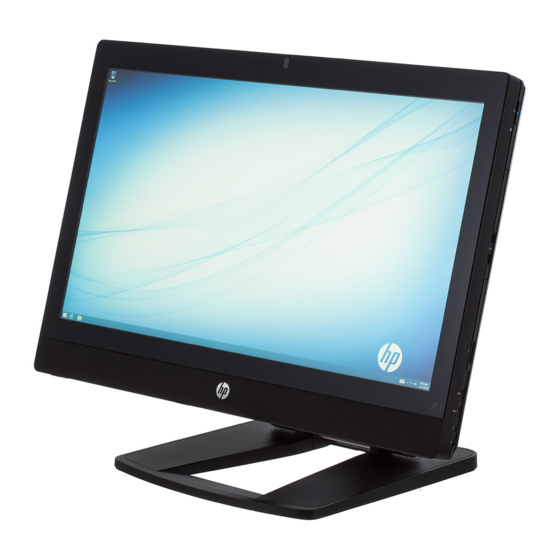
Hardware overview The HP Z1 G2 Workstation is offered in both a touch and a non-touch model. The touch model has a glossy glass front, and the non-touch model has a matte surface, surrounded by a plastic bezel. HP continually improves and changes product parts. For complete and current information on supported parts for your computer, go to http://partsurfer.hp.com, select your country or region, and then follow the on-... -
Page 10: Front And Bottom Components
Front and bottom components Camera angle adjustment dial Serial number pull-out card Camera Speakers Left and right digital microphones Stand Display panel Chassis latches (bottom view) Chapter 1 Hardware overview... -
Page 11: Side Components
Side components Power button USB 3.0 port Hard drive activity light USB 3.0 with battery charging port Slimline slot-load optical drive (or Headset jack optional Thunderbolt 2 module) Memory card reader Microphone jack Side components... -
Page 12: Rear Components
Rear components Handle Power cord connector Subwoofer jack(orange) USB 2.0 connectors (4) Audio line-out jack (green) Optical S/PDIF audio output Audio line-in jack (blue) RJ-45 network connector DisplayPort 1.1a connector Security cable slot Chapter 1 Hardware overview... -
Page 13: Chassis Components
Chassis components Chassis and display assembly Memory modules (DIMMs) Graphics filler block (installed if graphics card assembly is not ordered) Stand Slot-load optical drive Rear I/O board Power supply 3.5” hard drive carrier Wireless keyboard/mouse USB receiver Graphics card assembly System board Memory fan Mini-PCIe or mSATA card... -
Page 14: System Board Components
System board components The following figure and table describe the system board component layout. Cooling Misc Internal USB CPU fan Display Rear DP/LAN Memory fan Hood sensor Rear USB MXM fan LED backlight Rear audio Power Speakers Side I/O Battery Webcam/Mic Touch controller header Main power... -
Page 15: System Board Architecture
System board architecture The following figure shows the system board block diagram. System board architecture... -
Page 16: Workstation Specifications
Workstation specifications Physical characteristics and technical specifications HP Z1 G2 Workstation With stand (non touch) 19.2 kg (42.3 lbs) With stand (touch) 21.0 kg (46.3 lbs) Weight Without stand (non touch) 13.3 kg (29.3 lbs) Without stand (touch) 15.1 kg (33.3 lbs) Stand only 5.9 kg (13.0 lbs) - Page 17 External and internal USB 2.0 ports ● External USB 3.0 ports; the lower port supplies USB battery charging ● HP Low Power State technology enabled Supports European Union ERP Lot 6 tier2 power limit of less than 0.5W in off mode ● RJ-45 for LAN ●...
-
Page 18: Environmental Specifications
Environmental specifications Operating: 5°C to 35°C (40°F to 95°F) Nonoperating: -40°C to 60°C (-40°F to 140°F) Temperature NOTE: The ambient upper limit of 35°C is good up to 1524 m (5000 ft) elevation. Derate by 1°C for every 305 m (1000 ft) above 1524 m (5000 ft). For example, at 3,048 m (10,000 ft), the upper ambient air temperature limit is 30°C. -
Page 19: System Management
System management This section describes the tools and utilities that provide system management for the workstation. Topics Power management features on page 11 BIOS ROM on page 12 Computer Setup (F10) Utility on page 13 Desktop management on page 23 Power management features ERP compliance mode This computer provides ERP compliance mode capability. -
Page 20: Hyper-Threading Technology (Htt)
SATA Power Management enables or disables SATA bus and/or device power management. Intel Turbo Boost Technology The HP Z Workstation series supports Intel® Turbo Boost Technology. This feature enables the CPU to run at frequencies above the normal frequency. When all CPU cores are not necessary for the workload, inactive cores are turned off and power is diverted to the active cores to increase their performance. -
Page 21: Computer Setup (F10) Utility
Computer Setup (F10) Utility Topics Computer Setup (F10) Utility functions on page 13 Accessing Computer Setup (F10) Utility on page 14 Computer Setup (F10) Utility menu on page 15 Computer Setup (F10) Utility functions This section presents the Computer Setup (F10) Utility functions. In most cases, OS-specific information is described for a Windows-based computer, however much of this information applies to all operating systems. -
Page 22: Accessing Computer Setup (F10) Utility
Hide or show the integrated I/O functionality, including serial, USB, or parallel ports, audio, or embedded ● NIC. Hidden devices are inaccessible, which increases system security. Enable or disable removable media boot ability. ● ● Enable or disable removable media write ability (if supported by hardware). ●... -
Page 23: Computer Setup (F10) Utility Menu
Computer Setup (F10) Utility menu The following table describes the functions available in the Computer Setup (F10) Utility menu. NOTE: With new BIOS releases, the following content is subject to change, so the menu might be different than shown. Heading Option Description File... - Page 24 Heading Option Description Ignore Changes Exits workstation setup without applying or saving changes. and Exit Save Changes Saves changes to system configuration and exits the workstation setup. and Exit Storage Device Lists installed storage devices and provides options for obtaining specific information about each device: Configuration To see additional information about a device, use the Down...
- Page 25 Heading Option Description ● Use the arrow keys to move a selected device up or down in the boot order. Press to accept the new boot order. ● For a selected device, press to enable or disable it as a bootable device. MS-DOS drive lettering assignments might not apply after an operating system other than MS-DOS has started.
- Page 26 Heading Option Description ◦ One time saved Key (Applies to Falcon Ridge devices only, allows Thunderbolt host controller to differentiate between many of the same type of device.) ◦ DP++ only (This option allows only monitor connections and does not allow data traffic.) For each device (except Embedded Security Device), Device Available is the default setting and allows the operating system to access the device.
- Page 27 Legacy Support—(Enable/Disable) Configuration ● Secure Boot—(Enable/Disable) Key Management ● ◦ Clear Secure Boot Keys—(Clear/Don't Clear) ◦ Key Ownership—(HP Keys/Custom Keys) ● Fast Boot—(Enable/Disable) For more information on secure boot management go to http://h10025.www1.hp.com/ewfrf/wc/ document?docname=c03653226&cc=us&dlc=en&lc=en. Power OS Power Enables or disables: Management ●...
- Page 28 Heading Option Description ● S5 Maximum Power Savings Thermal Enables you to set the rate of the system fan when the CPU is in idle (Fan Idle Mode). Advanced Power-On Enables you to set the following: Options ● POST Messages—Enables or disables the splash screen during POST. Press the key for Startup Menu ●...
- Page 29 Update BIOS via ● Update BIOS via Network—(Enable/Disable) Network ● Update Source—(HP, Custom) Update Address (Only appears if Custom is selected in Update Source) ● ● Automatic BIOS Update Setting—(Enable/Disable) For more information about Updae BIOS via Network, go to http://h20565.www2.hp.com/portal/site/...
- Page 30 Heading Option Description ◦ UEFI Driver ◦ Adapter PBA ◦ Chip Type PCI Device ID ◦ Bus:Device:Function ◦ ◦ Link Status ◦ MAC Address Chapter 2 System management...
-
Page 31: Desktop Management
Updating and managing software on page 25 LANDesk Software on page 25 HP Driver Pack on page 25 HP SoftPaq Download Manager on page 25 HP System Software Manager on page 26 ROM Flash on page 26 FailSafe Boot Block on page 26... -
Page 32: Initial Computer Configuration And Deployment
F12=Network Service Boot appears in the lower right corner of the HP logo screen. Follow the onscreen instructions to continue the installation process. The default boot order can be changed in the BIOS so that the system always attempts to boot from the network. -
Page 33: Updating And Managing Software
HP SoftPaq Download Manager is a free, easy-to-use interface for locating and downloading software updates for the HP client PC models in your environment. By specifying your models, operating system, and language, you can quickly locate, sort, and select the SoftPaqs you need. For more information, go to http://www8.hp.com/us/en/ads/clientmanagement/drivers-bios.html#softpaq-download-mng. -
Page 34: Hp System Software Manager
HP System Software Manager HP System Software Manager (SSM) is a utility that is available on Windows computers. It enables you to update system-level software on multiple systems simultaneously. When executed on a PC client system, SSM detects hardware and software versions and then updates the software from a central repository, known as a file store. -
Page 35: Recovering The Computer From Boot Block Recovery Mode
Remove any media such as USB flash drives or discs in the optical drives. Insert a BIOS image CD into the DVD drive. You can also use USB media such as an HP DriveKey. Turn the computer off, and then turn it on. -
Page 36: Sata Hard Drive Security
To balance this level of security with the need to address the issue of a forgotten password, the HP implementation of DriveLock employs a two-password security scheme. One password is intended to be set and used by a system administrator, while the other is typically set and used by the user. -
Page 37: Using Drivelock
DriveLock is typically performed by a system administrator, a master password should be set first. HP encourages system administrators to set a master password whether they plan to enable DriveLock or not. This gives the administrator the ability to modify DriveLock settings if the drive is locked in the future. -
Page 38: Password Security
Enter the password again in the Enter New Password Again field. If you forget this password, the drive is permanently disabled. Select File and then select Save Changes and Exit. Press Enter to accept the changes. After you press Enter, the computer performs a cold start before invoking the DriveLock function. When the computer starts, you are prompted to enter the DriveLock password for each DriveLock- capable drive for which you have set a password. -
Page 39: Entering A Power-On Password
When Network Server Mode is disabled, you must enter the password when the computer is turned on and the key icon appears on the monitor. When Password Prompt on Warm Boot is enabled, you must enter the password. The password must also be entered each time the computer is restarted. When Network Server Mode is enabled, the password prompt is not presented during POST. -
Page 40: Changing A Power-On Or Setup Password
Changing a power-on or setup password To change a power-on or setup password: Restart the computer. To change the power-on password, go to step 4. To change the setup password, as soon as the computer is turned on, repeatedly press the key until you enter Computer Setup (F10) Utility. -
Page 41: National Keyboard Delimiter Characters
National keyboard delimiter characters Each keyboard meets country-specific requirements. The syntax and keys you use for changing or deleting passwords depend on the keyboard included with the computer. Language Delimiter Language Delimiter Language Delimiter Arabic Greek Russian Belgian Hebrew Slovakian BHCSY Hungarian Spanish... -
Page 42: Cable Lock (Optional)
If the computer is connected to a network that is managed by HP CMS, the computer sends a fault notice to the network management application. With HP CMS, you can also remotely schedule diagnostics to run on managed PCs and create a summary report of failed tests. -
Page 43: Changing The Power Button Configuration (Windows Only)
Changing the power button configuration (Windows only) CAUTION: To reduce the risk of data loss, do not use the power button to turn off the computer unless the system is unresponsive. NOTE: If the computer is unresponsive, press and hold the power button for four seconds to completely turn off power to the computer. -
Page 44: Component Replacement Information And Guidelines
This chapter provides warnings, cautions, information, and guidelines for removal and replacement procedures. It does not document the step-by-step procedures. IMPORTANT: Removal and replacement procedures are now available in videos on the HP website. Go to the HP Customer Self Repair Services Media Library at http://www.hp.com/go/sml. This chapter includes these topics:... -
Page 45: Service Considerations
— Create a common ground for the equipment you are working on by connecting the static-free mat, static strap, and peripheral units to that piece of equipment. NOTE: HP accessories are for use in HP products. They have been extensively tested for reliability and are manufactured to high quality standards. Service considerations... - Page 46 Removing bubble pack from PCB 7,000V 20,000V 26,500V Packing PCBs in foam-lined box 5,000V 11,000V 21,000V Preventing ESD Many electronic components are sensitive to ESD. Circuitry design and structure determine the degree of equipment damage sensitivity. To prevent damage to electronic components and accessories, observe the following packaging and grounding precautions: ●...
-
Page 47: Product Recycling
Removal and replacement procedures are now available in videos on the HP website. Go to the HP Customer Self Repair Services Media Library at http://www.hp.com/go/sml. In Media Selection, choose Desktops & Workstations for product category and Personal Workstations for the product family, and then choose your platform. -
Page 48: Cable Management
Cable management Proper routing of the internal cables is critical to the operation of the workstation. Follow good cable management practices when removing and installing components. Handle cables with care to avoid damage. ● ● Apply only the tension required to seat or unseat cables during insertion or removal from the connector. ●... -
Page 49: Cpu (Processor) And Cpu Heatsink
Two Mini PCIe/mSATA slots that support mSATA devices or full-length Mini PCIe cards. Half-length cards require an extender plate. Go to http://www.hp.com/go/quickspecs to learn which cards are supported in the workstation. CAUTION: To prevent damage, the overall power consumption of the computer (including I/O cards, CPU, and memory) must not exceed the maximum rating of the computer power supply. -
Page 50: Hard Drives
“Fragile: Handle With Care.” Memory Supported DIMM configurations The HP Z1 G2 Workstation has 4 DIMM slots and supports up to 32 GB ECC or 16 GB non-ECC unbuffered DDR3 1866 MHz memory. NOTE: Mirroring and DIMM sparing are not supported. -
Page 51: Bios Errors And Warnings
● Install only HP-approved DDR3 DIMMs CAUTION: HP ships only DIMMs that are electrically and thermally compatible with this computer. Because third-party DIMMs might not be electrically or thermally compatible, they are not supported by ● For ECC DIMMs, use only industry-standard ECC unbuffered DIMMs. Go to http://www.hp.com/go/... -
Page 52: Power Supply
Power supply The workstation includes a 400W 90% efficient power supply that is compatible with ENERGY STAR requirements. Power supply specifications Power supply 400 W wide-ranging, active Power Factor Correction, 90% efficient Operating voltage range 90–264 V ac Rated voltage range 100–240 V ac Rated line frequency 50–60 Hz... -
Page 53: Power Consumption And Heat Dissipation
Power consumption and heat dissipation Power consumption and heat dissipation specifications are available for multiple configurations. To review available specifications, go to http://www.hp.com/go/quickspecs. To reach zero power consumption, unplug the workstation from the power outlet or use a power strip with an on/off switch. -
Page 54: Diagnostics And Troubleshooting
Troubleshooting checklist on page 50 HP troubleshooting resources and tools on page 50 Troubleshooting scenarios and solutions on page 53 Using HP PC Hardware Diagnostics (UEFI) on page 62 Diagnostic codes and errors on page 63 Chapter 4 Diagnostics and troubleshooting... -
Page 55: Calling Support
(tower and desktop configurations) or on a pull-out card on the side of the display (all-in-one configurations). For a listing of all worldwide support phone numbers, go to http://www.hp.com/support, select your region, and click Connect with HP in the upper-right corner. -
Page 56: Locating Id Labels
To locate base warranty information, see http://www.hp.com/support/warranty-lookuptool. To locate an existing Care Pack, see http://www.hp.com/go/lookuptool. To extend a standard product warranty, visit http://www.hp.com/hps/carepack. HP Care Pack Services offer upgraded service levels to extend and expand a standard product warranty. Chapter 4 Diagnostics and troubleshooting... -
Page 57: Diagnosis Guidelines
Verify that the computer is turned on and the power light is blue (normal operation) and not red (error state). ● If you have installed an operating system other than the factory-installed operating system, go to http://www.hp.com/go/quickspecs to verify that it is supported on your system. Diagnosis during operation ●... -
Page 58: Troubleshooting Checklist
● http://www.hp.com/support—Provides a listing of the worldwide technical support phone numbers. Access the telephone numbers by visiting the website, then select your region, and click Contact HP in the upper-left corner. ● http://www.hp.com/support/workstation_swdrivers—Provides access to software and drivers for workstations. -
Page 59: Troubleshooting A Problem
Troubleshooting a problem To help you troubleshoot problems with your system, HP provides the HPSC. The HPSC is a portal to an extensive selection of online tools. To access HPSC and troubleshoot a problem with the workstation, complete the following: Go to http://www.hp.com/go/workstationsupport. -
Page 60: During Operation
NOTE: Some components are not eligible for customer self-repair and must be returned to HP for service. Call HP Support for further instructions before attempting to remove or repair these components. Chapter 4 Diagnostics and troubleshooting... -
Page 61: Troubleshooting Scenarios And Solutions
Troubleshooting scenarios and solutions This section presents an extensive overview of various troubleshooting scenarios and possible solutions for a Windows-based computer. Solving minor problems Problem Cause Possible Solution Workstation appears frozen Software control of the power Press and hold the power button for at least four seconds and does not shut down when switch is not functional. -
Page 62: Solving Hard Drive Problems
Problem Cause Possible Solution Repeat this process until the faulty device is identified. Remove the graphics card last. Replace the faulty device. If no faulty device is found, replace the system board. Press and hold the power button for less than four seconds. -
Page 63: Solving Internal Display Problems
Problem Cause Solution recognized a newly ● Verify that the drive is listed in the Computer Setup (F10) Utility installed device. (Storage>Device Configuration). If it is listed, the probable cause is a driver problem. If it is not listed, the probable cause is a hardware problem. - Page 64 Correct video drivers Install the video drivers included in the upgrade kit, or download and resolution cannot be set. were not loaded after install the latest drivers for your graphics card from graphics controller http://welcome.hp.com/country/us/en/support.html. upgrade. Chapter 4 Diagnostics and troubleshooting...
- Page 65 Problem Cause Solution The internal LCD panel Change the resolution to either 2560 x 1440 or 1280 x 720. cannot display Update the graphics driver to the latest version available for your requested resolution. graphics controller. The graphics driver is Boot into the OS and uninstall the graphics driver.
-
Page 66: Solving Externally Connected Display Problems
Problem Cause Solution NOTE: Maintain the card parallel with the motherboard slot when inserting the card! Solving externally connected display problems Problem Cause Solution Blank screen (no video). The cable connections are not Verify the cable connections from the monitor to the computer correct. - Page 67 Install the video drivers included in the upgrade kit, or resolution cannot be set. upgraded, the correct video drivers download and install the latest drivers for your graphics card might not be loaded. from http://welcome.hp.com/country/us/en/support.html. Monitor cannot display requested Change the resolution. resolution. The picture is broken up,...
-
Page 68: Solving Audio Problems
Problem Cause Solution Some typed symbols do The font you are using does not Use the Character Map to locate and select the appropriate not appear correctly. support that symbol. symbol. Select Start > All Programs > Accessories > System Tools > Character Map. -
Page 69: Solving Printer Problems
Problem Cause Solution Sound occurs Processor resources are being Shut down all open processor-intensive applications. intermittently. used by other open applications. Workstation appears to The hard drive might be full. Before recording, be sure there is enough free space on the be locked up while hard drive. -
Page 70: Using Hp Pc Hardware Diagnostics (Uefi)
Using HP PC Hardware Diagnostics (UEFI) HP PC Hardware Diagnostics is a Unified Extensible Firmware Interface (UEFI) that allows you to run diagnostic tests to determine whether the computer hardware is functioning properly. The tool runs outside of the operating system so that it can isolate hardware failures from issues that may be caused by the operating system or other software components. -
Page 71: Diagnostic Codes And Errors
CPU. If fan is plugged in and seated properly, but is not spinning, the problem might be in the CPU fan. Contact HP for assistance. Verify that the fan assembly is properly attached. If problems persist, there might be a problem with the CPU heatsink. Contact HP for assistance. - Page 72 Upgrade the ROM using SoftPaq, either from the hard drive, CD, diskette, or USB flash drive (for example, HP Drive Key). The ROM can be flashed by through the F10 Setup Menu by going to File>Flash System ROM. SoftPaq is a self-extracting executable,...
- Page 73 ROM. To download the Softpaq executable, go to http://www.hp.com/go/workstationsupport. The problem might be on the system board. Contact HP for assistance. Power LED flashes red nine System turns on but does The problem might be on the system board.
-
Page 74: Led Color Definitions
LED color definitions The following table describes what each LED light on the computer front panel signifies. LED state LED color System status Solid Blue System is on. Flashing Blue System is in Standby. System has experienced an error. (See POST error messages Solid or flashing on page... - Page 75 Windows utilities. Verify that the memory modules are installed properly. If third-party memory has been added, test the memory configuration using HP memory. Verify the memory module type. 201—Memory Error RAM failure. Run the Computer Setup (F10) Utility or the Windows utilities.
- Page 76 Screen message Probable cause Recommended action 208—Mismatched DIMMs Installed DIMMs are improperly Verify that matching DIMMs are installed. detected matched. 209—Memory warning condition Incorrect memory module type in use. Verify that the memory modules are compatible detected with computer requirements. 212—Failed Processor 0 Processor has failed to initialize.
- Page 77 LCD panel is missing or Replace the cable. not connected. 539—Unable to read GPU Power cycle the system. temperature. The graphics card If the problem persists, contact HP support. may overheat. 550—Thunderbolt power cable The Thunderbolt power cable is Reseat the cable. not connected.
- Page 78 Unknown or unsupported processor The microcode update failed. Verify the processor stepping. stepping to confirm that it is a supported stepping. If it is contact, HP Support. 1802—Processor Not Supported The system board does not support Replace the processor with a compatible one.
-
Page 79: Configuring Password Security And Resetting Cmos
Configuring password security and resetting CMOS This chapter describes how to configure password security and to reset CMOS, and includes these topics: Preparing to configure passwords on page 71 ● ● Resetting the password jumper on page 71 Clearing and resetting the CMOS on page 73 ●... - Page 80 Restart the computer: Close the workstation. Reconnect the AC power cord to the computer. Turn on the computer and wait for the workstation to display the HP splash screen. Repeat step 1. Replace the jumper on pins 1 and 2.
-
Page 81: Clearing And Resetting The Cmos
Clearing and resetting the CMOS This section describes the steps necessary to successfully clear and reset the CMOS. The CMOS of the computer stores password information and information about the computer configuration. Using the CMOS button to reset CMOS To clear CMOS using the Clear CMOS button, use the following procedure: WARNING! To reduce the risk of personal injury from electrical shock and hot surfaces, disconnect the power cord from the wall outlet and allow the internal system components to cool before touching them. -
Page 82: Using Computer Setup (F10) Utility To Reset Cmos
Using Computer Setup (F10) Utility to reset CMOS Access Computer Setup (F10) Utility menu. When the computer setup message appears in the lower-right corner of the screen, press F10, and then press Enter to bypass the title screen, if necessary. If you do not press while the message is displayed, the computer must be rebooted to access this utility. -
Page 83: Appendix A Linux Technical Notes
System RAM HP supports different amounts of total RAM in various HP workstations, based on the number of hardware DIMM slots and the capabilities of the system. The total memory supported for each configuration is listed in the Hardware Support Matrix for HP Linux Workstations at http://www.hp.com/support/... -
Page 84: Network Cards
Network cards All HP workstations include one or two integrated network interface controllers. The HP Z1 G2 Workstation includes a PCI Express Mini Card that implements both wireless LAN and Bluetooth. The iwlagn driver supports the wireless LAN; in most distributions, the Network Manager automatically senses that wireless networks are available. -
Page 85: Nvidia Graphics Workstations
When HP installers are used, their contents and documentation links are installed in the /opt/hp/nvidia folder. When installing Linux on an HP Z1 G2 workstation that contains an NVIDIA card, administrators should select a VESA-compatible driver to avoid the instability that is experienced with some open-source versions of the Nouveau and DRM drivers. -
Page 86: Appendix B Configuring Raid Devices
Supported RAID configurations on page 79 Configuring Intel SATA RAID on page 80 Configuring SATA RAID in Windows on page 81 Software RAID solution on page 81 For additional information about RAID configuration, go to http://www.hp.com/support/RAID_FAQs. Appendix B Configuring RAID devices... -
Page 87: Raid Hard Drive Maximum And Associated Storage Controller Options
RAID hard drive maximum and associated storage controller options This section lists the maximum number of hard drives supported on HP workstations according to RAID configuration and storage controller options. NOTE: This section applies to internal workstation configurations that do not use add-in cards and external enclosures. -
Page 88: Configuring Intel Sata Raid
Configuring the system BIOS to enable embedded SATA RAID functionality The Z1 G2 Workstation defaults to RAID emulation mode. RAID emulation mode includes the benefits of AHCI with the added benefit of supporting RAID configurations. If the mode has been changed to IDE or AHCI, follow the steps below to change it back. -
Page 89: Configuring Raid Volumes In Option Rom
Configuring RAID volumes in Option ROM Follow these steps to create RAID volumes. Press ctrl+I, when prompted, to enter the Intel Rapid Storage Technology Option ROM. Use the arrow keys to navigate and select options. NOTE: If only a single hard drive is attached, the utility does not execute. No message is displayed. Select 1. -
Page 90: Software Raid Considerations
(checksums that allow error detection and limited rebuilding of data in case of a failure). For all software RAID solutions on HP workstations, redundancy can be restored only after the system is shut down so that the failed drive can be replaced. This replacement requires only a minimum amount of work. -
Page 91: Appendix C System Board Designators
System board designators This appendix describes the system board designators for this computer. Main system board Designator Name on board Component Flash Descriptor Override header/jumper Boot Block header/jumper Crisis recovery header/jumper PSWD Clear password header/jumper WEBCAM Webcam/Digital Mic connector CON6701 DP/LAN Rear DP/LAN connector (white) Side I/O connector (black) -
Page 92: Rear I/O Board
Designator Name on board Component SATA2 SATA 6.0 Gbps optical drive port (black) CPU FAN CPU cooler (black) P125 HSENSE Hood sensor (white) P160 SATA PWR SATA hard drive power (white) P161 ODD PWR SATA optical drive power/eject (white) SPKR Internal speakers (white) XBT1 BATT... -
Page 93: Side I/O Board
Side I/O board Designator Name on board Component Microphone jack HDSET Headset jack USB3 USB 3.0 & battery charging port USB3 USB 3.0 J166 CARD READER SD 4.0 card reader Side I/O connector (bottom side) Thunderbolt 2 module board Designator Name on board Component TBT-PWR... -
Page 94: Index
Dual-state power button 34 Card configuration restrictions FailSafe Boot Block ROM 26 Fault notification and recovery Power consumption 45 Resetting power supply 45 HP SoftPaq Download Manager Specifications 44 Product features HP System Software Manager ERP compliance mode 11 Hyper-threading 12...
Need help?
Do you have a question about the Z1 G2 and is the answer not in the manual?
Questions and answers