Vicon Roughneck V920D Series Quick Manual
Camera domes
Hide thumbs
Also See for Roughneck V920D Series:
- Installation manual (82 pages) ,
- Instruction manual (35 pages) ,
- Quick manual (16 pages)
Table of Contents
Advertisement
Quick Links
Quick Guide
XX258-20-00
Roughneck® V920D Series
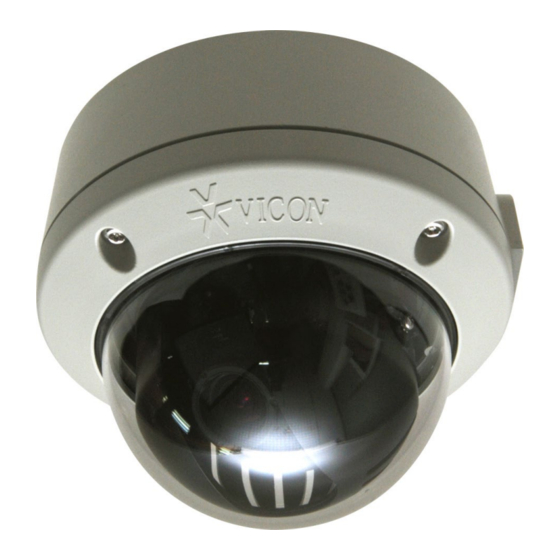
Camera Domes
Vicon Industries Inc., 89 Arkay Drive, Hauppauge, New York 11788
Tel: 631-952-2288 Fax: 631-951-2288 Toll Free: 800-645-9116
24-Hour Technical Support: 800-34-VICON (800-348-4266) UK: 44/(0) 1489-566300
Vicon Industries Inc. does not warrant that the functions contained in this equipment will meet your requirements or that the
operation will be entirely error free or perform precisely as described in the documentation. This system has not been designed
to be used in life-critical situations and must not be used for this purpose.
www.vicon-security.com
Document Number: 8009-8258-20-00
Issued: 1012
Product specifications subject to change without notice.
Copyright © 2012 Vicon Industries Inc. All rights reserved.
Advertisement
Table of Contents

Related Manuals for Vicon Roughneck V920D Series


Summary of Contents for Vicon Roughneck V920D Series
- Page 1 24-Hour Technical Support: 800-34-VICON (800-348-4266) UK: 44/(0) 1489-566300 Vicon Industries Inc. does not warrant that the functions contained in this equipment will meet your requirements or that the operation will be entirely error free or perform precisely as described in the documentation. This system has not been designed to be used in life-critical situations and must not be used for this purpose.
- Page 2 V920D Series Quick Installation Guide...
-
Page 3: Installation Steps
V920D Series of Camera Domes. These units should only be installed by a qualified technician using approved materials in conformance with federal, state, and local codes. Read these instructions thoroughly before beginning an installation. Always refer to Vicon’s website to assure you have the most up-to-date manual, www.vicon-security.com. - Page 4 V920D Series Quick Installation Guide • Package Component The system comes with the following components: Camera unit Installation CD Installation Guide Template Sheet Accessory Kit Optional OSD Controller Check your package to make sure that you received the complete system, including all components shown above.
-
Page 5: Installation
V920D Series Quick Installation Guide 2. Installation For the operation of the network camera, it is necessary to connect a network cable for data transmission (IP version) and power connection from supplied power adapter. Depending on operation methods, it is possible to additionally connect an alarm cable. Refer to the full User's manual . 2.1 Connection ... - Page 6 V920D Series Quick Installation Guide Connect a standard RJ-45 cable to the network port of the network camera. Generally a cross-over cable is used for directly connection to PC, while a direct cable is used for connection to a hub. A router featuring PoE (Power over Ethernet) can also be used to supply power to the camera.
- Page 7 V920D Series Quick Installation Guide 3. Press the SET key to access Main menu. 4. Change Camera ID, and IP Address. You can change the Name or Title and IP address of the camera. Using the ↑↓←→ buttons on the controller, change the parameters. 5.
-
Page 8: Network Connection And Ip Assignment
V920D Series Quick Installation Guide 2.2 Network Connection and IP assignment The IP network camera supports the operation through the network. When a camera is first connected to the network it has no IP address. It is necessary to allocate an IP address to the device with the “Smart Manager”... -
Page 9: Operation
V920D Series Quick Installation Guide 3. Operation The network camera can be used with Windows operating system and browsers. The recommended browsers are Internet Explorer®, Safari®, Firefox®, Opera® and Google® Chrome® with Windows. 3.1 Access from a browser Start a browser (i.e., Internet Explorer). Enter the IP address or host name of the network camera in the Location/Address field of your browser. -
Page 10: Setting The Admin Password Over A Secure Connection
V920D Series Quick Installation Guide 3.3 Setting the admin password over a secure connection To gain access to the camera, the password for the default administrator user must be set. This is done in the “Admin Password” dialog, which is displayed when the network is accessed camera... - Page 11 V920D Series Quick Installation Guide The Snapshot button takes a snapshot of the current image. The location where the image is saved can be specified. The Digital Zoom activates a zoom-in or zoom-out function for the video image on the live screen.
-
Page 12: Network Camera Setup
V920D Series Quick Installation Guide • Adjusting Zoom: Click “–” button to zoom out and click “+” button to zoom in. The focus is moved slightly after adjusting zoom; adjust the focus again, as necessary. • Adjusting Focus: Click “–” button for far focus and click “+” button to near focus. •... -
Page 13: Resetting To The Factory Default Settings
V920D Series Quick Installation Guide 3.6 Resetting to the factory default settings To reset the network camera to the original factory settings, go to the Setup>System> Maintenance web page (described in “3.5.5 System > Maintenance”) or use the Reset button (SW1) on the board of the dome camera, as described below: •... - Page 14 V920D Series Quick Installation Guide...
- Page 15 V920D Series Quick Installation Guide...
- Page 16 Vicon Industries Inc. Corporate Headquarters 89 Arkay Drive Hauppauge, New York 11788 631-952-2288 800-645-9116 Fax: 631-951-2288 Vicon Europe Headquarters Brunel Way Fareham, PO15 5TX United Kingdom +44 (0) 1489 566300 Fax: +44 (0) 1489 566322 Vicon Germany Kornstieg 3 D-24537 Neumuenster...
Need help?
Do you have a question about the Roughneck V920D Series and is the answer not in the manual?
Questions and answers