Table of Contents
Advertisement
Quick Links
Download this manual
See also:
Service Manual
Advertisement
Table of Contents

Related Manuals for Partner OT-310


Summary of Contents for Partner OT-310
- Page 1 OT-310 Handheld POS Terminal User's Manual...
-
Page 2: Table Of Contents
Table of Contents Introduction ..................1 Features ......................1 Package Contents ..................1 Product Overview ..................2 Front and Back ..................2 Left and Right ..................3 Top and Bottom ..................3 LED Indicators ....................4 Getting Started .................. 5 Inserting the Battery .................. - Page 3 Viewing the Current Web Page ............26 Managing Web Pages ................27 Camera ......................28 Capturing Photos ................. 28 Reviewing Photos ................28 Configuring Camera Settings ............... 29 Recording Videos ................. 30 Reviewing Videos ................. 30 Configuring Video Settings ..............31 Capturing Panorama Shots ..............
- Page 4 Reading a Barcode ................54 MSR Module ....................55 Configuring MSR Settings ..............55 Testing the MSR Module ..............56 Appendix .................... 57 Specifications ....................57 Troubleshooting .................... 59 RF Exposure Information (SAR) ............61 WEEE Notice ..................62 FCC Regulations .................. 62...
-
Page 5: Introduction
Optional features for OT-310 are the 1D or 2D barcode scanner, and MSR or IC card. These modular features are combined in various ways to satisfy many different application settings such as transportation and logistics, public sector and hospitality related. -
Page 6: Product Overview
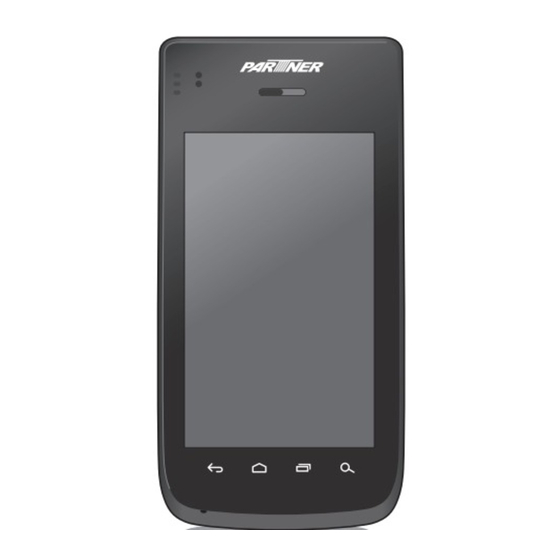
INTRODUCTION: Product Overview Product Overview Front and Back 7 6 5 Item Description 3 LEDs Used for system and application notifications. Receiver Speaker for handheld phone calls. Proximity and light Proximity sensor for detection of near objects (e.g., sensor used for turning off touch display during voice calls). Light sensor for automatically adjusting display backlight to the environmental light. -
Page 7: Left And Right
INTRODUCTION: Product Overview Left and Right Item Description Barcode scan trigger Press to scan barcodes, can also be set as a keys convenience key. Micro USB OTG port Connect to a USB cable for data transfer or battery charging purposes. Earphone jack 3.5mm audio jack. -
Page 8: Led Indicators
INTRODUCTION: LED Indicators LED Indicators The OT-310 handheld POS terminal has three LED indicators. Item Description Module indicator Lit Green when 1D or 2D barcode scanner is activated. Wireless indicator Lit Green when wireless connection (3G, Wi-Fi, or Bluetooth) is activated. -
Page 9: Getting Started
GETTING STARTED: Inserting the Battery Getting Started Inserting the Battery 1. Place the thumbs on the back cover then press firmly and slide down to remove the battery cover. 2. Align the battery connectors and then insert the battery as shown in the illustration. 3. -
Page 10: Charging The Battery
3. Plug the other end of the power adaptor to the wall outlet to start charging. NOTE: Charging can also be done through PC via USB or via the OT-310 charging cradle. Additionally, any micro USB charger that meets: http://www.usb.org/ developers/devclass_docs/USB_Battery_Charging_1.2.pdf, can also be... -
Page 11: Inserting The Memory Card
1. Take off the battery cover and remove the battery and the SIM card. 2. Unlock the memory card slot by sliding it toward the bottom of OT-310. 3. Insert a micro SD card into the memory card slot. 4. Gently place down the memory card slot. Lock the memory card slot by sliding it toward the top of OT-310. -
Page 12: Powering The Device On/Off
GETTING STARTED: Powering the Device On/Off Powering the Device On/Off To turn on the device: Press and hold the Power button for 3 seconds to turn on the device. To turn off the device: 1. Press and hold the Power button for 3 seconds. 2. -
Page 13: Unlocking The Screen
GETTING STARTED: Unlocking the Screen Unlocking the Screen The screen is locked after turning the device on, leaving sleep mode or after a period of inactivity. The screen lock time can be set in Settings menu (see “Configuring Display Settings” on page 16). To unlock the screen, drag towards , or drag... -
Page 14: Using The Handheld Pos Terminal
USING THE HANDHELD POS TERMINAL: Understanding the Interface Using the Handheld POS Terminal Understanding the Interface Home Screen Overview Item Description Status Bar Display status icons and notifications. See “Status and Notifications” on page 11 for more information. Home screen Main screen display. -
Page 15: Status And Notifications
USING THE HANDHELD POS TERMINAL: Understanding the Interface Status and Notifications The Status Bar always appears on top of the screen to indicate different types of information. Item Description Barcode reader Indicates the barcode reader is enabled. Bluetooth icon Indicates Bluetooth is enabled. To enable this function, see “Connecting to Bluetooth Devices”... -
Page 16: Using The Touch Screen
USING THE HANDHELD POS TERMINAL: Understanding the Interface Using the Touch Screen The device is equipped with a 4.3-inch touch screen. The following describes some tips on how to use the touch screen. Touching • Touch an icon displayed on the screen to select it. •... -
Page 17: Managing The Home Screen
USING THE HANDHELD POS TERMINAL: Understanding the Interface Managing the Home Screen Add shortcut icons, widgets, and folders on the Home screen and change the wallpaper. To change the wallpaper: 1. Touch and hold a blank space on the Home screen. 2. -
Page 18: Opening Applications
USING THE HANDHELD POS TERMINAL: Understanding the Interface To remove items: 1. Touch and hold the desired item to remove. 2. Drag and drop the item to the Remove icon until the item turns red. Opening Applications Touch > APPS tab to access the pre-installed applications and device settings. •... -
Page 19: Changing Basic Settings
USING THE HANDHELD POS TERMINAL: Changing Basic Settings Changing Basic Settings Setting the Date and Time Adjust the date and time of the device to provide accurate operation. The time zone can also be set accordingly. To automatically adjust date and time, perform the following: 1. -
Page 20: Configuring Display Settings
USING THE HANDHELD POS TERMINAL: Changing Basic Settings Configuring Display Settings This device display can be configured in many ways to better suit the working environment. To adjust the brightness, perform the following: 1. On the Home screen, touch > Settings. 2. -
Page 21: Configuring Sound Settings
USING THE HANDHELD POS TERMINAL: Changing Basic Settings Configuring Sound Settings This device has several sound settings such as general sound, ringtones, notifications, and alarms. To adjust the volume, perform the following: 1. On the Home screen, touch > Settings. 2. -
Page 22: Managing Wireless And Network Settings
Bluetooth devices in range. 4. To connect to a device, touch the device name. 5. Enter the passkey to connect. The passkey must be the same passkey on the other device. NOTE: Touch “OT-310” to make the device visible to other devices. -
Page 23: Configuring Language And Keyboard Settings
USING THE HANDHELD POS TERMINAL: Configuring Language and Keyboard Settings Configuring Language and Keyboard Settings Changing the System Language To change the system language, perform the following: 1. On the Home screen, touch > Settings. 2. In PERSONAL, touch Language & input. 3. -
Page 24: Using The User Dictionary
USING THE HANDHELD POS TERMINAL: Configuring Language and Keyboard Settings Using the User Dictionary The device has a built-in user dictionary, allowing users to add words to it. To add words to the dictionary, perform the following: 1. On the Home screen, touch >... -
Page 25: Advanced Settings
USING THE HANDHELD POS TERMINAL: Advanced Settings Advanced Settings Configuring Location Services Based on the location, the Location Services settings menu allows interactive options with Google. 1. On the Home screen, touch > Settings > Location access. 2. Touch one of the following options: •... -
Page 26: Managing Accounts
USING THE HANDHELD POS TERMINAL: Advanced Settings • Unknown sources: Check the box to allow installation of applications from unknown sources. • Trusted credentials: Allow applications to display trusted CA certificates. • Install from storage: Install encrypted certificates from memory card. •... - Page 27 USING THE HANDHELD POS TERMINAL: Advanced Settings 3. Touch Corporate. 4. Enter the Email address and Password. NOTE: If there are more than one accounts, check the Send email from this account by default box to set the current account as the default account.
- Page 28 USING THE HANDHELD POS TERMINAL: Advanced Settings To synchronize other accounts, perform the following: 1. On the Home screen, touch > Settings > Accounts & sync. 2. Touch the desired account to sync. 3. Check the boxes of the desired data to sync, such as Contacts, Calendar.
-
Page 29: Managing Storage Space
USING THE HANDHELD POS TERMINAL: Advanced Settings Managing Storage Space Use the Storage settings menu to view the total and available space on the device. The device has two storage sources: • USB STORAGE: The internal storage • SD CARD: The micro SD card To view the total and available storage space, touch from the Home screen, then touch Settings >... -
Page 30: Application And Operation
APPLICATION AND OPERATION: Browser Application and Operation This chapter covers information on how to use pre-installed applications and customize related settings. Browser Use Browser to view web pages. Launching a Web Page 1. On the Home screen, touch > Browser. 2. -
Page 31: Managing Web Pages
APPLICATION AND OPERATION: Browser Managing Web Pages Touch to change the view current setting or configure other functions. • Refresh: Select to reload current web page. • Forward: Select to go to the next page. • Bookmarks: Select to view bookmarks, history, or saved pages. -
Page 32: Camera
APPLICATION AND OPERATION: Camera Camera Use Camera to capture photos and panorama shots and record videos. Capturing Photos 1. On the Home screen, touch > Camera. Flash mode Zoom icon Touch to enter Camera menu. Touch to view the latest record file. 2. -
Page 33: Configuring Camera Settings
APPLICATION AND OPERATION: Camera Configuring Camera Settings Touch to enter the camera menu. Perform the following: • Touch to configure the basic camera settings. Available options: Store location (OFF/ON), Picture size (5M Pixels/3M Pixels/2M Pixels/WXGA/HD720/1M Pixel/SVGA/WVGA/VGA/CIF/QVGA/QCIF), Focus mode (Normal/Macro), Anti Banding (Auto/60 Hz/50 Hz/ Off), Restore defaults (Cancel/OK). -
Page 34: Recording Videos
APPLICATION AND OPERATION: Camera Recording Videos 1. On the Home screen, touch > Camera. 2. Touch and select to switch to Video mode. Zoom icon Touch to enter Video menu. Touch to view the latest record file. 3. Aim the device at the subject. 4. -
Page 35: Configuring Video Settings
APPLICATION AND OPERATION: Camera Configuring Video Settings Touch to enter the video menu. Perform the following: • Touch to configure the basic video settings. Available options: Store location (OFF/ON), Video Encoder (H264/H263/MPEG4), Audio Encoder (AAC/ AMRNB), Video duration (30 minutes/15 minutes/10 minutes/30 seconds), Color effect (None/Mono/Sepia/ Negative/Solarize), Power Mode (Normal_Power/ Low_Power), Restore defaults (Cancel/OK). -
Page 36: Capturing Panorama Shots
APPLICATION AND OPERATION: Camera Capturing Panorama Shots 1. On the Home screen, touch > Camera. 2. Touch and select to switch to Panorama mode. Touch to view the latest record file. 3. Aim the device at the subject. 4. Touch to start capturing the shot. -
Page 37: Email
APPLICATION AND OPERATION: Email Email Use the device to send and receive emails using Internet email accounts. Setting up an Email Account 1. On the Home screen, touch > Email. 2. Enter the email address and password. 3. Touch Next. NOTE: Touch Manual setup to manually configure the email. -
Page 38: Viewing Emails
APPLICATION AND OPERATION: Email 6. Enter the account and display names and touch Next. Once the account setup is complete, the device will automatically retrieve the emails. Viewing Emails By default, emails are automatically saved in the Inbox folder. Unread emails Indicates this email contains attachment. -
Page 39: Composing And Sending An Email
APPLICATION AND OPERATION: Email Composing and Sending an Email 1. On the Home screen, touch > Email. 2. Touch 3. Enter the recipient’s email address in the To field. 4. Enter a subject in the Subject field (if necessary). 5. Compose the email. NOTE: To add attachments to emails, touch >... -
Page 40: Deleting Emails
APPLICATION AND OPERATION: Email Deleting Emails To delete an email at a time, perform the following: 1. On the Home screen, touch > Email. 2. Touch an email to open it. 3. Touch to delete the current email. To delete selected emails in the same folder, perform the following: 1. -
Page 41: Adding Other Email Accounts
APPLICATION AND OPERATION: Email Adding Other Email Accounts 1. On the Home screen, touch > Email. 2. Touch > Settings. 3. Touch ADD ACCOUNT. 4. Repeat Steps 2~6 in “Setting up an Email Account” on page 33. NOTE: Check the Send email from this account by default box to set this new account as the default email account. -
Page 42: File Manager
APPLICATION AND OPERATION: File Manager File Manager Use File Manager to browse and manage files/folders stored in the internal memory (the device) or the memory card installed in the device. Browsing Files 1. On the Home screen, touch > File Manager. 2. -
Page 43: Gallery
APPLICATION AND OPERATION: Gallery Gallery Use Gallery to view captured photos, recorded videos, or downloaded photos stored in the internal memory (the device) or the memory card installed in the device. Viewing Photos 1. On the Home screen, touch > Gallery. 2. -
Page 44: Playing Videos
APPLICATION AND OPERATION: Gallery Playing Videos 1. On the Home screen, touch > Gallery. 2. Touch the desired album/folder. The recorded files are displayed in thumbnails. 3. Touch the desired video to playback. 4. Perform one of the following: • To play the video, touch •... -
Page 45: Messaging
APPLICATION AND OPERATION: Messaging Messaging Use Messaging to send and receive text and MMS messages. Creating and Sending a Text Message 1. On the Home screen, touch > Messaging. 2. Touch 3. Enter the recipient’s phone number in the To field. 4. -
Page 46: Configuring Messaging Settings
APPLICATION AND OPERATION: Messaging Configuring Messaging Settings 1. On the Home screen, touch > Messaging. 2. Touch > Settings. 3. Choose an option and change the necessary settings: • Delete old messages: Select this option to delete old messages as limits are reached. •... -
Page 47: Music
APPLICATION AND OPERATION: Music Music Use Music to listen to the favorite songs using the device. Playing a Song 1. On the Home screen, touch > Music. 2. Select the Song tab. All songs are displayed on the screen. 3. Select a song to play. Press to enter Now Playing screen. -
Page 48: Creating A Playlist
APPLICATION AND OPERATION: Music Creating a Playlist 1. On the Home screen, touch > Music. 2. Touch and hold the desired song to add. 3. Touch Add to playlist. 4. Select a playlist. To create a new playlist, select New. Enter the new playlist name and select Save. -
Page 49: Deleting A Song
APPLICATION AND OPERATION: Music Deleting a Song 1. On the Home screen, touch > Music. 2. Touch and hold the desired song to delete. 3. Touch Delete. 4. Touch OK to delete the selected song. Configuring the Sound Effect 1. On the Home screen, touch >... -
Page 50: People
APPLICATION AND OPERATION: People People Use People to view and manage the contact list. Adding a New Contact 1. On the Home screen, touch > People. 2. Touch 3. Touch one of the following: • New Contact in Device: To save the new contact to the phone memory. -
Page 51: Importing Contacts
APPLICATION AND OPERATION: People Importing Contacts To import contacts from the SIM card, perform the following: 1. On the Home screen, touch > People. 2. Touch > Import/export > Import from SIM card. 3. Touch the desired contact to import. To import contacts from the memory card, perform the following: 1. -
Page 52: Backing Up Contacts
APPLICATION AND OPERATION: People Backing Up Contacts To copy contacts to the SIM card, perform the following: 1. On the Home screen, touch > People. 2. Touch > Import/export > Export to SIM/RUIM card. 3. Touch the desired contact to export. To copy contacts to the memory card, perform the following: 1. -
Page 53: Managing Contacts
APPLICATION AND OPERATION: People Managing Contacts To edit a contact information, perform the following: 1. On the Home screen, touch > People. 2. Touch the desired contact to modify. 3. Touch > Edit. 4. Modify the necessary information. 5. Touch DONE to save the changes. To share a contact information, perform the following: 1. - Page 54 APPLICATION AND OPERATION: People To send all calls from specific contact to voicemail, perform the following: 1. On the Home screen, touch > People. 2. Touch the desired contact to revert all calls directly to voicemail. 3. Touch > All calls to voicemail. To add a contact to Favorite list, perform the following: 1.
-
Page 55: Phone
APPLICATION AND OPERATION: Phone Phone Use Phone to make or receive a phone call using the device. Making a Call 1. On the Home screen, touch > Phone. 2. Enter the phone number using the on-screen keypad. • To delete a wrong number, touch •... -
Page 56: Answering A Call
APPLICATION AND OPERATION: Phone Answering a Call • To answer a call, touch and drag it to the icon. • To reject the call, touch and drag it to the icon. • To reject and send a message directly to the caller, touch and drag it to the icon. -
Page 57: Barcode Scanner Module
APPLICATION AND OPERATION: Barcode Scanner Module Barcode Scanner Module This device is equipped with a barcode scanner module which supports many of the popular barcode formats currently used worldwide. NOTE: During the system initialization (after powering on the device for the first time or resetting the device to factory default), the scanner will take approximately 30 seconds to be activated. -
Page 58: Reading A Barcode
APPLICATION AND OPERATION: Barcode Scanner Module • Show the notification icon: Check the box to enable notification icon to be displayed on the status bar. • Firmware Version: View the module firmware version. 3. Touch to return to the Home screen. Reading a Barcode To read 1D/2D barcodes, perform the following: 1. -
Page 59: Msr Module
APPLICATION AND OPERATION: MSR Module MSR Module The Magnetic Stripe Reader module supports tracks 1, 2, and 3, which cover all possible reading methods currently in use. Configuring MSR Settings Use the MSR settings menu to configure the MSR module related settings. 1. -
Page 60: Testing The Msr Module
APPLICATION AND OPERATION: MSR Module Testing the MSR Module 1. On the Home screen, touch > Settings > MSR Settings. 2. Touch MSR Demo to open the swipe test screen. 3. Swipe a magnetic stripe card through the MSR module. Make sure the magnetic stripe is facing upward. -
Page 61: Appendix
APPENDIX: Specifications Appendix Specifications OT-310 Specifications Processor Qualcomm MSM8960 Dual Core Krait– 1.5GHz Android 4.2 Memory Standard: 1GB Storage Standard: 8GB Display • 4.3" TFT, 800*480 • Brightness 350nits Capacitive Touch • 5 finger touch • Gorilla glass+ AR solution WWAN 1. - Page 62 APPENDIX: Specifications OT-310 Specifications Speaker Internal, 1 (0.5W) more than 80 dB SPL at 1m Receiver Internal, 1, add HAC compliant receiver Microphone Internal, 1 • 1 x SIM • 1 x Micro SD • 1 x Micro USB Female type, OTG & Charging function •...
-
Page 63: Troubleshooting
APPENDIX: Troubleshooting Troubleshooting 1. The device powers off automatically. • The battery power may be depleted, try charging the battery. 2. No sound comes out from the device. • Check if the device is muted, press the volume keys to adjust the volume. •... - Page 64 Preface Copyright Copyright © 2014. All rights reserved. No part of this user manual may be reproduced, transmitted, stored in a retrieval system, or translated into any language, in any form or by any means, without permission from the manufacturer. Google, the Google logo, Android, the Android logo and Tags are trademarks of Google Inc.
-
Page 65: Rf Exposure Information (Sar)
Regulatory Statement RF Exposure Information (SAR) This phone is designed and manufactured not to exceed the emission limits for exposure to radio frequency (RF) energy set by the Federal Communications Commission of the United States. During SAR testing, this device was set to transmit at its highest certified power level in all tested frequency bands, and placed in positions that simulate RF exposure in usage against the head with no separation, and near the body with the separation of 10 mm. -
Page 66: Weee Notice
WEEE Notice The WEEE logo on the product or on its box indicates that this product must not be disposed of or dumped with your other household waste. You are liable to dispose of all your electronic or electrical waste equipment by relocating over to the specified collection point for recycling of such hazardous waste. -
Page 67: About This Manual
About this Manual The content in this manual is as accurate as possible. However, due to continuous product improvements, some contents and specifications may have been changed since this manual was written. In this case, take the actual device as basis. No part of this user manual may be reproduced, transmitted, stored in a retrieval system, or translated into any language, in any form or by any means, without a written permission from the manufacturer.
Need help?
Do you have a question about the OT-310 and is the answer not in the manual?
Questions and answers