Table of Contents
Advertisement
Quick Links
Download this manual
See also:
User Manual
Advertisement
Table of Contents

Summary of Contents for Partner OT-310
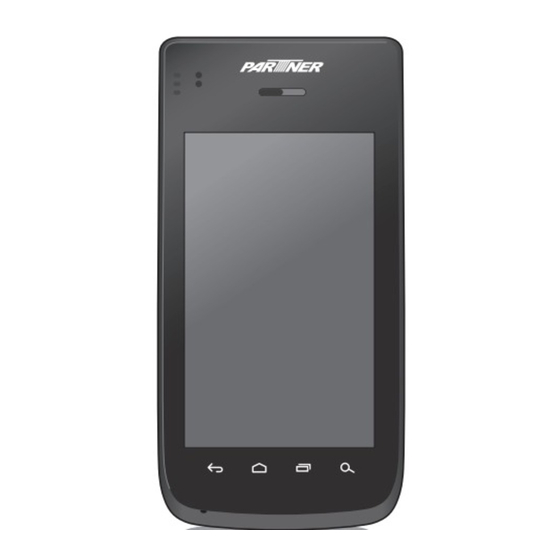
- Page 1 OT-310 Handheld POS Terminal Service Manual...
-
Page 2: Table Of Contents
Table of Contents Troubleshooting Guide ..............1 Access Diagnostic Program ................1 LCD RGB ...................... 2 LCD Backlight ....................4 Switch Key ....................6 Touch Panel ....................10 SD Card ......................13 Rear Camera ....................15 MSR ......................17 Barcode ......................20 LED ....................... -
Page 3: Troubleshooting Guide
TROUBLESHOOTING GUIDE: Access Diagnostic Program Troubleshooting Guide When repairing OT-310, you can test the major components by using the Diagnostic Program. To access the Diagnostic Program, do the following: Access Diagnostic Program 1. Touch the Home key( ) to return to the Home screen. Then touch Function Test to launch the Diagnostic Program. -
Page 4: Lcd Rgb
TROUBLESHOOTING GUIDE: LCD RGB LCD RGB To test the LCD, do the following: 1. Touch the LCD RGB button. 2. After the LCD test is complete, select Pass or Fail. LCD Checking Flowchart If the LCD test fails, perform the following:... - Page 5 TROUBLESHOOTING GUIDE: LCD RGB Circuit Diagram and Related Scanning Circuit Board [Check point: LCD Connector (CON8)] [Check point: Power suppy for LCD]...
-
Page 6: Lcd Backlight
TROUBLESHOOTING GUIDE: LCD Backlight LCD Backlight To test the LCD backlight, touch the Backlight button. LCD Backlight Checking Flowchart If the LCD backlight is not working normally, perform the following:... - Page 7 TROUBLESHOOTING GUIDE: LCD Backlight Circuit Diagram and Related Scanning Circuit Board [Check point: LCD Backlight (CON8)]...
-
Page 8: Switch Key
TROUBLESHOOTING GUIDE: Switch Key Switch Key To test the Switch key, touch the Switch button. Switch Checking Flowchart a. If the Volume Up / Volume Down / F1 / F2 key is not working normally, perform the following:... - Page 9 TROUBLESHOOTING GUIDE: Switch Key b. If the Power key is not working normally, perform the following: Circuit Diagram and Related Scanning Circuit Board [Check point: Volume Up / Volume Down / F1 / F2 key]...
- Page 10 TROUBLESHOOTING GUIDE: Switch Key [Check point: Volume Up / Volume Down / F1 / F2 key (continue)]...
- Page 11 TROUBLESHOOTING GUIDE: Switch Key [Check point: Power key]...
-
Page 12: Touch Panel
TROUBLESHOOTING GUIDE: Touch Panel Touch Panel To test the touch panel, touch the Touch button. Touch Panel Checking Flowchart If the touch panel is not functioning normally, perform the following:... - Page 13 TROUBLESHOOTING GUIDE: Touch Panel Circuit Diagram and Related Scanning Circuit Board...
- Page 14 TROUBLESHOOTING GUIDE: Touch Panel...
-
Page 15: Sd Card
TROUBLESHOOTING GUIDE: SD Card SD Card To test the SD card slot, touch the SD Card 2 button. SD Card Slot Checking Flowchart If the system fails to read the memory card inserted into the SD card slot, perform the following:... - Page 16 TROUBLESHOOTING GUIDE: SD Card Circuit Diagram and Related Scanning Circuit Board...
-
Page 17: Rear Camera
TROUBLESHOOTING GUIDE: Rear Camera Rear Camera To test the rear camera, touch the Rear Camera button. Rear Camera Checking Flowchart If the rear camera is not functioning normally, perform the following:... - Page 18 TROUBLESHOOTING GUIDE: Rear Camera Circuit Diagram and Related Scanning Circuit Board...
-
Page 19: Msr
TROUBLESHOOTING GUIDE: MSR To test the MSR module, touch the MSR TEST button. MSR Module Checking Flowchart If the MSR module is not functioning normally, perform the following:... - Page 20 TROUBLESHOOTING GUIDE: MSR Circuit Diagram and Related Scanning Circuit Board...
- Page 21 TROUBLESHOOTING GUIDE: MSR...
-
Page 22: Barcode
TROUBLESHOOTING GUIDE: Barcode Barcode To test the barcode module, touch the Barcode TEST button. Barcode Module Checking Flowchart If the barcode module is not functioning normally, perform the following:... - Page 23 TROUBLESHOOTING GUIDE: Barcode Circuit Diagram and Related Scanning Circuit Board...
- Page 24 TROUBLESHOOTING GUIDE: Barcode...
- Page 25 TROUBLESHOOTING GUIDE: Barcode...
-
Page 26: Led
TROUBLESHOOTING GUIDE: LED To test the LED module, touch the LED TEST button. LED Module Checking Flowchart If the LED module is not functioning normally, perform the following:... - Page 27 TROUBLESHOOTING GUIDE: LED Circuit Diagram and Related Scanning Circuit Board...


Need help?
Do you have a question about the OT-310 and is the answer not in the manual?
Questions and answers