Table of Contents
Advertisement
Advertisement
Table of Contents

Related Manuals for Partner SP-550


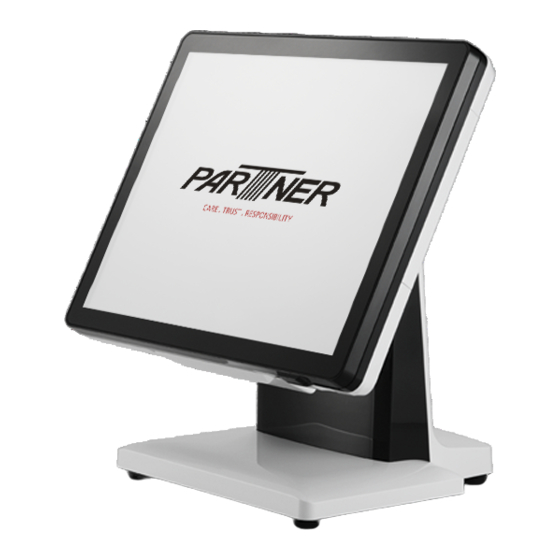
Summary of Contents for Partner SP-550
- Page 1 POS Terminal SP-550 Service Manual...
-
Page 2: Regulatory Notices
Regulatory Notices WARNING This is Class A Product. In domestic environment this product may cause radio interference in which case the user may be required to take adequate measures. 警告使用者 這是甲類的資訊產品,在居住的環境中使用時,可能會造成射頻干擾,在這種情況下,使用者會被要 求採取某些適當的對策。 FCC Statement This device has been tested and found to comply with the limits for a Class A digital device, pursuant to part 15 of the FCC Rules, these limits are designed to provide reasonable protection against harmful interference when the device is operated in a commercial environment. -
Page 3: Legislation And Weee Symbol
Legislation and WEEE Symbol 2002/96/EC Waste Electrical and Electronic Equipment Directive on the treatment, collection, recycling and disposal of electric and electronic devices and their components. The crossed-out wheeled bin symbol on the device means that it should not be disposed of with other waste at the end of its working life. -
Page 4: Safety Information
Safety Information Computer components and electronic circuit boards can be damaged by discharges of static electricity. Working on computers that are still connected to a power supply can be extremely dangerous. Follow these guidelines to avoid damage to the computer or injury to yourself. •... -
Page 5: Contact Information
Contact Information Partner Tech Corporation 10F., No.233-2, Baoqiao Rd., Xindian Dist., New Taipei City 231, Taiwan (R.O.C.) http://www.partner.com.tw/... -
Page 6: Copyright And Trademark
Copyright and Trademark Copyright This publication, including all photographs, illustrations and software, is protected under international copyright laws, with all rights reserved. Neither this manual, nor any of the material contained herein, may be reproduced without written consent of the author. Disclaimer The information in this document is subject to change without notice. -
Page 7: Table Of Contents
Contents Regulatory Notices ......................2 Safety Information ......................4 Contact Information ......................5 Copyright and Trademark ....................6 About this manual ......................6 Chapter 1 Getting Started ....................9 Unpacking ........................9 Identifying Components ....................10 Connector Pin Define ....................... 13 Mainboard Jumper ...................... - Page 8 Network Symptoms ......................47 USB Symptoms ....................... 48 Peripheral-Device Symptoms .................... 48 Boot Symptoms ......................48 Chapter 5 Replacing Field Replaceable Units (FRUs) ............ 49 MSR ..........................50 Customer Display ......................50 Hard Disk Drive ....................... 51 Panel..........................52 Rear Hard Drive Compartment Cover ................53 Panel Back Cover ......................
-
Page 9: Chapter 1 Getting Started
Getting Started This chapter describes how to unpack and identifying components on the device. Unpacking It is a good idea to save the packaging materials and shipping box in case that machine needs to be returned for service. Please un-pack and re-pack the machine terminal as shown below. -
Page 10: Identifying Components
Identifying Components This section describes the parts and connectors on the machine. 15-inch TFT LCD LED Power Indicator VFD Customer Display (optional) Slot MSR (optional) Slot Cable Compartment Cable Compartment Cover... - Page 11 I/O Panel Power Button I/O Cover HDD Compartment Cover I/O Connectors COM4 COM1 USB 2.0 USB 3.0 RJ-11 Cash drawer port DC12V-In USB 2.0 DC12V-Out COM2 PS/2 KB COM3...
- Page 12 COM4 COM1 USB 2.0 USB 3.0 RJ-11 Cash drawer port DC12V-In USB 2.0 DC12V-Out COM2 Line Out COM3 MIC In RJ-11 COM4 COM1 USB 2.0 USB 3.0 Cash drawer port DC12V-In DC12V-Out PS/2 KB COM3 COM2...
-
Page 13: Connector Pin Define
Connector Pin Define This section describes the connectors pin define. COM Connector Pin Define Signal Signal SOUT *Can be selected for 5V or 9V via jumpers. VGA Connector Pin Define Signal Signal Signal AGND Green AGND DDC DAT Blue AGND Horizontal Sync Vertical Sync DDC CLK... - Page 14 RJ-11 Cash Drawer Connector Pin Define Signal CASEOPEN2 CASH1 CASEOPEN1 CASH2 *Voltage is selected via JP1 DC 12V Input Connector Pin Define Signal LAN Connector Pin Define Signal Signal TXA+ TXC- TXA- TXB- TXB+ TXD+ TXC+ TXD- DC 12V Output Connector Pin Define Signal +12V...
- Page 15 USB 3.0 Connector Pin Define Signal Signal USB Vcc StdA_SSRX- USB - StdA_SSRX+ USB + USB GND StdA_SSTX- StdA_SSTX+ SATA Connector Pin Define Signal Signal SATA_RX- SATA_TX+ SATA_RX+ SATA_TX- Parallel Connector Pin Define Signal Signal Signal Strob# Acknowledge# Data 0 Busy Data 1 Paper Empty#...
-
Page 16: Mainboard Jumper
Mainboard Jumper JLV2 JLV1 JCMOS Jumper Setting Description JLV1 1-2 Closed 2-3 Closed (Default) +12V (LVDS Backlight Power Select Jumper) JLV2 1-2 Closed (Default) +3.3V 2-3 Closed (LVDS VDD Select Jumper) JCMOS 1-2 Close (Default) Keep Data 2-3 Close Clear CMOS (Clear CMOS Jumper) - Page 17 Jumper Setting Description 1-2 Close COM3 Pin 9: 5V 3-4 Close (Default) COM3 Pin 9: RING (COM3 Power Select Jumper) 5-6 Close COM3 Pin 9: 12V 1-2 Close COM4 Pin 9: 5V 3-4 Close (Default) COM4 Pin 9: RING (COM4 Power Select Jumper) 5-6 Close COM4 Pin 9: 12V 1-2 Close...
-
Page 18: Mainboard Connectors
Mainboard Connectors connector to LCD panel connector to connector to SATA HDD connector to HDD power connector to power button connector to connector to speaker power LED connector to power jack connector to touch panel... -
Page 19: Chapter 2 Bios Setup
BIOS Setup The primary function of the BIOS (Basic Input and Output System) is to identify and initiate component hardware. The BIOS parameters are stored in non-volatile BIOS memory (CMOS). CMOS contents don’t get erased when the computer is turned off. About the BIOS Setup Utility The BIOS Setup Utility enables you to configure the following items: •... -
Page 20: Entering The Setup Utility
Entering the Setup Utility When you power on the system, BIOS enters the Power-On Self Test (POST) routines. POST is a series of built-in diagnostics performed by the BIOS. After the POST routines are completed, the following message appears: Press DEL to run Setup Press the delete key <Delete>... -
Page 21: Main Screen
Main Screen This screen includes System BIOS Information, Processor, System memory and displays the System Time and System Date. System Overview This screen displays System BIOS Information, Processor, System memory, System Time and System Date. System Time/ System Date The System Time and System Date items show the current date and time held by the machine. To set the time and date use the Tab key to move from field to field. -
Page 22: Advanced Settings
Advanced Settings This setup screen includes sub-menus for APCI Configuration, CPU Configuration, SATA Configuration, USB Configurations, Super IO Configurations and Hardware Health Configuration. ACPI Settings Enable Hibernation This item allows user to enable or disable the hibernation feature for OS. This option may be not effective with some OS. -
Page 23: Super Io Configuration
Soft-Off by PWR-BTTN Under ACPI (Advanced Configuration and Power management Interface) you can create a software power down. In a software power down, the system can be resumed by Wake Up Alarms. This item lets you install a software power down that is controlled by the normal power button on your system. -
Page 24: Serial Port X Configuration
Serial Port x Configuration Serial Port x This item allows you to enables or disables a serial port. Change Settings This item allows you to specific IO address and IRQ for the serial port. Parallel Port Configuration Parallel Port This item allows you to enables or disables the parallel port. -
Page 25: Hardware Monitor
Change Settings This item allows you to specific IO address and IRQ for the parallel port. Device Mode This item allows you to set the data transfer protocol for the parallel port. There are four options: Standard Parallel Port Mode, EPP Mode (Enhanced Parallel Port), ECP Mode(Extended Capabilities Port), and ECP &... -
Page 26: Cpu Configuration
CPU Configuration Virtualization Tech This feature allows you to enable or disable Intel Virtualization Technology support that allow multiple OS to run simultaneously on the same system. CPU PPM Configuration EIST This item allow you to enable or disable EIST (Enhanced Intel Speedstep Technology). When enabled, CPU will reduce power consumption. -
Page 27: Sata Configuration
SATA Configuration SATA Controller Use this item to enable or disable the on-chip SATA controller. The default setting is Enabled. SATA Controller Mode This item is used to configure SATA mode. The default setting is SATA Mode. SMART Self Test This item is used to enable monitoring of hard disks that support the S.M.A.R.T. - Page 28 Legacy USB Support When enabled, the BIOS will enable legacy support for USB keyboards, mice and floppy drives. You will be able to use these USB devices even with operating systems that do not support USB. TXE Control TXE Control ®...
-
Page 29: Chipset Settings
Chipset Settings This screen allow you to configure the chipset options. System Agent (SA) Configuration... -
Page 30: Graphics Configuration
Graphics Configuration DVMT Pre-Allocated This item allows you to adjust system memory that can be pre-allocated as graphics memory. DVMT Total Gfx Mem This item allows you to set the maximum amount of system memory that can be allocated as graphics memory. - Page 31 Backlight Control This feature allows you to specific how to control the backlight. LVDS Backlight This feature allows you to adjust the backlight of the LCD monitor. LVDS Spread Spectrum When the motherboard clock generator pulses, the extreme values (spikes) of the pulses creates EMI (Electromagnetic Interference).
- Page 32 Onboard LAN Device Use this item to enable or disable the onboard LAN controller. The default setting is Enabled. LAN Boot ROM This feature allows you to enable or disable the onboard LAN boot ROM to boot system. Mini PCI Express Port This item allows you to enable or disable the Mini PCI Express device.
-
Page 33: Security Settings
Security Settings This screen allows you to configure the system security settings. Create or Change Adminitrator/ User Password An administrator password takes precedence over a user password, and the administrator can limit the activities of a user. To create or change a password, follow these steps: Highlight the item Administrator/ User Password on the Security menu and press <Enter>. -
Page 34: Boot Settings
Boot Settings This screen allow you to configure the boot options. OS Selection This item allows you to select OS to install or boot. Bootup Numlock State This item is used to select the Power-on state for Numlock. FullScreen Logo This item enables you to show the full screen logo on the bootup screen. -
Page 35: Save & Exit
Save & Exit This screen allows you to load default setting values, save changes and discard changes. Save Changes and Reset Highlight this item and press <Enter> to save the changes that you have made in the Setup Utility and restart the system. When the dialog box appears, press <Yes> to save and exit, or press <No>... -
Page 37: Chapter 3 Installing Drivers And Software
Installing Drivers and Software This section explains how to install the included drivers and software. Driver Installation Use an external CD-ROM drive to install the drivers or copy the drivers to a USB flash drive and then plug to the machine. When you insert the CD ROM the following screen appears. Click Install Terminal Drivers and then select the name of your terminal to begin the driver installation. -
Page 38: Intel Chipset Driver
Intel Chipset Driver Follow these instructions to install the chipset driver: Click Next to continue. Read the license agreement, then click Yes. - Page 39 Browse the ReadMe Information, then click Next. The Intel Chipset Software Utility files are installed to the system. When prompted to restart, select Yes, I want to restart my computer now. Then click Finish to restart the system.
-
Page 40: Intel Chipset Graphics Driver
Intel Chipset Graphics Driver Follow these instructions to install the chipset grapgics driver: Click Next to continue. Read the license agreement, then click Yes. - Page 41 Browse the ReadMe Information, then click Next. When installation is completed, select Yes, I want to restart my computer now. Then click Finish to restart the system.
-
Page 42: Lan Driver
LAN Driver Follow these instructions to install the LAN driver: Click Next to continue. Click Install to begin installation. - Page 43 When installation is completed, click Finish.
-
Page 45: Chapter 4 Locating The Problem
Locating the Problem Refer to this section to locate the problem with the drvice. General Checkout Guidelines Use the following procedure to troubleshoot problems: • Identify as many symptoms as possible in detail. • Verify symptoms by recreating them. • Follow the corrective procedures in order. -
Page 46: Lcd Symptoms
Refer to the following to prevent incorrect cash drawer status detection by the system: I/O Port Port Condition Note Address High(1) → Close If Bit is set to Low to open Cashdrawer A 05A8 the cash drawer, after it Control port Low(0) →... -
Page 47: Touch Screen Symptoms
Touch Screen Symptoms Symptom Corrective Procedure • Touchscreen does not • Reseat the panel cable. function • Reseat the touchscreen board-to-touch panel cable. • No virtual mouse • Replace the touch control board. • Cursor doesn’t follow when • Replace the touch panel. touching the screen Power Symptoms Symptom... -
Page 48: Usb Symptoms
USB Symptoms Symptom Corrective Procedure • USB device does not function • Check that the USB device is detected in Windows Device Manager. • Reinstall the USB device driver. • Replace the mainboard. Peripheral-Device Symptoms Symptom Corrective Procedure • USB ports do not work •... -
Page 49: Chapter 5 Replacing Field Replaceable Units (Frus)
Replacing Field Replaceable Units (FRUs) This chapter provides instructions for replacing FRUs. Before You Begin Make sure you have a stable, clean working environment. Dust and dirt can get into components and may cause malfunction. Adequate lighting and proper tools can prevent you from accidentally damaging the internal components. -
Page 50: Msr
Remove one screw. Disconnect the cable. Remove the MSR. Customer Display Remove two screws. Disconnect the cable. Remove the customer display. -
Page 51: Hard Disk Drive
Hard Disk Drive Press and slide to remove the hard drive compartment cover. Remove one screw securing the HDD tray to the stand. Pull the HDD out of its bay. Remove four screws securing the HDD to its tray. -
Page 52: Panel
Panel Before proceeding, remove the following FRUs. • • Customer Display • Hard Disk Drive Rotate the LCD screen forward Remove one screw that secure the base to the panel. Slide to remove the base bracket cover. CAUTION The screen is fragile. Placing the monitor face-down on a flat, soft area prevents... -
Page 53: Rear Hard Drive Compartment Cover
Remove two screws from base bracket. Disconnect power and HDD cables. Lift the panel and remove it from the base. Rear Hard Drive Compartment Cover Before proceeding, remove the following FRUs. • • Customer Display • Panel Slide to remove the rear hard drive compartment cover. -
Page 54: Panel Back Cover
Panel Back Cover Before proceeding, remove the following FRUs. • • Customer Display • Panel Remove five screws. Press and slide the cover edges to remove it. EMI Shield Before proceeding, remove the following FRUs. • Panel Back Cover Remove the EMI shield. -
Page 55: Speaker
Speaker Before proceeding, remove the following FRUs. • Panel Back Cover Remove two screws. Disconnect the cable from the mainboard. Remove the speaker. Power Button Before proceeding, remove the following FRUs. • Panel Back Cover Remove two screws. Disconnect the cable from the mainboard. -
Page 56: Battery
Battery Before proceeding, remove the following FRUs. • Panel Back Cover Open the hock. Pull out the battery. I/O Shield Before proceeding, remove the following FRUs. • Panel Back Cover • EMI Shield Remove all screws from the I/O ports. Remove two screws from the I/O shield. -
Page 57: Mainboard
Mainboard Before proceeding, remove the following FRUs. • Panel Back Cover • EMI Shield • I/O Shield Disconnect all cables from the mainboard. Remove four screws. Remove the mainboard. Heatsink Before proceeding, remove the following FRUs. • Panel Back Cover •... -
Page 58: Touch Panel, Lcd Panel
Touch Panel, LCD Panel Before proceeding, remove the following FRUs. • Panel Back Cover • EMI Shield SHD Base • I/O Shield • Mainboard Front Bezel Remove four screws from the SHD base. LCD Panel Remove the LCD panel. Touch Panel Remove the touch panel and the front bezel. -
Page 59: Appendix A Part List And Specification
Part List and Specification Exploded Diagram... - Page 60 Part list Description Item Number TOUCH PANEL15 HD-T150NN01-G8SA 2619040310014 TFT LCD 15 inch TM-QIM1541 2614550150300 Front Bezel 25000500U0000 SHD Base 21004500U0001 Main PCBA 2610000200000 SPEAKER 3W 4OHM JST2P(PH)15CM 1379004003000 EMI SHD 21004500U0000 Rear Case Black 25002500U0000 VFD Cover Black 25003500U0015 HDD cover Black 25003500U0001 Single MSR Cover 1Black...
-
Page 61: Specifications
Specifications Item SP-550 ® CPU Type Intel Bay Trail-D J1900 2.0G up to 2.4G, 2M Cache 15” Active TFT color LCD, 350 nits resolution 1024 x 768 Touch Projected Capacitive Touch Memory 2G 204pin DDR3L-1333, SO-DIMM x 2 Max Support up to 8GB...
Need help?
Do you have a question about the SP-550 and is the answer not in the manual?
Questions and answers