Tait t2020 User Manual
Hide thumbs
Also See for t2020:
- Operator's manual (27 pages) ,
- Application note (4 pages) ,
- Service manual (150 pages)
Table of Contents
Advertisement
Quick Links
Advertisement
Table of Contents

Related Manuals for Tait t2020


Summary of Contents for Tait t2020
-
Page 3: Table Of Contents
Priority Scanning ................17 Voting ................... 17 Tait Electronics Ltd has made every effort to ensure the accuracy of the information in this manual. However, Tait Electronics Ltd reserves the right to update the radio and/or this manual without notice. - Page 4 5-Tone Signaling ................18 Receiving a 5-Tone Call ..............18 Clearing a Call ................18 Receiving a 5-Tone Group Call ............19 Making a 5-Tone Call .................19 Preset 5-Tone Calls ................19 Dialing 5-Tone Calls ..............19 Call Acknowledgement ..............21 Making a 5-Tone Group Call ..............21 Dialing 5-Tone Group Calls ............22 5-Tone Emergency Calling ..............23 Status Messages ..................23...
- Page 5 Changing an Option Setting ............36 Call Queuing ..................36 Call Queue Not Empty ..............37 Accessing the Call Queue .............. 37 Exiting Call Queue Entry Mode ............ 38 Call Queue Full ................38 Call Diversion ..................38 Activating Call Diversion ............... 39 Exiting Call Diversion Mode ............
-
Page 6: Safety Warnings
Safety Warnings FCC RF This product generates radio fre- Exposure quency energy during transmissions. Limits This device must be restricted to work-related use in an occupational/ controlled exposure environment. The radio operator must have control of the expo- sure conditions and duration of all persons exposed to the antenna of this transmitter to satisfy FCC RF exposure compliance. -
Page 7: Getting Started
Getting Started Variation in Your T2020 mobile radio has been programmed to Radio Setup suit your communication needs. If you are unsure of which of the features described in this manual are available on your radio, consult your system man- ager or the person who programmed your radio. -
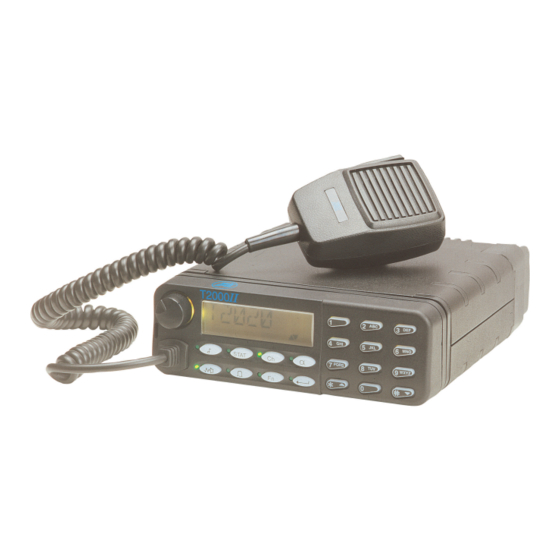
Page 8: Radio Controls And Indicators
Radio Controls and Indicators Your T2020 radio controls and indicators include the on/off/volume control, control head keys and display indicators. On/Off/ Rotating the on/off/volume control clockwise Volume turns on the radio and increases volume. This also Control controls the volume level of audible indicators and confidence tones. - Page 9 Symbol Key Name Function Monitor * Controls the signaling mute and RF squelch control of your receiver (see “Monitor” on page 15). * Long press: Turns squelch over- ride on and off. Auxiliary * Activates emergency mode or sends a one touch 5-tone or DTMF call.
-
Page 10: Radio Indicators
Radio In combination, the radio’s LED indicators and Indicators control head display indicators provide you with visual information on the state of your radio. The radio indicators are summarized in the following tables. LED Indicators Indicator Name Meaning Call LED Steady: Your radio has received a 2-tone or 5-tone call. -
Page 11: Control Head Display Indicators
Indicator Name Meaning Auxiliary LED Indicates the state of the auxiliary options switch. The programmed configuration of the auxiliary options switch determines whether this indica- tor is displayed continuously , not displayed continuously, or is only displayed when the auxiliary key is pressed. - Page 12 Indicator Name Meaning SCAN Scan Indicator Your radio is sampling each of a group of channels for any activity. When it detects traffic on a chan- nel, scanning halts on the active channel. WAIT Wait Indicator The channel you are using is busy and your call has been deferred to a queue.
-
Page 13: Basic Operation
Basic Operation This section describes the basic operation of your radio, including turning the radio on and off, adjusting volume, selecting channels, transmitting calls and receiving calls. Turning the Rotating the on/off/volume control clockwise Radio On and turns on the radio and increases volume. Rotating the control counterclockwise decreases volume and turns off the radio. -
Page 14: Selecting A Group
display, along with the current channel name e.g. REGION2 2. Press the up and down keys ( ) to scroll through the list of available channels, until the control head display shows desired channel name or use the keypad ( ) to enter the new channel number. -
Page 15: Making A Call
Making a Call 1. Select the desired channel or group. If the indicator appears, the channel is BUSY active with traffic and you must wait until the channel is available. If you attempt to transmit while the indicator is displayed, the BUSY WAIT indicator appears. -
Page 16: Transmit Timer
Transmit Your radio is fitted with a transmit timer that limits Timer the amount of time you can transmit continuously. If the radio gives three beeps, the transmit timer is about to expire. You must release the PTT before you can transmit again. The radio may be pro- grammed to prevent transmission for a period after the transmit timer has expired. -
Page 17: Selective Call Mute
your radio only unmutes if the call carries the sub- audible tone or code specific to your fleet or group. Selective Call Mute 2-tone decoding and 5-tone signaling use audible tones to isolate your calls, so that your radio only unmutes if the call carries the tones specific to your fleet or group. -
Page 18: Muting An External Device
Press the monitor key again to reactivate RF squelch. Muting an External Device Your radio may be fitted with the ability to mute another device, such as a car stereo, so that received or transmitted messages are heard. Scanning and A series of channels may be grouped together so Voting that the radio can scan through them looking for... -
Page 19: Making A Call In Scan Mode
3. To cancel scanning, select a non-scanning channel. The indicator disappears from the SCAN control head display Making a Call in Scan Mode If you wish to make a call when the radio is in scan mode, lift the microphone off the microphone clip to suspend scanning. -
Page 20: 5-Tone Signaling
5-Tone Signaling 5-tone (also known as multi-tone) signaling is selec- tive calling that segregates a group of users from others on a channel, using a set of audible tones. Each radio has a unique identity and you can direct calls to individuals within your own group and make different types of calls. -
Page 21: Receiving A 5-Tone Group Call
5-tone group calls. Making a There are two ways to make 5-tone calls on your 5-Tone Call T2020: I preset 5-tone calls, and I dialed 5-tone calls. Preset 5-Tone Calls There are two different types of preset 5-tone calls that may be programmed for your radio. - Page 22 2. If the number displayed is the one you wish to call, press the enter key ( to send the call. The transmit indicator ( ) appears briefly and the radio may give a short beep, as the call is transmitted.
-
Page 23: Call Acknowledgement
Call Acknowledgement After you have made a 5-tone call, you may hear an acknowledgement tone, beep, or series of tones from your radio, indicating that your call has been received. If you do not hear a tone, either: I the called radio is incapable of generating an acknowledgement, or I the called radio is turned off, or I the called radio is out of range of your call. -
Page 24: Dialing 5-Tone Group Calls
Dialing 5-Tone Group Calls The way you dial 5-tone group calls depends on the way your radio was programmed. Group calls can be dialed using the # character, the * character, or both. If you are unsure what characters you can use for dialing 5-tone group calls, consult your system manager or the person who programmed your radio. -
Page 25: 5-Tone Emergency Calling
Press Key Display Meaning Reads Second digit of the group call. 37GGG The group character (G) is substi- tuted for the remaining digits. 37GGG Call transmitted to all 37??? users. Wait a few seconds after the transmit indicator ( disappears from the control head display, and then broadcast your message. -
Page 26: Status Message Display
You may be able to transmit a status message with: I preset 5-tone calls, or I 5-tone numbers that have variable status pro- grammed, or I alpha symbols (see “Alphanumeric Entry Mode” on page 32 for further information on alpha symbol calls). -
Page 27: Other 5-Tone Features
2. Use the up and down scroll keys ( to move through the list of status messages until the required message is displayed, or enter the status number using the keypad. 3. Press the enter key ( ) to confirm your choice. -
Page 28: Deferred Calling
Deferred Calling If the channel you are making a call on is busy, the radio may be programmed to store the call and send it again once the channel is free. If the call is being resent and you wish to cancel it, press any key. -
Page 29: G-Star Id Encoding
Making a There are two ways to make G-STAR calls on your G-STAR Call T2020. I A one touch G-STAR call may be assigned to the auxiliary ( ) key. To make the call, press the auxiliary key. -
Page 30: 2-Tone Decoding
2-Tone Decoding 2-tone signaling is used with conventional systems to selectively call either individual or groups of radios, using two sets of programmed decodes. Your radio may be programmed to decode 2-tone calls. Receiving a When a 2-tone encoded call is received, the radio 2-Tone Call gives a beep, indicating which type of 2-tone call has been decoded. -
Page 31: Dtmf Calls
DTMF tones, your radio can make a call to a telephone or send control codes to a remote device. There are two ways to make DTMF calls on your T2020: I preset DTMF calls, and I dialed DTMF calls. Preset DTMF... -
Page 32: Dialing Type
“shift” key in conjunction with the numeric keys, as follows: PTT + PTT + PTT + PTT + For example, pressing the PTT key, holding it, then pressing the key enters tone A in the DTMF string. Dialing Type Your radio may be programmed for either normal or buffered dialing. -
Page 33: Dialing A Dtmf Call
Dialing a DTMF Call 1. Press any illuminated mode keys to deactivate the function ( ). The radio is now in DTMF dialing mode and the last call dialed may appear. 2. If the number displayed is the one you wish to call, press the enter key ( ) to send the call. -
Page 34: Alphanumeric Entry Mode
Alphanumeric Entry Mode Alphanumeric entry mode allows you to select and execute up to 20 programmed command sequences called alpha symbols. An alpha symbol can: I change to a specific channel or scan group, I dial a 5-tone or DTMF call, I change the radio’s status, or I any combination of these tasks. - Page 35 In the following example, you wish to call your base, which monitors a channel called REGION2 and has the 5-tone number 24624. The sequence of keystrokes, and the corresponding characters that appear in the control head display, are shown in the table below.
-
Page 36: User Function Menu
User Function Menu The user function menu allows you to personalize the way your radio operates. Two types of menu options can be accessed using the user function menu: I options that change between two settings, and I options that take you into another operating mode. -
Page 37: Altering User Options
Display Settings Meaning DTMF BUF/NOR Switches the DTMF dialing type between buffered (tones sent together) and nor- mal (tones sent as each key is pressed). CALL QUE Accesses call queue entry mode. See “Call Queuing” on page 36. DIVERT Accesses call diversion setup mode. See “Call Diversion”... -
Page 38: Changing An Option Setting
Changing an Option Setting 1. Press the function key ( ) to enter user function menu entry mode. The scrolling available indicator ( appears in the control head display, along with the last item viewed in user function menu entry mode. 2. -
Page 39: Call Queue Not Empty
Call Queue Not Empty When a call has been queued, the radio automati- cally switches to user function menu entry mode after a period of user inactivity. When this happens, appears in the control head display and CALL QUE the function LED flashes ( Accessing the Call Queue 1. -
Page 40: Exiting Call Queue Entry Mode
) to move through the list of call queue entries. 5. Press the enter key ( to return a call. The radio switches to the channel the call was received on and sends the call. The entry is then automatically removed from the call queue. 6. -
Page 41: Activating Call Diversion
5-tone hardware must be installed in the radio and call diversion must be programmed before this option is available. Activating Call Diversion 1. Press the function key ( ) to enter user function menu entry mode. The scrolling available indicator ( appears in the control head display, along with the last item viewed in user function menu entry mode. -
Page 42: Exiting Call Diversion Mode
Exiting Call Diversion Mode To leave call diversion mode or call diversion setup mode, press another mode key (function, call, sta- tus, channel or alphanumeric). Receiving a Call During Call Diversion When a standard incoming call is received by the radio in call diversion mode, the programmed auto- acknowledgement sequence is transmitted, as for a normal call. -
Page 43: Changing The Channel Signaling
Changing the Channel Signaling 1. Press the function key ( ). The item last viewed while in user function entry mode appears in the control head display. 2. Use the up and down scroll keys ( to move through the list of menu options until option is displayed. -
Page 44: Exiting Signal Programming Mode
Exiting Signal Programming Mode To leave the signal programming session, press another mode key (function, call, status, channel or alphanumeric). Programmable Your radio may be programmed so that you can Scanning and change the mix of channels that belong to your Voting Groups scanning and voting groups. -
Page 45: Changing A Channel's Group Membership
groups and press the enter key ( again to start editing the group. The name of the first channel programmed in your radio is displayed. 5. Use the up and down scroll keys ( to move through the list of channels. indicator appears when the channel SCAN displayed is a member of the group you wish to... -
Page 46: Other Features
Other Features Economy Economy mode conserves battery power when Mode there is no activity on the radio by turning off some internal circuitry after a programmed period of inactivity. While economy mode is active, the control head display backlighting may dim or switch off. This feature of economy mode may be turned on and off using the function menu (see “User Function Menu”... -
Page 47: Emergency Cycling
operation at any time by turning the radio off, then on again. Emergency Cycling This begins after emergency mode is activated and the emergency sequence has been transmitted. The radio cycles between transmitting and receiving so that any activity near the radio can be heard by the party receiving the emergency call. -
Page 48: Maintenance And Troubleshooting
Maintenance and Troubleshooting Basic Your T2020 requires no regular maintenance other Maintenance than ensuring that cables and connections are secure and that no damage has occurred to the antenna or wiring. Trouble- If you are experiencing difficulty operating your shooting radio, review “Basic Operation”...
Need help?
Do you have a question about the t2020 and is the answer not in the manual?
Questions and answers