
Subscribe to Our Youtube Channel
Related Manuals for Promise Technology Pegasus2 R2+


Summary of Contents for Promise Technology Pegasus2 R2+
- Page 1 PEGASUS2 R2+ Product Manual Version 1.0 © 2015 PROMISE Technology, Inc. All Rights Reserved.
- Page 2 Pegasus2 R2+ Product Manual Copyright © 2015 PROMISE T echnology, Inc. All Rights Reserved. PROMISE, the PROMISE logo, VTrak, Pegasus, SmartStor, SuperTrak, FastTrak, VessRAID, Vess, PerfectPATH, PerfectRAID, SATA150, ULTRA133, VTrak S3000, BackTrak, Hyper- Cache, HyperCache-R, HyperCache-W, DeltaScan and GreenRAID are registered or pending trademarks of PROMISE T echnology, Inc.
- Page 3 Promise Technology bout this guide This Product Manual describes how to setup, use, and maintain the Pegasus2 R2+ unit. It also describes how to use the PROMISE Utility software that you install and run on your Windows or Mac computer.
- Page 4 Pegasus2 R2+ Product Manual Federal Communications Commission (FCC) Class B Information ICES/NMB-003 Compliance This device complies with Canada ICES-003 Issue 5. CAN ICES-3 (B) / NMB-3 (B)
- Page 5 Promise Technology VCCI Class B Device Please note that this device has been approved for non-business purposes and may be used in any environment, Including residential areas. Pegasus2 R2+ Korean KCC certification ID : MSIP-REM-PMS-Pegasus2R2 Pegasus2 R2+ Media Pods HDD Pod Korean KCC certification ID : MSIP-REM-PMS-HDDPod...
- Page 6 Pegasus2 R2+ Product Manual WARNING WARNING...
- Page 7 Promise Technology WARNING WARNING...
-
Page 8: Table Of Contents
Pegasus2 R2+ Product Manual Contents ontents bout this guide 2 r2+ ntroduction to egAsus rotocol uPPort enefitS PecificAtions ardware ediA cf/SD r eaDer SSD r eaDer 2.5” HDD P nstAllAtion And etuP acking nstaLL on indows comPuter ysteM requireMents for indoWs uMMAry of the setuP Procedure oWnloAd the lAtest driver And softWAre... - Page 9 Contents Promise Technology ProMise u tility Promise u tiLity in Pening loSing nlocking the ProMise u 2 r2+ 31 tility interfAce for egAsus oolBar uStomize tHe ac uSer interface AshboArd evice Menus HySical rive menu Artition Hange Partition SettingS Hange...
-
Page 10: I Ntroduction To P Egasus 2 R2
Promise Technology 2 r2+ ntroduction to egAsus This chapter covers the following topics: • “Protocol Support” • “Key Benefits” • “Specifications” • “Hardware” PROMISE T echnology’s Pegasus2 R2+ is a portable high performance external direct attached storage system (DAS) for small and medium business (SMB) users, small office / h ome office (SOHO) users, and digital Audio and Video production professionals. -
Page 11: P Rotocol S Upport
Pegasus2 R2+ Product Manual rotocol uPPort Pegasus2 R2+ has two Thunderbolt 2™ ports, as well as one USB 3.0 port. Note that the USB 3.0 port and Thunderbolt 2 ports cannot be used simultaneously. Pegasus2 R2+ supports Thunderbolt 2™ technology, providing two channels with 20 Gb/s of throughput in both directions simultaneously. Thunderbolt 2 is compatible with the previous original version of Thunderbolt. -
Page 12: Pecifications
Promise Technology peCifiCAtions Storage Disks Pegasus2 R2+ supports 3.5” 6 Gbps SATA HDD for the two hard disk drive bays. The Media Bay accommodates one of three available types of Media Pods for compact mobiles storage, including a 2.5” SATA HDD Pod, and an SSD Reader Pod, both available for purchase separately. -
Page 13: H Ardware
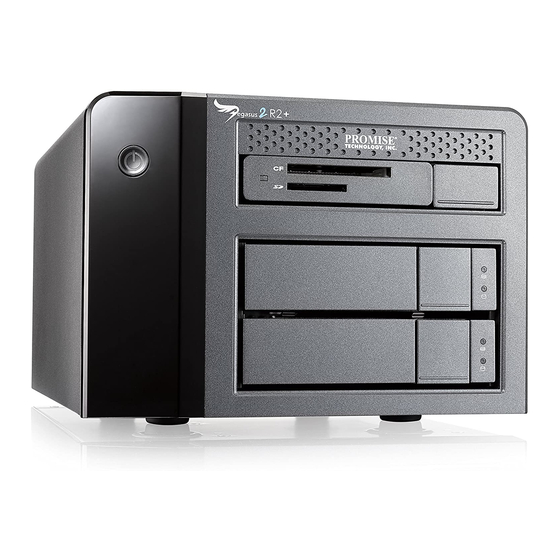
Pegasus2 R2+ Product Manual ArdWAre This section provides a brief introduction to the external hardware of the Pegasus2 R2+. Please note that he appearance of the front of the enclosure will differ slightly according to the type of Media Pod that is inserted in the Media Bay. -
Page 14: Led Description
Promise Technology LED Description The System Status LED located on the Power button lights blue when the Pegasus2 is operating normally. When the system is System Status booting up, this lights orange and will light blue when fully booted located on power button if there are no problems detected. - Page 15 Pegasus2 R2+ Product Manual Pegasus2 R2+ back view Thunderbolt Ports USB 3 Port Power Receptacle Feature Description Use a Thunderbolt cable to connect the Pegasus2 to a Thunderbolt Thunderbolt ready computer. This connection completes the physical link, it is the Ports path through which the SATA link is established.
-
Page 16: M Edia P Ods
Promise Technology ediA The Pegasus2 R2+ includes a CF/SD Reader Pod. Other Media Pods available for purchase include an HDD Pod and SSD Reader Pod. These are described below. The Media Pod can be removed from the Pegasus2 R2+ enclosure, and connected via the included USB 3.0 cable (USB 3.0 Type A to Micro-B) directly to a computer. -
Page 17: Cf/Sd R Eader P Od
Pegasus2 R2+ Product Manual cf/SD r eaDer CF/SD Reader Pod (empty) The CF/SD Reader Pod includes one slot for CF (Compact Flash) memory and one slot for SD (Secure Digital) cards. The memory cards are not included with the shipment. To use the memory cards, just insert CF or SD memory into the appropriate slot and use the PROMISE Utility to format the drives. -
Page 18: Ssd R Eader P Od
Promise Technology SSD Reader Pod (empty) SSD r eaDer Insert an SSD drive into the slot and use the PROMISE Utility to format the drives. Then follow instructions in “Partition” on page 37 to format the drive. To insert the SSD, orient the drive right... -
Page 19: Hdd P Od
Pegasus2 R2+ Product Manual 2.5” HDD Pod 2.5” HDD P The 2.5” HDD Pod includes a 1 TB drive installed. It is shipped ready for use. Follow follow instructions in “Partition” on page 37 to format the drive. 2.5” HDD Pod inserted into Pegasus2 R2+... -
Page 20: I Nstallation And S Etup
Promise Technology nstAllAtion And etuP This chapter covers installation and setup of the Pegasus2 R2+ on Mac and Windows computers. However, since the process is a little different for the different operating systems, the hardware installation and setup procedures are presented in separate sections according to the type of OS used. -
Page 21: P Acking L Ist
Pegasus2 R2+ Product Manual Acking The Pegasus2 R2+ box contains the following items: • Pegasus2 R2+ Unit includes two 3.5” hard disk drives installed in disk trays and inserted into enclosure • CF/SD Reader Pod* inserted into Media Bay • Power cord • Thunderbolt cable • USB 3.0 Type A to Type B cable • USB 3.0 Type A to Micro-B cable... -
Page 22: I Nstall On W Indows Computer
Promise Technology nstAll on indoWs coMPuter Pegaus2 R2+ is shipped with a hardware RAID that can be used on a Windows computer. But the RAID 0 drive needs to be partitioned and formatted with a file system (NTFS) usable in Windows. Install the driver and software on the Windows system, then partition the RAID drive, or change the RAID and partition it using the PROMISE Utility software designed for managing and monitoring the device. -
Page 23: D Ownload The Latest Driver And Software
Pegasus2 R2+ Product Manual oWnloAd the lAtest driver And softWAre Before installing the Pegasus2 R2+, download the latest version of the PROMISE Utility and latest Windows driver from the PROMISE website. Go to www.promise.com and click on Support at the top of the page. Find the Pegasus2 logo and click on that, then find the link for Pegasus2 R2+ near the bottom left corner. That’s where you will find the software and Windows driver as well as user documentation for the Pegaus2 R2+. -
Page 24: I Nstall Driver And Software On W Indows
Promise Technology nstAll driver And softWAre on indoWs When you use the Pegasus@ R2+ with a Windows computer, make sure to first install the driver and software package before you connect the Thunderbolt cable. Get the latest Windows driver and PROMISE Utility from the PROMISE website. nStall inDoWS river To install the driver on a Windows computer, double-click on the installation file to launch the InstallShield Wizard. In the InstallShield menu, click on Next to continue with the driver installation. - Page 25 Pegasus2 R2+ Product Manual Click on Install. Click on Next to continue. Click on Finish to complete the installation. Final driver install menu in Windows 8 Final driver install menu in Windows 7...
-
Page 26: S Oftware For W Indows
Promise Technology nStall oftWare for inDoWS Now install the PROMISE Utility on you computer. Double-click the software installation file for Windows. The InstallShield Wizard appears. Click Next. In the license agreement menu, read the user agreement and click to select the “I agree ... “ option if you agree to the terms. Click Next. - Page 27 Pegasus2 R2+ Product Manual Accept the default location for the software, or click Browse to place it somewhere else. Click Next to continue. To begin installation, click the Install button. When the installation is completed, click Finish to exit the wizard.
-
Page 28: I Nstall On M Ac
Promise Technology nstAll on The Pegasus2 R2+ is shipped ready to use with a Mac computer. Follow the instructions in this section to connect and power on the device. Install the PROMISE Utility on the Mac system for monitoring and managing the Pegaus2 R2+, and other connected Pegaus2 or Pegasus devices. -
Page 29: I Nstalling The Promise U Tility On M Ac
Pegasus2 R2+ Product Manual proMise u nstAlling the tility on The Pegasus2 R2+ unit ships ready to use without configuration or set-up. However it is a good idea to install the PROMISE Utility software even if you do not plan to make any changes to device configuration. The utility is useful for monitoring the system and getting firmware updates. The utility is necessary if you plan to change the default RAID configuration (Pegasus2 is shipped with a RAID 0) or if you will swap out any of the hard disks shipped with the device. The software utility installation package is located on the Pegasus2. Follow the instructions below to install the utility. - Page 30 Promise Technology The Welcome menu explains that software will be installed on the Mac. Click the Continue button to proceed with installation. The Software License Agreement appears, please read the statement and click Continue to proceed. Click Agree if you agree to the terms of the license. To read the license, click Read License.
- Page 31 Pegasus2 R2+ Product Manual It takes a few seconds for the utility software to be installed. When the installation has completed, a message informs you that the installation was successful. Click Close to end the installation procedure. The PROMISE Utility is now available to be used for management of the Pegasus2 R2+. Use this if you need to change a hard disk drive, or change the default RAID configuration, or to update the device firmware. This is also useful for monitoring the status of the system and for troubleshooting.
-
Page 32: C Onnect The Power Cord
Promise Technology onnect the PoWer cord To connect the power cord the Pegasus2 R2+ unit: Attach the power cord on the back of the Pegasus2 R2+ unit. Plug the other end into a suitable power source. Thunderbolt and power connections... -
Page 33: C Onnect To Your Computer
Pegasus2 R2+ Product Manual onnect to your coMPuter Note If the Thunderbolt cable is connected to a computer that is powered on, the Pegasus2 R2+ will power up as soon as the power is connected. See “Power modes on the Pegasus2 R2+”... -
Page 34: P Ower Modes On The P Egasus 2 R2
Promise Technology 2 r2+ oWer Modes on the egAsus The Pegasus2 R2+ uses power saving and response features. These are described below. The automatic power features are: • Sleep - When your computer goes to sleep, the Pegasus2 unit automatically shuts down. -
Page 35: Aisy - Chaining Multiple P Egasus /P Egasus 2 Units
Pegasus2 R2+ Product Manual Aisy ChAining Multiple egAsus egAsus units Up to 6 Pegasus or Pegasus2 devices can be connected to each other and to your computer in a daisy chain sequential Thunderbolt connection. To daisy-chain multiple Pegasus and/or Pegasus2 units: Connect a Thunderbolt cable from one of the Thunderbolt ports on the back of your computer to one of the Thunderbolt ports on the first Pegasus/Pegasus2 unit. -
Page 36: U Sing The Usb Connection
Promise Technology sing the ConneCtion The Pegasus2 R2+ as well as the Media Pods feature a USB 3.0 connection. The USB 3.0 connection is available for computers that do not have a Thunderbolt port. The main limitation for using the USB 3.0 connection is speed, since USB 3.0 connection is slower than Thunderbolt. -
Page 37: He Promise U Tility
Pegasus2 R2+ Product Manual ProMise u tility Use the PROMISE Utility to monitor the health of the Pegasus2 R2+ and, if you want to change the RAID or format new storage drives in the HDD bays or Media Bay, use the utility to make settings changes to installed storage. -
Page 38: Promise U Tility In M Ac
Promise Technology ProMise u tility in Accessing the PROMISE Utility includes: • Opening and Closing • Unlocking the UI Pening T o open the PROMISE Utility, double-click the PROMISE Utility icon in the Macintosh Dock (right). The PROMISE Utility window opens and displays the Dashboard. See “Dashboard” on page 34. -
Page 39: U Nlocking The Ui In M
Pegasus2 R2+ Product Manual nloCking the By default, the PROMISE Utility UI is locked to prevent unauthorized changes to your RAID system. When the UI is locked, you cannot change settings on the Pegasus2 R2+ or any Pegasus or Pegaus2 unit that is connected and powered on. -
Page 40: T He Promise U Tility Interface For P Egasus 2 R2
Promise Technology proMise u 2 r2+ tility interfACe for egAsus The PROMISE Utility interface consists of menus and icons, each leading you to a specific function. There are some differences in the user interface, and in the way the menus are used in the Mac and Windows versions. Functionally the utility is the same for both versions. -
Page 41: T Oolbar
Pegasus2 R2+ Product Manual The PROMISE Utility interface on Windows Drop-down menus at the top of the PROMISE Utility user interface Toolbar icons oolBar The default toolbar icons for Mac and Windows are: • Dashboard • Physical Drive • Partition • RAID Configuration • Firmware Update If you would like to add the Front or Back view icons to the toolbar in Mac, follow the instructions in... -
Page 42: C Ustomize The M Ac User Interface
Promise Technology uStoMize tHe ac uSer interface T o add and remove toolbar icons: From the PROMISE Utility window, click the View menu and choose Customize Toolbar... The toolbar options dialog box appears. Do one or both actions are needed: • Click and drag an icon from the dialog box to the toolbar to add the icon. -
Page 43: Ashboard
Pegasus2 R2+ Product Manual AshboArd The Dashboard is the first menu displayed when you launch the utility. The various submenus in the Dashboard display status information (see table below for description). Use the System Monitor pull- down menu to change frequency of system monitor functions. Dashboard menu Description Provides a summary of the RAID, fan and temperature status. The color coded icons let you know the condition of the hardware at a glance. -
Page 44: D Evice Menus
Promise Technology eviCe Menus Use the Device drop-down menu as another option for navigating the different menus available in the utility. Click on the Device menu option to display that menu. Windows users will find this drop-down menu at the top of the PROMISE Utility user interface. For Mac, go to the top of the Mac desktop while the PROMISE Utility is selected. -
Page 45: P Hysical D Rive Menu
Pegasus2 R2+ Product Manual HySical rive Menu Go to Device drop-down menu and choose the Physical Drive option; or click on the Physical Drive icon in the toolbar to display the Physical Drive menu. This menu displays basic information on the physical storage installed in the device including the hard disk drives and storage in the Media Bay. -
Page 46: P Artition
Promise Technology Artition Use the Partition menu to check the status of an existing partition or partitions on storage in the HDD bays or in the Media Bay. The default storage configuration uses a single partition. However you if have changed the RAID configuration, installed new storage drives, or if you want to add one or more partition to the installed storage, use the partition menu. Note that any change to existing partition arrangement will delete all data on the storage drive. - Page 47 Pegasus2 R2+ Product Manual To change an existing partition or add a partition to a drive, click on the padlock icon in the lower left corner or the utility interface to allow changes (requires password in Mac OS), and do the following: Click on the Partition icon.
- Page 48 Promise Technology Type a Volume Name for the new partition. The percentage of the drive that will be partitioned must add up to 100%. If you are creating just one partition, the default percentage is 100%. However, if you intend to create two or more partitions, you can change the percentage setting to have different sizes for the partitions, as long as the entire drive is used. If you want to create another partition, click the Add button again, and supply a Volume Name again.
-
Page 49: Hange M Edia P Od Drive Partition
Pegasus2 R2+ Product Manual Hange eDia oD Drive Partition The procedure for partitioning and formatting the drive(s) in the Media Pod is identical to creating a partition in the RAID drive. Partition SSD in Media Pod - Windows... -
Page 50: Raid C Onfiguration
Promise Technology rAid C onfigurAtion Use the RAID Configuration menu to view the status of the current RAID configuration, or to change the RAID configuration. To view the status of the current configuration, click on the RAID Configuration icon. Basic information displayed includes the health status of the RAID, capacity and RAID level. There are two possible RAID types available for the Pegaus2 R2+, RAID 0 or RAID 1. The two hard disk drives shipped with the Pegasus2 R2+ are configured with a hardware RAID 0. This type of RAID is excellent for applications where high read/write performance is desirable. However it does not include redundancy, that is, if one of the hard disk drives fails, the data contained on the RAID is lost. -
Page 51: Hange Raid Configuration
Pegasus2 R2+ Product Manual raiD Hange configuration Back up all data on the PROMISE RAID drive, click on the padlock icon in the lower left corner or the utility interface to allow changes (requires Mac OS password), follow these steps to install or change RAID settings: Click on the RAID Configuration icon. - Page 52 Promise Technology You are reminded that changing the RAID will erase all data on the current RAID drive. To confirm that you want to change the RAID, type “confirm” in the space provided and click the Confirm button. A warning notice might appear notifying you that the disk is not readable. Click the Ignore button, then go to the Partition menu. Follow the instructions in “Change partition settings” on page 37 to create a new partition.
-
Page 53: F Ront V Iew
Pegasus2 R2+ Product Manual ront The Front View active menu lets you view the components on the front of the Pegasus2 R2+. Note that the toolbar icon for Front View does not appear in the default view. Mac users can place the Front View and Back View icons in the toolbar, see “Customize the Mac user interface”... -
Page 54: B Ack V Iew
Promise Technology The Front View active menu lets you view the components on the front of the Pegasus2 R2+. Note that the toolbar icon for Front View does not appear in the default view. Mac users can place the Front and Back view icons in the toolbar, see “Customize the Mac user interface”... -
Page 55: Pdating Irmware In Ac
Pegasus2 R2+ Product Manual pdAting irMWAre in For best performance, it is a good idea to keep the Pegasus2 R2+ firmware up to date. The update procedure is used for the controller and other system hardware. Download the latest firmware from the PROMISE website at www.PROMISE.com/support/download.aspx and place the .img file on your Mac. Keep in mind that after the update process, it will be necessary to restart your Mac. To update the firmware: Click the Firmware Update icon. Click on the padlock icon to unlock the menu, and type in the password for your Mac when the prompt appears. -
Page 56: Pdating Irmware In Indows
Promise Technology pdAting irMWAre in indoWs For best performance, it is a good idea to keep the Pegasus2 R2+ firmware up to date. The update procedure is used for the controller and other system hardware. Download the latest firmware from the PROMISE website at www.PROMISE.com/support/download.aspx and place the file on your computer. To update the firmware: Click the Firmware Update icon. Click the Choose File button and locate the .bin file you downloaded from PROMISE. Click the Submit button. In the Confirmation box, type the word “confirm” in the field provided and click the Confirm button. The process will take several seconds. When it is completed, you will be prompted to restart the... -
Page 57: Pdating The Promise U Tility
Pegasus2 R2+ Product Manual ProMiSe u PDating tHe tility The procedure for keeping the PROMISE Utility up to date is different for Windows and Mac. Follow the instructions below for your operating system. Update software in Windows Follow these instructions to update the utility software in Windows: Click on the Global Management drop-down menu and choose Online Update. -
Page 58: T Roubleshooting
Promise Technology roubleshooting This chapter deals problems you might encounter with your Pegasus2 R2+ unit and how to resolve them. • “Checking LEDs” on page 50 • “Replacing a Physical Drive” on page 52 Pegasus2 R2+ LED indicators including 2.5” HDD pod... -
Page 59: T Roubleshooting Using Led
Pegasus2 R2+ Product Manual hecking All LEDs, including the Thunderbolt and USB 3.0 connection indicators, light blue to indicate normal function. The System LED located on the power button, and the Drive Status LED indicators on the front of both drive carriers and the Media Pod, can light red or orange to indicate a problem with the physical drive or the RAID on the 3.5”... -
Page 60: D Ownload Hard Disk Drive Compatibility List
Promise Technology oWnloaD HarD DiSK Drive coMPatiBility liSt If you are going to replace a hard disk drive, download the compatibility list from PROMISE before purchasing a new drive. Download HDD compatibility list from PROMISE website Go to www.promise.com and do the... -
Page 61: R Eplacing A P Hysical D Rive
Pegasus2 R2+ Product Manual eplACing A hysiCAl rive A failed physical drive displays a red Drive Status LED on the drive carrier. Failed physical drive Drive Status LED is red Activity LED is blue Check the failed drive, then obtain a replacement drive of the same: •... - Page 62 Promise Technology T o replace a physical drive: Press the release button to unlock the drive carrier. The drive carrier handle swings out. Grasp the handle and gently pull the drive carrier out of the Pegasus unit and place it onto a static-...
- Page 63 Pegasus2 R2+ Product Manual Remove the four mounting screws, then slide the failed drive out of the carrier. Mounting screw Physical drive Mounting screw Mounting screw Mounting screw Drive carrier handle Place the replacement drive into the carrier then install the four mounting screws. Tighten the screws just until they are snug.
-
Page 64: P Hysical D Rive W Arning M Essage
Promise Technology HySical rive arning eSSage If you see messages that says, “ajar HDD from the backplane,” you must reseat the physical drives. T o reseat the physical drives: On the Pegasus unit, press and hold the Power Button LED until it turns red. -
Page 65: U Nreadable D Isk W Arning
Pegasus2 R2+ Product Manual nreAdAble Arning Your Pegasus logical drive displays on the computer’s desktop as a removable-drive icon (right). If your computer’s operating system recognizes a logical drive but cannot access it, the computer might display a warning message. See Figure 6. Warning message Normally, you never see this warning message for Pegasus logical drive because the PROMISE Utility formats your logical drives automatically. -
Page 66: S Ubsystem P Roblems
Promise Technology ubsysteM robleMs Subsystem problem troubleshooting includes: • “Diagnosing a Subsystem Problem” • “Overheating” • “Power Supply” iAgnosing A ubsysteM robleM Check System Status on the Dashboard tab. If a yellow ! or red X appears in the System... -
Page 67: O Verheating
Pegasus2 R2+ Product Manual verheAting Overheating is a potentially serious condition because the excessively high temperatures can lead to physical drive failure and controller malfunction. Overheating usually results from: • Fan failure • Inadequate air circulation around the Pegasus unit ailure The fan on the back of the Pegasus unit cools the entire enclosure including physical drives, the RAID controller and the power supply. The cooling fan is not field-replaceable. If there is any problem with a... -
Page 68: I Nadequate A Ir C Irculation
Promise Technology naDequate irculation Air circulation around the Pegasus unit might be a more complex problem. Check for these conditions: • Accumulated dust or objects blocking the fans. • Less than a minimum of 13 cm (5 inches) space between the back of the unit and the wall or other object. -
Page 69: C Onnection P Roblems
Pegasus2 R2+ Product Manual onnection robleMs Connection problem troubleshooting includes: • “Cables” • “Daisy-Chains” Ables While the installation of the cables and components was correct, they don't function properly, or at all, because: • A connector is dirty or corroded • A connector is loose or damaged • A cable looks OK outside but has an open circuit inside • The wrong cable was used. -
Page 70: C Ontacting T Echnical S Upport
Promise Technology ontActing echnicAl uPPort PROMISE Technical Support provides several support options for PROMISE users to access information and updates. We encourage you to use one of our electronic services, which provide product information updates for the most efficient service and support. - Page 71 Pegasus2 R2+ Product Manual United States 580 Cottonwood Drive Milpitas, Ca 95035, USA Technical Support (E-Support): https://support.PROMISE.com Web site: http://www.PROMISE.com// Australia Technical Support (E-Support): https://support.PROMISE.com Web site: http://www.PROMISE.com// EMEA Netherlands Science Park Eindhoven 5228 5692 EG Son, The Netherlands Technical Support (E-Support): https://support.PROMISE.com Web site: http://www.PROMISE.com// Austria Technical Support (E-Support): https://support.PROMISE.com...
- Page 72 Promise Technology Technical Support (E-Support): https://support.PROMISE.com Web site: http://www.PROMISE.com// Switzerland ITF Technical Support (E-Support): https://support.PROMISE.com Web site: http://www.PROMISE.com// Norway ITF Technical Support (E-Support): https://support.PROMISE.com Web site: http://www.PROMISE.com// Belguim Technical Support (E-Support): https://support.PROMISE.com Web site: http://www.PROMISE.com// Luxembourg Technical Support (E-Support): https://support.PROMISE.com Web site: http://www.PROMISE.com//...
- Page 73 Pegasus2 R2+ Product Manual Korea Technical Support (E-Support): https://support.PROMISE.com Web site: http://www.PROMISE.com// Hong Kong Technical Support (E-Support): https://support.PROMISE.com Web site: http://www.PROMISE.com// Singapore Technical Support (E-Support): https://support.PROMISE.com Web site: http://www.PROMISE.com// Japan 3F, Mura Matsu Bldg, 3-8-5, Hongo Bunkyo-ku Tokyo 113-0033, Japan Technical Support (E-Support): https://support.PROMISE.com Web site: http://www.PROMISE.com//...
-
Page 74: L Imited W Arranty
Promise Technology iMited ArrAnty PROMISE Technology, Inc. (“PROMISE”) warrants that this product, from the time of the delivery of the product to the original end user: a) all components for a period of two (2) years; b) will conform to PROMISE’s specifications;... -
Page 75: D Isclaimer Of Other Warranties
Pegasus2 R2+ Product Manual iSclaiMer of otHer WarrantieS This warranty covers only parts and labor, and excludes coverage on software items as expressly set above. Except as expressly set forth above, PROMISE disclaims any warranties, expressed or implied, by statute or otherwise, regarding the product, including, without limitation, any warranties for fitness for any purpose, quality, merchantability, non-infringement, or otherwise. -
Page 76: Y Our R Esponsibilities
The technician helps you determine whether the product requires repair. If the product needs repair, the technician issues an RMA (Return Merchandise Authorization) number. Return ONLY the specific product covered by the warranty. Do not ship cables, manuals, CDs, etc. USA and PROMISE Technology, Inc. Canada: Customer Service Dept. Attn.: RMA # ______... - Page 77 Pegasus2 R2+ Product Manual • Use the original shipping carton and packaging • Include a summary of the product’s problem(s) • Write an attention line on the box with the RMA number • Include a copy of your proof of purchase You are responsible for the cost of insurance and shipment of the product to PROMISE.
- Page 78 © 2015 PROMISE Technology, Inc. All Rights Reserved.
Need help?
Do you have a question about the Pegasus2 R2+ and is the answer not in the manual?
Questions and answers