Table of Contents
Advertisement
Available languages
Available languages
Quick Links
About this Quick Start Guide
Use this Quick Start Guide to connect, power on and begin using the Pegasus2 R2+ storage unit
with a computer equipped with a Thunderbolt™ port. The Pegasus2 R2+ is shipped with two 3.5"
hard disk drives installed and configured for RAID0 storage.
Note that a RAID0 configuration does not have built-in redundancy, therefore it is
very important to back up all data that will be stored on the Pegasus2 R2+.
Step 1: Unpack the Pegasus2 R2+ Unit
The Pegasus2 R2+ box contains the following items:
•
Pegasus2 R2+ Unit
•
Power cord
includes two 3.5" hard disk drives installed
•
Thunderbolt cable
in disk trays and inserted into enclosure
•
USB 3.0 Type A to Type B cable
•
CF/SD Reader Pod*
•
USB 3.0 Type A to Micro-B cable
inserted into Media Bay
•
Quick Start Guide
* Optional additional equipment available for separate purchase include:
•
SSD Reader Pod
•
2.5" Hard Disk Drive Pod
Please ask your retailer for purchasing details.
Visit the PROMISE Website to download the Product Manual or for information
regarding possible future release of other types of Media Pods.
http://www.promise.com/Solutions/RichMedia
Figure 1. Pegasus2 R2+ unit back view
Cooling fan vent
Thunderbolt ports
©2015 Promise Technology, Inc. All Rights Reserved. Version 1.0 P/N G6102PR2P000400
Step 2: Connect the Power
Attach the power cord on the back of the Pegasus2 R2+ unit. See Figure 2. Plug the other end
into a power source.
Step 3: Connect to computer, power on
Connect a Thunderbolt cable from one of the Thunderbolt ports on the back of the Pegasus2
R2+ to the Thunderbolt port on your computer. See Figure 2.
The Pegasus2 R2+ powers on automatically as soon as the Thunderbolt cable is connected.
You also have the option of connecting the 3.5" hard disk drive RAID storage to a host via the
USB 3.0 on the back of the Pegasus2 R2+.
Note that the USB 3.0 connection and Thunderbolt connection CANNOT be used at the
same time. Also, a drive or connected device in the Media Bay is not detected when using the
USB 3.0 connection. Please read the Pegasus2 R2+ Product Manual for more information.
Figure 2. Thunderbolt and power connections
Thunderbolt ports
USB 3.0 port
T o power source
See Product Manual
You can use the second Thunderbolt port to connect to another Thunderbolt device
for information about
or a mini-Display Port device.
using the USB 3.0
port.
Pegasus2 R2+ Power up sequence
When the device is powered on by connecting the Thunderbolt cable, or by pressing the Power
Button, the Power Button turns orange. It takes about 2 seconds to start the Pegasus2 R2+ unit.
When start-up is complete:
Power insert
•
The Power Button turns blue.
•
The drive carrier Power/Status LEDs turn blue.
Need assistance and more information?
PROMISE E-Support:
PROMISE Website:
Computer
Thunderbolt port
Power cable
Thunderbolt cable
https://support.promise.com
http://www.promise.com/Solutions/RichMedia
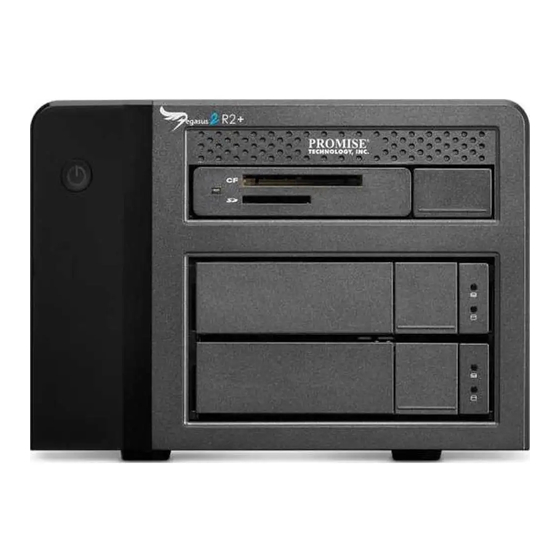
Figure 3. Pegasus2 R2+ unit front view
Power button/
Thunderbolt connection LED
Status LED
USB connection LED
Note that the front of the different Media Pods available
Lights only when USB
for the Pegasus2 R2+ differ in appearance.
connection established
Automatic Functions
•
Sleep - When your computer goes to sleep, the Pegasus2 R2+ unit
automatically shuts down.
•
Wake – When your computer wakes, the Pegasus2 R2+ unit automati-
cally powers on.
•
Shutdown – When your computer shuts down, the Pegasus2 R2+ unit
automatically shuts down.
•
Restart After Shutdown – When your computer powers up, the Pega-
sus2 R2+ unit automatically powers up.
See the Pegasus2 R2+ Product Manual for more information.
Pegasus2 R2+ ships from the factory pre-configured with one RAID0 logical
drive. Note that the RAID0 storage configuration does not have any built-in
redundancy. Back up all data stored on this system.
When you start the Pegasus2 R2+, a removable-drive disk icon, representing
the logical drive, appears on your desktop (see right).
Portable
Media Pod in
Media Bay
Hard Disk
Drive Carrier
Status LED
Drive Activity
LED
Advertisement
Table of Contents

Related Manuals for Promise Technology PEGASUS 2 R2+


Summary of Contents for Promise Technology PEGASUS 2 R2+
- Page 1 Step 2: Connect the Power About this Quick Start Guide Figure 3. Pegasus2 R2+ unit front view Use this Quick Start Guide to connect, power on and begin using the Pegasus2 R2+ storage unit Power button/ with a computer equipped with a Thunderbolt™ port. The Pegasus2 R2+ is shipped with two 3.5” Attach the power cord on the back of the Pegasus2 R2+ unit. See Figure 2. Plug the other end Thunderbolt connection LED Status LED hard disk drives installed and configured for RAID0 storage. into a power source. Step 3: Connect to computer, power on Note that a RAID0 configuration does not have built-in redundancy, therefore it is very important to back up all data that will be stored on the Pegasus2 R2+.
- Page 2 Blitzschnelle Leistung Schnellstartanleitung Schritt 2: Stromversorgung herstellen Über diese Schnellstartanleitung Abbildung 3. Pegasus2 R2+ - Frontansicht Nutzen Sie diese Schnellstartanleitung zur Verbindung, Einschaltung und Inbetriebnahme Schließen Sie das Netzkabel an der Rückseite des Pegasus2 R2+-Gerätes an. Siehe Abbildung 2. Thunderbolt-Verbindungs-LED Ein-/Austaste / Status-LED des Speichersystems Pegasus2 R2+ mit einem Computer mit Thunderbolt™-Anschluss. Das Verbinden Sie das andere Ende mit einer Steckdose. Pegasus2 R2+ wird mit zwei für RAID 0-Speicher installierten und konfigurierten 3,5-Zoll- Schritt 3: An Computer anschließen, einschalten Festplatten geliefert. Tragbarer Medien-Pod im Verbinden Sie einen der Thunderbolt-Anschlüsse an der Rückseite des Pegasus2 R2+ über ein Beachten Sie, dass eine RAID 0-Konfiguration keine integrierte Redundanz bietet; Medienschacht Thunderbolt-Kabel mit dem Thunderbolt-Anschluss an Ihrem Computer. Siehe Abbildung 2.
- Page 3 Performances extrêmes GUIDE DE PRISE EN MAINPRISE EN MAIN Étape 2 : brancher l‘alimentation À propos de ce Guide de prise en main Figure 3. Vue de face du Pegasus2 R2+ Utilisez ce Guide de prise en main pour connecter, allumer et commencer à utiliser le système de Branchez le cordon d‘alimentation à l‘arrière du Pegasus2 R2+. Voir Figure 2. Branchez l'autre Diode du bouton stockage Pegasus2 R2+ avec un ordinateur équipé d'un port Thunderbolt™. Le Pegasus2 R2+ extrémité à une source d'alimentation. est livré avec deux disques durs de 3,5” installés et configurés pour un stockage en mode RAID0. d'alimentation / d'état LED de connexion Thunderbolt Étape 3 : brancher à...
-
Page 4: Guida Rapida
Prestazioni velocissime GUIDA RAPIDA Fase 2: Collegare l'alimentazione Info su questa guida rapida Figura 3. Vista anteriore dell'unità Pegasus2 R2+ Pulsante di Utilizzare la presente guida rapida per collegare, accendere e iniziare ad utilizzare l'unità di alimentazione / archiviazione Pegasus2 R2+ con un computer dotato di porta Thunderbolt™. Pegasus2 R2+ è Collegare il cavo di alimentazione alla parte posteriore dell'unità Pegasus2 R2+. Vedere la LED collegamento Thunderbolt LED di stato dotato di due unità hard disk da 3,5” installate e configurate per l‘archiviazione RAID0. Figura 2. Collegare l‘altra estremità a una fonte di alimentazione. Fase 3: Collegare al computer e accendere Una configurazione RAID0 non dispone di ridondanza integrata, pertanto è estremamente importante effettuare il backup di tutti i dati archiviati su Media Pod Pegasus2 R2+. -
Page 5: Guía De Inicio Rápido
Velocidad ultrarrápida GUÍA DE INICIO RÁPIDO Paso 2: Conectar la alimentación Acerca de esta guía rápida Figura 3. Vista frontal de la unidad Pegasus2 R2+ LED de estado Use esta guía de inicio rápido para conectar, proporcionar energía y comenzar a usar la unidad Enchufe el cable de alimentación en la parte trasera de la unidad Pegasus2 R2+. Consulte la y botón de de almacenamiento Pegasus2 R2+ con un PC equipado con un puerto Thunderbolt™. Su Figura 2. Enchufe el otro extremo a una fuente de alimentación. LED de conexión Thunderbolt alimentación Pegasus2 R2+ se suministra con dos unidades de disco duro de 3,5” instaladas y configuradas Paso 3: Conectar a un PC y encender para almacenamiento RAID0. - Page 6 Desempenho ultra-rápido GUIA DE CONSULTA RÁPIDA Passo 2: Ligar a alimentação Acerca deste Guia de Consulta Rápida Figura 3. Vista frontal da unidade Pegasus2 R2+ Utilize este Guia de Consulta Rápida para conectar, ligar e começar a usar a unidade de Ligue o cabo de alimentação à traseira da unidade Pegasus2 R2+. Consulte a Figura 2. Ligue a Botão de energia/ armazenamento Pegasus2 R2+ com um computador equipado com uma porta Thunderbolt™. O LED da ligação Thunderbolt outra extremidade a uma tomada elétrica. LED de estado Pegasus2 R2+ é fornecido com duas unidades de disco rígido de 3,5” instaladas e configuradas para armazenamento RAID0. Passo 3: Conectar a um computador e ligar Tenha em atenção que uma configuração RAID0 não possui redundância Estação incorporada, por isso é...
-
Page 7: Краткое Руководство
Сверхвысокое быстродействие КРАТКОЕ РУКОВОДСТВО Шаг 2: Подключите питание Сведения о Кратком руководстве Рис. 3. Модуль Pegasus2 R2+. Вид спереди Кнопка питания/ Присоедините сетевой шнур к задней панели модуля Pegasus2 R2+. См. рис. 2. В Кратком руководстве содержится информация о подключении, включении питания и Светодиодный Подключите другой конец шнура к источнику питания. начале эксплуатации запоминающего устройства Pegasus2 R2+ вместе с компьютером, индикатор состояния Светодиодный индикатор подключения Thunderbolt оснащенным портом Thunderbolt™. Pegasus2 R2+ поставляется с двумя жесткими дисками Шаг 3: Подключитесь к компьютеру и 3,5”, установленными и настроенными для работы с диском RAID0. включите питание Портативный Обратите... -
Page 8: Skrócona Instrukcja Obsługi
Ultraszybkie działanie SKRÓCONA INSTRUKCJA OBSŁUGI Krok 2: Podłącz zasilanie Informacje o skróconej instrukcji obsługi Rysunek 3. Widok urządzenia Pegasus2 R2+ z przodu Skrócona instrukcja obsługi zawiera informacje dotyczące podłączania, włączania Podłącz przewód zasilający z tyłu urządzenia Pegasus2 R2+. Patrz Rysunek 2. Podłącz drugi Przycisk zasilania/ i rozpoczynania obsługi urządzenia pamięci masowej Pegasus2 R2+ z komputerem koniec przewodu do źródła zasilania. dioda LED stanu wyposażonym w port Thunderbolt™. Urządzenie Pegasus2 R2+ jest dostarczane wraz z dwoma Dioda LED połączenia Thunderbolt 3,5-calowymi dyskami twardymi zainstalowanymi i skonfigurowanymi w konfiguracji RAID 0. Krok 3: Podłącz do komputera, włącz urządzenie Moduł nośnika Należy pamiętać, że konfiguracja RAID 0 nie ma wbudowanej redundancji, dlatego Podłącz kabel Thunderbolt do jednego z portów Thunderbolt z tyłu urządzenia Pegasus2 R2+... - Page 9 Villámgyors teljesítmény GYORS ÜZEMBE HELYEZÉSI ÚTMUTATÓ 2. lépes: A tápegység csatlakoztatása A Gyors üzembe helyezési útmutatóról 3. ábra Pegasus2 R2+ egység - elölnézet Ez a Gyors üzembe helyezési útmutató segítséget nyújt a Pegasus2 R2+ tárolóegység Csatlakoztassa a hálózati kábel egyik végét a Pegasus2 R2+ egység hátlapjához. Lásd a 2. Főkapcsoló gomb/ csatlakoztatásához, bekapcsolásához és használatához egy Thunderbolt™-porttal rendelkező ábrát. Csatlakoztassa a kábel másik végét az áramforráshoz. Állapotjelző LED Thunderbolt-kapcsolatjelző LED számítógéppel. A Pegasus2 R2+ egységet két darab 3,5"-es merevlemez-meghajtóval telepítve 3. lépes: Csatlakoztassa a számítógéphez, majd és RAID0 tárolásra konfigurálva szállítják. Hordozható...
-
Page 10: Stručná Příručka
Bleskový výkon STRUČNÁ PŘÍRUČKA Krok 2: Připojení napájení O této stručné příručce Obrázek 3. Jednotka Pegasus2 R2+ - pohled zepředu Pokyny v této stručné příručce vám pomohou připojit, zapnout napájení a začít používat jednotku Vypínač/indikátor úložiště Pegasus2 R2+ s počítačem, který je vybaven portem Thunderbolt™. Jednotka Připojte napájecí kabel k zadní části jednotky Pegasus2 R2+. Viz obrázek 2. Připojte druhý Indikátor LED připojení Thunderbolt LED stavu Pegasus2 R2+ je dodávána se dvěma nainstalovanými 3,5” pevnými disky, které jsou konec ke zdroji napájení. nakonfigurovány jako úložiště RAID0. Krok 3: Připojte k počítači, zapněte napájení Upozorňujeme vás, že konfigurace RAID0 není redundantní, takže je velmi důležité Pozice pro zálohovat veškerá... - Page 11 啟動 Pegasus2 R2+ 時,桌面上會顯示代表邏輯磁碟的卸除式磁碟圖示(請見 接埠的資訊,請參閱產 右圖)。 品手冊。 Pegasus2 R2+ 電源開啟順序 接上 Thunderbolt 連接線或按下電源按鈕來開啟裝置電源時,電源按鈕會亮橘燈。Pegasus2 R2+ 裝置需約 2 秒的時間才能啟動。開機完成時: 電源插頭 • 電源按鈕亮藍燈。 • 磁碟座電源 狀態 LED 亮藍燈。 需要協助及更多資訊嗎? Thunderbolt 連接埠 冷卻風扇通風孔 喬鼎線上支援: https://support.promise.com http://www.promise.com/Solutions/RichMedia 喬鼎網站: ©2015 Promise Technology, Inc. 保留所有權利。1.0 版 G6102PR2P006500...
- Page 12 连接到电源 电源线 储配置没有任何内置冗余。备份此系统上存储的所有数据。 请参阅产品手册了解如 您可以使用第二个 Thunderbolt 端口连接另一个 Thunderbolt 设备或 mini-Display 端口设 在启动Pegasus2 R2+时,桌面上出现一个可移动磁盘图标,表示逻辑驱动器 何使用USB 3.0端口。 备。 (见右图)。 Pegasus2 R2+开机顺序 在连接Thunderbolt线或按电源按钮使设备开机后,电源按钮变为橙色。Pegasus2 R2+装置启动大 约需要2秒。当启动完毕时: 电源插入 • 电源按钮变为蓝色。 • 驱动器托架电源/状态LED变为蓝色。 Thunderbolt端口 散热风扇孔 需要帮助和更多信息? PROMISE电子支持: https://support.promise.com PROMISE网站: http://www.promise.com/Solutions/RichMedia ©2015 Promise Technology, Inc.保留所有权利。版本1.0 P/N G6102PR2P006500...
- Page 13 Thunderbolt ケーブルの接続、 あるいは電源ボタンを押してデバイスの電源を入れると、 電源ボタン のアイコンがデスク トップに表示されます (右図参照)。 がオレンジ色に点灯します。 Pegasus2 R2+ の起動には約 2 秒を要します。 起動が完了すると: 電源コードの挿入口 • 電源ボタンが青く点灯します。 • ドライブキャリアの電源/ステータス LED が青く点灯します。 冷却ファンの通気口 Thunderbolt ポート サポートと追加情報について PROMISE E-サポート: https://support.promise.com PROMISE Web サイト: http://www.promise.com/Solutions/RichMedia ©2015 Promise Technology, Inc. 無断複製、 転載を禁じます。 バージョン 1.0 P/N G6102PR2P007K00...
- Page 14 • 전원 버튼이 파란색으로 켜집니다. • 드라이브 캐리어 전원/상태 LED가 파란색으로 켜집니다. Thunderbolt 포트 냉각 팬 통풍구 도움이나 자세한 내용이 필요하십니까? PROMISE E-지원 센터: https://support.promise.com PROMISE 웹사이트: http://www.promise.com/Solutions/RichMedia ©2015 Promise Technology, Inc. 모든 권리는 당사가 보유합니다. 버전 1.0 P/N G6102PR2P007K00...
Need help?
Do you have a question about the PEGASUS 2 R2+ and is the answer not in the manual?
Questions and answers