Table of Contents
Advertisement
Quick Links
INSTALLER: Leave this manual with the appliance.
CONSUMER: Retain this manual for future reference.
These instructions are supplementary to the Installation and Operating
Instructions supplied with the replace and should be kept together.
Refer to the Installation and Operating Instructions for proper gas
supply, safety requirements and operating instructions.
091014-16
TC42
TRANQUILITY
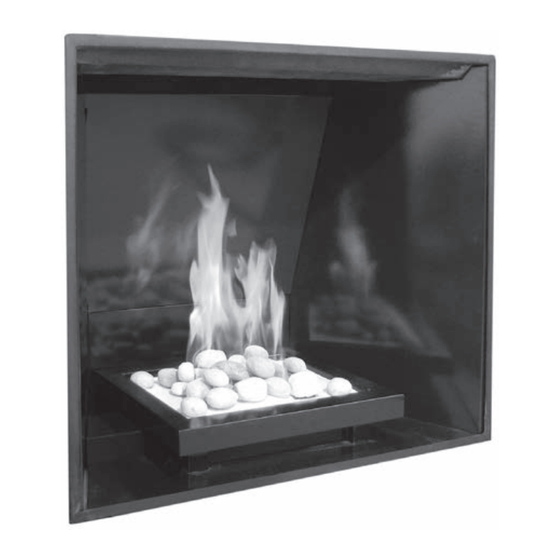
BURNER KIT
INSTALLATION
INSTRUCTIONS
PART# TC42.NG04D
For TC42 Series D
Fireplaces
TC42_NG04D
5056.426D4
Advertisement
Table of Contents

Summary of Contents for Town & Country Fireplaces TC42.NG04D
- Page 1 Instructions supplied with the replace and should be kept together. Refer to the Installation and Operating Instructions for proper gas supply, safety requirements and operating instructions. TC42 TRANQUILITY BURNER KIT INSTALLATION INSTRUCTIONS PART# TC42.NG04D For TC42 Series D Fireplaces 091014-16 TC42_NG04D 5056.426D4...
-
Page 2: Contents Of Package
Contents of Package BURNER ASSEMBLY PANEL, BASE PEBBLE ASSEMBLY COVER RHS COVER LHS 3.4 LBS SAND BAG TAPERED PLUGS Tranquility Burner Installation If converting to propane see conversion instructions on page #6 before proceeding. NOTE: Plug the 4 vacant holes in the bottom of the rebox with 1/2” screws, as they are not required to attach this style of burner. - Page 3 Fig #4 Position lower rear porcelain panel centered at the rear of the rebox. Place burner assembly into the rebox against the rear panel. (Fig #4) Fig #4a Place panel clips under both rear corners of the base plate as shown in Fig. #4a (approx. 3”...
- Page 4 2 SCREWS Fig #6 5. Secure the electrical bulkhead plate (Fig.#6) and gasket to the rebox. (2 screws) Attach the ignition and sensor wires to the module. (Fig.#7). BULKHEAD PLATE Fig #7 IGNITION FLAME INTERFACE WIRE SENSOR MODULE (RED) WIRE (WHITE) TC42_NG04D_091014-16...
- Page 5 Fig #8 Remove panel retainer from upper heat shield. Install right porcelain panel tilting in from front corner. (Fig #8) Fig #9 Slip the side panels into the panel clip as shown in Fig #9. Finish the installation as per instructions. TC42_NG04D_091014-16...
- Page 6 Position upper rear panel on the top of Fig #10 the lower rear panel and behind the right panel. While supporting the upper rear panel install and secure left porcelain panel in the same manner as the right panel. (Fig #10) 8.
- Page 7 10. Insert tapered plugs into raised burner Fig #12 ports to prevent sand from entering ports. (Fig #12) Fig #13 11. Place sand in tray. Brush sand smooth and level to just below top of raised burner ports. (Fig #13) 12.
- Page 8 14. Remove pebble assembly from Fig #14 packaging by placing hand on top and tipping upside down. Gently place pebble assembly onto sand base using pins to locate position. (Fig #14) NOTE: Lift pebble assembly from bottom. Do not lift by top rocks. Hollowed out rock must cover the pilot.
-
Page 9: Propane Conversion
Propane Conversion MAIN BURNER (2.50 mm) ORIFICE (5022.3) Fig #16 CONVERSION LABEL (5052.5206D) WARNING Note: Factory supplied components must be used to ensure correct input. This conversion kit After conversion con rm proper manifold shall be installed by a pressure. quali ed service agency in accordance with the The burner assembly must... - Page 10 With a 7/16” wrench loosen the pilot head Fig #19 on the pilot assembly using a wrench to hold the bracket steady. (Fig. #19) Fig #20b Fig #20a 6. Slide the pilot adjustment band over and ensure that the hole in the ori ce band is showing.
-
Page 11: Burner Flame Adjustment
Burner Flame Adjustment The air shutter on the burner inlet tube controls the primary combustion air. It is set to the closed position at the factory for natural gas fuel. Some adjustment may be necessary to obtain desired ame and to eliminate carbon deposits. Evaluate ame appearance after the replace has reached operating temperature. -
Page 12: Replacement Parts
Replacement Parts (WHEN ORDERING, INCLUDE PART NUMBER WITH DESCRIPTION) ITEM ..DESCRIPTION ..........PART NO. ITEM ..DESCRIPTION ..........PART NO. #5..PILOT ASSEMBLY, CONVERTIBLE .. TCRP.5005025 #1..TRANQUILITY BURNER KIT ..... TC42.NG04C #6..ORIFICE, NATURAL GAS (#25) ..5022.12 #2..PEBBLE ASSEMBLY ......TC42.9499 #7.. - Page 13 TC42_NG04D_091014-16...
- Page 14 TC42_NG04D_091014-16...
- Page 15 TC42_NG04D_091014-16...
- Page 16 © 2014 Copyright Paci c Energy Fireplace Products LTD Reproduction, adaptation, or translation without prior written permission is prohibited, except as allowed under the copyright laws. For technical support, please contact your retailer. Web site: www.townandcountry replaces.net 2975 Allenby Rd., Duncan, BC V9L 6V8 Printed in Canada...


Need help?
Do you have a question about the TC42.NG04D and is the answer not in the manual?
Questions and answers