
Related Manuals for Marantz CDR420


Summary of Contents for Marantz CDR420
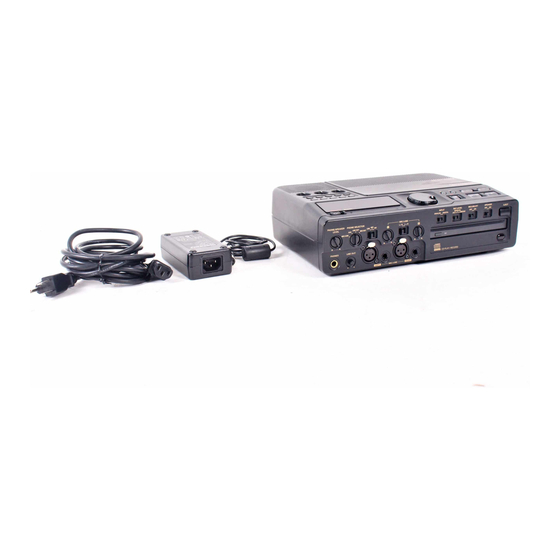
- Page 1 Model CDR420 User Guide HD/CD Recorder ® CLASS 1 LASER PRODUCT LOUKAN 1 LASERLAITE Recordable KLASS 1 LASERAPPARAT...
-
Page 2: Warnings And Cautions
Warnings and Cautions CAUTION RISK OF ELECTRIC SHOCK DO NOT OPEN CAUTION: TO REDUCE THE RISK OF ELECTRIC SHOCK, DO NOT REMOVE COVER (OR BACK) NO USER-SERVICEABLE PARTS INSIDE REFER SERVICING TO QUALIFIED SERVICE PERSONNEL The lightning fl ash with arrowhead symbol, within an equilateral triangle, is intended to alert the user to the presence of un-insulated “dangerous voltage”... - Page 3 WARNINGS ANTENNA • Do not expose the equipment to rain or moisture. LEAD IN WIRE • Do not remove the cover from the equipment. ANTENNA GROUND • Do not insert anything into the equipment DISCHARGE UNIT CLAMP (NEC SECTION through the ventilation holes. 810-20) •...
-
Page 4: Important Safety Instructions
11. Only use attachments/accessories specifi ed by the • Do not place heavy objects on the unit. manufacturer. • Be sure the CDR420 is placed on a vibration-free surface. 12. Use only with the cart, stand, tripod, bracket, or table speci- Precautions - connection fi... -
Page 5: Specifi Cations
Specifi cations Digital Audio System System ............................Hard Disk Recorder Recording media ..........................2.5” 20GB HDD Burning CD media ........................CD-R, CD-RW discs Recording audio format MP3 (.mp3) ....................MPEG Audio Layer 3 compression WAVE (.wav) ........................... 16 bit linear PCM Recording bit rate MP3 Stereo ...................... -
Page 6: Introduction
• You can change the fi le name later if desired, or fi le to a standard CD or MP3 data disc. while recording using an attached keyboard. • PCM recordings on the CDR420 can be burned to an AUDIO CD (CD-DA). • A multi-session CD (EXTRA) can also record fi... -
Page 7: Table Of Contents
Table of Contents Topic page 6 POWER switch .......... 20 Topic page 7 STANDBY light ........20 Warnings and Cautions ......... 2 8 Jog Wheel (SELECT, PUSH ENTER) ..21 Laser Safety ............. 2 9 IN button ........... 21 Important Safety Instructions ......4 How to jump to an IN mark ....... - Page 8 FILE DIR INFO JUMP PHANTOM CD/HD unit MARK UTILITY MENU UNDO REDO EDIT MENU HD/CD RFECORDER CDR420 AUDIO ............33 SELEC T DATA ............33 POWER STANDBY PUSH ENTER EXTRA ............33 • Audio cable (2) Add all tracks ..........33 (stereo pair) How to add a track to a CD Project ....
- Page 9 NOTEs • If your recorded track is longer than will fi t on a single CD, the CDR420 will tell you how many blank CDs are needed. • Whether or not a CD is made, the recording remains on the 4.
-
Page 10: Features
Playback functions Includes playback functions that let you check your The CDR420 records directly to the Hard Drive (HD). recording. Immediate CD • One button (CD/HD button) toggles between CD At the end of a recording session (a recording session... -
Page 11: Connections
Failure to L + R LINE LINE do this could damage fi les on the CDR420 or the HD itself. Refer to your computer's operating system "help" section for instructions PUSH PUSH on using the "Safely Remove Hardware"... -
Page 12: Connect Digital Equipment
CDR420, or line level input via the AUX IN jacks. 4. The red STANDBY NOTE: Digital In: The CDR420 can only receive and record a 16 bit, light will be lit. BASS TREBLE 44.1kHz digital audio signal. Should you input any other format of... - Page 13 Example display time. The date and time are displayed when the CDR420 is idle and ready to receive commands. NOTE: If a power on test fails an error procedure is followed. See page 64.
-
Page 14: Built-In Microphone
To edit the fi le press and release the EDIT MENU MARK UTILITY MENU UNDO UNDO REDO EDIT MENU HD/CD RFECORDER CDR420 button while the track name is displayed. See How to SELEC T EDIT AUDIO, page 52. POWER STANDBY ANDBY... -
Page 15: B Info Button
Press and release the INFO button to tab through the track information displays. NOTE: • An information display is only displayed briefl y. If the next information display is not selected the CDR420 returns to idle mode. - 15 -... -
Page 16: C Jump Button
4. Control buttons continued • Jump backwards is available if audio is cued within the audio track and at least one second of audio has elapsed. During playback when you press and release the FILE DIR INFO JUMP JUMP PHANTOM CD/HD JUMP button the track time is frozen while playback continues. -
Page 17: D Phantom Button
PHANTOM CD/HD Mode with the IN and/or OUT marks if you don't change the MARK UTILITY MENU UNDO REDO EDIT MENU HD/CD RFECORDER CDR420 SELEC T selected track. POWER STANDBY PUSH ENTER • A marked audio segment can be copied, cut, deleted, or pasted in Edit Mode. -
Page 18: H Undo Button
INFO JUMP PHANTOM CD/HD MARK UTILITY MENU UNDO REDO EDIT MENU HD/CD RFECORDER CDR420 SELEC T Press and release to select the Edit POWER STANDBY PUSH ENTER Menu. Press and release the EDIT MENU button, or turn the Jog Wheel to tab... -
Page 19: A Record Icon
The red OVER block Play icon on the left is displayed when the level of The Play icon appears when the CDR420 is the left channel clips or is over 0 dB. in playback or recording. d FILES label... -
Page 20: Q Working Label
HD/CD RFECORDER CDR420 is selected/active. SELEC T POWER STANDBY REC label PUSH ENTER The REC label appears when the CDR420 is in record mode. POWER switch u Timer label Timer POWER Slide the POWER switch to the Displayed when a preset time for recording right to turn power on or off. -
Page 21: Jog Wheel (Select, Push Enter)
PHANTOM CD/HD MARK UTILITY MENU UNDO REDO EDIT MENU The IN- mark is set at time in the track when the HD/CD RFECORDER CDR420 SELEC T MARK button is pressed. POWER STANDBY PUSH ENTER PUSH ENTER How to jump to an IN mark:... -
Page 22: Rec Button Light
INFO JUMP PHANTOM CD/HD MARK UTILITY MENU UNDO REDO EDIT MENU HD/CD RFECORDER CDR420 SELEC T During recording, turn the Jog Wheel to adjust REC LEVEL. POWER STANDBY PUSH ENTER The REC button/light fl ashes during a CD Project to indicate that tracks are waiting to be written to a CD. -
Page 23: Fast Reverse Button
During menu, or other functions press and release the The Example display cursor Stop button to cancel the function and return the shows an edit screen with CDR420 to idle mode. EDIT MENU dB -50 the cursor at the current point in the audio. -
Page 24: Phone Selector
Controls, Connections (front) jacks or via XLR connectors are input here. 3a Left XLR or 1/4” input jack Plug in an instrument or other line level audio device here to provide audio to the left stereo channel. NOTE: To avoid feedback, turn the internal SPEAKER OFF/ON switch OFF or reduce the PHONE/SPEAKER LEVEL control, and reduce the LINE OUT level control if connected to an external 1 PHONE/SPEAKER LEVEL... -
Page 25: Input Analog/Digital Switch
DIGITAL IN jack on the rear of CDR420*. Con- CD drive. nect analog input to either the MIC/LINE input jacks on the front of the CDR420, and/or the AUX IN jacks on the rear of the CDR420, or use the internal micro- phone. -
Page 26: Line Out Jacks
(PC or MAC). input of a amplifi er or other exter- nal unit. Use for recording onto The HD on the CDR420 appears as an external hard an external recorder. drive on your computer. That makes it easy to copy Input from MIC/LINE (or INT audio fi... -
Page 27: Rec Format
fi les over the internet. can continue with RECORD SETTING. The 20 GB Hard Drive in the CDR420 can store up to 1400 hours of MP3 recording at 32 kbps, mono. You 5 To exit press and release the Stop button . -
Page 28: Stereo Or Mono Recording
*If your selected REC FORMAT is PCM, KBPS is not applicable. level source, use the Left jack (left XLR or Phone jack The display switches to the next RECORD SETTING parameter: on the front of the CDR420, or left AUX IN RCA jack A. TRK INC HD. on the rear). -
Page 29: Kbps
Using HD is more convenient if you are starting with Jog Wheel to select MENU UTILITY an empty or recently formatted HD. For example, if KBPS. "?" appears in you are using the CDR420 to record board meetings the display. Example display - 29 -... - Page 30 FILE DIR INFO JUMP PHANTOM CD/HD MARK UTILITY MENU UNDO REDO EDIT MENU HD/CD RFECORDER CDR420 HD/CD RFECORDER CDR420 PUSH ENTER SELEC T 8 To exit press and release the Stop button . POWER STANDBY PUSH ENTER Changes will be stored.
-
Page 31: Record Timer
To change the setting, turn the Jog Wheel so the desired month is displayed. The CDR420 can be set to automatically begin record- Press and release the Jog Wheel to confi rm the ing at a pre-specifi ed date and time, record for a set month. - Page 32 How to set the RECORD TIMER (continued) STANDBY MODE, and, up to about 10 years if the CDR420 is unplugged. • Set the SPEAKER switch to OFF when using the RECORD To change the setting, turn the Jog Wheel to select TIMER.
-
Page 33: Utility Menu - New Cd Project
The DATA CD choice will burn exact fi le images of After you have tracks, audio fi les, recorded on the HD fi les (tracks) on the CDR420 HD, MP3 and/or PCM. and have edited the tracks you can assemble one or The CD is formatted as ISO 9660. -
Page 34: How To Add A Track To A Cd Project
Double click the Jog MENU UTILITY During CD Project a single click of the Jog Wheel Wheel to select the switches between * and no *. displayed fi le as the Example display fi rst track on your CD During CD Project if a display has no *, turning project. -
Page 35: How To Burn Your Cd Project To A Cd
fl ashes during CD burn- Display messages during CD burning ing, but may stay off for a couple of minutes dur- The CDR420 uses the display to keep you informed of ing some CD burning progress during CD writing (burning). The messages operations. -
Page 36: How To Copy A Cd
CD without changing anything or storing a copy PLEASE WAIT alter- MENU UTILITY on the CDR420. To store a copy on the CDR420, copy nates with the percent- individual tracks, change the fi le type, channels, or age of copying completed. When done, the origi- bitrate use RIP CD. -
Page 37: How To Rip A Cd
*Only the folder name (folder stored within the RIPPED CD folder CDR FUNCTIONS is on the CDR420 HD) can be renamed at this time. Tracks within displayed, the folder are named 01, 02, ... You can use EDIT MENU / EDIT TAGS / TRACK NAME to rename them later. -
Page 38: How To Rip A Single Track
Jog Wheel. Turn Jog Wheel to select MP3 or PCM i. Press Jog Wheel ..CHANNEL:STEREO/MONO As each track is ripped to the CDR420 HD prog- j. Press Jog Wheel ress is displayed as a percentage of the track and a IF PCM ............go to k... - Page 39 RIP: ENTIRE CD is displayed. *Only the folder name (folder stored within the RIPPED CD folder on the CDR420 HD) can be renamed at this time. The track will be 5. Turn the Jog Wheel in the folder and named RIPPED/(folder name from this step)/...
-
Page 40: Date And Time
5 Turn the Jog Wheel to MENU UTILITY change the hour. When Because the CDR420 uses the date and time as the correct, push and re- Example display default name for a recorded track, and tags a recorded lease the Jog Wheel. -
Page 41: Filters
Press Jog Wheel ......SET DATE/TIME Utility Menu. c. Turn Jog Wheel ...... RECORD FILTERS • Do nothing. After one minute the CDR420 re- d. Press Jog Wheel ........MIC EQ HI turns to Idle Mode with your changes, if any, e. - Page 42 Util- ity Menu. 8 The display switches MENU UTILITY • Do nothing. After one minute the CDR420 returns to MIC EQ LO. to Idle Mode with your changes, if any, saved. Press and release the Jog Wheel to adjust...
-
Page 43: Playback Mode
Jog Wheel. The display returns to PLAY- the beginning of the next track and continues play- BACK MODE. back. At the end of the fi le directory, the CDR420 automatically switches to the fi rst track in the fi le You can: directory and continues playback. -
Page 44: User Settings
AUTO MAKE CD (?, Y, N) You can: If ? is chosen the CDR420 will always ask you if you • Press and release the Jog Wheel to review or reset want to make a CD after recording. If Y is chosen, a A.TRK INC CD. -
Page 45: Auto Trk Inc Cd
Turn Jog Wheel ........A.TRK INC CD ity Menu. Press Jog Wheel ....... ? A.TRK INC CD • Do nothing. After one minute the CDR420 returns Turn Jog Wheel ........... ?/Y/N to Idle Mode with your changes, if any, saved. Press Jog Wheel ........confi rm setting Press Stop button ..........exit... -
Page 46: Cd Type
Menu. MENU UTILITY TINGS is displayed, • Do nothing. After one minute the CDR420 returns press and release the to Idle Mode with your changes, if any, saved. Jog Wheel. AUTO MAKE CD is displayed. CD TYPE (?, AUDIO, DATA, EXTRA) -
Page 47: Allow Format
Y and UTILITY ity Menu. N. When correct, press • Do nothing. After one minute the CDR420 returns and release the Jog Wheel. to Idle Mode with your changes, if any, saved. 8 The display switches to MENU... -
Page 48: Lock Editing
Util- N. When correct, press ity Menu. and release the Jog Wheel. • Do nothing. After one minute the CDR420 returns to Idle Mode with your changes, if any, saved. 8 The display switches to MENU UTILITY the next User Setting: LOCK REC.SET. -
Page 49: Lock Rec.set
User Setting: PRE-ROLL TRK. LOCK REC.SET (N, Y) When set to Y, the CDR420 will not allow the user to You can: change any of the record settings when recording to • Press and release the Jog Wheel to review or reset the HD (REC FORMAT, CHANNEL, or A.TRK INC... -
Page 50: Req.confirm
Jog Wheel. ? appears. REQ. CONFIRM (Y, N) 7 Turn the Jog Wheel to When set to Y the CDR420 requires confi rmation be- MENU UTILITY toggle between Y and fore accepting major changes. The display ARE YOU N. -
Page 51: Rst Defaults
Y and N. When correct, press RST DEFAULTS (N, Y) and release the Jog Wheel. When set to Y the CDR420 resets all USER SET- 8a If N the display switch- TINGS to their system defaults. MENU UTILITY... -
Page 52: Format Hdd
fi les. and paste points of an audio segment to be pasted by listening. Before entering edit mode set up the CDR420 for how you want to monitor the editing (headphones, internal speaker, line out to an How to format the HDD amplifi... -
Page 53: How To Navigate Within The Track
JUMP PHANTOM CD/HD is present. MARK UTILITY MENU UNDO REDO EDIT MENU HD/CD RFECORDER CDR420 SELEC T b An IN point marker POWER STANDBY PUSH ENTER appears in the graphic. c Play continues with the playback position indi- During play you can use a the Scrub Reverse button cated by the cursor. -
Page 54: Precise Editing (Navigation)
To play a selection that has both an IN and an OUT point set, from stop or pause, press and hold the EDIT Precise Editing (navigation) MENU button while you press the Play/Pause button . The CDR420 will start playing back at the IN 1. Enter Edit Mode (see MENU EDIT dB -50 pint and stop at the OUT point. -
Page 55: How To Cut, Copy Or Delete
How to Cut, Copy or Delete Play to approximately EDIT MENU dB -50 the desired input point. First enter Edit Mode and mark your audio selection, Pause near the desired either Quick Marking (page 53) or Precise Editing EDIT MENU dB -50 input point. -
Page 56: How To Exit Edit Execute Mode
CURSOR is displayed briefl y. The marked audio segment is pasted at click the Jog Wheel. EDIT MENU dB -50 the cursor position and the CDR420 returns to the beginning of the track MENU Example display EDIT dB -50 for more editing. Go to The example shows editing at pause. -
Page 57: How To Edit Tags
The extension .wav, or .mp3, is automatically added at the end CDR420 and are not editable. of the track name. • Press and release the Stop button on the CDR420 to exit nam- The editable tags are TRACK NAME, ARTIST ing the track without saving. NAME, GENRE, and COMMENTS. -
Page 58: Delete Track
Wheel to save the tag to edit the fl ashing and exit. Example display Example display The CDR420 returns to step 5. The CDR420 character set is: NOTE: • Press and release the Stop button any time during tag edit- ing to cancel edits and return to Idle mode. -
Page 59: Delete All Trk
7 The track is deleted. SCANNING HD . . . is fi ve times until COPY displayed momentarily. TRACK is displayed. The CDR420 returns to idle mode. 3 Press and release the MENU FILES How to delete all tracks Jog Wheel. -
Page 60: Split Track
From 0:00, if you turn the Jog Wheel one click counterclock- wise you position the cursor at the end of the track. That is 5 When correct, press handy because the CDR420 displays the total track time. EDIT MENU and release the Jog Wheel. -
Page 61: Firmware Update
The CDR420 returns to idle mode. fi rmware version is briefl y displayed. Firmware Update If there is no new fi rmware on the CDR420 Hard drive and no CD in the CDR420, The CDR420's fi rmware is the program that includes INSERT F/W CD is the operating instructions for the CDR420. -
Page 62: Keyboard
Most of the F keys (function keys) on a connected keyboard act interchangeably with buttons on the F12 Record Pause / Make New File CDR420. Some of the F keys have special functions. Press and release to work the same the REC but- ton light on the CDR420. -
Page 63: About Compact Discs
About Compact Discs writing strategy of the recorder. At 1X speed (stand The CDR420 can play CD, CD-R, or CD-RW discs alone audio) the match between disc and recorder is and can record on CD-R or CD-RW discs. important. Higher recording speeds are less critical in terms of recording quality. -
Page 64: Optional Battery Supply
ERROR CODE and Call Technical Service. result. • Write only on the printed side The CDR420 will not work until the problem is cor- of a CD-R or CD-RW disc, rected. and only with a soft felt- tipped pen. -
Page 65: Limited Warranty
Cleaning, check-ups with no fault found or changes incurred in Marantz products, damages based on inconvenience or loss for installation, removal or reinstallation of the product. of use of the product, or any other damages, whether incidental, consequential, or otherwise. - Page 66 ® Marantz is a registered trademark. 2005/6...
Need help?
Do you have a question about the CDR420 and is the answer not in the manual?
Questions and answers
When I **** trying to copy a cd after I insert cd to be copied message "Scanning cd" appears then after a while it goes back to say "Insert cd"
The Marantz CDR420 displays "Scanning cd" and then "Insert cd" when trying to copy a CD because it checks for a blank CD in the drive. If a non-blank CD is detected, it is ejected, and the device prompts the user to insert a blank CD to proceed with copying.
This answer is automatically generated