
Related Manuals for Marantz CDR300


Summary of Contents for Marantz CDR300
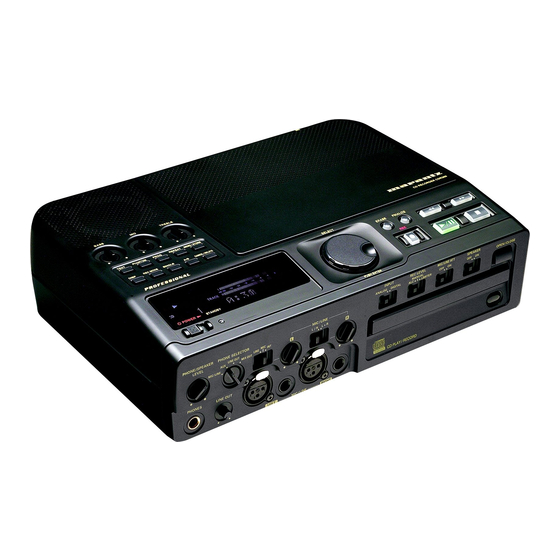
- Page 1 CLASS 1 LASER PRODUCT KLASSE 1 LASER PRODUKT I.H.T. IEC 825 Model CDR300 User Guide CD Recorder...
-
Page 2: Laser Safety
CAUTION: TO REDUCE THE RISK OF ELECTRIC SHOCK, REFER SERVICING TO QUALIFIED SERVICE PERSONNEL The lightning flash with arrowhead symbol, within an equilateral triangle, is intended to alert the user to the presence of uninsulated "dangerous voltage" within the product's enclosure that may be of sufficient magnitude to constitute a risk of electric shock to persons. -
Page 3: Safety Instructions
This product was designed and manufactured to meet strict quality and safety standards. There are, however some installation and operation precautions which you should be particularly aware of. Read Instructions – All the safety and operating instructions should be read before the appliance is operated. Retain Instructions –... -
Page 4: Specifications
Specifications General System ... Compact Disc Digital Audio (CD-DA) Number of channels ... 2 (stereo) Applicable discs ... CD, CD-R, CD-RW Power requirements ...AC100V-240V, 50/60 Hz, 21W DC ... 13.2V, 1.5A Max DC ... 16V, 2.5A Dimensions (maximum) Width ... 11 inches (279 mm) Height ... -
Page 5: Table Of Contents
Table of Contents Topic Warnings ...2 Safety Instructions ... 3 Specifications ... 4 Table of Contents ... 5 Introduction ... 5 Package contents ... 7 Remote batteries ...7 Connections (basic) ... 7 Controls, Display (top) 1 Speaker grill ... 8 2 Built in microphone ... -
Page 6: Introduction
Troubleshooting ... 35 Maintenance ... 35 Warranty ... 36 Introduction page The CDR300 CD recording system is a CD recorder with playback capability. For CD recording you can: • record on CD-R or CD-RW discs • record from digital or analog sources For CD playing you can: •... -
Page 7: Package Contents
Package contents BASS TREBLE TEXT PHANTOM PROG REPEAT MENU/STORE REC MODE SINGLE A-B DISP CANCEL/DELETE CD RECORDER CDR300 PROFESSIONAL SELECT ERASE FINALIZE POWER STANDBY PUSH ENTER Infrared remote control CDR300 unit Power cord Audio cables (2) AA batteries (2) Remote batteries Press and lift at arrow to open the remote control battery compartment. -
Page 8: Controls, Display (Top)
BASS Low frequencies (150 Hz) TEXT PHANTOM PROG REPEAT MENU/STORE SINGLE A-B DISP REC MODE CANCEL/DELETE CD RECORDER CDR300 FINALIZE Tone controls Turning a knob controls the level of the correspond- ing frequency - 8 - Control buttons TEXT button Activates scrolling text in the display. -
Page 9: Menu/Store Button
TREBLE TEXT PHANTOM PROG REPEAT MENU/STORE DISP REC MODE SINGLE A-B CANCEL/DELETE DISP CD RECORDER CDR300 PROFESSIONAL SELECT ERASE FINALIZE POWER STANDBY PUSH ENTER MENU/STORE button Push and release to enter Menu mode. Menu selections and changes are made using the SELECT control (a). -
Page 10: Single Button
TRACK (b) displays are flashing, and the time counter (c) is counting up indicating elapsed time (example display below). TRACK CD TEXT When the track is finished the CDR300 will auto- matically pause at the beginning of the next track. TRACK CD TEXT REPEAT... -
Page 11: Standby Power Switch
Controls, Display (top) continued BASS TREBLE TEXT PHANTOM PROG REPEAT MENU/STORE DISP REC MODE SINGLE A-B CANCEL/DELETE CD RECORDER CDR300 PROFESSIONAL SELECT ERASE FINALIZE POWER STANDBY PUSH ENTER Standby POWER switch POWER Slide the Standby POWER switch to the right to turn power on or off. -
Page 12: 3 Auto Indicator
SELECT SELECT control This is the "master" control for the CDR300. For most opera- tions you turn to select, then push and release to confirm and enter your selection. PUSH / ENTER •... -
Page 13: Controls, Connections (Front)
Controls, Connections (front) INPUT DIGITAL MIC/LINE ANALOG PHONE/SPEAKER PHONE SELECTOR LEVEL LINE OUT LINE L + R MIX OUT MIC/LINE PUSH PUSH PHONES LINE OUT Recordable CD PLAY / RECORD ReWritable LEFT MIC/LINE RIGHT PHONE/SPEAKER LEVEL PHONE/SPEAKER LEVEL control Turn to adjust the level (volume) of the built-in speaker and head- phones plugged into the PHONE jack. -
Page 14: Input Analog/Digital Switch
DIGITAL IN jack on the rear of CDR300. Connect analog input to either the MIC/LINE input jacks on the front of the CDR300 and/or the AUX IN jacks on the rear of the CDR300. REC LEVEL... -
Page 15: Controls, Connections (Rear)
The signal is output before going to the CDR drive, so it is available for monitoring or recording even if the CDR drive is stopped. This signal cannot be equalized by the CDR300 tone controls. LINE OUT jacks LINE Plug Right and Left RCA... -
Page 16: Dc In
Power switch (10) in to ON. Turn power on with the Standby POWER slide switch on the top of the unit. Battery life depends on use and battery type. A low battery indicator is built in. When the CDR300 detects a low battery condition during recording the red 12VDC -... -
Page 17: How To Play How To Play A Cd (Basics)
How to Play How to Play a CD (basics) Connect and turn on the CDR300, see Connections (basic) on page 7. ERASE TREBLE BASS TEXT PHANTOM PROG REPEAT MENU/STORE DISP REC MODE SINGLE A-B CANCEL/DELETE CD RECORDER CDR300 PROFESSIONAL SELECT... -
Page 18: How To Display Time
BASS TREBLE TEXT PHANTOM PROG REPEAT MENU/STORE DISP REC MODE SINGLE A-B CANCEL/DELETE CD RECORDER CDR300 PROFESSIONAL SELECT ERASE FINALIZE POWER STANDBY PUSH ENTER How to Search While playing push and hold a Fast backward search or Fast forward search button (6). -
Page 19: How To Program Tracks
Play symbol flashing indicates track is playing. b Example track #3 is playing c Flashing "TRACK" indicates single track play. When the track is completed the CDR300 remains in Single track, paused at the beginning of the next track. -
Page 20: How To Erase A Programed Track
How to play continued Push Play/ Pause (a) to play the pro- gram. Example PROG display shown. Pause, Stop: While playing the program: Push Play/Pause to pause, push again to resume play from that point in the program. Push Stop to stop. Push Play/Pause to resume play from the beginning of the program. -
Page 21: How To Record
CDR drive. With the CDR drive at Stop. Connect your microphone(s) or instrument(s) to the MIC/LINE jacks on the front of the CDR300. Set the LINE MIC switches for microphone input (MIC) or for instrument input (LINE). -
Page 22: Scms
CD recorder (CDR300) will act differently. If the digital source being recorded on the CDR300 contains no SCMS information then the copy will also not include SCMS. If the digital source material being recorded on the CDR300 contains SCMS information then the copy will also include SCMS. -
Page 23: Select Record Mode
How to Record continued Select record mode The record mode (REC mode) sets the CDR300 to expect and accept certain inputs, outputs, and other conditions such as the settings of AUTO TRACK and AUTO STOP, and the easy availability of some adjust- ments such as REC LEVEL. -
Page 24: Auto Track
SPDIF format digital connection. If AUTO TRACK is ON and the source is digital (without track data) or analog, the CDR300 will use a silence gap to mark a track. When the source audio signal drops below -80dB for digital, or -40dB for... -
Page 25: How To Adjust The Mic Equalizer
DISP REC MODE CANCEL/DELETE PROFESSIONAL POWER STANDBY 1 With the CDR300 in REC mode (recording mode selected and REC button lit and flashing). 2 Push and release MENU/STORE. 3 Turn the SELECT control so REC BALANCE is displayed. TRACK CD-R... -
Page 26: How To Select Filters
REC MODE SINGLE A-B CANCEL/DELETE PROFESSIONAL POWER STANDBY 1 With the CDR300 in Stop, Play/Pause, REC or REC Pause mode, 2 Push and release MENU/STORE. 3 Turn the SELECT control so FILTER SELECT is displayed. TRACK a Push and release the SELECT control. MIC/LINE... -
Page 27: How To Erase
• Three times in succession to unfinalize. BASS TREBLE TEXT PHANTOM PROG REPEAT MENU/STORE DISP REC MODE SINGLE A-B CANCEL/DELETE CD RECORDER CDR300 PROFESSIONAL SELECT ERASE FINALIZE POWER STANDBY PUSH ENTER How to Erase the last track 1 Push Stop. The display shows the... -
Page 28: How To Finalize
• A finalized CD-R disc can never be recorded onto again. • A finalized CD-RW disc can be unfinalized for more recording. • The CDR300 can play back unfinalized CD-R or CD-RW discs. • SYNC REC+FINAL mode automatically finalizes. BASS... -
Page 29: About The Remote
LINE EXT. INT. The REMOTE EXT. INT. switch on the back of the CDR300 must be at INT. for the infrared remote to work. Most of the controls on the remote work identically to the control on the unit. The page number describing identical functioning unit controls is given below. -
Page 30: Ams Button (Automatic Search)
About the Remote continued PROG TEXT SINGLE DISPLAY SPACE REPEAT CAN/DEL ENTER MEN/STO TR INC REMOTE CONTROLLER RC300CDR AMS (Automatic Search) button. Remote only. Push and release to play the first 10 seconds of each track. AMS is displayed in the time display while searching. Push Pause to pause the automatic search. -
Page 31: About Cd Discs
• Some CD players can not play finalized CD-R discs because of the low reflectivity of such discs. Which discs to use: The CDR300 is able to record onto any 1X or 2X compatible CD-R and CD-RW disc, including discs for Consumer use and Professional (computer) discs. -
Page 32: Cd Text
CD-R or CD-RW disc that you record. CD text during playback When a disc is inserted in the CDR drive the CDR300 automatically detects if a disc has text information and automatically displays the CD title. The CDR300 can display 14 characters, if the text information is longer than that the text automatically scrolls from right to left. -
Page 33: How To View Cd Text
2 Turn the SELECT control so TEXT VIEW is dB-50 3 Push and release the SELECT control to confirm 4 Push and release the SELECT control to review 5 Turn the SELECT control to switch to reviewing CD RECORDER CDR300 SELECT ERASE FINALIZE PUSH ENTER... -
Page 34: How To Erase Cd Text
How to erase CD text The TEXT ERASE menu item lets you delete CD text that has been entered. With your unfinalized disk in the CDR drive and stopped 1 Push and release MENU/STORE. 2 Turn the SELECT control so TEXT ERASE is displayed. -
Page 35: Troubleshooting
• Clean the CDR300 with a soft, slightly dampened lint-free cloth. Do not use any cleaning agents as they may have a corrosive effect. • Do not expose the CDR300, batteries or CDs to humidity, rain, sand or excessive heat (caused by heating equipment or direct sunlight). -
Page 36: Limited Warranty
Manufacturer shall not be liable for damage to other prod- ucts caused by any defects in Marantz products, damages based on inconvenience or loss of use of the product, or any other damages, whether incidental, consequential, or otherwise.
Need help?
Do you have a question about the CDR300 and is the answer not in the manual?
Questions and answers