
Related Manuals for KING QUEST VQ4200


Summary of Contents for KING QUEST VQ4200
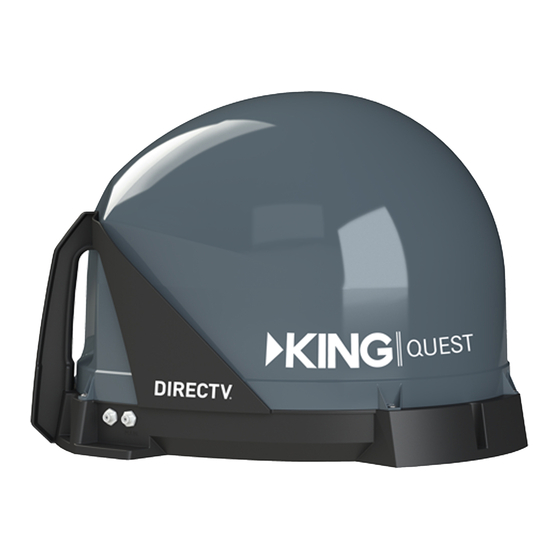
- Page 1 VQ4200 Owner’s Manual This manual contains detailed information on your KING Quest. To start watching TV right away, use the Quick Reference Guide. For Bell TV™ (Canada) and DISH (USA) ®...
-
Page 3: Table Of Contents
KING is a registered trademark of Electronic Controlled Systems, Inc. which is not affiliated with DIRECTV nor Bell TV. KING Quest and Simply better, by design. are trademarks of Electronic Controlled Systems, Inc. which is not affiliated with DIRECTV nor Bell TV. -
Page 4: Introduction
Thank you for purchasing a KING antenna! Bell TV This KING Quest is factory preset to work with Bell TV satellites 82 and 91, enabling you to receive your favorite SD and HD programming from Bell TV (programming subscription and Bell 6400 or 9400 receiver required - see our website for additional compatible legacy receivers). -
Page 5: Contents
CONTENTS Unbox contents and verify everything is present. APPLY RUBBER FEET TO ANTENNA UNIT Lay the antenna unit on a soft, non-scratching surface, and apply the (3) rubber feet. IMPORTANT! If you are going to permanently roof mount the antenna unit, DO NOT apply the rubber feet. See the roof installation section later in this manual. -
Page 6: Connections
CONNECTIONS Make connections A-D in order shown. Do not over tighten the coax connections. Do not route the coax cable where it can be tripped on or run over by a vehicle. Do not put sharp bends or kinks in the coax cable. See section 9 (Bell) or 11 (DISH) for optional second receiver use. -
Page 7: Alarm Configuration
ALARM CONFIGURATION This unit is shipped from the factory with the alarm feature in the ON condition. If you wish to have the alarm in the ON condition, you can skip this section and go to section 6. To disable the alarm, follow the instructions below. If desired, apply the included decal to the dome cover near the coax connections. -
Page 8: Antenna Configuration
ANTENNA CONFIGURATION The KING Quest is factory preset for BELL HD AND SD (satellites 82 and 91). If this is your desired service option, you do not need to configure your antenna. Go to section 7. If you wish to use the Bell SD service option (satellite 91), or the DISH mode, you will need to reconfigure the antenna as shown below. -
Page 9: Bell: Initial Scan And Receiver Configuration
Place the KING Quest on a stable and reasonably level surface with a clear view of the southern sky. When placing the KING Quest in position, be sure surface is dry and free of loose dirt or sand. - Page 10 If the indicated results are not obtained, go back to Step 1 and run test again. Contact KING if the check switch fails to load after 4 attempts. 4. When the installation summary shows the successful check switch test results, highlight “Done.”...
-
Page 11: Bell: Operation
Place the KING Quest on a stable and reasonably level surface with a clear view of the southern sky. When placing the KING Quest in position, be sure surface is dry and free of loose dirt or sand. -
Page 12: Bell: Second Receiver Operation
BELL: SECOND RECEIVER OPERATION Antenna locked on INITIAL SETUP FOR SECOND RECEIVER receiver connected! 1. With the antenna locked on the satellite and the second receiver connected to the antenna unit’s AUX port coax, use your receiver’s remote control and press MENU, 6, 1, 1 to display the Receiver sold separately. - Page 13 DOWNLOADING PROGRAMMING TO THE SECOND RECEIVER After completing the steps on the previous page, reset the second receiver by pressing the POWER button on the front panel for 10 seconds. The TV picture will go away and should reappear within two minutes. The receiver will then download the program guide to show only the channels available on the current satellite as determined by the channel selected on the main receiver.
-
Page 14: Dish Mode
DISH MODE IF YOU ARE USING A NEW RECEIVER WITH THE KING QUEST, YOU MUST FOLLOW THE FIRST TIME SETUP PROCEDURE STARTING BELOW. AFTER THIS FIRST TIME PROCEDURE, YOU CAN USE “STANDARD OPERATION WITH DISH RECEIVER” STARTING ON PAGE 16. - Page 15 IN STEPS 2-6, DO NOT BLOCK THE ANTENNA’S LINE OF SIGHT TO THE SATELLITES IN THE SOUTHERN SKY AT ANY TIME! IMPORTANT! If you move the antenna unit any time during or after the scan, you will have to repeat steps 2-6. 2.
- Page 16 The receiver will download software for the Custom User Interface. This step may take 20-25 minutes. 5. The receiver will reset and the Mobile Antenna Setup Screen will appear. Repeat steps 2-4 to start a second scan. The unit will scan a second time. Page 14...
- Page 17 When the scan is complete, the Acquiring Signal message will display. Acquiring the signal may take up to 5 minutes to complete. 6. After your receiver has acquired the signal, it is ready to be activated. To activate service call 1-800-963-DISH (3474). After your receiver is activated, the electronic program guide will download.
- Page 18 STANDARD OPERATION WITH DISH RECEIVER IF YOUR RECEIVER IS NEW AND UNACTIVATED, YOU MUST COMPLETE THE STEPS ON PAGES 12-15 FIRST! After connecting and turning on your equipment, the Mobile Antenna Setup screen will display. (It may take up to two minutes to display.) Note: If the Mobile Antenna Setup screen does not display, press MENU, 6, 1, 1 on your remote.
- Page 19 2. Highlight the state you are currently in from the state menu. Press SELECT. 3. Verify “Scan” is highlighted. Press SELECT. The scan will begin and may take up to several minutes to complete. This screen will display during the scan. 4.
- Page 20 OPERATING NOTES: IF YOU MOVE THE KING QUEST, YOU WILL HAVE TO REPEAT STEPS 1-5 TO REACQUIRE THE SATELLITES AND RESTORE PROGRAMMING. When in the northeastern United States, television programming from the 129 satellite may not be available (programming from the 110 and 119 should still be available.)
- Page 21 This page intentionally left blank. Page 19...
-
Page 22: Dish Mode: Second Receiver Operation
DISH MODE: SECOND RECEIVER OPERATION Antenna locked on INITIAL SETUP FOR SECOND RECEIVER receiver connected! 1. With the antenna locked on the satellite and the second receiver connected to the antenna unit’s AUX port coax, use your DISH remote control and press MENU, 6, 1, 1 to display the Point Dish screen. - Page 23 DOWNLOADING PROGRAMMING TO THE SECOND RECEIVER After completing the steps on the previous page, reset the second receiver by pressing the POWER button on the front panel for 10 seconds. The TV picture will go away and should reappear within two minutes. The receiver will then download the program guide to show only the channels available on the current satellite as determined by the channel selected on the main receiver.
-
Page 24: Roof Installation
ROOF INSTALLATION If you wish to semipermanently mount the antenna unit (allowing you to remove it for use as a portable) you can mount it with the MB600 removable feet (see page 27). 1. Make sure you have the following tools and materials before starting. Many RVs are prewired with RG-6 coax cable for satellite antennas. - Page 25 ANTENNA UNIT LOCATION APPROXIMATE MINIMUM DISTANCE HEIGHT OF TO EDGE OF ANTENNA UNIT OBSTRUCTION 10” 8” 11” 10” 12” 12” 13” 14” 14” 16” 15” 18” 16” 20” Page 23...
- Page 26 The installer is responsible for determining the most appropriate fastener to secure the antenna unit to the roof. Depending on the roof material, fasteners such as lag screws, well nuts, sheet metal screws, toggle bolts and T anchors may be used, and should always be used in combination with a roof compatible sealant. IMPORTANT! The installer is responsible for weatherproofing all roof holes with sealant.
- Page 27 6. Run coax from the antenna unit to the roof edge, then along edge to location where coax will be fed into the vehicle. If installing an optional second receiver, run second coax to location where it will enter the vehicle. Secure (both) coax to roof every 12-18 inches (see below). 7.
-
Page 28: Troubleshooting
Make sure nothing is temporarily blocking view to the southern sky (even tree branches swaying in the wind may cause temporary interruptions of signal). SECURITY FEATURE The KING Quest can be secured to an object using a cable looped thru the handle. Page 26... -
Page 29: Accessories
ACCESSORIES (SOLD SEPARATELY) MOUNTING BRACKETS AND MOUNTING FEET KING offers several options for permanent and temporary mounting of the antenna unit. MB150 MB500 Mounting Bracket Mounting Bracket Allows hanging of antenna unit on vehicle window or included hanger bracket. The KING Quest is not compatible with the MB100 Mounting Bracket. -
Page 30: Maintenance And Safety Information
5. Do not operate near any indoor or outdoor heat source such as radiators, heat registers, stoves, barbecues, campfires, or other items that produce heat. 6. Do not stack the KING Quest on top of or below other electronic devices as this can cause heat buildup or block the satellite signal from reaching the KING Quest. -
Page 31: Limited Warranty
This warranty does not cover installation and external wiring, or remanufactured units. This warranty does not cover damage caused by the use of a mounting bracket other than a KING mounting bracket designed for the product. This warranty is not transferable from the original owner. - Page 32 NOTES: Page 30...
- Page 33 Page 31...
- Page 34 Page 32...
- Page 36 Simply better, by design. ™ 11200 Hampshire Avenue South, Bloomington, MN 55438 PH 952.922.6889 || FAX 952.922.8424 || kingconnect.com ©2015 KING 21976 Rev A...
Need help?
Do you have a question about the QUEST VQ4200 and is the answer not in the manual?
Questions and answers
Will only lock on Satellite and displays a red light. The second Sat is green. Unit has not moved since last Aug. Everything was working properly after returning from an excursion.