Advertisement
Available languages
Available languages
Quick Links
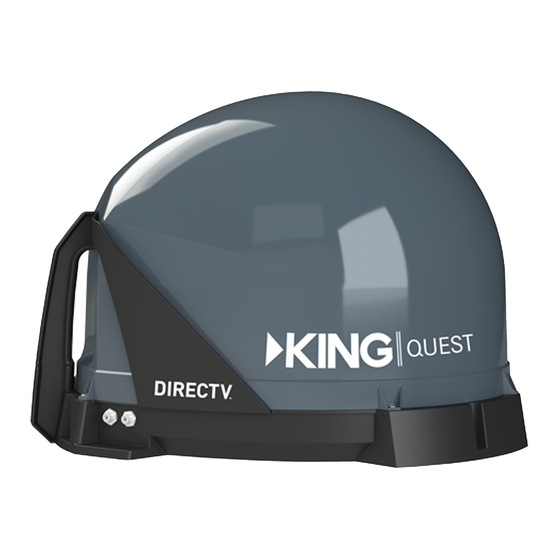
Automatic Satellite TV Antenna
for Bell TV
™
(Canada) and DISH
®
(USA)
VQ4200
Quick Reference Guide
Thank you for choosing a KING Antenna!
This KING Quest is factory preset to work with Bell TV satellites
82 and 91, enabling you to receive your favorite HD and SD
programming from Bell TV.
Follow the steps in this Quick Reference Guide
to start watching TV in no time at all.
If you have Bell SD service (satellite 91 only) or if you are
traveling in the US and wish to watch DISH programming (with
paid subscription) you will have to configure your antenna for
one of these options (see your Owner's Manual for details).
For additional information about your King Quest including
roof installation, troubleshooting, warranty information and
second receiver use, see your Owner's Manual.
11200 Hampshire Avenue South, Bloomington, MN 55438
PH 952.922.6889 || FAX 952.922.8424 || kingconnect.com
21977 Rev A ©2015 KING
Bell TV is an official trademark of Bell Canada. DISH is a registered trademark of DISH Network L.L.C.
KING Quest is a trademark, and KING is a registered trademark of Electronic Controlled Systems, Inc. which is not affiliated with Bell TV.
FIRST TIME USE: Complete all 4 steps.
For subsequent use, use steps 2-3.
TM
1
DO NOT APPLY FEET
IF YOU WILL BE ROOF
MOUNTING THE
ANTENNA UNIT.
Lay the unit on a soft,
non-scratching surface and
apply the (3) rubber feet.
2
Place KING Quest in position.
Any tall objects can block the satellite signal.
Place the KING Quest on a stable and reasonably level surface
with a clear view of the southern sky.
When placing the KING Quest in position, be sure surface is dry
and free of loose dirt or sand.
3
3.1 Make connections A-D in order shown at right.
3.2 Turn on the TV and satellite receiver.
3.3 Press POWER to turn on KING Quest controller. Wait for the COAX
CONNECTION light to stop flashing and remain on.
3.4 Press SCAN. The antenna will scan and locate the 82 and 91 satellites before
completing the search process.
PLEASE BE PATIENT! This initial scan may take up to 15 minutes to
complete. After this initial scan, subsequent scans may take as little as 2
minutes, but may occasionally take up to 10-15 minutes.
After the search is complete, the first two SCAN PROGRESS lights will turn
on to show the satellites have been found.
FIRST TIME USE ONLY:
After initial scan, complete step 4.
On subsequent scans, DO NOT DO STEP 4.
On subsequent scans your programming will appear
when the scan is complete.
Enjoy!
Make connections in
When you plug in the receiver, the green
order shown A-D.
power light should illuminate or begin cycling
on and off (if not, check AC connection).
Wait for the green light to turn solid.
This may take up to two minutes.
If it does not turn solid, power on your receiver
using the front panel POWER button.
A
C
Do not overtighten the
coax connections.
Do not route the coax
cable where it can be
B
tripped on or run over by
a vehicle.
Do not put sharp bends
or kinks in the coax cable.
DO NOT MOVE THE ANTENNA UNIT WHILE IT IS SCANNING.
Choose your TV's input that matches the connection from your receiver.
If antenna unit gets moved during a scan, press SCAN to start a new scan.
Configure the receiver by running a check switch test.
4
The SW21 switch is a receiver software configuration that is loaded into the receiver
after successfully running a check switch test with the antenna locked on the 82 and 91
satellites.
This one time procedure will not need to be repeated after successful installation, unless:
a) check switch test is run again while the receiver is connected to a home dish system.
b) check switch test is run when the receiver is not connected.
4.1 On the receiver remote, press MENU, 6, 1, 1 to access the Point Dish screen.
4.2 Highlight "Check Switch."
Press SELECT on your remote.
The receiver will perform a check switch test.
This process can take a little while so PLEASE BE PATIENT.
D
4.3 When test is complete, a screen similar to this should appear.
Verify the SW21 switch loaded and there are no "X"s.
NO "X"s
MUST SHOW "SW21"
If the indicated results are not obtained,
go back to Step 4.1 and run test again.
Contact KING if the check switch fails
to load after 4 attempts.
4.4 When the installation summary shows the successful
check switch test results, highlight "Done."
Press SELECT on your remote to exit the screen.
4.5 Configuration is complete. Watch TV and enjoy!
Use steps
-
for subsequent use.
2
3
Screen graphics may vary.
Advertisement

Subscribe to Our Youtube Channel
Related Manuals for KING Quest VQ4200


Summary of Contents for KING Quest VQ4200
- Page 1 If antenna unit gets moved during a scan, press SCAN to start a new scan. KING Quest is a trademark, and KING is a registered trademark of Electronic Controlled Systems, Inc. which is not affiliated with Bell TV.
- Page 2 Si l’antenne est bougée durant le balayage, appuyez sur BALAYAGE pour lancer un Bell Télé est une marque de commerce officielle de Bell Canada. DISH est une marque déposée de DISH Network L.L.C. KING Quest est une marque de commerce et KING une marque déposée d’Electronic Controlled Systems, Inc., nouveau balayage.
Need help?
Do you have a question about the Quest VQ4200 and is the answer not in the manual?
Questions and answers