
Related Manuals for Trojan WALKER 110


Summary of Contents for Trojan WALKER 110
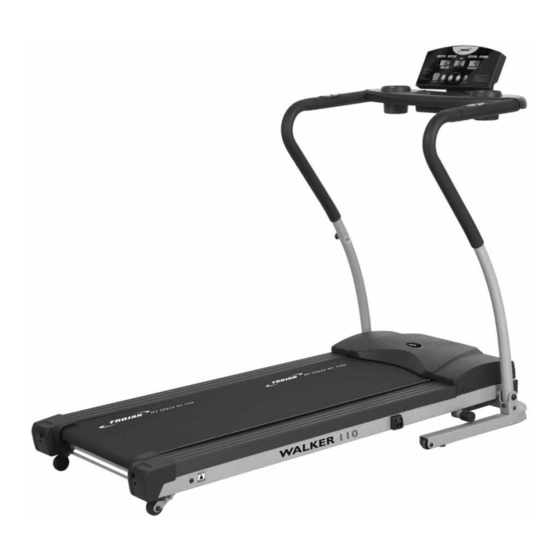
- Page 1 TROJAN ® MY SPACE MY TIME WALKER 110 TREADMILL TREADMILL CARE, INSTRUCTION AND ASSEMBLY MANUAL CAUTION READ ALL PRECAUTIONS AND INSTRUCTIONS IN THIS MANUAL BEFORE USING THIS EQUIPMENT. KEEP THIS MANUAL FOR FUTURE REFERENCE...
-
Page 2: Table Of Contents
SAFETY INSTRUCTIONS PRE ASSEMBLY CHECK LIST HARDWARE LIST ASSEMBLY STEPS UNFOLDING/FOLDING/TRANSPORT MAINTENANCE GROUNDING INSTRUCTIONS COMPUTER FUNCTIONS FITNESS TIPS & TECHNIQUES CONDITIONING GUIDELINES WARM -UP AND COOL-DOWN FREQUENTLY ASKED QUESTIONS PARTS LIST EXPLODED DRAWING TROJAN 1 YEAR LIMITED WARRANTY TROJAN REPAIRS PROCEDURE... -
Page 3: Safety Instructions
1. SAFETY INSTRUCTIONS It is the sole responsibility of the purchaser of TROJAN products to read the owner’s manual, warning labels and instruct all individuals, on proper usage of the equipment. Understanding each and every warning to the fullest is important. If any of these instructions or warnings are unclear please contact Trojan Customer Services on 0861 876 526 (0861 Trojan), within the Republic of South Africa. - Page 4 • This TROJAN WALKER 110 TREADMILL may not be used by persons weighing more than 100kg. SAVE THIS INSTRUCTION MANUAL FOR FUTURE USE AND REFERENCE If any of these instructions or warnings are unclear please contact Trojan Customer Services on 0861 876 526 (0861 Trojan), within the Republic of South Africa or visit www.trojanhealth.co.za.
-
Page 5: Pre Assembly Check List
Before reading further, please familiarise yourself with the parts that are labelled. Read this manual carefully before using the TROJAN WALKER 110 treadmill. Consol... -
Page 6: Hardware List
3. HARDWARE LIST ITEM DESCRIPTION Computer Consol Frame Handrail Bottle Holder ITEM DESCRIPTION Screw M5 x P0.8 x 18 Allen Bolt M8 x p1.25 x 15 Self Tapping Screw ø3.5 x 16 Allen Bolt M8 x p1.25 x 52 Allen Bolt M8 x p1.25 x 45 POP-Pin Rod POP-Pin Head Spring Allen Key & Screwdriver 5mm (70mm x 70mm) Safety Key / Clip Silicon Arc Washer Ø20 x Ø8.5 x 1.5t (R19.05) Nylon Nut M8 Spanner size 13 10200-6... -
Page 7: Assembly Steps
4. ASSEMBLY STEPS • Two people are required to complete the assembly. • Follow the steps below to avoid injury. STEP 1 – UPRIGHT ASSEMBLY • Raise the Left and Right Uprights into the vertical position and secure them into place with one Bolt (72), one Arc Washer (65), one Nylon Nut (71) and one Bolt (57). • Tighten the Pop-Pin Head (10) on the Right Upright. STEP 2: HANDRAIL ASSEMBLY CAUTION: Ensure that cables are not damaged during assembly or when tightening screws. -
Page 8: Unfolding/Folding/Transport
5. UNFOLDING / FOLDING / TRANSPORT FOLDING To fold away the treadmill running deck, turn off the treadmill and remove the power cord. Pull out the Pop Pin and then lift up the running deck into the vertical position. Make sure the Pop Pin clicks into place to secure the running deck in place. Do not let go of the running deck until you hear the Pop Pin click into place. UNFOLDING If you want to use the treadmill, hold the treadmill running deck firmly in one hand and with the other hand pull out the Pop Pin. Do not let the running deck go, slowly lower it to the ground, then re-insert the Pop Pin into the frame. -
Page 9: Maintenance
6. MAINTENANCE Your treadmill should require little maintenance other than to periodically apply lubricant. Lubricating under the treadbelt will ensure superior performance and extend the treadmill’s life expectancy. HOW TO CHECK TREADBELT FOR PROPER LUBRICATION • Lift one side of the treadbelt and feel the top surface of the treadboard. • If the surface is slick to the touch, then no further lubrication is required. • If the surface is dry to the touch, apply one packet of lubricant or half of the bottle of lubricant. HOW TO APPLY LUBRICANT • Lift one side of treadbelt. -
Page 10: Grounding Instructions
7. GROUNDING INSTRUCTIONS This product must be grounded. If a malfunction or breakdown occurs, grounding provides a path of least resistance for electric current to reduce the risk of electric shock. This product is equipped with a cord having an equipment-grounding conductor and a grounding plug. The plug must be plugged into an appropriate outlet that is properly installed and grounded in accordance with all local codes and ordinances. DANGER - improper connection of the equipment-grounding conductor can result in a risk of electric shock. Check with a qualified electrician or serviceman if you are in doubt as to whether the product is properly grounded. -
Page 11: Computer Functions
8. COMPUTER FUNCTIONS I. GENERAL OPERATION: 1. Turn on the treadmill. 2. Put the safety key in the recess of the consol. The beeper will sound, and all the windows will display values. The initial values are 0, and do not flash. This means the treadmill is in the START/READY mode. In this mode the user can hold the grip pulse sensor to detect heart rate values. - Page 12 8. COMPUTER FUNCTIONS (cont.) II. MANUAL AND PROGRAM OPERATION INSTRUCTION In this mode the user has 1 MANUAL and 6 PROGRAMS pre-installed to choose from. 1. MANUAL (P0): In this mode, you can set up the TIME, DISTANCE as your need. 1.1.
- Page 13 8. COMPUTER FUNCTIONS (cont.) PROGRAM 4 PROGRAM 5 PROGRAM 6 LEVEL 1 LEVEL 1 LEVEL 1 MINUTES MINUTES MINUTES LEVEL 2 LEVEL 2 LEVEL 2 MINUTES MINUTES MINUTES LEVEL 3 LEVEL 3 LEVEL 3 MINUTES MINUTES MINUTES 10200-13...
-
Page 14: Fitness Tips & Techniques
Serratus Anterior Tricep Biceps Latissimus Dorsi Abdominal Gluteals Sartorius Quadriceps Hamstrings Tibialis Gastrocnemius Trojan and the Heart and Stroke Foundation have joined forces to KEEP SOUTH AFRICA MOVING. The Heart and Stroke Foundation South Africa encourages all South Africans to make heart-healthy choices that include daily physical activity, exercise and a balanced diet. Use Trojan, SA’s No. 1 selling Home Fitness brand to gives you the ability to boost your fitness level and lower your risk of cardiovascular disease. Visit www.trojanhealth.co.za for equipment choices and exercise programs, and www.heartfoundation.co.za for information on how to adopt a healthy lifestyle. 10200-14... -
Page 15: Conditioning Guidelines
10. CONDITIONING GUIDELINES How you begin your exercise program depends on your physical condition. If you have been inactive for several years, or are severely overweight, you must start slowly and increase your time on the equipment; a few minutes per workout. Initially, you may be able to exercise only for a few minutes in your target zone, however, your aerobic fitness will improve over the next six to eight weeks. Don’t be discouraged if it takes longer. It’s important to work at your own pace. Ultimately, you’ll be able to exercise continuously for 30 minutes. The better your aerobic fitness, the harder you will have to work to stay in your target zone. Please remember these essentials : • Have your doctor review your training and diet programs to advise you of a workout routine you should adopt. • Begin your training program slowly with realistic goals that have been set by you and your doctor. • Monitor your pulse frequently. Establish your target heart rate based on your age and condition. • Set up your equipment on a flat, even surface at least 3 feet from walls and furniture. -
Page 16: Warm-Up And Cool-Down
11. WARM-UP AND COOL-DOWN WORKOUT GUIDELINES Each workout should include the following three parts: A warm-up, consisting of 5 to 10 minutes of stretching and light exercise. A proper warm-up increases your body temperature, heart rate, and circulation in preparation for exercise. Training zone exercise, consisting of 20 to 30 minutes of exercising with your heart rate in your training zone. (Note: During the first few weeks of your exercise program, do not keep your heart rate in your training zone for longer than 20 minutes.) A cool-down, with 5 to 10 minutes of stretching. This will increase the flexibility of your muscles and will help to prevent post-exercise problems. EXERCISE FREQUENCY To maintain or improve your condition, plan three workouts each week, with at least one day of rest between workouts. After a few months of regular exercise, you may complete up to five workouts each week, if desired. -
Page 17: Frequently Asked Questions
• Turn off computer, unplug, leave for 30 seconds, then restart the treadmill. • If the error persists please contact our call centre on 0861 876 526 (0861 TROJAN). 2. My consol is showing E1 • Memory of the consol is malfunctioning or the CPU is having accessing problems •... -
Page 18: Parts List
13. PARTS LIST Description Description Computer Console Socket Philips Screw M6xP1.0x25 Computer Handrail Tube Assembly Rear Roller Hand Pulse Set NAZNO2531&FBOP1136 Rear End Cap(Left) Foam Grip Ø36x2.5tx280 (FAE2536280) Rear End Cap(Right) Foam Grip Inner Span Ø34x2.5tx560 Washer Ø6xØ10x1.0t Hand Pulse Screw Cover CKS Hex Screw M6xP1.0x55(Full Thread) Hand Pulse Sensor Wire(Lower) Incline Base Truss Philips Self Tapping Screw Ø3.5x16 Truss Philips Screw M5xP0.8x10 Controller Socket Philips Self Tapping Screw Ø4x25 Washer Philips Self Tapping Screw Ø4x16... - Page 19 13. PARTS LIST (cont.) Description Description Truss Hex Screw M8xP1.25x15 Motor Adjustment Plate NAZ409185 End Cap Round Tube30x1.2t Nylon Nut M6xP1.0 Outer Cap PAD30 Extension Wire CKS Hex Screw M8xP1.25x105 (15mm) 16AWGx250,(FBG16AWG250WH) Nut M8 CKS Hex Screw M8xP1.25x15 Plastic Bottle Seat CKS Hex Screw M8xP1.25x45 Wheel PBKHM068 Plastic Washer Ø8xØ22x6t Rubber Pad Spanner size 13 End Cap match with 25x50x1.5t Lower Motor Cover Washer Drilling Philips Self Tapping Screw Fixing Plastic PEZP319 Ø4x12 Round Head Philips Screw M6xP1.0x42...
-
Page 20: Exploded Drawing
14. EXPLODED DRAWING 10200-20... -
Page 21: Trojan 1 Year Limited Warranty
Consumer upon collection or delivery of the repaired product. The Consumer does not need to return the product to the store. The Consumer shall phone the Trojan hotline on 0861 876526 (0861 Trojan) and the Manufacturer’s authorized agent will at its discretion either repair the item at the Consumer’s residence or collect and repair the item at their premises. -
Page 22: Trojan Repairs Procedure
16 . TROJAN REPAIRS PROCEDURE 1. Procedure for repairs Should you experience any faults or breakdowns on your Trojan equipment, please adhere to the following procedure to have the fault rectified speedily and professionally. • Do not return the product to the store* • Call 0861 Trojan (0861 876526) to log the faulty product (under warranty or out of warranty) • The operator will try identify the fault, and will book a service team call out. • The service team will call you to agree a date and time to collect the faulty product. • Items repaired in our service centre will be returned to your home on an agreed date and time. * Note: Should you live in an outlying area, it may be necessary to return the product to the store nearest to you. Our service operator will advise you of your repair procedure.
Need help?
Do you have a question about the WALKER 110 and is the answer not in the manual?
Questions and answers