Table of Contents

Subscribe to Our Youtube Channel
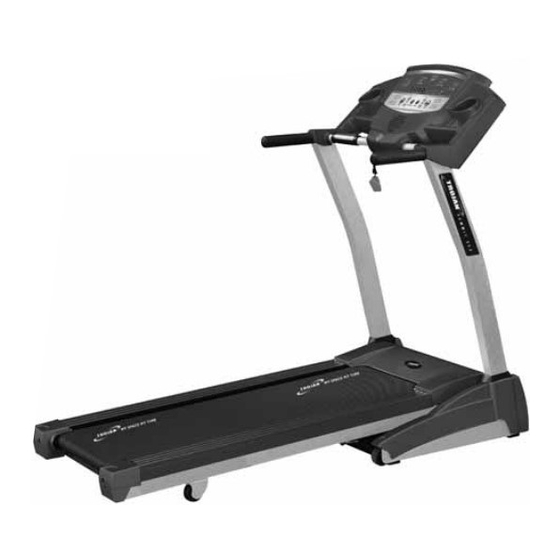
Related Manuals for Trojan SUMMIT 300


Summary of Contents for Trojan SUMMIT 300
- Page 1 TROJAN ® S U M M I T 3 0 0 MY SPACE MY TIME T R E A D M I L L TREADMILL CARE INSTRUCTIONS AND ASSEMBLY MANUAL CAUTION READ ALL PRECAUTIONS AND INSTRUCTIONS IN THIS MANUAL BEFORE USING THIS EQUIPMENT...
-
Page 2: Table Of Contents
ASSEMBLY STEPS FOLDING INSTRUCTIONS MAINTENANCE GROUNDING INSTRUCTIONS COMPUTER FUNCTIONS FITNESS TIPS AND TECHNIQUES 10. CONDITIONING GUIDELINES 11. WARM -UP AND COOL-DOWN 12. FREQUENTLY ASKED QUESTIONS 13. PARTS LIST 14. EXPLODED DRAWING 15. TROJAN 1 YEAR LIMITED WARRANTY 16. TROJAN REPAIRS PROCEDURE... -
Page 3: Safety Instructions
1. SAFETY INSTRUCTIONS WARNING : To reduce the risk of serious injury, read the following safety instructions before using the TROJAN SUMMIT 300 TREADMILL. 1. Use the TROJAN SUMMIT 300 TREADMILL only on a level surface. 2. Keep children and pets away from this equipment at all times. -
Page 4: Pre Assembly Check List
2. PRE ASSEMBLY CHECK LIST Thank you for choosing the TROJAN SUMMIT 300 TREADMILL. We take great pride in producing this quality product and hope it will provide many hours of quality exercise to make you feel better, look better and enjoy life to its fullest. -
Page 5: Hardware List
3. HARDWARE LIST 1563-5... -
Page 6: Assembly Steps
4. ASSEMBLY STEPS STEP 1 • Connect the Lower Control Wire of the Frame(B) to the Guide Thread of the Right Upright (D), then pull it into the Upright (D), and secure with wire ring, before inserting into the Upright. •... - Page 7 ASSEMBLY STEPS STEP 3 • Connect the Control Wires of the frame with the Con- trol Wires in the Computer Consol (A) • Place the Computer Consol (A) on the Upright. and tighten with Allen Bolt (c) NOTE: In order to prevent any injury, two persons are required to assemble the product.
-
Page 8: Folding Instructions
5. FOLDING INSTRUCTIONS FOLDING DECK CYLINDER Note: The Cylinder is pressurised, so extra care must be taken to avoid contact with other objects. Note: If you damage the Cylinder, usage could be affected. FOLDING MECHANISM • This treadmill can be folded away for storage. When storing the treadmill, all power must be off. -
Page 9: Maintenance
6. MAINTENANCE RUNNING BELT NOT CENTERED • If the running belt is not centered on the tail roller and it’s either too far left or right, please turn off the treadmill first. • Use 6mm Allen Wrench shaped wrench to loosen bolts within rear adjusting boxes. -
Page 10: Grounding Instructions
7. GROUNDING INSTRUCTIONS This product must be grounded. If malfunction or breakdown occurs, grounding provides a path of least resistance for electric current to reduce the risk of electric shock. This product is equipped with a cord having an equipment- grounding conductor and a grounding plug. -
Page 11: Computer Functions
8. COMPUTER FUNCTIONS A. GENERAL OPERATIONS 1. Turn on the treadmill. 2. Put the safety key in the recess of the consol. The beeper will sound and the window will display 00:00, which indicates the treadmill is in the START/READY position. - Page 12 COMPUTER FUNCTIONS B. MODE FUNCTION KEY 1. Press under START/READY position. MANUAL LED will begin to flash. Press to select P1 - P6. 2. MANUAL FUNCTIONS When MANUAL flashes, press to enter TIME selection. Adjust the TIME using When is pressed, the motor will start at a speed of 1.0km/h. Press to adjust the speed and the incline of the treadmill 3.
- Page 13 COMPUTER FUNCTIONS P1 - Nine Hole (Simulates walking 9 Holes of Golf) P2 - Cardio (designed to train your cardio system) 1563-13...
- Page 14 COMPUTER FUNCTIONS P3 - Speed training system P4 - Fat burn program designed to burn fat P5 - Alternating elevations for intense workout P6 - Simulates running through hills 1563-14...
-
Page 15: Fitness Tips And Techniques
9. FITNESS TIPS AND TECHNIQUES AEROBIC EXERCISE Aerobic exercise is any sustained activity that sends oxygen to your muscles via your heart and lungs. Aerobic exercise improves the fitness of your lungs and heart - your body’s most important muscle. Aerobic exercise fitness is promoted by any activity that uses your large muscle -arms, legs, or buttock, for example. -
Page 16: Conditioning Guidelines
10. CONDITIONING GUIDELINES How you begin your exercise program depends on your physical condition. If you have been inactive for several years, or are severely overweight, you must start slowly and increase your time on the equipment; a few minutes per workout. Initially, you may be able to exercise only for a few minutes in your target zone, however, your aerobic fitness will improve over the next six to eight weeks. -
Page 17: Warm-Up And Cool-Down
11. WARM-UP AND COOL-DOWN WORKOUT GUIDELINES Each workout should include the following three parts: A warm-up, consisting of 5 to 10 minutes of stretching and light exercise. A proper warm-up increases your body tem- perature, heart rate, and circulation in preparation for exercise. Training zone exercise, consisting of 20 to 30 minutes of exercising with your heart rate in your training zone. -
Page 18: Frequently Asked Questions
Restart the treadmill and check that the running belt is well lubricated and that the motor wasn’t overloaded because of insufficient lubrication. If the error continues please contact your local Trojan Service Centre on 0861 876526 Q3. E4 – Body fat function failure (if the treadmill has this function) Please re-start the treadmill, and make sure that both hands are holding the grip pulse sensor Q4. -
Page 19: Parts List
13. PARTS LIST Description Description Computer Console Screw M6xP1.0x25 Extension Wire 16AWGx90mm(white) Allen Bolt M8xP1.25x30 Extension Wire 16AWGx300mm(black) Rubber Cushion Extension Wire 16AWGx300mm(white) Screw(Copper) M5xP0.8x8 Self Tapping Screw Ø4x20 Foam Grip Deck NBZNO3232 Rear Fixer PCZP1708 Spring Lower Handrail Plastic Post Pad PCZP1707 Nylon Nut Allen Bolt... -
Page 20: Exploded Drawing
14. EXPLODED DRAWING 1563-20... -
Page 21: Trojan 1 Year Limited Warranty
15. TROJAN 1 YEAR LIMITED WARRANTY Masstores (Pty)Ltd (“the Supplier”) hereby provides a limited warranty to the original purchaser of this product (“the Consumer”) that this product will be free of manufacturing defects in materials and workmanship which under normal,... -
Page 22: Proof Of Purchase
The Consumer does not need to return the product to the store. The Consumer shall phone the Trojan hotline on 0861 Trojan (0861 876 526) and the Supplier’s authorized agent will at its discretion either repair the item at the Consumer’s residence or collect and repair the item at their premises. -
Page 23: Trojan Repairs Procedure
16. TROJAN REPAIRS PROCEDURE 1. Procedure for repairs Should you experience any faults or breakdowns on your Trojan equipment, please adhere to the following procedure to have the fault rectified speedily and professionally. • Do not return the product to the store* •... - Page 24 1563-24...
Need help?
Do you have a question about the SUMMIT 300 and is the answer not in the manual?
Questions and answers