Sharp AL-2020 Service Manual
Digital multifunctional system
Hide thumbs
Also See for AL-2020:
- Service manual (92 pages) ,
- Operation manual (90 pages) ,
- Online manual (42 pages)
Table of Contents
Advertisement
Quick Links
[1] GENERAL . . . . . . . . . . . . . . . . . . . . . . . . . . . . . . . . . . . . . . . . . . . 1 - 1
[2] SPECIFICATIONS . . . . . . . . . . . . . . . . . . . . . . . . . . . . . . . . . . . . . 2 - 1
[3] CONSUMABLE PARTS . . . . . . . . . . . . . . . . . . . . . . . . . . . . . . . . . 3 - 1
[4] EXTERNAL VIEWS AND INTERNAL STRUCTURES . . . . . . . . . 4 - 1
[5] UNPACKING AND INSTALLATION . . . . . . . . . . . . . . . . . . . . . . . . 5 - 1
[6] COPY PROCESS . . . . . . . . . . . . . . . . . . . . . . . . . . . . . . . . . . . . . 6 - 1
[7] OPERATIONAL DESCRIPTIONS . . . . . . . . . . . . . . . . . . . . . . . . . 7 - 1
[8] DISASSEMBLY AND ASSEMBLY . . . . . . . . . . . . . . . . . . . . . . . . . 8 - 1
[9] ADJUSTMENTS . . . . . . . . . . . . . . . . . . . . . . . . . . . . . . . . . . . . . . 9 - 1
[10] SIMULATION, TROUBLE CODES . . . . . . . . . . . . . . . . . . . . . . . 10 - 1
[11] USER PROGRAM . . . . . . . . . . . . . . . . . . . . . . . . . . . . . . . . . . . . 11 - 1
[12] FAX SOFT SWITCH . . . . . . . . . . . . . . . . . . . . . . . . . . . . . . . . . . 12 - 1
[13] ELECTRICAL SECTION . . . . . . . . . . . . . . . . . . . . . . . . . . . . . . . 13 - 1
[14] CIRCUIT DIAGRAM . . . . . . . . . . . . . . . . . . . . . . . . . . . . . . . . . . 14 - 1
Parts marked with "
" are important for maintaining the safety of the set. Be sure to replace these parts with
specified ones for maintaining the safety and performance of the set.
SERVICE MANUAL
DIGITAL MULTIFUNCTIONAL
SYSTEM
(AL-2040)
CONTENTS
SHARP CORPORATION
CODE: 00ZAL2040/S2E
AL-2020
AL-2035
AL-2040
AL-2050
AL-2060
MODEL
This document has been published to be used
for after sales service only.
The contents are subject to change without notice.
Advertisement
Chapters
Table of Contents

Related Manuals for Sharp AL-2020


Summary of Contents for Sharp AL-2020
-
Page 1: Service Manual
SERVICE MANUAL CODE: 00ZAL2040/S2E DIGITAL MULTIFUNCTIONAL SYSTEM AL-2020 AL-2035 AL-2040 (AL-2040) AL-2050 AL-2060 MODEL CONTENTS [1] GENERAL ......... . . 1 - 1 [2] SPECIFICATIONS . - Page 2 CAUTION This product is a class 1 laser product that complies with 21CFR 1040 of the CDRH standard and IEC825. This means that this machine does not produce hazardous laser radiation. The use of controls, adjustments or performance of procedures other than those specified herein may result in hazardous radiation exposure.
- Page 3 At the production line, the output power Caution of the scanner unit is adjusted to 0.18 This product contains a low power laser MILLI-WATT PLUS 20 PCTS and is device. To ensure continued safety do not maintained constant by the operation of remove any cover or attempt to gain access the Automatic Power Control (APC).
-
Page 4: Table Of Contents
4. Fuser section ....... . 7-3 D. SRH (AL-2020/2035) ......3-1 A. - Page 5 N. Paper exit sensor ......8-24 1. MCU PWB (AL-2020/2035/2040) ....14-1 12.
-
Page 6: Major Functions
IEEE1284: Interface port (parallel) USB: Interface port (USB) RJ45: Interface port (Network) External NIC: Network expansion kit Descriptions of table : Standard provision : No function or no option available Opt: Option AL-2020 AL-2035/2040 AL-2050/2060 AL-2020/2035/2040/2050/2060 GENERAL 1 - 1... -
Page 7: Specifications
Output data Output: R, G, B 1 or 8 bits/pixel / Input: A/D 16 bits (12 bits actual) Writing Writing system Writing to OPC drum by the semiconductor laser section Laser unit Resolution 600 dpi AL-2020/2035/2040/2050/2060 SPECIFICATIONS 2 - 1... -
Page 8: Copy Performance
"Selection of copy start state" set to ON in the user programs (A4 (8-1/2" x 11"), paper fed from paper tray). The first-copy time may vary depending on machine operating conditions and ambient conditions such as temperature. AL-2020/2035/2040/2050/2060 SPECIFICATIONS 2 - 2... -
Page 9: Gdi Printer (Al-2020/2035/2040)
Button Manager / Sharpdesk / Composer Scan key/lamp Duplex scan Supported OS Win 98 / Me / 2000 / XP / Vista Void area No (User settable by PC) WHQL supported Yes *1 *1: By running change AL-2020/2035/2040/2050/2060 SPECIFICATIONS 2 - 3... -
Page 10: Spf (Al-2035/2040)
• Specifying the destination number functions operation be selected and • Resolution registered by user • Density when transmitting • Transmission start time • Polling receive • Cover addition setting • Send document scan system AL-2020/2035/2040/2050/2060 SPECIFICATIONS 2 - 4... - Page 11 Inch series: Letter (8.5" x 11")/Legal (8.5" x 14") (Default: Letter (8.5" x 11")) Document size specification Half-tone Half-tone 256 gradations reproduction Resolution selection Manual 5 steps Standard/Fine/Super Fine/Fine + Half-tone/Super Fine + Half-tone (Default: Standard) AL-2020/2035/2040/2050/2060 SPECIFICATIONS 2 - 5...
- Page 12 Redial is performed according to the setting of "Number/ (CED/ FSK signal are interval of resend in communication error." not detected) Communication error Long document Supports up to 500mm. When this length is exceeded, send function "PAPER JAM" occurs. AL-2020/2035/2040/2050/2060 SPECIFICATIONS 2 - 6...
- Page 13 Countermeasure against print inhibit state. function • No recording paper • Recording paper jam • During copy/print job • During printing by printer • Cover open • Paper empty, size error Forcible memory receive function Overtake output function AL-2020/2035/2040/2050/2060 SPECIFICATIONS 2 - 7...
- Page 14 Communication Report select • Send report list report list • Receive report list • Serial broadcast send report list • Image memory addition Print status select • ALWAYS PRINTS • ERROR ONLY • NEVER PRINTS AL-2020/2035/2040/2050/2060 SPECIFICATIONS 2 - 8...
- Page 15 3SEC/1SEC/NO BEEP (Communication end sound length) setting Last Sunday of March AM1:00 → 2:00, Auto summer Last Sunday of October AM1:00 → 0:00 time setting (Default: ON) Multi language Conforms to the main unit setting. function AL-2020/2035/2040/2050/2060 SPECIFICATIONS 2 - 9...
-
Page 16: Consumable Parts
Toner bottle x 10 AL-100RH Developer bottle x 10 Charging nozzle x 1 Toner cap x 10 DV blade x 10 C. SCA / SCNZ / Asia Subsidiary / Distributor (AL-2020/2035) Name Content Life Product name Package Develop cartridge (Black) -
Page 17: Environmental
40˚C (4) Supply storage condition Humidity (RH) Production control label attachment position –5˚C 45˚C Production control label attachment position(*1) *1: The production control label is not attached to the cartridge of a China product. AL-2020/2035/2040/2050/2060 CONSUMABLE PARTS 3 - 2... -
Page 18: External Views And Internal Structures
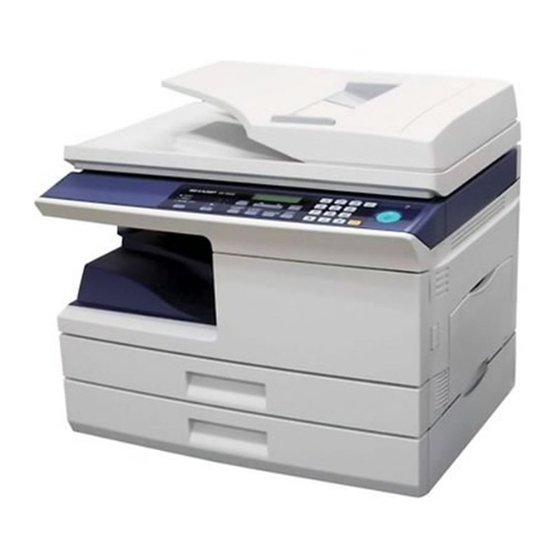
Paper output tray 10 Paper output tray extension Power switch Handle 13 Power cord 2. Internal TD cartridge Drum cartridge Front cover Side cover Fusing unit release lever Transfer charger Charger cleaner AL-2020/2035/2040/2050/2060 EXTERNAL VIEWS AND INTERNAL STRUCTURES 4 - 1... -
Page 19: Operation Panel
• When a print job is interrupted. • When reserving a copy job. • When toner is being replenished during a copy or print job. AL-2020/2035/2040/2050/2060 EXTERNAL VIEWS AND INTERNAL STRUCTURES 4 - 2... -
Page 20: Al-2050/2060
• When scanning an original that has been placed in the SPF, 4) Press the start ( ) key. only one original can be placed unless you are using Sharp- Scanning will start and the scanned data will be transferred desk. - Page 21 21 A checkmark " " appears when the exposure has been 22 FAX operation panel (AL-2060 only) changed, or when two-sided copying, sort, 2 IN 1, or margin shift is selected. AL-2020/2035/2040/2050/2060 EXTERNAL VIEWS AND INTERNAL STRUCTURES 4 - 4...
-
Page 22: Motors And Solenoids
Cassette Paper feed solenoid 1 Multi paper feed solenoid MPFS Multi manual pages feed solenoid SPF motor SPFM Drives the single pass feeder (AL-2035/2040) Duplex motor Devices the duplex paper transport section AL-2020/2035/2040/2050/2060 EXTERNAL VIEWS AND INTERNAL STRUCTURES 4 - 5... -
Page 23: Al-2050/2060
Duplex motor Devices the duplex paper transport section Shifter motor SFTM Drives the shifter. Reverse clutch SRVC Reverses the rotating direction of the roller. Paper feed solenoid (RSPF) SPUS Feeds paper. AL-2020/2035/2040/2050/2060 EXTERNAL VIEWS AND INTERNAL STRUCTURES 4 - 6... -
Page 24: Sensors And Switches
SPF sensor SPID/ Transmission sensor Paper entry detection "L" at paper pass (AL-2035/2040) SD SW Cover open/close detection SPPD sensor SPPD Transmission sensor Paper transport detection "L" at paper pass (AL-2035/2040) AL-2020/2035/2040/2050/2060 EXTERNAL VIEWS AND INTERNAL STRUCTURES 4 - 7... -
Page 25: Al-2050/2060
"H" at A4 size or less "L" at A4 size or more Paper sensor SPPD Transmission sensor Paper transport detection "H" paper empty Upper door open/close sensor SCOD Transmission sensor Cover open/close detection "L" open AL-2020/2035/2040/2050/2060 EXTERNAL VIEWS AND INTERNAL STRUCTURES 4 - 8... -
Page 26: Pwb Unit
LSU motor PWB For polygon motor drive TCS PWB For toner sensor control LSU PWB For laser control NIC PWB Network print control (AL-2040 only) Power PWB AC power input, DC voltage control AL-2020/2035/2040/2050/2060 EXTERNAL VIEWS AND INTERNAL STRUCTURES 4 - 9... -
Page 27: Al-2050/2060
LSU PWB For laser control NIC PWB Network print control FAX-operation PWB FAX operation input (AL-2060 only) Power PWB AC power input, DC voltage control Modem PWB FAX control (AL-2060 only) AL-2020/2035/2040/2050/2060 EXTERNAL VIEWS AND INTERNAL STRUCTURES 4 - 10... -
Page 28: Cross Sectional View
Picks up a sheet of paper from the cassette. Pickup roller Picks up documents. (AL-2035/2040) Separation roller Separates documents to feed properly. (AL-2035/2040) PS roller Feeds documents to the scanning section. (AL-2035/2040) Paper exit roller Discharges documents. (AL-2035/2040) AL-2020/2035/2040/2050/2060 EXTERNAL VIEWS AND INTERNAL STRUCTURES 4 - 11... -
Page 29: Al-2050/2060
Separates documents to feed properly. Upper transport roller Transports of a document. Paper exit roller Discharges documents. Lower transport roller Transports of a document. PS roller Feeds documents to the scanning section. AL-2020/2035/2040/2050/2060 EXTERNAL VIEWS AND INTERNAL STRUCTURES 4 - 12... -
Page 30: Unpacking And Installation
Be sure to allow the required space around the machine for servic- Software CD-ROM ing and proper ventilation. 20cm (8") 20cm (8") Drum cartridge (installed in unit) 10cm 10cm (4") (4") TD cartridge AL-2020/2035/2040/2050/2060 UNPACKING AND INSTALLATION 5 - 1... -
Page 31: Unpacking
Lock release button Lock Unlock To lock the scan head locking switch, hold up the catch in illus- tration (A) and turn the center knob counter-clockwise 90 degrees until you hear a click. AL-2020/2035/2040/2050/2060 UNPACKING AND INSTALLATION 5 - 2... -
Page 32: Loading Paper
*: The scanning feature can only be used with computers that are connected to the machine by a USB cable. If you are connected to the machine by a LAN connection, only the printer function can be used. AL-2020/2035/2040/2050/2060 UNPACKING AND INSTALLATION 5 - 3... -
Page 33: Before Installation
9) The files required for installation of the MFP driver are copied. Follow the on-screen instructions. When "The installation of the SHARP software is complete." appears, click the "OK" button. AL-2020/2035/2040/2050/2060 UNPACKING AND INSTALLATION 5 - 4... - Page 34 A message will appear instructing you to connect the machine to your computer. Click the "OK" button. Note: After the installation, a message prompting you to restart your computer may appear. In this case, click the "Yes" button to restart your computer. AL-2020/2035/2040/2050/2060 UNPACKING AND INSTALLATION 5 - 5...
- Page 35 Follow the on-screen instructions to click the "OK" button and then the "Search" button. If the machine is still not recognized, disable your computer’s firewall and then repeat the installation from the beginning. AL-2020/2035/2040/2050/2060 UNPACKING AND INSTALLATION 5 - 6...
- Page 36 "Continue Anyway" or "Yes". 6) When the "Finish" screen appears, click the "Close" button. 16) When "The installation of the SHARP software is complete." Note: After the installation, a message prompting you to restart appears, click the "OK" button.
-
Page 37: Setting Up Button Manager
3) In the "Properties" screen, click the "Events" tab. 4) Select "SC1:" from the "Select an event" pull-down menu. 6) Select "Sharp Button Manager O" in "Send to this application". 5) Select "Start this program" and then select "Sharp Button Man- ager O"... -
Page 38: Interface
5) Push the paper tray back into the unit. 6) Lock the scan head locking switch. Note: When shipping the unit, the scan head locking switch must be locked to prevent shipping damage. AL-2020/2035/2040/2050/2060 UNPACKING AND INSTALLATION 5 - 9... - Page 39 Align the edge of the mylar to the R part (the yellow line in the center of the raised part. diagram below) so that the hole of the metal plate is covered as much as possible. Stick the excessive part on the side. AL-2020/2035/2040/2050/2060 UNPACKING AND INSTALLATION 5 - 10...
- Page 40 Do not cover this hole. Align the edge of the cushion with Press the mylar with a sharp-pointed stick or something so that the edge of the metal plate. it is stuck correctly. AL-2020/2035/2040/2050/2060 UNPACKING AND INSTALLATION 5 - 11...
- Page 41 Stick the lower part of the cushion to the mylar, too. View from Back side Press the cushion with a sharp-pointed stick or something to fill the arrow A the gap between the mylar and the metal plate. Reference position Attach the cushion leaving 3 - 7mm from the edge.
-
Page 42: Copy Process
Waste toner box To face Synchronization Paper release Fusing Separation Transfer Manual feed down tray with drum Heat roller Electrode Transfer charger Cassette paper feed Transfer high Heater lamp voltage unit Print process Paper transport route AL-2020/2035/2040/2050/2060 COPY PROCESS 6 - 1... -
Page 43: Outline Of Print Process
A uniform negative charge is applied over the OPC drum surface Non-image area Image area by the main charging unit. Stable potential is maintained by means of the Scorotron charger. Positive charges are generated in the aluminum layer. About DC5.5KV ( 580V/ 400V) AL-2020/2035/2040/2050/2060 COPY PROCESS 6 - 2... - Page 44 It is transported to the waste toner collecting sec- tion in the cleaning unit by the waste toner transport roller. Toner is attracted over the shadowed area because of the develop- ing bias. AL-2020/2035/2040/2050/2060 COPY PROCESS 6 - 3...
- Page 45 Voltage added to the screen grid can be selected, high and low. To make it easily understood, the figure below shows voltage transi- tion at the developer unit. START STOP Print potential Toner attract Developing bias potential Drum potential High Time AL-2020/2035/2040/2050/2060 COPY PROCESS 6 - 4...
-
Page 46: Operational Descriptions
5) The LSU emits laser beams according to the print data. (Electrical signals are converted into photo signals.) 6) The laser beams are radiated through the polygon mirror and various lenses to the OPC drum. AL-2020/2035/2040/2050/2060 OPERATIONAL DESCRIPTIONS 7 - 1... -
Page 47: Scanner Section
473, the belt 190, and the shaft. Scanner motor Pulley gear Idle pulley Belt 473 Belt 190 Optical unit Shaft Idle gear Table glass AL-2020/2035/2040/2050/2060 OPERATIONAL DESCRIPTIONS 7 - 2... -
Page 48: Laser Unit
(Refer to the figure below.) Makes the laser scanning speeds at both ends of the drum same as each other. a ≠ b ≠ c d = e = f f θ LENS AL-2020/2035/2040/2050/2060 OPERATIONAL DESCRIPTIONS 7 - 3... -
Page 49: General Description
Level of the thermistor is controlled by the main PWB. Triac (in the power supply unit) With the signal from the main PWB, the triac is controlled on and off. (power supply PWB) AL-2020/2035/2040/2050/2060 OPERATIONAL DESCRIPTIONS 7 - 4... - Page 50 4) After more than half rotation of the pick-up roller, the paper feed latch is brought in contact with a notch on the clutch sleeve, stopping rotation of the pick-up roller. AL-2020/2035/2040/2050/2060 OPERATIONAL DESCRIPTIONS 7 - 5...
- Page 51 (Refer to 7-5 - 8.) paper feeding. 5) The solenoid turns off to close the gate and return to the initial state. MPFS MPFS AL-2020/2035/2040/2050/2060 OPERATIONAL DESCRIPTIONS 7 - 6...
-
Page 52: Process Unit New Drum Detection Mechanism
The RSPF (Reverse Single Path Feeder) is installed to the AL- 2050/2060 as a standard provision. It automatically copies up to 50 sheets of documents of a same size. (Only one set of copies) AL-2020/2035/2040/2050/2060 OPERATIONAL DESCRIPTIONS 7 - 7... -
Page 53: Document Transport Path And Basic Composition
4) When the OC cover is opened during document transport (dur- ing SPF motor rotation) (The SPF motor is stopped during doc- ument transport, but the OC cover open error occurs instead of the SPF JAM.) AL-2020/2035/2040/2050/2060 OPERATIONAL DESCRIPTIONS 7 - 8... -
Page 54: Spf/Rspf Open/Close Detection (Book Document Detection)
Note: When replacing the carriage unit, be sure to execute SIM41- If SIM41-06 is not executed, the carriage unit may not read the reference line on the white Mylar, preventing the docu- ment from being fed. AL-2020/2035/2040/2050/2060 OPERATIONAL DESCRIPTIONS 7 - 9... -
Page 55: Back Copy
Shift width: 2.5cm The offset function by the shifter is turned ON/OFF by the user pro- gram. According to the setting, offset operation is performed for every job. (Default: ON) AL-2020/2035/2040/2050/2060 OPERATIONAL DESCRIPTIONS 7 - 10... -
Page 56: Disassembly And Assembly
[8] DISASSEMBLY AND ASSEMBLY 2) Push up the lock pawls (2 positions) of the side cover, and remove the transfer charger. Before disassembly, be sure to disconnect the power cord Lock pawl rear for safety. 1. Do not disconnect or connect the connector and the harness while the machine is powered. -
Page 57: Charger Wire Replacement
2) Clean the TC front guide and the TC holder with alcohol. Charger wire 3) Set the charger cleaner to the transfer unit, and move it recipro- cally a few times in the direction of the arrow shown in the figure below. -
Page 58: Assembly Procedure
2) Remove the screws (4 pcs.), the harness, and the operation (AL-2050/2060) panel unit. 3) Remove four screws, and remove the operation cabinet. 4) Remove four screws, and remove the operation PWB. (AL-2020/2035/2040) C. Assembly procedure For assembly, reverse the disassembly procedure 3. Optical section A. List Part name Ref. - Page 59 2) Remove two screws, and remove the earth wire. 10) Move the carriage to the position indicated on the figure. 3) Disconnect the connector. 11) Loosen the screw which is fixing the tension plate. 4) Remove the SPF/RSPF unit. 12) Move the tension plate in the arrow direction to release the ten- sion, and remove the belt.
-
Page 60: Assembly Procedure
C. Assembly procedure 4. Fusing section CCD core A. List 1) Insert the CCD-MCU harness into the CCD PWB of the car- Part name Ref. riage unit. Thermistor 2) Attach the CCD-MCU harness to the duplex tape on the back PPD2 sensor surface of the carriage unit. - Page 61 4) Remove the screw and remove the U-turn guide. 7) Remove the plate spring on the right and remove the heater lamp. Pressure roller section disassembly 5) Remove the three screws, remove the fusing cover lower on the Heater lamp right side, and open the heat roller section.
- Page 62 Grease: "JFE552" UKOG-0235FCZZ Pressure roller 8) Remove two screws and remove the thermo unit. Note: The set temperature of the thermostat differs from that of the current model. Temperature Current model 210°C AL-2020/2035/2040/2050/2060 230°C AL-2030/2040CS/2050CS DISASSEMBLY AND ASSEMBLY 8 - 7...
-
Page 63: Assembly Procedure
2) Remove two screws, and remove the hinge guide R. 3) Disconnect the connector. (2 positions) 4) Remove five screws, and remove the scanner unit. 5) Remove the fan duct. C. Assembly procedure For assembly, reverse the disassembly procedure. 6) Remove the connector and the screw, and remove the speaker 5. - Page 64 9) Remove each connector and four screws, and remove the MCU 11) Remove two springs and open the intermediate frame unit. PWB. (The shape of the MCU PWB differs depending on the (AL-2020/2035/2040) model.) 10) Remove the PWB insulation mylar and remove the paper trans- port detection sensor (POD).
- Page 65 14) Remove the pulleys on the both sides and remove the paper 18) Remove the harness guide. exit roller. (AL-2020/2035/2040) 19) Remove two screws and remove the toner motor. 15) Disengage the pawl, and remove the roller knob. 16) Disengage the pawl, and shift the pulley and the bearing.
- Page 66 21) Remove five screws and the grounding wire, and remove the 23) Remove four screws, and remove the paper guide unit. main drive unit. (AL-2020/2035/2040) 24) Remove four screws, and remove the lower paper guide unit. (AL-2050/2060) [Note for installation] Fit the lower paper guide hole (a) with the shifter gear hole (b) so that the black resin (c) of the shifter unit can be checked.
- Page 67 25) Put the lower paper guide unit upside down, remove two 30) Remove four screws, and remove the LSU unit. screws, and remove the shifter motor. (AL-2050/2060) 26) Remove the screw, and remove the grounding plate and the [Note for assembling the LSU] gear.
- Page 68 31) Remove the screw, slide the left cabinet to the left to detach it. 34) Remove the screw and the E-ring, and remove the PS semi-cir- cular earth plate and the PS roller unit. Remove each pawl, and remove the paper exit tray. 35) Remove the E-ring and remove the spring clutch from the PS roller unit.
-
Page 69: Assembly Procedure
6. Manual paper feed section 37) Remove the screw and the connector, and remove the PPD1 sensor PWB. A. List Part name Ref. Manual transport roller Cassette detection switch Side door detection unit B. Disassembly procedure Multi unit 1) Remove the screw and remove the multi upper cover. 38) Remove two E-rings and remove the paper feed roller. - Page 70 2) Remove the screw and remove the side door detection unit. 4) Remove two screws and remove the multi feed bracket unit from the multi paper feed upper frame. Back Wire treatment 3) Remove three screws and remove the multi paper feed upper frame.
-
Page 71: Assembly Procedure
D. Pressure plate holder attachment 6) Remove the pick-up roller. 1) Attach the pressure plate holder so that the resin section is not covered with the seal M1-N. Seal M1-N Pressure plate holder Attachment reference 7) Cut the binding band and remove the multi paper feed solenoid. Attachment reference 7. - Page 72 2) Remove the connector and the screw, and remove the speaker 7) Remove two screws and one harness, and remove the main unit. (AL-2060 only) motor. 3) Remove the connector. 4) Remove four screws, and remove the FAX PWB unit. (AL-2060 only) 8) Remove two screws and one connector, and remove the exhaust fan motor.
-
Page 73: Assembly Procedure
B. Disassembly procedure 11) Disconnect the connector. 12) Remove the three screws, and remove the NIC PWB unit. 1) Disconnect each connector. (AL-2040/2050/2060) 2) Remove the screw, and remove the earth line. 3) Remove two screws, and remove the power PWB unit. 13) Disconnect the connectors. -
Page 74: Reverse Roller Section
10. Reverse roller section 11. RSPF section (AL-2050/2060) A. List A. Front cabinet, rear cabinet (1) Open the upper door unit. Part name Ref. Reverse roller B. Disassembly procedure 1) Remove four screws. 2) Remove the spring, and the earth wire. 3) Remove the reverse unit. -
Page 75: Document Tray Unit
C. Document tray unit (2) Paper exit roller removal 1) Remove the E-ring. 1) Release the shaft on the front side. 2) Slide the bearing. 2) Remove the tray unit. 3) Remove the paper exit roller. 4) Remove the E-ring. 5) Remove the bearing. -
Page 76: Shutter Solenoid
G. Shutter solenoid 8) Remove four screws. 9) Remove the transport unit. (1) Shutter solenoid unit removal 1) Remove the harness from the edge saddle. 2) Remove one screw. 3) Remove the shutter solenoid unit. Note for reassembly Before assembly, be sure to check that the harness is passed Note for reassembly through the rib. -
Page 77: Pickup Roller, Take-Up Roller
H. Pickup roller, take-up roller (4) Pickup roller removal 1) Disengage one pawl. (1) Paper feed unit removal 2) Remove the pickup drive gear from the pickup roller. 1) Remove the E-ring. 2) Slide the bearing. 3) Remove the stopper arm. 4) Release the paper feed shaft pressure release spring. -
Page 78: Ps Roller
(3) Paper empty sensor removal (3) Scan plate removal 1) Disconnect one connector. 1) Remove the scan plate. 2) Remove the paper empty sensor. (4) PS roller removal 1) Remove the PS roller. J. PS roller (1) Parts removal 1) Remove the gear. 2) Remove the pulley. -
Page 79: Paper Sensor
(2) Upper transport roller removal (2) Lower transport roller removal 1) Remove the upper transport roller. 1) Remove the E-ring. 2) Remove the gear. 3) Remove the bearing. 4) Remove the lower transport roller. L. Paper sensor 1) Disconnect one connector. 2) Remove the paper sensor. -
Page 80: Spf Section (Al-2035/2040)
12. SPF section (AL-2035/2040) 1) Remove the screw, and remove the harness. 2) Remove three screws. Part name Ref. 3) Disengage the pawl (4 positions). SPF motor 4) Remove the transport unit. Pick-up roller, paper feed roller Paper exit roller Set sensor, scan front sensor Transport roller (1) Rear cabinet disassembly... -
Page 81: Pick-Up Roller, Paper Feed Roller
B. Pick-up roller, paper feed roller 1) Remove the pick-up roller. 2) Remove the gear. 1) Remove two gears. C. Paper exit roller 1) Remove four gears. 1) Open the upper door. 2) Remove two screws. 2) Remove two E-rings, and remove the spring, the arm, and the 3) Remove the frame. -
Page 82: Set Sensor, Scan Front Sensor
D. Set sensor, scan front sensor 1) Remove the set sensor. 2) Remove the scan front sensor. 3) Disconnect the connectors. ∗ When assembling, attach the blue harness to the marking B side of the sensor, and attach the orange harness to the opposite side sensor. -
Page 83: Adjustments
4) Measure the length of the copied scale image. 2) When the main PWB is replaced. 3) When the EEPROM in the main PWB is replaced. 4) When "U2" trouble occurs. b. Necessary tools • Scale AL-2020/2035/2040/2050/2060 ADJUSTMENTS 9 - 1... -
Page 84: Image Position Adjustment
Repeat procedures 1) - 8) until the sub scanning direction actual copy magnification ratio in 100% copying is within the specified range. When the set value is changed by 1, the magnification ration is changed by 0.1%. AL-2020/2035/2040/2050/2060 ADJUSTMENTS 9 - 2... -
Page 85: Print Start Position
(PHOTO lamp ON) (C) to 0, and make a copy of a scale at Scale image 100%. (AL-2020/2035/2040) For the AL-2050/2060, the following LED’s are lighted: • AE lamp/COPY mode lamp: (A) Paper rear edge • TEXT lamp/PRINT mode lamp: (B) • PHOTO lamp/SCAN mode lamp: (C) AL-2020/2035/2040/2050/2060 ADJUSTMENTS 9 - 3... -
Page 86: Copy Density Adjustment
CCD which scan the reference lines (F/R) on the back of center brightness is made. document guide, there is no need to adjust manually. Manual T/S mode Brightness 5 steps. Adjustment of only the center brightness is made. T/S Auto mode Brightness 1 step only AL-2020/2035/2040/2050/2060 ADJUSTMENTS 9 - 4... -
Page 87: Copy Density Adjustment Procedure
(14" x 8 1/2") white paper on the test chart and close the docu- SCAN mode lamp ment cover. 3) Make a copy. Check the adjustment level (shown in the above table) of the exposure test chart (Sharp Gray Scale). Sharp Gray Scale adjustment level Non toner save mode White paper Slightly copied. -
Page 88: Dv Bias Check
1) Paper trailing edge void quantity 50-19 (TEXT) This adjustment is made when the cassette paper size is rec- 5 10 ognized. The trailing edge void quantity can be adjusted by changing the trailing edge image laser OFF timing. AL-2020/2035/2040/2050/2060 ADJUSTMENTS 9 - 6... -
Page 89: Spf/Rspf Scan Position Automatic Adjustment
1 of setting represents 0.1 mm in void area. (2) Print start position (Duplex back surface) 1) Set the test chart so that the scale is positioned as shown below. Scale (S-D mode) 6cm or more is required. AL-2020/2035/2040/2050/2060 ADJUSTMENTS 9 - 7... -
Page 90: Spf/Rspf Mode Sub Scanning Direction Magnification Ratio Adjustment
*** OK Sub scanning At normal: 48-5 Add 1: 1 – 99 direction ±1.0% 0.1% increase 3) In case of an error magnification ratio Reduce 1: 63-02 BLACK LEVEL (SPF/RSPF mode) 0.1% decrease *** ERR AL-2020/2035/2040/2050/2060 ADJUSTMENTS 9 - 8... -
Page 91: Simulation, Trouble Codes
SPF/RSPF sensor status display Transfer ON timing control setup (excluding AL-2020) Side void setup SPF/RSPF Motor ON (excluding AL-2020) γ life correction setting Resist clutch ON (SPF) (AL-2035/2040) Energy-save mode copy lamp setup AL-2020/2035/2040/2050/2060 SIMULATION, TROUBLE CODES 10 - 1... -
Page 92: Descriptions Of Various Simulations
01-01 SCAN CHK 01-01 SCAN CHK - 100% + 78% + EXECUTING... - 78% + 2) [ ] key 01-01 SCAN CHK 99% + 2) [ ] key 01-01 SCAN CHK - 101% + AL-2020/2035/2040/2050/2060 SIMULATION, TROUBLE CODES 10 - 2... - Page 93 The RSPF paper feed solenoid (SPUS) repeats ON for 500ms and OFF for 500ms 20 times by (AL-2050/2060) the use of the solenoid drive control Bios. [Operation] (AL-2050/2060) 1) Initial display 02-08 SPF SPUS CHK EXECUTING... AL-2020/2035/2040/2050/2060 SIMULATION, TROUBLE CODES 10 - 3...
- Page 94 When [OK]/[START] key is pressed, the fusing lamp repeats ON for 500ms and OFF for 500ms 5 times. During this period, the cooling fan motor rotates. [Operation] (AL-2050/2060) 1) Initial display 05-02 HT LAMP CHK EXECUTING... AL-2020/2035/2040/2050/2060 SIMULATION, TROUBLE CODES 10 - 4...
- Page 95 3sec, and copying is executed again to make the set quantity of copies. These operations are repeated. To cancel the simulation, turn off the power or execute a simulation which executes hardware reset. [Operation] (AL-2050/2060) 1) Initial display (Basic display of copy) READY TO COPY 100% AL-2020/2035/2040/2050/2060 SIMULATION, TROUBLE CODES 10 - 5...
- Page 96 Use the duplex motor Bios to drive the duplex motor in the reverse direction for 30sec. After completion of this process, the machine goes into the sub code entry standby mode. [Operation] (AL-2050/2060) 1) Initial display 09-02 DPLX ROT.REV. EXECUTING... AL-2020/2035/2040/2050/2060 SIMULATION, TROUBLE CODES 10 - 6...
- Page 97 012 → Blank → 345 → Blank → 012 0.7s 0.3s 0.7s 1.0s 0.7s Total counter display [Function] The total counter value is displayed. [Operation] AL-2050/2060 AL-2020/2035/2040 1) Initial display The operation is similar to simulation 22-04. 22-05 TTL CNT ***,*** AL-2020/2035/2040/2050/2060 SIMULATION, TROUBLE CODES 10 - 7...
- Page 98 The count value is displayed in 3 digits X 2 times repeatedly. 22-16 DPLX CNT <Display example: 12345> ***,*** 012 → Blank → 345 → Blank → 012 0.7s 0.3s 0.7s 1.0s 0.7s AL-2020/2035/2040/2050/2060 SIMULATION, TROUBLE CODES 10 - 8...
- Page 99 When [OK]/[START] key is pressed, the SPF/RSPF counter value is cleared to 0 and "000,000" is displayed on the LCD/display. [Operation] AL-2050/2060 AL-2035/2040 1) Initial display The operation is similar to simulation 22-04. 24-04 SPF CLR. CLEARED 000,000 AL-2020/2035/2040/2050/2060 SIMULATION, TROUBLE CODES 10 - 9...
- Page 100 When [OK]/[START] key is pressed, the SPF/RSPF JAM total counter value is cleared to 0, and (excluding AL-2020) "000,000" is displayed on the LCD/display. [Operation] AL-2050/2060 AL-2035/2040 1) Initial display The operation is similar to simulation 22-04. 24-14 S JAM TTL CLR. CLEARED 000,000 AL-2020/2035/2040/2050/2060 SIMULATION, TROUBLE CODES 10 - 10...
- Page 101 When this simulation is executed, the current set duplex is displayed. Enter the code number corresponding to the desired duplex and press [OK]/[START] key to save the setting. Code number Duplex Display item Duplex NO Duplex YES [Operation] The operation is similar to simulation 26-02. AL-2020/2035/2040/2050/2060 SIMULATION, TROUBLE CODES 10 - 11...
- Page 102 When the simulation is executed, the currently installed SDRAM of the main unit is displayed. Code number Setting Remark 8 MBYTE 16 MBYTE [Operation] (AL-2050/2060) 1) Memory capacity display 26-39 MEM.CHK 8 MBYTE AL-2020/2035/2040/2050/2060 SIMULATION, TROUBLE CODES 10 - 12...
- Page 103 B-REAR 0 - 21 Back surface paper rear edge B-END 1 - 99 <Paper lead edge adjustment table> is the same as that of the AL-2020/2035/2040 above. <Front/back surface of paper rear edge adjustment table> Code Setting Remark –98 msec .
- Page 104 ∗ Since the manual paper feed sensor is a single bypass sensor, its status is not displayed. ∗ The width sensor is available only in the FAX models. [Operation] (AL-2050/2060) 1) Initial display 2) When sensor ON 30-01 P-SENSOR 30-01 POD PPD1 PPD2 DRST AL-2020/2035/2040/2050/2060 SIMULATION, TROUBLE CODES 10 - 14...
- Page 105 [START] key. The setting is saved and the display is shifted to the sub code input standby menu. Setting range: 0 – 99 (Copes with margin 0 – 99 pixels.) Default: 30 (30 pixels) [Operation] The operation is similar to simulation 9-04. AL-2020/2035/2040/2050/2060 SIMULATION, TROUBLE CODES 10 - 15...
-
Page 106: Main Cassette Paper Feed
PHOTO mode lamp Manual paper feed (small-size) MFT SH AE mode lamp TEXT mode lamp ∗ The cassette feed and the manual feed are controlled similarly. [Operation] The operation is similar to simulation 43-01. AL-2020/2035/2040/2050/2060 SIMULATION, TROUBLE CODES 10 - 16... - Page 107 [OK]/[START] key to save it to the EEPROM. The machine goes to the sub code entry standby mode. Code Set temperature (°C) Remark Default [Operation] The operation is similar to simulation 43-01. AL-2020/2035/2040/2050/2060 SIMULATION, TROUBLE CODES 10 - 17...
- Page 108 TEXT mode lamp (600dpi) SCAN mode lamp PHOTO mode lamp TS mode (AE) (600dpi) TSAE COPY mode lamp AE mode lamp SCAN mode lamp PHOTO mode lamp [Operation] The operation is similar to simulation 46-01. AL-2020/2035/2040/2050/2060 SIMULATION, TROUBLE CODES 10 - 18...
- Page 109 FAX side.) PRINT 2) Enter a 2-digit value as the exposure After completion of printing, returns to “2)” adjustment value with [Numeric] key. display. ADJUST EXP. FINE ("YY" is the entered exposure adjustment value.) AL-2020/2035/2040/2050/2060 SIMULATION, TROUBLE CODES 10 - 19...
- Page 110 PHOTO mode lamp TS mode (AE) (300dpi) TSAE COPY mode lamp AE mode lamp SCAN mode lamp PHOTO mode lamp * No density display on LCD/display. [Operation] The operation is similar to simulation 46-01. AL-2020/2035/2040/2050/2060 SIMULATION, TROUBLE CODES 10 - 20...
- Page 111 When the set value is increased, copy becomes darker. When the set value is decreased, copy becomes lighter. (Adjustment range: 1 – 99) Display item Display lamp Mode Default Remark (AL-2050/2060) (AL-2035/2040) RSPF/SPF TEXT mode lamp [Operation] The operation is similar to simulation 46-01. AL-2020/2035/2040/2050/2060 SIMULATION, TROUBLE CODES 10 - 21...
- Page 112 TEXT mode lamp SCAN mode lamp PHOTO mode lamp TS mode (AE) TSAE COPY mode lamp AE mode lamp SCAN mode lamp PHOTO mode lamp [Operation] The operation is similar to simulation 46-01. AL-2020/2035/2040/2050/2060 SIMULATION, TROUBLE CODES 10 - 22...
- Page 113 1: STD 2: FINE 3: S-FINE 4: FINE/PHOTO 5: S-FINE/PHOTO When initializing each data: 1 [Operation] 1) Initial display 4) Enter a one-digit value (0-2) as the sharp- ness adjustment value with [Numeric] SHARPNESS SETTING key. ← → PRESS SHARPNESS SETTING...
- Page 114 PRINT mode — ratio adjustment on the lamp back surface of RSPF document (AL-2050/ 2060) * When there is no document in SPF/RSPF, copy is inhibited. [Operation] The operation is similar to simulation 46-01. AL-2020/2035/2040/2050/2060 SIMULATION, TROUBLE CODES 10 - 24...
- Page 115 To enter the download mode, there is a method to use key operations as well as to use a simu- lation. With the power OFF, press and hold [Clear All] key + [ ] key, turn on the power. [Operation] (AL-2050/2060) 1) Initial display DOWNLOAD MODE AL-2020/2035/2040/2050/2060 SIMULATION, TROUBLE CODES 10 - 25...
- Page 116 Image loss, R = 4mm void amount is regarded as 0.) ∗ The SPF/RSPF adjustment is made by adjusting the SPF/RSPF image scan start position after OC 10mm adjustment. [Operation] The operation is similar to simulation 46- AL-2020/2035/2040/2050/2060 SIMULATION, TROUBLE CODES 10 - 26...
-
Page 117: Print Center Offset (Manual Paper Feed)
* In the 2nd print center offset adjustment, print is made forcibly as 1to2/Short Edge from OC regardless of duplex setting. * When paper is discharged, the shifter is operated. [Operation] The operation is similar to simulation 46-01. AL-2020/2035/2040/2050/2060 SIMULATION, TROUBLE CODES 10 - 27... - Page 118 * The initial value of duplex setting is "1to2/Long Edge" for the duplex model, or "2to1" for the simplex model. ∗ When paper is discharged, the shifter is operated. [Operation] The operation is similar to simulation 46-01. AL-2020/2035/2040/2050/2060 SIMULATION, TROUBLE CODES 10 - 28...
-
Page 119: (Main Cassette Paper Feed)
Main cassette lamp (AL-2050/2060) Duplex back surface DUP-2 PRINT mode lamp TEXT mode lamp SCAN mode lamp PHOTO mode lamp Main cassette lamp Main cassette lamp [Operation] (AL-2050/2060) The operation is similar to simulation 46-01. AL-2020/2035/2040/2050/2060 SIMULATION, TROUBLE CODES 10 - 29... - Page 120 CCD which is not corrected is detected and the value is displayed in deci- mal values on the LCD/display. (3 digits) [Operation] (AL-2050/2060) 1) Initial display 63-01 SHADING CHK EXECUTING... AL-2020/2035/2040/2050/2060 SIMULATION, TROUBLE CODES 10 - 30...
- Page 121 [START] key. The entered value is stored and the machine goes into the sub code entry standby mode. Setting range: 0 – 99 (Complying with the light quantity stable wait time of 0 – 99sec.) Default: 15 (15sec) [Operation] The operation is similar to simulation 9-04. AL-2020/2035/2040/2050/2060 SIMULATION, TROUBLE CODES 10 - 31...
- Page 122 After 2sec, returns to "1) Initial display". FAX soft SW initializing [Function] (excluding the adjustment Use to initializing FAX soft SW. values) (AL-2060 only) [Operation] 1) Initial display INITIALIZED After 2sec, FAX control is terminated. AL-2020/2035/2040/2050/2060 SIMULATION, TROUBLE CODES 10 - 32...
- Page 123 1:NO SIGNAL 35:LINE ON HOOK ∗ [Clear] key: FAX control is terminated. 3) [OK] key Send after setting OUTPUTING SIGNAL MAX PRESS CLEAR TO STOP ∗ [Clear] key: Returns to "1) Initial display". AL-2020/2035/2040/2050/2060 SIMULATION, TROUBLE CODES 10 - 33...
- Page 124 CLEAR IMAGE MEMORY After completion of memory clear, the buzzer After completion of memory clear sounds. CLEARED CLEARED PLEASE POWER OFF After 2sec, FAX control is terminated. Remains unchanged until the power is turned off. AL-2020/2035/2040/2050/2060 SIMULATION, TROUBLE CODES 10 - 34...
- Page 125 SELECT SIGNAL (1-6) ..SELECT SIGNAL (1-6) 1:NO SIGNAL 6:00001 ∗ [Clear] key: FAX control is terminated. 3) [OK] key OUTPUTING SIGNAL SSW PRESS CLEAR TO STOP ∗ [Clear] key: Returns to "1) Initial display". AL-2020/2035/2040/2050/2060 SIMULATION, TROUBLE CODES 10 - 35...
- Page 126 ∗ [Clear] key: FAX control is terminated. PRESS CLEAR TO STOP ∗ [Clear] key: Returns to "1) Initial display". 2) [Numeric] key: Input The content selected with signal send level selection is set inside. AL-2020/2035/2040/2050/2060 SIMULATION, TROUBLE CODES 10 - 36...
- Page 127 Use to check the TEL/LIU status change. [Operation] 1) Initial display HS2 :xxx HS1 :xxx RHS :xxx EXHS:xxx ↑ The display is switched every 2sec. ↓ CHECKING PRESS CLEAR TO STOP ∗ [Clear] key: FAX control is terminated. AL-2020/2035/2040/2050/2060 SIMULATION, TROUBLE CODES 10 - 37...
- Page 128 ] key is pressed, the sequence is reversed. SELECT (1-4) SELECT (1-4) ..1:NO SOUND 2:LOW ∗ [Clear] key: FAX control is terminated. 3) [OK] key STORED xxx: Set content After 2sec, FAX control is terminated. AL-2020/2035/2040/2050/2060 SIMULATION, TROUBLE CODES 10 - 38...
- Page 129 When this simulation is executed, the currently set code number is displayed. Enter the code number corresponding to the adjustment value, and press [START] key to change the setting. Code number Setting Speed ↑ Fast FAST NORMAL1 NORMAL2 ↓ Slow SLOW AL-2020/2035/2040/2050/2060 SIMULATION, TROUBLE CODES 10 - 39...
-
Page 130: Trouble Codes
CCD unit abnormality remedy terminated, it may cause an error. Download MCU PWB abnormality the program again to avoid this. Check Check connection of the CCD unit flat cable. Check the CCD unit. remedy AL-2020/2035/2040/2050/2060 SIMULATION, TROUBLE CODES 10 - 40... - Page 131 Fusing section connector disconnection The fusing unit is not installed. Check Check the harness and the connector between the thermistor and the PWB. remedy Use SIM 14 to clear the self diagnostic display. AL-2020/2035/2040/2050/2060 SIMULATION, TROUBLE CODES 10 - 41...
- Page 132 MCU PWB abnormality Check Use SIM 25-01 to check the main motor operations. remedy Check connection of the main motor harness/connector. Replace the main motor. Replace the MCU PWB. AL-2020/2035/2040/2050/2060 SIMULATION, TROUBLE CODES 10 - 42...
-
Page 133: Fax Communication Error Codes (Al-2060 Only)
Reception length The length of reception data over of one page exceeds the range during reception. Communication Communication enable (OK) before transmission Document error A document jam during direct transmission (Image quality error) AL-2020/2035/2040/2050/2060 SIMULATION, TROUBLE CODES 10 - 43... - Page 134 PPS-PRI-Q V.8 Phase-1 V.8 Phase-1 V.8 Phase-2 V.8 Phase-2 V.8 Phase-3 V.8 Phase-3 (Note) For error codes 16 – 31, V.34 mode communication. <Error codes 1> Error codes 1 are fixed to “00”. AL-2020/2035/2040/2050/2060 SIMULATION, TROUBLE CODES 10 - 44...
-
Page 135: User Program
*1 → 300dpi, 2 → 600dpi Resolution of AUTO & MANUAL mode 1 → YES, *2 → NO Reset factory *1 → ON, 2 → OFF Prevention of OC copies when the SPF is up function AL-2020/2035/2040/2050/2060 USER PROGRAM 11 - 1... -
Page 136: User Programs (Al-2050/2060)
• If the memory fills up when two-sided copying is performed, "NORMAL" can MODE 2: NORMAL be selected to make copying possible. However, "NORMAL" results in a slower copying speed. Normally "HI-SPEED" is selected to enable fast two- sided copying. AL-2020/2035/2040/2050/2060 USER PROGRAM 11 - 2... - Page 137 • Set the temperature of the fusing unit when the bypass tray is used. Normally 2: HEAVY PAPER "PLAIN PAPER" should be selected. DISPLAY 1: LIGHTER • Set the contrast of the display. CONTRAST 2: LIGHT 3: NORMAL 4: DARK 5: DARKER AL-2020/2035/2040/2050/2060 USER PROGRAM 11 - 3...
-
Page 138: Print Mode
(excluding the bypass tray). The function can be disabled. * The scanning speed increases when the USB 2.0 mode is set to "HI-SPEED", however, the printing speed does not increase considerably. AL-2020/2035/2040/2050/2060 USER PROGRAM 11 - 4... -
Page 139: Fax Soft Switch
Reception print Paper selection Automatic reduction print User program SW 24-8 When reduction print is not made Index Index print setup User program SW 32-6 When an index is attached to the reception data AL-2020/2035/2040/2050/2060 FAX SOFT SWITCH 12 - 1... -
Page 140: Soft Switch List
0 Refer to User program “RECALL INTERVAL Bit No. 5 6 7 8 (BUSY)”. Set range 1 to 15min 3min When a value outside the set range is set, the initial value is set. AL-2020/2035/2040/2050/2060 FAX SOFT SWITCH 12 - 2... - Page 141 Binary input 0 When a value outside number the set range is set, Bit No. 3 4 5 6 7 8 the initial value is set. Set range Pattern No. 1 to 35 AL-2020/2035/2040/2050/2060 FAX SOFT SWITCH 12 - 3...
- Page 142 Ringing volume Bit No. Refer to User program “RINGER VOLUME”. Silent Small Medium Medium Large Speaker volume in DTMF Bit No. send Not used Small Medium Medium Large Inhibited to use Inhibited to use AL-2020/2035/2040/2050/2060 FAX SOFT SWITCH 12 - 4...
- Page 143 0: No ECM JBIG mode (in SG3) 1: Yes 0: No Inhibited to use Inhibited to use Recording table automatic 1: Yes 0: No Refer to User program print “AUTO LISTING”. Inhibited to use AL-2020/2035/2040/2050/2060 FAX SOFT SWITCH 12 - 5...
- Page 144 1 2 3 4 Set range 0 to 15% Transmission end sound Bit No. When a value outside tone the set range is set, 550Hz 1000Hz the initial value is set. 1000Hz 1700Hz AL-2020/2035/2040/2050/2060 FAX SOFT SWITCH 12 - 6...
- Page 145 Inhibited to use Default data, sender print 1: ON 0: OFF Inhibited to use Date/sender print position 1: Inside of document 0: Outside of document Outside of setup document Inhibited to use AL-2020/2035/2040/2050/2060 FAX SOFT SWITCH 12 - 7...
- Page 146 0 0 0 Signal send level Binary input 1 1 1 Max. Bit No. 5 6 7 8 0 0 0 –8dBm Set range 0 (0dBm) to 15 (–15dBm) 0 0 0 0 0 0 AL-2020/2035/2040/2050/2060 FAX SOFT SWITCH 12 - 8...
- Page 147 Bit No. 1 2 3 4 5 6 7 8 (LINE ERROR)”. Set range 0 to 5 times When a value outside 1 times the set range is set, the initial value is set. AL-2020/2035/2040/2050/2060 FAX SOFT SWITCH 12 - 9...
- Page 148 “DATE&TIME FORMAT SET”. Scan effective image area Binary input main scan right edge Bit No. 5 6 7 8 96 dots image loss (RSPF) Set range 0 to 360 dots 24 dots interval AL-2020/2035/2040/2050/2060 FAX SOFT SWITCH 12 - 10...
- Page 149 3 4 5 6 7 8 1 1 1 number the initial value is set. Set range Pattern No. 1 to 35 0 0 0 0 0 0 0 0 0 0 0 0 AL-2020/2035/2040/2050/2060 FAX SOFT SWITCH 12 - 11...
- Page 150 0 to 240 lines 16 lines interval CI signal OFF detection Binary input enable time Bit No. 1 2 3 4 5 6 7 Set range 0 to 1270ms 10ms unit 1200ms Inhibited to use AL-2020/2035/2040/2050/2060 FAX SOFT SWITCH 12 - 12...
- Page 151 Scan effective image area Binary input sub scan rear edge image Bit No. 5 6 7 8 144 lines loss (RSPF back surface) Set range 0 to 240 lines 16 lines interval Inhibited to use AL-2020/2035/2040/2050/2060 FAX SOFT SWITCH 12 - 13...
- Page 152 33ms (A/C) Set range 26 to 41ms 41ms (B) 1 1 1 by increment of 1ms 1 1 1 Inhibited to use 0 0 0 0 0 0 0 0 0 0 0 0 AL-2020/2035/2040/2050/2060 FAX SOFT SWITCH 12 - 14...
- Page 153 1: 6 times 0: 7 times 6 times Inhibited to use CNG send start Bit No. When a value outside the set range is set, 0.5sec 0.5sec the initial value is set. 1.0sec 1.5sec AL-2020/2035/2040/2050/2060 FAX SOFT SWITCH 12 - 15...
- Page 154 1: – 0: + adjustment (sub scan) flag Scan magnification ratio Binary input adjustment (RSPF sub Bit No. 2 3 4 5 6 7 8 scan) Set range 0 to ±12.7% 0.1% interval AL-2020/2035/2040/2050/2060 FAX SOFT SWITCH 12 - 16...
- Page 155 LETTER 0 0 0 1 SIZE LEGAL 0 0 1 0 PRIORITY”. 0 0 1 1 When a value outside the set range is set, the initial value is set. Inhibited to use AL-2020/2035/2040/2050/2060 FAX SOFT SWITCH 12 - 17...
- Page 156 3 4 5 6 7 8 the initial value is set. Set range Pattern No. 1 to 35 Inhibited to use Inhibited to use Inhibited to use Inhibited to use Inhibited to use Inhibited to use AL-2020/2035/2040/2050/2060 FAX SOFT SWITCH 12 - 18...
- Page 157 1: Enable 0: Disable enable in V.34 Enable communicate Symbol speed 2743 1: Enable 0: Disable enable in V.34 Enable communicate Inhibited to use Inhibited to use Inhibited to use Inhibited to use AL-2020/2035/2040/2050/2060 FAX SOFT SWITCH 12 - 19...
- Page 158 24 dots interval Scan effective image area Binary input main scan right edge Bit No. 5 6 7 8 96 dots image loss (OC) Set range 0 to 360 dots 24 dots interval AL-2020/2035/2040/2050/2060 FAX SOFT SWITCH 12 - 20...
- Page 159 (RSPF back surface sub scan) flag Scan magnification ratio Binary input adjustment (RSPF back Bit No. 2 3 4 5 6 7 8 surface sub scan) Set range 0 to ±12.7% 0.1% interval AL-2020/2035/2040/2050/2060 FAX SOFT SWITCH 12 - 21...
-
Page 160: Soft Switch Descriptions
Used to set the size specification (AB series, inch series). Default: 1 (Yes) Under setting of "Follow information from machine," when command information from the machine is uncertain, set this item to AB series. Default: 0 1 (Conforms to the machine information.) AL-2020/2035/2040/2050/2060 FAX SOFT SWITCH 12 - 22... - Page 161 SW7 No.6 Max. length of reception Used to set whether registered sender's telephone number can be Used to set max. length of reception for long document. changed or not. Default: 0 (1.5m) Default: 0 (Allow) AL-2020/2035/2040/2050/2060 FAX SOFT SWITCH 12 - 23...
- Page 162 Setting is made in binary input. Default: 0 0 (No fixing) Default: 6sec SW16 No.7, No.8 Inhibited to use SW22 No.1–No.8 Inhibited to use SW17 No.1 Inhibited to use SW23 No.1–No.8 Inhibited to use AL-2020/2035/2040/2050/2060 FAX SOFT SWITCH 12 - 24...
- Page 163 Used to set the number of calls to switch to auto receive in manual Used to set whether duplex print of received data is made or not. receive mode. Default: 0 (No) When set to 0, switch to auto receive is not made. Default: 0 time AL-2020/2035/2040/2050/2060 FAX SOFT SWITCH 12 - 25...
- Page 164 Used to set DTMF signal send time. Used to set whether FAST function is enabled or not. Setting is made in binary input by the increment of 10ms. Default: 0 (No) Default: 80ms AL-2020/2035/2040/2050/2060 FAX SOFT SWITCH 12 - 26...
- Page 165 Used to set whether external telephone is used or not. When set to 0, RTN reception is judged as an error. This switch must be set to YES in order to use external telephone. Default: 0 (Error) Default: 1 (Yes) AL-2020/2035/2040/2050/2060 FAX SOFT SWITCH 12 - 27...
- Page 166 SW67 No.1–No.4 Make time (10PPS) setup SW57 No.2 Sharp machine mode Used to set make time in dialing in 10PPS. Used to set whether communication is made in Sharp machine Setting is made in binary input in the increment of 1ms. mode or not.
- Page 167 The void amount on the lead edge in the sub scan direction can be adjusted. When the set value is increased, the void amount on the lead edge is increased. Setting is made in binary input in the increment of 16 lines. Default: 32 lines AL-2020/2035/2040/2050/2060 FAX SOFT SWITCH 12 - 29...
- Page 168 Image loss on the left edge in OC main scan direction can be Default: 1 (Enable) adjusted. When the set value is increased, image loss is increased. Setting is made in binary input in the increment of 24 dots. Default: 96 dots AL-2020/2035/2040/2050/2060 FAX SOFT SWITCH 12 - 30...
- Page 169 (OC sub scan) Used to set the sub scan magnification ratio in OC scan. By binary input, setting can be made in the range of 0 – ±12.7% in 0.1% increments. Default: 0% AL-2020/2035/2040/2050/2060 FAX SOFT SWITCH 12 - 31...
-
Page 170: Electrical Section
[13] ELECTRICAL SECTION 1. Block diagram A. Overall block diagram (1) AL-2020/2035/2040 AL-2020/2035/2040/2050/2060 ELECTRICAL SECTION 13 - 1... - Page 171 (2) AL-2050/2060 AL-2020/2035/2040/2050/2060 ELECTRICAL SECTION 13 - 2...
-
Page 172: Actual Wiring Diagram
2. Actual wiring diagram A. MCU PWB (AL-2020/2035/2040) AL-2020/2035/2040/2050/2060 ELECTRICAL SECTION 13 - 3... -
Page 173: Mcu Pwb (Al-2050/2060)
B. MCU PWB (AL-2050/2060) AL-2020/2035/2040/2050/2060 ELECTRICAL SECTION 13 - 4... -
Page 174: Spf Unit (Al-2035/2040)
/INIT /SELIN3 /SLCTIN /AFFFD3 /AUTOFD /STB /STB /FLT /FAULT SLCT SLCT PFRR PBSY BUSY /PACK /ACK PARAD7 PARAD6 PARAD5 NETWORK PARAD4 PARAD3 PARAD2 PARAD1 PARAD0 /RESET /OA_RST VCC3 VCC3 EN5V EN5V D-GND D-GND 24FMN-BTK-A AL-2020/2035/2040/2050/2060 ELECTRICAL SECTION 13 - 5... -
Page 175: Signal Name List
Scanner motor phase control Optical drive section (ADCLK) AFE control signal Scanner unit section (AFE_DB0) Image scan data Scanner unit section (AFE_DB1) Image scan data Scanner unit section (AFE_DB2) Image scan data Scanner unit section AL-2020/2035/2040/2050/2060 ELECTRICAL SECTION 13 - 6... - Page 176 Shifter motor phase control Shifter motor section /SFTMT1 Shifter motor Shifter motor phase control Shifter motor section /SFTMT2 Shifter motor Shifter motor phase control Shifter motor section /SFTMT3 Shifter motor Shifter motor phase control Shifter motor section AL-2020/2035/2040/2050/2060 ELECTRICAL SECTION 13 - 7...
- Page 177 Peripheral bus control signal FAX optional section PB_NCS1 Control signal Peripheral bus control signal FAX optional section PB_NOE Control signal Peripheral bus control signal FAX optional section PB_NWE Control signal Peripheral bus control signal FAX optional section AL-2020/2035/2040/2050/2060 ELECTRICAL SECTION 13 - 8...
-
Page 178: Circuit Diagram
[14] CIRCUIT DIAGRAM 1. MCU PWB (AL-2020/2035/2040) AL-2020/2035/2040/2050/2060 CIRCUIT DIAGRAM 14 - 1... - Page 179 AL-2020/2035/2040/2050/2060 CIRCUIT DIAGRAM 14 - 2...
- Page 180 AL-2020/2035/2040/2050/2060 CIRCUIT DIAGRAM 14 - 3...
- Page 181 AL-2020/2035/2040/2050/2060 CIRCUIT DIAGRAM 14 - 4...
- Page 182 AL-2020/2035/2040/2050/2060 CIRCUIT DIAGRAM 14 - 5...
- Page 183 AL-2020/2035/2040/2050/2060 CIRCUIT DIAGRAM 14 - 6...
- Page 184 AL-2020/2035/2040/2050/2060 CIRCUIT DIAGRAM 14 - 7...
- Page 185 AL-2020/2035/2040/2050/2060 CIRCUIT DIAGRAM 14 - 8...
- Page 186 AL-2020/2035/2040/2050/2060 CIRCUIT DIAGRAM 14 - 9...
- Page 187 AL-2020/2035/2040/2050/2060 CIRCUIT DIAGRAM 14 - 10...
- Page 188 AL-2020/2035/2040/2050/2060 CIRCUIT DIAGRAM 14 - 11...
- Page 189 AL-2020/2035/2040/2050/2060 CIRCUIT DIAGRAM 14 - 12...
-
Page 190: Ope Pwb (Al-2020/2035/2040)
2. OPE PWB (AL-2020/2035/2040) AL-2020/2035/2040/2050/2060 CIRCUIT DIAGRAM 14 - 13... -
Page 191: Mcu Pwb (Al-2050/2060)
3. MCU PWB (AL-2050/2060) AL-2020/2035/2040/2050/2060 CIRCUIT DIAGRAM 14 - 14... - Page 192 AL-2020/2035/2040/2050/2060 CIRCUIT DIAGRAM 14 - 15...
- Page 193 AL-2020/2035/2040/2050/2060 CIRCUIT DIAGRAM 14 - 16...
- Page 194 AL-2020/2035/2040/2050/2060 CIRCUIT DIAGRAM 14 - 17...
- Page 195 AL-2020/2035/2040/2050/2060 CIRCUIT DIAGRAM 14 - 18...
- Page 196 AL-2020/2035/2040/2050/2060 CIRCUIT DIAGRAM 14 - 19...
- Page 197 AL-2020/2035/2040/2050/2060 CIRCUIT DIAGRAM 14 - 20...
- Page 198 AL-2020/2035/2040/2050/2060 CIRCUIT DIAGRAM 14 - 21...
- Page 199 AL-2020/2035/2040/2050/2060 CIRCUIT DIAGRAM 14 - 22...
- Page 200 AL-2020/2035/2040/2050/2060 CIRCUIT DIAGRAM 14 - 23...
- Page 201 AL-2020/2035/2040/2050/2060 CIRCUIT DIAGRAM 14 - 24...
- Page 202 AL-2020/2035/2040/2050/2060 CIRCUIT DIAGRAM 14 - 25...
- Page 203 AL-2020/2035/2040/2050/2060 CIRCUIT DIAGRAM 14 - 26...
- Page 204 AL-2020/2035/2040/2050/2060 CIRCUIT DIAGRAM 14 - 27...
- Page 205 AL-2020/2035/2040/2050/2060 CIRCUIT DIAGRAM 14 - 28...
- Page 206 AL-2020/2035/2040/2050/2060 CIRCUIT DIAGRAM 14 - 29...
-
Page 207: Operation Pwb (Al-2050/2060)
4. OPERATION PWB (AL-2050/2060) AL-2020/2035/2040/2050/2060 CIRCUIT DIAGRAM 14 - 30... - Page 208 AL-2020/2035/2040/2050/2060 CIRCUIT DIAGRAM 14 - 31...
- Page 209 AL-2020/2035/2040/2050/2060 CIRCUIT DIAGRAM 14 - 32...
-
Page 210: Fax Main Pwb (Al-2060)
5. FAX MAIN PWB (AL-2060) AL-2020/2035/2040/2050/2060 CIRCUIT DIAGRAM 14 - 33... - Page 211 AL-2020/2035/2040/2050/2060 CIRCUIT DIAGRAM 14 - 34...
- Page 212 AL-2020/2035/2040/2050/2060 CIRCUIT DIAGRAM 14 - 35...
- Page 213 AL-2020/2035/2040/2050/2060 CIRCUIT DIAGRAM 14 - 36...
- Page 214 AL-2020/2035/2040/2050/2060 CIRCUIT DIAGRAM 14 - 37...
- Page 215 AL-2020/2035/2040/2050/2060 CIRCUIT DIAGRAM 14 - 38...
-
Page 216: Fax Operation Pwb (Al-2060)
6. FAX OPERATION PWB (AL-2060) AL-2020/2035/2040/2050/2060 CIRCUIT DIAGRAM 14 - 39... - Page 217 Memo...
- Page 218 LEAD-FREE SOLDER The PWB’s of this model employs lead-free solder. The “LF” marks indicated on the PWB’s and the Service Manual mean “Lead-Free” solder. The alphabet following the LF mark shows the kind of lead-free solder. Example: <Solder composition code of lead-free solder> Solder composition Solder composition code Solder composition...
- Page 219 CAUTION FOR BATTERY REPLACEMENT (Danish) ADVARSEL ! Lithiumbatteri – Eksplosionsfare ved fejlagtig håndtering. Udskiftning må kun ske med batteri af samme fabrikat og type. Levér det brugte batteri tilbage til leverandoren. (English) Caution ! Danger of explosion if battery is incorrectly replaced. Replace only with the same or equivalent type recommended by the manufacturer.
- Page 220 States and other countries. • IBM, PC/AT, and PowerPC are trademarks of International Business Machines Corporation. • Sharpdesk is a trademark of Sharp Corporation. • All other trademarks and copyrights are the property of their respective owners. SHARP CORPORATION Digital Document System Group...