Table of Contents
Advertisement
Advertisement
Table of Contents

Related Manuals for Trojan IRONMAN 510


Summary of Contents for Trojan IRONMAN 510
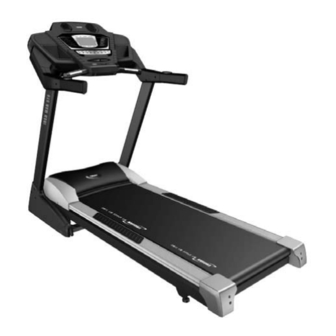
- Page 1 TROJAN ® IRONMAN 510 MY SPACE MY TIME TREADMILL TREADMILL CARE INSTRUCTION AND ASSEMBLY MANUAL CAUTION READ ALL PRECAUTIONS AND INSTRUCTIONS IN THIS MANUAL BEFORE USING THIS EQUIPMENT KEEP THIS MANUAL FOR FUTURE REFERENCE 0861 876526 0861 TROJAN WARRANTY www.trojanhealth.co.za...
-
Page 2: Table Of Contents
GROUNDING INSTRUCTIONS COMPUTER FUNCTIONS HEART RATE TRANSMITTER 10. FITNESS TIPS & TECHNIQUES 11. CONDITIONING GUIDELINES 12. WARM -UP AND COOL-DOWN 13. FREQUENTLY ASKED QUESTIONS 14. PARTS LIST 15. EXPLODED DRAWING 16. TROJAN 1 YEAR LIMITED WARRANTY 17. TROJAN REPAIRS PROCEDURE... -
Page 3: Safety Instructions
1. SAFETY INSTRUCTIONS It is the sole responsibility of the purchaser of TROJAN products to read the owner’s manual, warning labels and instruct all individuals, on proper usage of the equipment. Understanding each and every warning to the fullest is important. If any of these instructions or warnings are unclear, please contact Trojan Customer Services on 0861 876526 (0861 Trojan), within the Republic of South Africa. -
Page 4: Step
1. SAFETY INSTRUCTIONS INSPECTION • Do not use or permit use of any equipment that is damaged or has worn or broken parts. For all TROJAN equipment use only replacement parts supplied by TROJAN. • Always make sure that all nuts and bolts are tightened prior to each use. -
Page 5: Pre Assembly Check List
2. PRE ASSEMBLY CHECK LIST Thank you for choosing the TROJAN IRONMAN 510 treadmill. We take great pride in producing this quality product and hope it will provide many hours of quality exercise to make you feel better, look better and enjoy life to its fullest. -
Page 6: Hardware List
3. HARDWARE LIST #140. M5 x 10 mm #128. M5 #113. Ø10 Phillips Head Screw (8 pcs) Speed Nut Clip (6 pcs) Split Washer (4pcs) #119. 3.5×12 mm #130. Ø5/16”×1/2” Button Head #120. 5×16 mm Sheet Metal Screw (4 pcs) Socket Bolt (8 pcs) Self Tapping Screw (6 pcs) #139. -
Page 7: Assembly Steps
4. ASSEMBLY STEPS STEP 01 Take the treadmill out of the carton and place it on a level floor. STEP 02 Install the six M5 Speed Nut Clips (128) to the Frame Base left and right hand sides. Connect the Lower Computer Cable (49) to the Middle Computer Cable (50). 10195M-7... - Page 8 STEP 03 Fasten the Left and Right Uprights (4,5) to the Frame Base (2) with the eight 5/16” × 1/2” Button Head Socket Bolts (130) by using the Combination M5 Allen Wrench & Phillips Head Screw Driver (131). STEP 04 Install the left and right Frame Base Caps (62,63) onto the Frame Base (2) with the six 5 ×...
- Page 9 STEP 05 Connect the cable from the Speed Adjustment Switch (54) to the Speed Cable (37). Connect the cable from the Incline Adjustment Switch (55) to the Incline Cable (38). Connect the Middle Computer Cable (50) to the Upper Computer Cable (48). STEP 06 Install the Console Assembly (52) onto the Right and Left Uprights (4,5) with the four 3/8”...
- Page 10 STEP 07 Install the Left Hand Grip Side Caps (141,142) and Right Hand Grip Side Caps (143,144) on the Left and Right Uprights (4,5) and Console Support (6) with the eight M5 ×10mm Phillips Head Screws (140) and four 3.5 ×12mm Sheet Metal Screws (119) by using the Combination M5 Allen Wrench &...
-
Page 11: Unfolding/Folding/Transport
5. UNFOLDING / FOLDING / TRANSPORT UNFOLDING Hold the treadmill running board with your left hand. Pull the locking knob with your right hand and slowly lower the treadmill running board. Remove your right hand as you slowly lower the running board to the floor. (Figure 1) FOLDING Ensure the incline angle of the treadmill is at its lowest position. -
Page 12: Maintenance
6. MAINTENANCE Your treadmill should require little maintenance other than to periodically apply lubricant. Lubricating under the treadbelt will ensure superior performance and extend the treadmill’s life expectancy. HOW TO CHECK TREADBELT FOR PROPER LUBRICATION Lift one side of the treadbelt and feel the top surface of the treadboard. -
Page 13: Grounding Instructions
7. GROUNDING INSTRUCTIONS This product must be grounded. If a malfunction or breakdown occurs, grounding provides a path of least resistance for electric current to reduce the risk of electric shock. This product is equipped with a cord having an equipment-grounding conductor and a grounding plug. -
Page 14: Computer Functions
8. COMPUTER FUNCTIONS GETTING STARTED: Power the treadmill on by plugging it into an appropriate wall outlet, then turn on the power switch located at the front of the treadmill below the motor hood. Ensure that the safety key is installed, as the treadmill will not power on without it. - Page 15 8. COMPUTER FUNCTIONS QUICK-START OPERATION: STEP 1: Attach the Safety key to activate the display (if not already on). STEP 2: Press the START key to begin belt movement then adjust to the desired speed using the Fast / Slow keys (console or handgrip).
- Page 16 8. COMPUTER FUNCTIONS Optional: There is an Audio Input Jack on the front of the console and built-in speakers. You may plug any low-level audio source signal into this port. Audio sources include MP3, Ipod, portable radio, CD player or even a TV or computer audio signal.
- Page 17 8. COMPUTER FUNCTIONS: PRESET PROGRAMMES PROGRAMS 10195M-17...
-
Page 18: Heart Rate Transmitter
1. Attach the transmitter to the elastic chest strap using the clips provided. 2. Adjust the strap to a firm fit around the chest 3. Position the transmitter in the centre of your chest, immediately below the pectoral muscles, with the TROJAN logo facing outwards. - Page 19 Special Operations of Heart Rate Functions: TROJAN treadmills that are factory equipped with a Heart Rate Control system have many distinct features both in the Heart Rate Control program and during heart rate monitoring. This section will give you a more detailed background to use your treadmill in the most effective manner.
-
Page 20: Fitness Tips & Techniques
10. FITNESS TIPS AND TECHNIQUES AEROBIC EXERCISE Aerobic exercise is any sustained activity that sends oxygen to your muscles via your heart and lungs. Aerobic exercise improves the fi tness of your lungs and heart - your body’s most important muscle. Aerobic exercise fi tness is promoted by any activity that uses your large muscles (arms, legs, or buttock, for example). -
Page 21: Conditioning Guidelines
11 CONDITIONING GUIDELINES How you begin your exercise program depends on your physical condition. If you have been inactive for several years, or are severely overweight, you must start slowly and increase your time on the equipment; a few minutes per workout. Initially, you may be able to exercise only for a few minutes in your target zone, however, your aerobic fitness will improve over the next six to eight weeks. -
Page 22: Warm-Up And Cool-Down
12. WARM-UP AND COOL-DOWN WORKOUT GUIDELINES Each workout should include the following three parts: A warm-up, consisting of 5 to 10 minutes of stretching and light exercise. A proper warm-up increases your body tem- perature, heart rate, and circulation in preparation for exercise. Training zone exercise, consisting of 20 to 30 minutes of exercising with your heart rate in your training zone. -
Page 23: Frequently Asked Questions
1. Treadmill has not received a speed signal for 8 seconds. 2. Turn off computer, unplug, leave for 30 seconds, then restart the treadmill. 3. If the error persists please contact our call centre on 0861 876 526 (0861 Trojan). Q2. My consol is showing E1 1. -
Page 24: Parts List
14. PARTS LIST DESCRIPTION O’TY DESCRIPTION O’TY Main Frame On/Off Switch Frame Base Power Cord Incline Bracket 100mm × 764 × 764mm Connecting Right Upright Wire (Black) Left Upright 150mm × 764 × 764mm Connecting Console Support Wire (White) Deck Cross Brace 100mm ×... - Page 25 14. PARTS LIST DESCRIPTION O’TY DESCRIPTION O’TY Ø5 × Ø13 × 1.0T Flat Washer Frame Base Cap (R) Ø1/4” × 19 × 1.5T Flat Washer Left Connecting Cap (Top) Ø6.5 × Ø25 × 1.5T Concave Washer Left Connecting Cap (Bottom) M8 Split Washer Right Connecting Cap (Top) Ø10 Split Washer...
-
Page 26: Exploded Drawing
15. EXPLODED DRAWING 10195M-26... -
Page 27: Trojan 1 Year Limited Warranty
Consumer upon collection or delivery of the repaired product. The Consumer does not need to return the product to the store. The Consumer shall phone the Trojan hotline on 0861 876526 (0861 Trojan) and the Manufacturer’s authorized agent will at its discretion either repair the item at the Consumer’s residence or collect and repair the item at their premises. -
Page 28: Trojan Repairs Procedure
17. TROJAN REPAIRS PROCEDURE 1. Procedure for repairs Should you experience any faults or breakdowns on your Trojan equipment, please adhere to the following procedure to have the fault rectified speedily and professionally. • Do not return the product to the store* •...
Need help?
Do you have a question about the IRONMAN 510 and is the answer not in the manual?
Questions and answers