Table of Contents
Advertisement
Advertisement
Table of Contents

Related Manuals for Trojan CARDIO 470


Summary of Contents for Trojan CARDIO 470
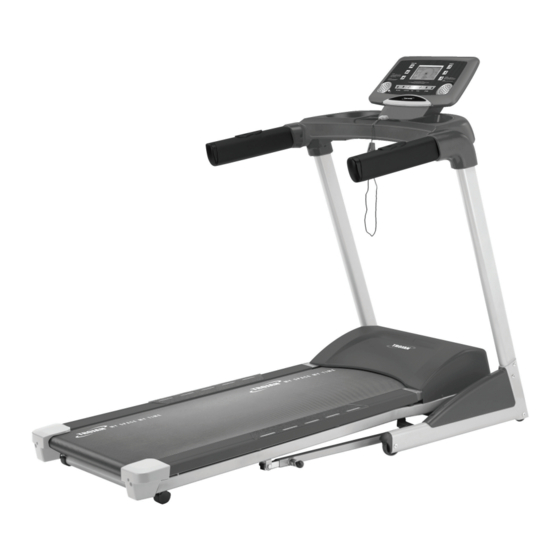
- Page 1 CARDIO 470 TREADMILL TREADMILL CARE, INSTRUCTION AND ASSEMBLY MANUAL...
-
Page 2: Table Of Contents
SAFETY INSTRUCTIONS PRE ASSEMBLY CHECK LIST HARDWARE LIST ASSEMBLY STEPS UNFOLDING/FOLDING/TRANSPORT MAINTENANCE GROUNDING INSTRUCTIONS COMPUTER FUNCTIONS FITNESS TIPS & TECHNIQUES CONDITIONING GUIDELINES WARM -UP AND COOL-DOWN FREQUENTLY ASKED QUESTIONS PARTS LIST EXPLODED DRAWING TROJAN 1 YEAR LIMITED WARRANTY TROJAN REPAIRS PROCEDURE... -
Page 3: Safety Instructions
1. SAFETY INSTRUCTIONS It is the sole responsibility of the purchaser of TROJAN products to read the owner’s manual, warning labels and instruct all individuals, on proper usage of the equipment. Understanding each and every warning to the fullest is important. If any of these instructions or warnings are unclear, please contact TROJAN CUSTOMER SERVICES on 0861 876526 (0861 TROJAN), within the Republic of South Africa. - Page 4 TROJAN equipment. • Before any use, examine all accessories approved for use with the TROJAN equipment for damage or wear. • Should your Trojan equipment appear damaged or worn, do not attempt to use or repair the equipment yourself. Please contact our TROJAN SERVICE DEPARTMENT on 0861 876526 (0861 TROJAN) to arrange a repair. OPERATING WARNINGS • It is the purchaser’s responsibility to instruct all users as to the proper operating procedures of all TROJAN equipment. • Keep children away from all moving parts and away from all strength equipment. Parents must provide close supervision of children if the equipment is used in the presence of children.
-
Page 5: Pre Assembly Check List
Read this manual carefully before using the TROJAN CARDIO 470 TREADMILL. -
Page 6: Hardware List
3. HARDWARE LIST #74. 3.5 × 12 mm #99. 5/16" × 1/2" Sheet Metal Screw (4pcs) Button Head Socket Bolt (14pcs) #100. 5/16" × 18 × 1.5T #101. 5/16" × 23 × 1.5T Flat Washer (6pcs) Curved Washer (8pcs) #125. M5 × 25 mm #126. -
Page 7: Assembly Steps
4. ASSEMBLY STEPS WARNING: • Two people are required to assemble the treadmill. • Please follow the assembly steps to avoid injury. STEP 1: • Take the treadmill out of the box and lay it on a fl at surface. STEP 2: CAUTION: Ensure that cables are not damaged during assembly or when tightening screws. • Connect the Lower Computer Cable (53) to the Right Upright (4). STEP 3: CAUTION: Ensure that cables are not damaged during assembly or when tightening screws. - Page 8 STEP 4: CAUTION: Ensure that cables are not damaged during assembly or when tightening screws. • Connect the Middle Computer Cable (55) to the Lower Computer Cable (53). STEP 5: • Attach the Consol Support (6) onto the Left and Right Uprights (5, 4) with six 5/16” × 1/2” Button Head Socket Bolts (99), two 5/16” x 18 x 1.5T Flat Washers (100) and four 5/16” × 23 × 1.5T Curved Washers (101) using the Combination M5 Allen Wrench &...
- Page 9 STEP 7: CAUTION: Ensure that cables are not damaged during assembly or when tightening screws. • Connect the Middle Computer Cable (55) to the Upper Computer Cable (21 ~ 13). • Connect the Computer Cable (90 ~ 7) to the Computer Cable (21 ~ 12). • If there is a HR Receiver, connect the 5 Pin Upper HR Receiver Cable (21 ~ 14) and 5 Pin Middle HR Receiver Cable (90 ~ 8).
-
Page 10: Unfolding/Folding/Transport
5. UNFOLDING / FOLDING / TRANSPORT UNFOLDING • Hold the treadmill running board with your left hand. • Pull the Locking Knob out with your right hand and slowly lower the treadmill Running Deck. • Remove your right hand as you slowly lower the Running Board to the fl oor. (As shown in fi gure 1 & 2) FOLDING • Ensure the incline angle of the treadmill is at its lowest position. • Pull out the Locking Knob until the treadmill running deck can be lifted. • Lift the treadmill running deck up until the Locking Knob locks securely into the frame. (As shown in fi gure 3 & 4) TRANSPORT • Placing your hands on the Rear End Cap, gently Pull the treadmill toward you lifting the base of the treadmill. • You can now easily move the treadmill to the desired position by pushing it on its wheels. -
Page 11: Maintenance
6. MAINTENANCE Your treadmill should require little maintenance other than to periodically apply lubricant. Lubricating under the treadbelt will ensure superior performance and extend the treadmill’s life expectancy. HOW TO CHECK TREADBELT FOR PROPER LUBRICATION • Lift one side of the treadbelt and feel the top surface of the treadboard. • If the surface is slick to the touch, then no further lubrication is required. • If the surface is dry to the touch, apply one packet of lubricant or half of the bottle of lubricant. HOW TO APPLY LUBRICANT • Lift one side of treadbelt. -
Page 12: Grounding Instructions
7. GROUNDING INSTRUCTIONS This product must be grounded. If a malfunction or breakdown occurs, grounding provides a path of least resistance for electric current to reduce the risk of electric shock. This product is equipped with a cord having an equipment-grounding conductor and a grounding plug. The plug must be plugged into an appropriate outlet that is properly installed and grounded in accordance with all local codes and ordinances. DANGER - improper connection of the equipment-grounding conductor can result in a risk of electric shock. Check with a qualified electrician or serviceman if you are in doubt as to whether the product is properly grounded. -
Page 13: Computer Functions
8. COMPUTER OPERATION FUNCTIONS KEYS FOR COMPUTER CONSOL START KEY Press the START key to start the Running Belt, the speed of the Running Belt will be 1.0 km/h. STOP KEY When the Running Belt is moving at a speed of 3.5 km/h, press the STOP key to stop the Running Belt. The Running Belt will slow to a stop. Once the STOP key is pressed no other Function Keys will function. If the speed of the treadmill is less than 1.5 km/h the Running Belt will stop immediately. CLEAR / SET KEY Once the Running Belt has stopped, you can clear all figures by pressing CLEAR / SET. The Time, Distance and Calorie functions can be changed by pressing the CLEAR / SET button and holding it for 3 seconds. - Page 14 8. COMPUTER FUNCTIONS (CONT.) SPEED KEY Press the SPEED key “ ” or “ “ , to adjust the running speed of the treadmill. INCLINE KEY Press the INCLINE key “ ” or “ “, to adjust the incline of the treadmill. SPEED SHORTCUT KEY These three keys adjust your speed automatically without selecting a specific program. The following options may be selected, “Speed Walk”, “Jog” or “Run”.
- Page 15 8. COMPUTER FUNCTIONS (CONT.) INCLINE FEATURE • The INCLINE may be adjusted at any time during the workout. • The INCLINE range is from “0” to “12” levels. • Press the “ ” or “ “ to achieve desired level of effort. The three INCLINE SHORTCUT KEYS of “3”, “6” or “9” may also be used. • The consol display will indicate the incline percentage as adjustments are made. • The incline will remain in its position when the display is turned off. PULSE GRIP FEATURE The Pulse (Heart Rate) consol window will display your current heart rate in beats per minute during the workout.
- Page 16 8. COMPUTER FUNCTIONS (CONT.) 10282-16...
-
Page 17: Fitness Tips & Techniques
Serratus Anterior Tricep Biceps Latissimus Dorsi Abdominal Gluteals Sartorius Quadriceps Hamstrings Tibialis Gastrocnemius Trojan and the Heart and Stroke Foundation have joined forces to KEEP SOUTH AFRICA MOVING. The Heart and Stroke Foundation South Africa encourages all South Africans to make heart-healthy choices that include daily physical activity, exercise and a balanced diet. Use Trojan, SA’s No. 1 selling Home Fitness brand to gives you the ability to boost your fitness level and lower your risk of cardiovascular disease. Visit www.trojanhealth.co.za for equipment choices and exercise programs, and www.heartfoundation.co.za for information on how to adopt a healthy lifestyle. 10282-17... -
Page 18: Conditioning Guidelines
10. CONDITIONING GUIDELINES How you begin your exercise program depends on your physical condition. If you have been inactive for several years, or are severely overweight, you must start slowly and increase your time on the equipment; a few minutes per workout. Initially, you may be able to exercise only for a few minutes in your target zone however; your aerobic fitness will improve over the next six to eight weeks. Don’t be discouraged if it takes longer. It’s important to work at your own pace. Ultimately, you’ll be able to exercise continuously for 30 minutes. The better your aerobic fitness, the harder you will have to work to stay in your target zone. -
Page 19: Warm-Up And Cool-Down
11. WARM-UP AND COOL-DOWN WORKOUT GUIDELINES Each workout should include the following three parts: A warm-up: 5 to 10 minutes of stretching and light exercise. A proper warm-up increases your body temperature, heart rate, and circulation in preparation for exercise.Training zone exercise: 20 to 30 minutes of exercising with your heart rate in your training zone. (Note: During the first few weeks of your exercise program, do not keep your heart rate in your training zone for longer than 20 minutes.) cool-down: 5 to 10 minutes of stretching. This will increase the flexibility of your muscles and will help to prevent post-exercise problems. EXERCISE FREQUENCY To maintain or improve your condition, plan three workouts each week, with at least one day of rest between workouts. After a few months of regular exercise, you may complete up to five workouts each week, if desired. Remember, the key to success is to make exercise a regular and enjoyable part of your everyday life. -
Page 20: Frequently Asked Questions
· Computer cannot read the speed value, motor damaged or signal lost. · Turn off treadmill unplug, leave for 30 seconds and then restart the treadmill. · If the error persists please contact our TROJAN Call Centre on 0861 876 526 (0861 Trojan). Q2. My consol is showing E6 ·... -
Page 21: Parts List
13. PARTS LIST Main Frame Frame Base Incline Bracket Right Upright Left Upright Consol Support Outer Slide Inner Slide Locking Knob Incline Motor Drive Belt Motor Bracket Motor Running Belt Running Deck Front Roller W / Pulley 16~3 Magnet Rear Roller Sleeve for Frame Base Front Wheel Rear Wheel Sleeve Consol Assembly... - Page 22 13. PARTS LIST (CONT.) Incline / Hand Pulse Complex Breaker On / Off Switch Frame Base End Cap Frame Base Front Wheel Frame Base Rear Wheel Rubber Foot Handgrip Foam Foot Rail Non - Slip Rubber Motor Cover Anchor (C) 21.4 mm ×...
- Page 23 13. PARTS LIST (CONT.) 3.5 × 12 mm Sheet Metal Screw 1/2” × 8T Nyloc Nut 3/8” × 7T Nyloc Nut 5/16” × 7T Nyloc Nut M8 × 7T Nyloc Nut 3/8” × 2T Split Washer M8 × 1.5T Split Washer M5 Split Washer 3/8”...
- Page 24 13. PARTS LIST (CONT.) Foot Rail Cap (Right) Foot Rail Cap (Left) M5 × 25 mm Phillips Head Screw M5 × 35 mm Phillips Head Screw M5 × 12 mm Phillips Head Screw Outer Handlebar Cover (Left) Outer Handlebar Cover (Right) Bottom Inner Handlebar Cover (Right) Bottom Inner Handlebar Cover (Left) Top Inner Handlebar Cover (Left)
-
Page 25: Exploded Drawing
14. EXPLODED DRAWING 10282-25... -
Page 26: Trojan 1 Year Limited Warranty
Consumer upon collection or delivery of the repaired product. The Consumer does not need to return the product to the store. The Consumer shall phone the TROJAN Hotline on 0861 876526 (0861 TROJAN) and the Manufacturer’s authorized agent will at its discretion either repair the item at the Consumer’s residence or collect and repair the item at their premises. -
Page 27: Trojan Repairs Procedure
Should you experience any faults or breakdowns on your Trojan equipment, please adhere to the following procedure to have the fault rectified speedily and professionally. • Do not return the product to the store* • Call 0861 Trojan (0861 876526) to log the faulty product (under warranty or out of warranty) • The operator or technical advisor will try identify the fault, and will book a service team call out. • The service team will endeavour to fix the problem in your home on an agreed date and time. • O nly if the fault cannot be repaired in the convenience of your home, will the service team take the faulty product back to the service centre.
Need help?
Do you have a question about the CARDIO 470 and is the answer not in the manual?
Questions and answers